Access an Additional $20 Off All 2438mm Wall Panels!
CALL US

0411 280 646

Categories
garage design garage makeover Garage Wall Accessories garage wall panel colours

StoreWALL’s Durability and Long Life Expectancy Reduce Waste

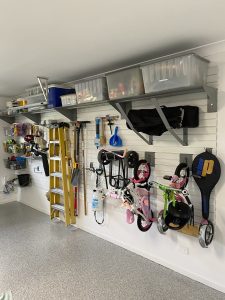
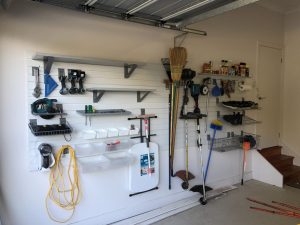
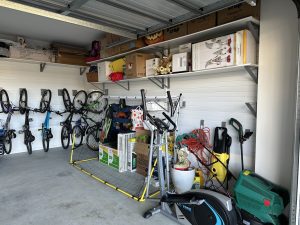
In today’s world, the issue of waste is more pressing than ever. We live in a society where throwaway culture dominates, with countless products designed for short-term use, only to be discarded and replaced in a matter of years—or even months. This cycle of consumption leads to excessive waste, overflowing landfills, and a strain on natural resources. One way to break free from this wasteful habit is by investing in durable, long-lasting solutions. This is exactly where StoreWALL makes a difference. StoreWALL’s Durability and Long Life Expectancy Reduce Waste.

Built to Last: How StoreWALL Outperforms Cheap Storage Solutions

Many storage systems on the market are made from low-quality plastic or flimsy materials that deteriorate quickly. Over time, they can crack, warp, or break, leading consumers to replace them frequently—adding to the cycle of waste. StoreWALL, on the other hand, is designed with durability in mind.
StoreWALL’s Durability and Long Life Expectancy Reduce Waste

Key features that contribute to StoreWALL’s longevity include:

  • Heavy-duty materials – StoreWALL panels are made from impact-resistant, waterproof, and weather-resistant materials that stand the test of time.
  • Strong accessories – Hooks, brackets, and shelves are built to support heavy loads without bending or breaking.
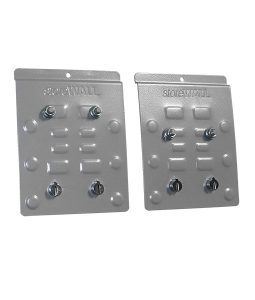
  • Secure installation – The exclusive InstallStrip system ensures a firm, reliable attachment to the wall, preventing damage and sagging over time.

By choosing a high-quality storage solution like StoreWALL, homeowners and businesses can eliminate the need for frequent replacements, ultimately reducing waste and saving money.

A Sustainable Choice: How StoreWALL Promotes Reuse and Adaptability

One of the major drawbacks of disposable storage solutions is their lack of adaptability. Many shelving systems and wall organizers are rigid in design, meaning that once your storage needs change, the system becomes obsolete. This often results in removal and disposal, further contributing to landfill waste.

StoreWALL is different because it is a modular and adaptable storage system. It can be reconfigured, expanded, and customized over time to suit evolving storage needs. Whether you move to a new home, repurpose a room, or need additional storage, StoreWALL allows you to rearrange and add new accessories without replacing the entire system.

This adaptability ensures that the storage system remains useful for years—even decades—rather than being thrown away and replaced.

Reducing Environmental Impact with a Long-Term Storage Investment

When considering the environmental impact of a storage solution, lifespan and durability are critical factors. The longer a product lasts, the fewer resources are needed to manufacture replacements, and the less waste is generated.

By investing in StoreWALL, customers are making a sustainable choice that contributes to:

  • Less landfill waste – Because StoreWALL lasts significantly longer than traditional storage systems, fewer materials end up discarded.
  • Reduced manufacturing demand – Lower turnover of storage solutions means fewer raw materials are extracted and processed, reducing environmental strain.
  • A circular economy mindset – Instead of the traditional “use and discard” approach, StoreWALL encourages reuse and long-term functionality.

Why Choose StoreWALL? A Smarter Alternative to Throwaway Storage

If you’re looking for a storage solution that not only keeps your space organized but also aligns with sustainable practices, StoreWALL is the ideal choice. Unlike many mass-produced, low-quality storage options, StoreWALL offers:

  • Unmatched durability – Engineered to withstand heavy use without deterioration.
  • Versatility – A modular system that can be reconfigured as needed.
  • Long-term value – A one-time investment that eliminates the need for frequent replacements.
  • Recyclable Panels – If needed, our PVC wall panels can be recycled as hard plastic.

StoreWALL’s Durability and Long Life Expectancy Reduce Waste

Our throwaway culture has created a world where short-lived, disposable products are the norm, leading to significant environmental challenges. By choosing high-quality, long-lasting storage solutions like StoreWALL, individuals and businesses can reduce waste, minimize environmental impact, and embrace a more sustainable way of organizing their spaces.

Investing in durability is one of the simplest yet most effective ways to combat waste. With StoreWALL’s heavy-duty construction, adaptable design, and long-lasting value, you can enjoy an efficient and organized space without contributing to the growing problem of disposable consumerism.

Are you ready to break free from throwaway storage solutions? Explore StoreWALL today and make a lasting investment in sustainability and organization. StoreWALL’s Durability and Long Life Expectancy Reduce Waste
Categories
Garage Ideas garage makeover Shelving StoreWALL

How to Manage Weight on Your Shelves

When installing shelves, it’s essential to understand how to manage the weight they will hold to prevent damage or accidents. Here’s a guide on how to effectively manage weight on your shelves and how brackets contribute to their stability.

Understanding Shelf Load Capacity

The load capacity of a shelf refers to the maximum weight it can safely support without bowing, sagging, or breaking. This capacity depends on factors such as the material that the floating shelf is made of, its thickness, length, and the quality of the brackets used for support. Overloading a shelf can cause it to warp, detach from the wall, or collapse entirely, posing safety risks and potential damage to your belongings.

How to Manage Weight on Your Shelves

Distributing Weight Evenly

To maximize the shelf’s durability, distribute weight evenly across its surface. Place heavier items closer to the wall or directly above the brackets, where the shelf is strongest. Lighter items should be positioned toward the front or on the ends. This approach minimizes stress on the shelf and prevents it from tipping or sagging.

The Importance of Brackets in Shelf Support

Brackets play a critical role in supporting a shelf’s weight. They are the primary means of transferring the load from the shelf to the wall. The number, size, and spacing of brackets directly affect how much weight a shelf can handle:

  • Number of Brackets: The longer the shelf, the more brackets it will need. For example, a shelf up to 1.2 meters typically requires two brackets, while a 1.8-meter shelf requires three. Adding more brackets reduces the span of unsupported shelf length, thereby increasing the weight it can bear.
  • Bracket Size and Material: Larger, sturdier brackets provide better support and can hold more weight. Choose brackets that match the depth of your shelf and are made of strong materials, such as metal, to ensure durability.
  • Spacing Between Brackets: Brackets should be spaced evenly to distribute weight efficiently. For heavier loads, reduce the spacing between brackets to increase support. A good rule of thumb is to place brackets no more than 60 cm apart.
How to Manage Weight on Your Shelves

Recognizing Signs of Overloading

Signs that your shelf may be overloaded include bowing or sagging in the middle, the shelf pulling away from the wall, or cracking sounds from the brackets or shelf material. If you notice any of these signs, reduce the load immediately and consider adding more brackets for reinforcement.

How to Manage Weight on Your ShelvesExamples of incorrect spacing, 2 or 3 brackets over 2.4m
Choosing the Right Wall Anchors

The effectiveness of your brackets also depends on the wall anchors used. Anchors should be appropriate for the wall type (drywall, plaster, brick, etc.) and strong enough to handle the combined weight of the shelf and its contents. Heavy-duty anchors, such as toggle bolts or molly bolts, are recommended for heavier loads.

Regular Maintenance and Safety Checks

Periodically check your shelves and brackets for signs of wear, damage, or loosening. Tighten any loose screws, replace damaged brackets, and ensure the shelf remains level and secure. Regular maintenance helps prevent accidents and prolongs the life of your storage solution.

Proper weight management on shelves and the strategic use of brackets is crucial for creating safe and functional storage spaces. By understanding load capacity, distributing weight evenly, and choosing the right brackets and anchors, you can maximize the utility of your shelves while ensuring they remain secure and stable.

Categories
Craft Storage garage design Garage Hooks Garage Ideas

Why a Craft Wall is the Ultimate Craft Storage Solution

As the school year begins again in Australia, teachers are preparing for the year ahead—thinking about ways to enhance their classrooms and improve organisation. One area that often needs attention is craft storage.

The Problem with Traditional Craft Storage

Traditional classroom storage solutions, like drawers and tubs, present several challenges:

  • Limited visibility – Supplies are hidden away, making it difficult to see what’s available.
  • Messy access – Drawers and tubs get cluttered over time, making it hard to keep things organised.
  • Wasted time – Teachers and students spend too much time searching for materials.
  • Inefficient use of space – Large storage units take up valuable classroom space, and stacked tubs can be hard to manage.

A Craft Wall offers a smarter alternative by keeping materials visible, organised, and easily accessible.

What is a Craft Wall?

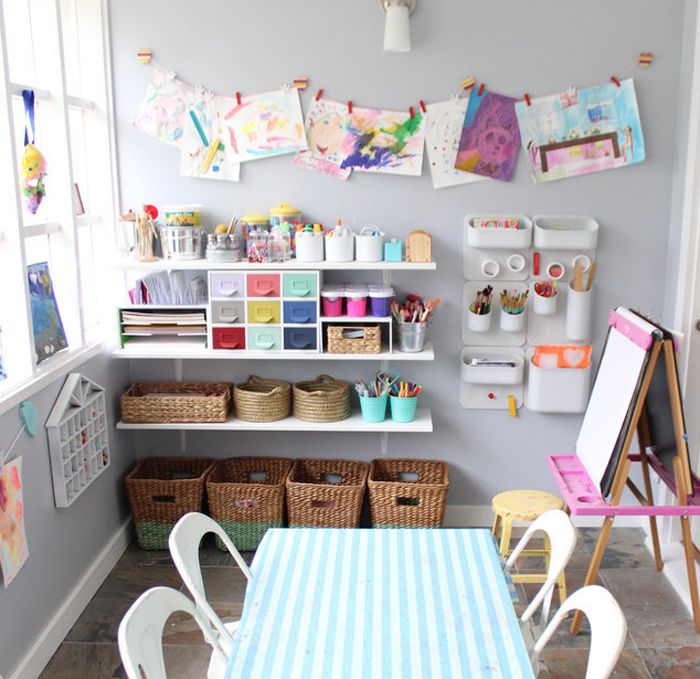
A Craft Wall is a wall-mounted storage system that uses bins, hooks, and shelves to organise craft materials efficiently. Instead of stacking tubs or cramming supplies into drawers, everything is displayed neatly on the wall—ready for instant access.

This setup is not only practical but also encourages creativity. When kids can see their materials, they’re more likely to use them, experiment, and stay engaged in activities.

The Benefits of a Craft Wall

Switching to a Craft Wall can transform how craft supplies are stored and accessed. Here’s why it’s a great idea:

Easy Access & Better Organisation

With a Craft Wall, every item has its place. Whether it’s paintbrushes, glue sticks, coloured paper, or beads, everything is visible and within reach. This reduces the time spent searching for supplies and minimises classroom disruptions.

Saves Space

A traditional chest of drawers or a large shelving unit can take up a significant amount of space. By mounting storage on the wall, you free up valuable floor space, creating a more open and organised environment.

Reduces Clutter – Craft Storage

A well-organised Craft Wall eliminates the need for stacked tubs and messy drawers. Instead, items are stored in designated bins, making it easy for students to grab what they need and put it back when they’re done.

Encourages Independence

Students can quickly identify and retrieve materials themselves, fostering independence and responsibility in keeping their workspace tidy.

Customisable & Expandable

StoreWALL offers a wide range of bin sizes, shapes, and colours, allowing you to design a storage system that suits your specific needs. Our bin options include:

 Slot Bins, Cube Bins, and Large Bins in various sizes
 Colours such as Clear, Crystal Clear, White, Black, and Grey

You can mix and match different bins to create a setup that works for your space, and as your needs grow, your Craft Wall can be easily expanded.

Craft Storage – Not Just for Classrooms!

While a Craft Wall is a fantastic solution for schools, it’s just as useful for:

  • Garages – Perfect for storing tools, screws, and DIY supplies.
  • Home Craft Studios – Ideal for artists, scrapbookers, and hobbyists.
  • Workshops – Keeps small parts, accessories, and materials neatly arranged.

No matter where you install it, a Craft Wall provides a clean, organised, and accessible storage solution.

See It in Action!

To help you visualise how a Craft Wall can improve your space, we’ve included a short video showcasing StoreWALL’s bin range and organisation possibilities.

StoreWALL Large Bins

Final Thoughts

If you’re looking for a smarter way to store craft supplies—whether in the classroom, at home, or in your workspace—a Craft Wall is the perfect solution. With StoreWALL’s versatile bin range, you can create a customised, organised, and efficient storage system that makes craft time easier and more enjoyable.

Want to learn more? Visit the StoreWALL online store and get started on your own Craft Wall today!

Categories
Bike Storage

Steadyrack Bike Bracket: A Space-Saving Solution for Your Home or Garage

If you’re an avid cyclist or even a casual rider, you’re likely familiar with the ongoing challenge of storing your bike. It’s often difficult to find a storage solution that’s not only secure but also space-efficient. That’s where the Steadyrack Bike Bracket comes in, offering an innovative way to store your bikes without sacrificing valuable floor space. In this blog post, we’ll explore what makes the Steadyrack Bike Bracket a standout choice for bike storage, and how it can simplify your life.

What is the Steadyrack Bike Bracket?

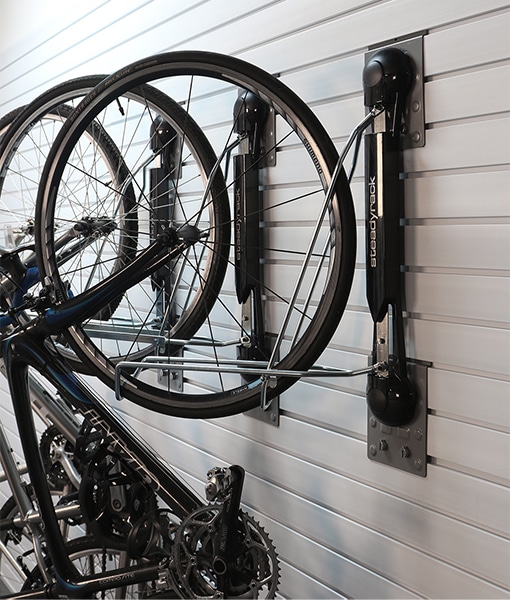
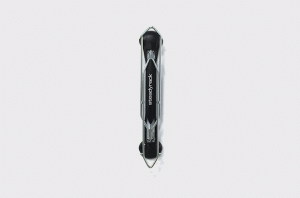
The Steadyrack Bike Bracket is a wall-mounted bike rack that allows you to store your bike vertically. It’s unique because it pivots from side to side, letting you swing the bike to the left or right to save even more space. The design of the Steadyrack ensures that your bike is securely stored without the need to lift it—a significant advantage for those who struggle with heavy lifting or lack the physical space for traditional bike stands.

Key Features of the Steadyrack Bike Bracket

Swivelling Design

  • One of the standout features of the Steadyrack is its 180-degree pivoting mechanism. Once the bike is mounted, you can swivel it to either side, keeping it flat against the wall. This is especially useful in tight spaces like small garages or apartments where every inch counts.

Easy Loading and Unloading

  • Unlike traditional vertical bike racks that require you to lift the entire bike, the Steadyrack allows you to simply roll your bike in and out of the rack. This makes it ideal for heavier bikes, such as e-bikes, mountain bikes, or anyone who prefers not to lift their bike.

Universal Fit for Most Bike Types

  • The Steadyrack is designed to accommodate a wide variety of bikes. Whether you ride a road bike, mountain bike, or commuter bike, there’s likely a Steadyrack model that fits your needs. The standard model fits bikes with tires between 20″ and 29″ and widths up to 2.4″.

Space-Saving Efficiency

  • Because the Steadyrack allows you to store your bike flat against the wall and pivot it to the side, it dramatically reduces the amount of floor space required. This makes it a top choice for people looking to maximize their garage, shed, or apartment storage.

Durability and Quality

  • Made from high-quality steel and UV-treated plastic, the Steadyrack is built to last. It can handle up to 35kg (77 lbs), making it strong enough to hold most bikes on the market. The materials are designed to withstand everyday wear and tear, whether you’re storing your bike indoors or outdoors.

Protects Your Bike

  • The rack is designed to minimize contact with the bike’s frame, which reduces the risk of damage. It cradles the wheels of your bike, ensuring that the frame, pedals, and handlebars don’t come into contact with the wall or the rack itself.

Minimal Wall Damage

  • Installed over the StoreWALL Wall Panels, the Steady Rack Bike Bracket can be moved around on your wall really easily. There is no additional drilling as StoreWALL’s SteadyRack brackets are used to mount onto the StoreWALL panels. The SteadyRack Bike Bracket is then mounted onto these brackets.

steadyrack bike bracket

Step-by-Step Installation Guide for the Steadyrack Bike Bracket

One of the reasons the Steadyrack is so popular is because of its simple installation process. Here’s a detailed step-by-step guide to help you set it up correctly:

Tools You’ll Need:

  • None, you just need one pair of the StoreWALL SteadyRack Bike Brackets.

Installation Steps:

  1. Choose the Mounting Location
    StoreWALL’s SteadyRack Brackets come in two pieces. One bracket fits the top mount, the second the lower mount. These brackets are fitted to your StoreWALL panels and are locked in using CamLok. Once in place, you can then screw the actual SteadyRack Bike Bracket onto these.
  2. Install the Bracket
    By using the StoreWALL brackets first, there is no messy drilling. Not holes in your wall. Everything simply fits onto your StoreWALL wall panels.
  3. Test the Rack with Your Bike
    Once the rack is mounted, gently roll your bike into the rack to ensure it fits correctly. Try pivoting the bike to either side to see how much space you save. Make any adjustments to the angle of the pivot if necessary.

steadyrack bike bracket

Installation Tips:

  • Mounting Height: If you plan to install multiple racks for different bikes, make sure to stagger the heights to avoid overlapping handlebars or pedals.
  • Spacing Between Racks: For garages or spaces where multiple bikes will be stored, allow at least 60–70 cm (24–28 inches) between racks to accommodate the pivoting movement.

Why Choose Steadyrack Over Other Bike Storage Solutions?

There are many bike storage options on the market, but the Steadyrack stands out for several key reasons:

  1. No Lifting Required: This feature alone makes Steadyrack a go-to choice for cyclists who have heavy bikes or those who simply want a more convenient storage solution.
  2. More Space-Efficient Than Floor Stands: Traditional floor stands take up valuable space, but the Steadyrack mounts on the wall, freeing up the floor for other uses.
  3. High-Quality Build: With a robust design made from steel and durable plastic, Steadyrack is built to last. Unlike cheaper bike racks, it won’t rust, bend, or lose its ability to hold your bike securely over time.
  4. Perfect for Multiple Bikes: If you have more than one bike, the pivoting feature becomes even more beneficial. You can easily store multiple bikes side-by-side without them taking up a lot of horizontal space.
  5. Low Profile Design: When not in use, the Steadyrack folds flat against the wall, making it an unobtrusive solution for bike storage.

steady rack bike bracket

Steadyrack Models Available

Steadyrack offers several models to accommodate different types of bikes:

  • Classic Steadyrack: Ideal for road bikes and hybrid bikes with narrower tires.
  • Mountain Bike Rack: Designed to accommodate wider tires typically found on mountain bikes.
  • Fat Rack: A version built for bikes with extra-wide tires, such as fat bikes.
  • Fender Rack: Perfect for bikes with fenders or mudguards.

Each model is designed with the same space-saving and durability features, ensuring that no matter what type of bike you ride, there’s a Steadyrack for you.

Make the Most of Your Space with Steadyrack

Whether you’re looking to organize a cluttered garage, free up space in your apartment, or simply find a better way to store your bike, the Steadyrack Bike Bracket is an excellent solution. With its easy installation, space-saving pivot feature, and heavy-duty construction, Steadyrack is the ideal choice for cyclists who want both convenience and security.

Categories
garage design Garage Ideas garage makeover Garage Walls Polystyrene block wall

Installing StoreWALL on a Polystyrene block wall

This week, I received an inquiry about installing StoreWALL on a polystyrene block wall. Since I wasn’t very familiar with this building material, I took the time to explore the process in detail with the customer. Here’s what I learned and the solutions we discussed.

What Are Polystyrene Blocks and Why Are They Popular?

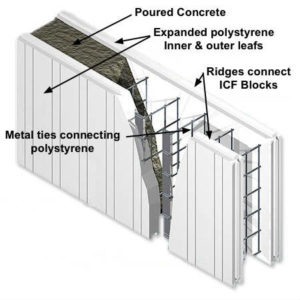
Polystyrene blocks are becoming a go-to material in modern construction for their blend of energy efficiency, light weight, and cost-effectiveness. These blocks are known for their superior insulation, which helps maintain consistent indoor temperatures, leading to reduced heating and cooling costs. Their lightweight nature makes them easy to handle and install, speeding up construction and reducing labor costs. Additionally, polystyrene blocks are moisture-resistant and durable, making them suitable for a variety of climates. They are also recyclable, making them an environmentally friendly choice for sustainable building projects. As energy-efficient and budget-conscious housing solutions continue to gain momentum, polystyrene blocks are emerging as a preferred option for builders.

How Are Polystyrene Block Walls Constructed?

Polystyrene block walls are assembled in a straightforward process, similar to stacking LEGO blocks. These blocks are cut to size and feature a hollow core, which is later filled with concrete, and reinforced with steel, forming a strong, dense wall structure. The polystyrene on the outside remains intact, providing insulation on both sides of the concrete core. This combination of materials creates a highly efficient and durable wall system.

Installing StoreWALL on Polystyrene Block Wall: The Challenges

When installing StoreWALL on a polystyrene block wall, the main challenge is finding a way to securely fasten the installstrips to the polystyrene while ensuring they can support the weight of whatever will be stored. I suggested two possible solutions to the customer:

Plasterboard Zinc Anchors

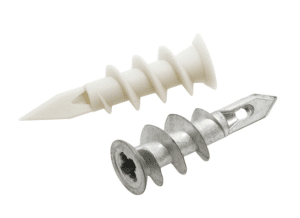
One option is to use plasterboard anchors, which can be placed behind each of the 12 screw holes on the StoreWALL installstrip. Each anchor can support up to 10kg of weight, making it a reliable and efficient method. This approach is also relatively quick and straightforward, using proven fasteners that are easy to source and install.

plasterboard anchorsNail Anchors

Wall Panels on a Garage Brick Wall

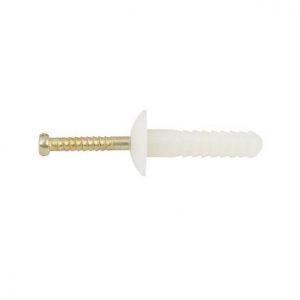
The second option involves using nail anchors long enough to penetrate into the concrete core behind the polystyrene. To determine the correct length of the fastener, you’d first need to puncture the block to measure the thickness of the polystyrene. The fastener should extend at least 20mm into the concrete for optimal hold. While this method provides a stronger, more secure solution, it may require longer and thicker anchors, such as 75mm or even 100mm options. These are readily available and should provide ample support when fastened into the concrete.

Both methods offer viable solutions depending on the specific needs of the installation, with the nail anchors providing a more robust option for heavier loads.

Categories
Garage Ideas garage makeover Garage Walls Slatwall StoreWALL

If You See a Reddit Review Saying “Think Twice About StoreWALL” — Here’s What You Should Really Know

There’s a Reddit post (about 2 years old) in the garage organisation threads titled “If you’re looking at StoreWALL, think twice.” (Reddit) It’s important to read every review — but also to understand context, common industry engineering realities, and the broader range of customer experiences.

Let’s break it down and clarify what’s real, what’s misunderstood, and what every homeowner should consider before dismissing a premium garage storage system.

1. One User’s Experience ≠ Entire System Failure

In the Reddit post, the customer described a panel failure after six months under load — implying that the system is inherently unsafe.

Here’s what’s crucial to understand:

  • Weight ratings are not guesses — they are based on tested load capacities at specific points measured in controlled conditions.
  • Every modular wall storage system (including gladiator and proslat brands) can fail if installation standards aren’t fully met or loads are applied in ways the system wasn’t designed for (e.g., far from studs without adequate backing).
  • StoreWALL, like other premium systems, has published load ratings and installation recommendations to help you mount it safely — and these matter more than anecdote.
  • We publish load ratings at the wall surface and 10cm from the wall.
  • We also publish ratings for each accessory, ie how much it can hold in weight.

A single panel incident doesn’t prove systemic failure — it suggests either a specific installation or loading issue that likely could have been prevented with correct mounting or load distribution.

2. Installation Matters — A Lot

Wall storage systems rely on strong anchoring to your structural studs or masonry. What’s rarely discussed in one-off reviews:

  • In this particular case, the customer secured the panels directly to the wall using screws. They did not use installstrips.
  • Whilst this installation method works, the load capacity of the panel and therefore the hooks is much less than specified.
  • The customer mentioned using installstrips in some places and not in other due to bulging and loose panels. This bulging is most likely due to an uneven wall and poor leveling at installation. The installstrips themselves are only a few mm in thickness so they themselves can cause bulging.
  • A direct installation through the panel may seem like a tighter more secure fixing of the panel to the wall.  However, the load is only supported by the fasteners/screws and the panel. Whereas when Installstrips are used, these metal brackets sit between the panel and the wall. Having all three support your weight it better than just the two.

3. “Crash” Incidents Don’t Automatically Mean Product Fault

When someone says a panel failed and materials fell off the wall — several possibilities exist beyond a product defect:

  • Improper stud engagement or fastener choice
  • Loads applied in ways exceeding recommended ratings

If a panel is properly mounted into studs and loads are distributed correctly, the likelihood of failure is near zero. Our experience selling StoreWALL for the past 10 years has proven this.

4. Weight Ratings Are Technical — Not Arbitrary

Weight capacities are usually rated for loads applied directly at the panel surface, not at extended distances (like heavy tools hung far out from the wall surface). This is common with all slatwall systems:

  • StoreWALL’s capacity ratings include at surface and at 10cm from surface.
  • A hook’s rating is one thing
  • A lever force (weight held far from the wall with leverage) is another
  • Over leveraging is easy to do. If the ladder sits at the end of the hook, and the hook has a depth of 30cm, then the weight in this case is extended to 30cm from the wall. Heavy items should shit as close to the wall as possible.
  • If you consider the type of ladder in this case and its depth, the 40lbs was sitting on the Utility Hook, with the weight spread across the depth of the Hook. I believe that this ladder was too heavy for the hook and its depth pushed the weight to the end of the hook. It was over leveraging.
  • I think the ladder could probably have rested on the ground, supported by hook. It would have been a safer option.

Both need proper engineering consideration — and advanced systems like StoreWALL offer accessories designed to handle these scenarios, as well as guidance on how to mount and distribute loads.

Crucially, StoreWALL’s CamLok locking mechanism secures the accessory to the wall, allowing for easy on/off without worrying that the hook itself will give way and come off the wall.

5. Load Capacity varies by manufacturer.

You can purchase storage systems at Bunnings that state their wall rail can support 100KG when installed with 6 just screws. See our notes comparing the Storease and the Gladiator system.

At StoreWALL, we have always recommend installing with Installstrips to give you the best experience you can have with our systems.

Choosing the right system means understanding your storage loads, installation surface, and accessory needs — not just the brand name.

6. Reviews Should Be Balanced — Look at Both Sides

While negative feedback can be useful, it’s important to weigh it against the broader consensus from:

These frequently highlight:

  • Ease of installation
  • Robust accessory options
  • Long-term performance in real garages which contrasts with isolated negative anecdotes.

7. What You Should Do as a Potential Buyer

If a Reddit post concerns you:

  1. Evaluate load requirements — what will you hang?
  2. Choose proper fixings into structural studs
  3. Use accessory ratings appropriately
  4. Ask for professional installation if unsure
  5. Compare broad user feedback
  6. Watch the various installation videos to understand the installation process.
Categories
garage design Garage Hooks Garage Ideas garage makeover Mould in Garage PVC vs MDF Slatwall

The Durability of PVC

A Deep Dive into PVC, One of the Most Resilient Materials

PVC (Polyvinyl Chloride) is one of the most widely used synthetic plastic polymers in the world, known for its versatility, affordability, and, most importantly, durability. From everyday household items to complex industrial applications, PVC’s robust properties make it a go-to material across various industries. In this blog post, we’ll explore the durability of PVC and why it stands out among other materials.

What is PVC?

Polyvinyl Chloride, commonly known as PVC, is a high-strength thermoplastic material commonly used in construction for pipes, wiring, and other applications. Its popularity comes from its long-lasting, corrosion-resistant, and weatherproof nature, which makes it ideal for both indoor and outdoor use.

Key Factors Contributing to the Durability of PVC

Chemical Resistance

PVC is highly resistant to many chemicals, including acids, alkalis, and salts, which makes it suitable for various applications where other materials might degrade or corrode. This resistance ensures that PVC remains unaffected by the harsh substances it might encounter in industrial settings or even household environments.

Water and Moisture Resistance

One of the standout features of PVC is its ability to resist water and moisture, making it perfect for applications in damp environments. This is why PVC is widely used in plumbing, rainwater systems, and even outdoor furniture.

PVC – Weather Resistance

Unlike many other materials, PVC can withstand extreme weather conditions, including heavy rain, snow, and UV radiation from the sun. Its ability to endure temperature fluctuations without losing its structural integrity makes it ideal for outdoor use.

Impact Resistance

PVC’s high impact resistance means it can absorb shock without cracking or breaking, making it a durable choice for high-traffic areas or places prone to rough use. This is particularly important for products like PVC wall panels or flooring, which need to endure daily wear and tear.

Longevity

PVC products are known to last for decades without significant degradation. This longevity is not only a testament to its physical properties but also contributes to its cost-effectiveness. For example, PVC pipes have an expected lifespan of over 50 years, outlasting many traditional materials.

Low Maintenance

PVC requires minimal maintenance compared to other materials. It doesn’t need painting, sealing, or frequent repairs, which further enhances its durability and keeps long-term costs down. A simple clean with water and mild detergent is often all it takes to keep PVC products looking new.

Fire Resistance

PVC has inherent fire-resistant properties due to its chlorine content, which slows down the spread of fire. This makes it a safer option for applications in environments where fire safety is a concern.

Mold and Bacteria Resistance

Its non-porous surface makes PVC resistant to mold, mildew, and bacteria, contributing to its durability and suitability for hygienic environments such as hospitals and food processing facilities.

Applications of Durable PVC

The durability of PVC makes it ideal for a wide range of applications, including:

  • Building and Construction: Pipes, window frames, flooring, wall cladding, and roofing sheets.
  • Automotive Industry: Used in dashboard components, cables, and trims due to its impact resistance.
  • Healthcare: Blood bags, tubing, and other medical devices that require a durable, sterile environment.
  • Home and Garden: Furniture, fences, decking, and storage solutions that need to withstand outdoor elements.
  • Industrial Uses: Conveyor belts, protective clothing, and other items exposed to harsh conditions.

Environmental Impact and Recycling

While PVC is highly durable, concerns about its environmental impact have led to significant advancements in recycling processes. Modern PVC can be recycled multiple times without losing its properties, making it a more sustainable option than many alternatives. Recycling PVC not only extends its lifespan but also reduces the environmental footprint of products made from this material.

The Durability of PVC – Conclusion

PVC’s durability is unmatched when it comes to resisting the elements, chemicals, and daily wear and tear. Its versatility and low maintenance needs make it a popular choice in industries ranging from construction to healthcare. As recycling technologies improve, the environmental footprint of PVC continues to shrink, making it not only a durable but also a sustainable choice for the future.

Whether you’re considering PVC for construction, home improvement, or industrial use, its resilience ensures a long-lasting solution that stands the test of time. So, the next time you see PVC in use, you can appreciate the science and engineering that go into making this material a durable, reliable option for a wide range of applications.

Categories
Bike Storage Steadyrack

Steadyrack Bike Bracket

A Space-Saving Solution for Your Home or Garage

If you’re an avid cyclist or even a casual rider, you’re likely familiar with the ongoing challenge of storing your bike. It’s often difficult to find a storage solution that’s not only secure but also space-efficient. That’s where the Steadyrack Bike Bracket comes in, offering an innovative way to store your bikes without sacrificing valuable floor space. In this blog post, we’ll explore what makes the Steadyrack Bike Bracket a standout choice for bike storage, and how it can simplify your life.

What is the Steadyrack Bike Bracket?

The Steadyrack Bike Bracket is a wall-mounted bike rack that allows you to store your bike vertically. It’s unique because it pivots from side to side, letting you swing the bike to the left or right to save even more space. The design of the Steadyrack ensures that your bike is securely stored without the need to lift it—a significant advantage for those who struggle with heavy lifting or lack the physical space for traditional bike stands.

Key Features of the Steadyrack Bike Bracket

Swiveling Design

  • One of the standout features of the Steadyrack is its 180-degree pivoting mechanism. Once the bike is mounted, you can swivel it to either side, keeping it flat against the wall. This is especially useful in tight spaces like small garages or apartments where every inch counts.

Easy Loading and Unloading

  • Unlike traditional vertical bike racks that require you to lift the entire bike, the Steadyrack allows you to simply roll your bike in and out of the rack. This makes it ideal for heavier bikes, such as e-bikes, mountain bikes, or anyone who prefers not to lift their bike.

Universal Fit for Most Bike Types

  • The Steadyrack is designed to accommodate a wide variety of bikes. Whether you ride a road bike, mountain bike, or commuter bike, there’s likely a Steadyrack model that fits your needs. The standard model fits bikes with tires between 20″ and 29″ and widths up to 2.4″.

Space-Saving Efficiency

  • Because the Steadyrack allows you to store your bike flat against the wall and pivot it to the side, it dramatically reduces the amount of floor space required. This makes it a top choice for people looking to maximize their garage, shed, or apartment storage.

Durability and Quality

  • Made from high-quality steel and UV-treated plastic, the Steadyrack is built to last. It can handle up to 35kg (77 lbs), making it strong enough to hold most bikes on the market. The materials are designed to withstand everyday wear and tear, whether you’re storing your bike indoors or outdoors.

Protects Your Bike

  • The rack is designed to minimize contact with the bike’s frame, which reduces the risk of damage. It cradles the wheels of your bike, ensuring that the frame, pedals, and handlebars don’t come into contact with the wall or the rack itself.

Minimal Wall Damage

  • Installed over the StoreWALL Wall Panels, the Steady Rack Bike Bracket can be moved around on your wall really easily. There is no additional drilling as StoreWALL’s SteadyRack brackets are used to mount onto the StoreWALL panels. The SteadyRack Bike Bracket is then mounted onto these brackets.

Step-by-Step Installation Guide for the Steadyrack Bike Bracket

One of the reasons the Steadyrack is so popular is because of its simple installation process. Here’s a detailed step-by-step guide to help you set it up correctly:

Tools You’ll Need:

  • None, you just need one pair of the StoreWALL SteadyRack Bike Brackets.

Installation Steps:

  1. Choose the Mounting Location
    StoreWALL’s SteadyRack Brackets come in two pieces. One bracket fits the top mount, the second the lower mount. These brackets are fitted to your StoreWALL panels and are locked in using CamLok. Once in place, you can then screw the actual SteadyRack Bike Bracket onto these.
  2. Install the Bracket
    By using the StoreWALL brackets first, there is no messy drilling. Not holes in your wall. Everything simply fits onto your StoreWALL wall panels.
  3. Test the Rack with Your Bike
    Once the rack is mounted, gently roll your bike into the rack to ensure it fits correctly. Try pivoting the bike to either side to see how much space you save. Make any adjustments to the angle of the pivot if necessary.
steadyrack bike bracket

Installation Tips:

  • Mounting Height: If you plan to install multiple racks for different bikes, make sure to stagger the heights to avoid overlapping handlebars or pedals.
  • Spacing Between Racks: For garages or spaces where multiple bikes will be stored, allow at least 60–70 cm (24–28 inches) between racks to accommodate the pivoting movement.

Why Choose Steadyrack Over Other Bike Storage Solutions?

There are many bike storage options on the market, but the Steadyrack stands out for several key reasons:

  1. No Lifting Required: This feature alone makes Steadyrack a go-to choice for cyclists who have heavy bikes or those who simply want a more convenient storage solution.
  2. More Space-Efficient Than Floor Stands: Traditional floor stands take up valuable space, but the Steadyrack mounts on the wall, freeing up the floor for other uses.
  3. High-Quality Build: With a robust design made from steel and durable plastic, Steadyrack is built to last. Unlike cheaper bike racks, it won’t rust, bend, or lose its ability to hold your bike securely over time.
  4. Perfect for Multiple Bikes: If you have more than one bike, the pivoting feature becomes even more beneficial. You can easily store multiple bikes side-by-side without them taking up a lot of horizontal space.
  5. Low Profile Design: When not in use, the Steadyrack folds flat against the wall, making it an unobtrusive solution for bike storage.

Steadyrack Models Available

Steadyrack offers several models to accommodate different types of bikes:

  • Classic Steadyrack: Ideal for road bikes and hybrid bikes with narrower tires.
  • Mountain Bike Rack: Designed to accommodate wider tires typically found on mountain bikes.
  • Fat Rack: A version built for bikes with extra-wide tires, such as fat bikes.
  • Fender Rack: Perfect for bikes with fenders or mudguards.

Each model is designed with the same space-saving and durability features, ensuring that no matter what type of bike you ride, there’s a Steadyrack for you.

Make the Most of Your Space with Steadyrack

Whether you’re looking to organize a cluttered garage, free up space in your apartment, or simply find a better way to store your bike, the Steadyrack Bike Bracket is an excellent solution. With its easy installation, space-saving pivot feature, and heavy-duty construction, Steadyrack is the ideal choice for cyclists who want both convenience and security.

Categories
Brick Walls garage design Garage Ideas garage makeover Garage Storage On TV Garage Walls Slatwall StoreWALL

Battening out a brick wall

Battening out a brick wall is a common practice in construction and renovation, but it’s not always necessary for every project. Understanding when and why you should batten out a brick wall can help ensure the longevity and stability of your installations, whether you’re adding insulation, installing garage wall panels, or creating a smooth surface for new finishes. In this article, we’ll explore the situations that require battening, the benefits of the process, and a step-by-step guide on how to do it.

What Does Battening Out Mean?

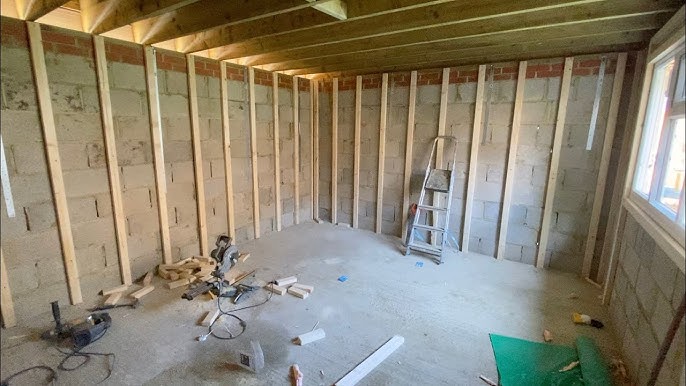
Battening out a brick wall refers to the process of attaching vertical wooden battens (strips of timber) or metal furring strips to a brick or masonry wall. These battens create a framework that allows you to attach various materials, such as plasterboard, insulation, or garage panels, while maintaining an air gap between the wall and the new surface. This method is commonly used when the surface of the wall is uneven, damaged, or needs extra support for the materials being attached.

When is it Necessary to Batten Out a Brick Wall?

Not every brick wall will need battening out, but there are several situations where it becomes essential:

Uneven or Damaged Brickwork

  • If the brick wall is uneven or damaged, it’s challenging to achieve a smooth, level surface using plasterboard or panels alone. Battening out the wall creates a uniform, level framework for attaching these materials, ensuring a better finish and stronger support.
Adding Insulation
  • If you’re renovating an old building or a garage and need to add insulation, battening out the wall is often necessary. Battens create the space needed for insulation boards or rolls to fit securely between the wall and the interior cladding. This not only improves energy efficiency but also helps prevent moisture buildup.

Installing StoreWALL or Similar Garage Wall Panel Systems

  • Heavy-duty slatwall systems like StoreWALL require a stable and even surface to support their weight and functionality. If the brick wall is very uneven, damaged, or if you need to create a gap for wiring and other installations, battening out the wall provides the necessary support and structure for secure installation.

Moisture and Damp Issues

  • If the brick wall is prone to moisture or dampness, battening out the wall can help create an air gap that improves ventilation and reduces the risk of moisture-related damage. This is particularly important in basements, garages, or older buildings where damp issues are common.

Accommodating Electrical and Plumbing Systems

  • When installing electrical wiring, pipes, or other systems that need to run behind the interior surface, battening out the wall creates the space needed to conceal these elements safely and effectively.

Benefits of Battening Out a Brick Wall

  • Creates a Level Surface: Ensures that the final surface, whether it’s plasterboard, panels, or tiles, is level and professional-looking.
  • Improves Insulation: Allows for the addition of thermal or acoustic insulation, enhancing energy efficiency and soundproofing.
  • Provides Support: Offers a stable structure for mounting heavy items like shelving, wall panels, or large installations.
  • Moisture Control: Helps manage moisture by creating an air gap that improves ventilation and reduces the risk of damp issues.
  • Flexibility for Services: Allows for the easy routing of cables, pipes, and other utilities behind the wall surface.

Step-by-Step Guide to Batoning Out a Brick Wall

If you determine that battening out your brick wall is necessary, follow these steps for a successful installation:

Tools and Materials Needed:

  • Wooden battens or metal furring strips
  • Electric drill with masonry bit
  • Wall plugs and screws
  • Tape measure
  • Spirit level
  • Pencil or marker
  • Saw (if cutting battens)
  • Insulation boards or rolls (if insulating)

Steps:

  1. Measure and Mark the Wall
    Begin by measuring the height and width of the wall where you’ll be installing the battens. Mark the positions where each batten will be placed, typically spacing them 400–600 mm (16–24 inches) apart. Ensure that the markings are level using a spirit level. A typical interior wall has studs at 450mm intervals. You can use this as your guide for spacing out your battens.
  2. Cut the Battens to Size
    If using wooden battens, ensure you select wood that is as straight as possible. Cheap bent wooden battens will not fix an uneven brick wall. Cut the battens or furring strips to the required length using a saw. Ensure they are cut precisely so they fit snugly from floor to ceiling.
  3. Drill Holes in the Wall
    Using an electric drill with a masonry bit, drill holes at the marked positions where you’ll attach the battens. These holes should be deep enough to accommodate wall plugs and screws.
  4. Attach the Battens to the Wall
    Insert wall plugs into the drilled holes. Place the batten against the wall and drive screws through the batten into the wall plugs. Check each batten with a spirit level to ensure it is vertical and aligned properly. Tighten the screws securely to hold the battens in place.
  5. Install Insulation (Optional)
    If you’re adding insulation, cut the insulation boards or rolls to fit between the battens. Fit them snugly into place, ensuring there are no gaps that could reduce the effectiveness of the insulation.
  6. Attach the Cladding or Panels
    Once the battens and insulation (if applicable) are securely in place, you can proceed with attaching the cladding, plasterboard, or garage wall panel system. Use the battens as the framework for securing these materials, ensuring they are level and securely fastened.
  7. Final Checks
    Once everything is installed, check that the new surface is level and free of gaps or movement. Make any necessary adjustments before finishing with paint, wallpaper, or other finishing touches.

Conclusion

Battening out a brick wall is a practical solution in many renovation and construction scenarios. Whether you’re dealing with uneven brickwork, adding insulation, or installing a heavy-duty system like StoreWALL, battoning ensures a secure and professional finish. By following the steps outlined in this guide, you can achieve a stable and effective installation, improving both the aesthetics and functionality of your space.

If you’re planning a project that involves battening out a wall, ensure you have the right tools and materials on hand, and always consult a professional if you’re unsure about the wall’s condition or structure.

Categories
Bike Storage Carport Storage Solution garage design Garage Hooks Garage Ideas garage makeover Garage Storage On TV Shelving

The Limitations of Garage Shelving

When it comes to organizing your garage, adding a few shelves might seem like the easiest solution. While shelves certainly have their place, relying on shelving alone for garage storage can leave you with limited flexibility, wasted space, and ongoing organization challenges. In this article, we’ll explore the limitations of garage shelving, and what alternatives or additions you might consider to truly maximize your garage storage.

Limitations of Garage Shelving

Garage shelving provides some utility, but it often falls short in addressing the diverse storage needs of a garage. Here are some of the limitations that can arise:

Wasted Vertical Space

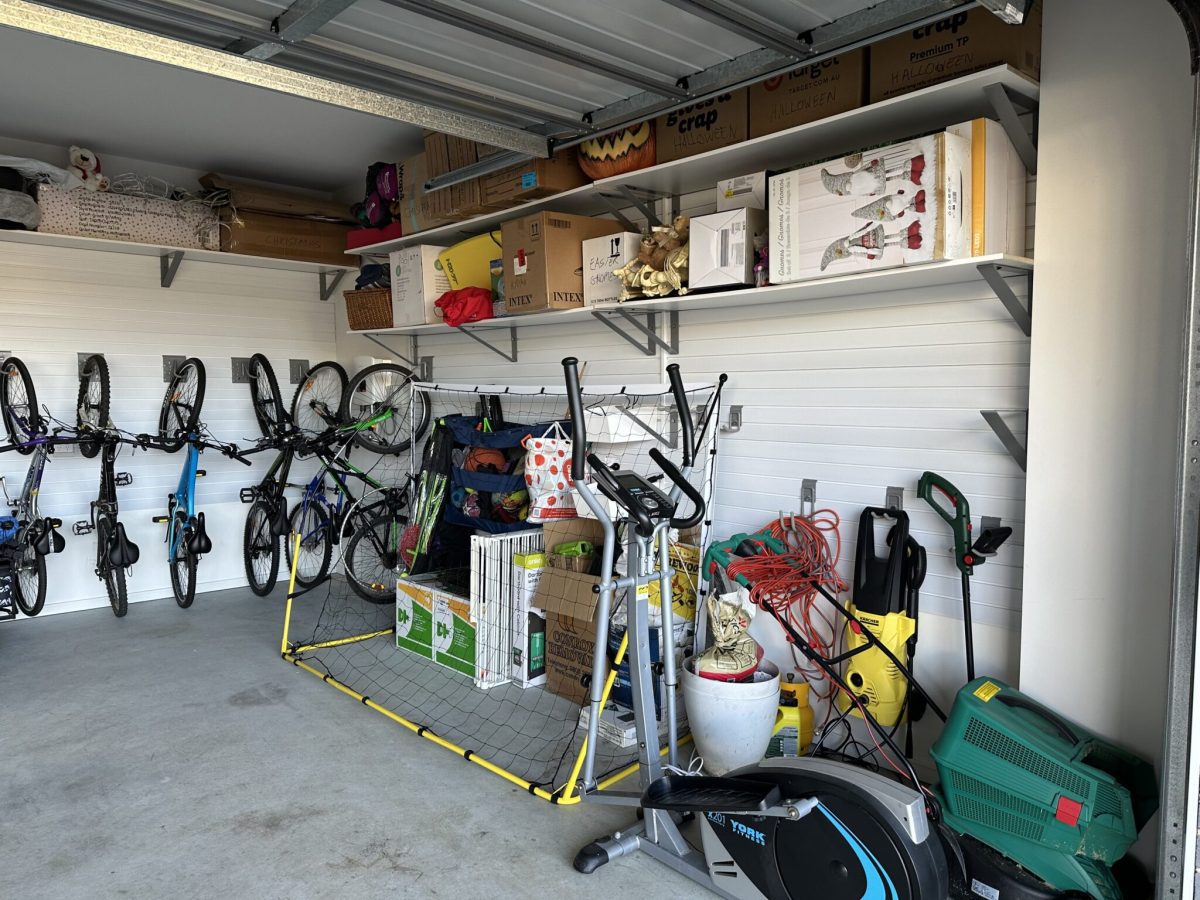
Standard garage shelving typically leaves a significant amount of vertical space unused. This space could otherwise be used for storing tools, equipment, or seasonal items. Without utilizing the full height of your walls, you may find yourself quickly running out of space and struggling to keep everything accessible.

Difficulty Organizing Small and Medium-Sized Items

Shelves are best suited for large, stackable items or bins, but they can make it difficult to store small and medium-sized items efficiently. When stored on open shelves, items like tools, sports equipment, or cleaning supplies can quickly create clutter and become hard to locate when you need them.

Limited Flexibility

Once installed, traditional shelves can be hard to adjust or reorganize, especially if you’re dealing with fixed or heavy-duty shelving units. Garages often require adaptable storage options that can change with your needs, and shelving alone doesn’t always offer this flexibility.

Risk of Clutter and Accessibility Issues


Shelving alone encourages stacking items, which can lead to clutter, making it difficult to access what’s stored in the back. As shelves fill up, it’s easy for items to become piled or hidden, which not only makes organization harder but can also increase the risk of items falling and causing damage.

Underutilized Wall and Ceiling Space

Shelving takes up valuable floor space while leaving the walls and ceiling areas largely unused. This is a missed opportunity, especially in garages where space is at a premium. Ceiling racks, wall panels, or other modular solutions can make better use of these areas and free up floor space for other uses.

Alternative and Complementary Storage Solutions

To make the most of your garage storage, it’s worth exploring other storage options that can work alongside shelving to create a more comprehensive and efficient setup.

Slatwall and Wall Panel Systems

Slatwall systems, like those from StoreWALL, are versatile garage wall storage solutions that allow you to hang hooks, shelves, baskets, and brackets. Unlike traditional shelving, these panels make it easy to store items of varying sizes, such as tools, sporting goods, and gardening supplies. Wall panels allow you to use your walls effectively, keep items accessible, and prevent clutter on shelves.

limitations of garage shelving

Pegboards and Tool Racks

Pegboards and tool racks provide customizable storage for smaller and lighter items. By mounting them on the wall, you keep your tools organized and within reach, while also freeing up valuable shelf space for larger, bulkier items.

Overhead Storage

Overhead racks or ceiling storage solutions are ideal for items that aren’t needed regularly, such as seasonal decor, camping gear, or spare tires. By using the ceiling space, you maximize storage without taking up floor or wall space. Overhead storage keeps these items safe, organized, and out of the way until they’re needed.

limitations of garage shelving

Cabinets and Drawer Units

Cabinets and drawer units offer enclosed storage, which helps reduce dust accumulation and keeps items hidden for a tidier look. Cabinets can house a variety of items that don’t need to be on display, and drawer units work particularly well for storing smaller tools, hardware, or crafting supplies. Additionally, locking cabinets can be useful for securing chemicals, paints, and other hazardous materials safely out of reach.

Bins, Baskets, and Specialized Holders

Adding bins, baskets, and specialized holders (e.g., for sports equipment or gardening tools) can help you organize items that are hard to store on shelves alone. Labelled storage bins allow you to categorize items for easy access, while baskets can hold oddly shaped items like balls, hoses, or extension cords. These can be attached to wall panels or placed on shelves in an organized manner.

Benefits of a Mixed Storage System

Incorporating a variety of storage options in your garage enables you to overcome some of the limitations of garage shelving.

Increased Space Efficiency

By utilizing the walls and ceiling alongside shelving, you can dramatically increase your available storage without sacrificing floor space. Combining shelving with slatwall, overhead storage, and cabinets ensures every inch of the garage is working for you.

Better Organization and Accessibility

A mixed storage system allows you to assign specific places for each type of item, so they’re easy to find and access when needed. You can store frequently used items within reach and keep seldom-used items out of the way.

Improved Safety and Clutter Reduction

A well-organized garage reduces the risk of accidents caused by items falling off overcrowded shelves. Hazardous materials can be safely locked away, and bulky or heavy items can be securely stored on racks or in cabinets, making the space safer for family members.

Enhanced Flexibility for Changing Needs

As your storage needs evolve, a versatile system that includes slatwalls, pegboards, and ceiling storage can adapt with you. You can reconfigure your setup to accommodate new tools, equipment, or seasonal items without a complete overhaul.

Getting Started: Creating a Balanced Storage Plan

To get the most out of your garage, start by assessing your storage needs:

Identify What You Need to Store

  • Make a list of the items you currently store in your garage and those you’d like to add. This helps you determine the types and sizes of storage solutions you’ll need.

Map Out Your Space

  • Measure your garage and sketch a rough layout, marking where you could install shelving, wall panels, ceiling racks, and cabinets. Aim to balance storage across floor, wall, and ceiling areas to avoid overcrowding any one area.

Choose a Combination of Storage Solutions

  • Based on your list and layout, choose a combination of storage options to fit your needs. If you have many small items, prioritize pegboards or slatwall with baskets. For larger items, consider overhead racks or dedicated shelving.

Install and Organize

  • Start by installing the more permanent fixtures, such as slatwall or ceiling racks, before adding smaller storage accessories. Once everything is in place, arrange your items in a logical, accessible way to ensure easy access and organization.

Conclusion – Limitations of Garage Shelving

While garage shelving is a useful storage tool, relying on it alone can limit your options and lead to a cluttered, inefficient space. By combining shelving with wall-mounted systems, ceiling racks, cabinets, and specialized storage accessories, you can create a well-organized and highly efficient garage that meets all your storage needs.

Explore StoreWALL for high-quality slatwall solutions, hooks, baskets, and other accessories that will take your garage organization to the next level. With a thoughtfully designed setup, your garage can become a clean, accessible, and functional space tailored to you.