
Access an Additional $20 Off All 2438mm Wall Panels!
CALL US

0411 280 646

Categories
Brick Walls Power Tools

Why You Need a Hammer Drill for Brick Walls

Drilling into brick or masonry is very different to drilling into timber, plasterboard, or steel. Many DIYers assume a standard power drill will do the job, only to find the bit overheating, the hole drifting off-centre, or progress grinding to a halt altogether. This is where a hammer drill becomes essential—and where the right masonry drill bit makes all the difference.

Why a Regular Drill Struggles with Brick

A standard power drill works by rotating the drill bit to cut through material. This method is effective for softer materials like wood or metal, but brick and masonry are dense and brittle, designed to resist wear and impact.

When using a regular drill on brick:

  • The bit relies purely on friction and cutting
  • Heat builds up quickly, dulling the bit
  • The drill can “polish” the surface instead of penetrating it
  • Holes often wander, making fixings less secure

The result is slower drilling, uneven holes, and a higher risk of damaging both the drill bit and the wall.

What a Hammer Drill Does Differently

A hammer drill combines rotational motion with a rapid hammering action. This hammering motion creates small, repeated impacts that help fracture the brick or masonry while the bit rotates and clears debris.

In simple terms:

  • The hammer action breaks up the brick
  • The rotation removes material efficiently
  • Less pressure is required from the user
  • Holes are drilled faster and more accurately

For tasks like mounting wall panels, shelves, or heavy-duty garage storage systems, a hammer drill ensures fixings are seated correctly and securely.

Why You Need a Hammer Drill for Brick WallsWhy 4-Cutter (4-Cross) Masonry Bits Are Better

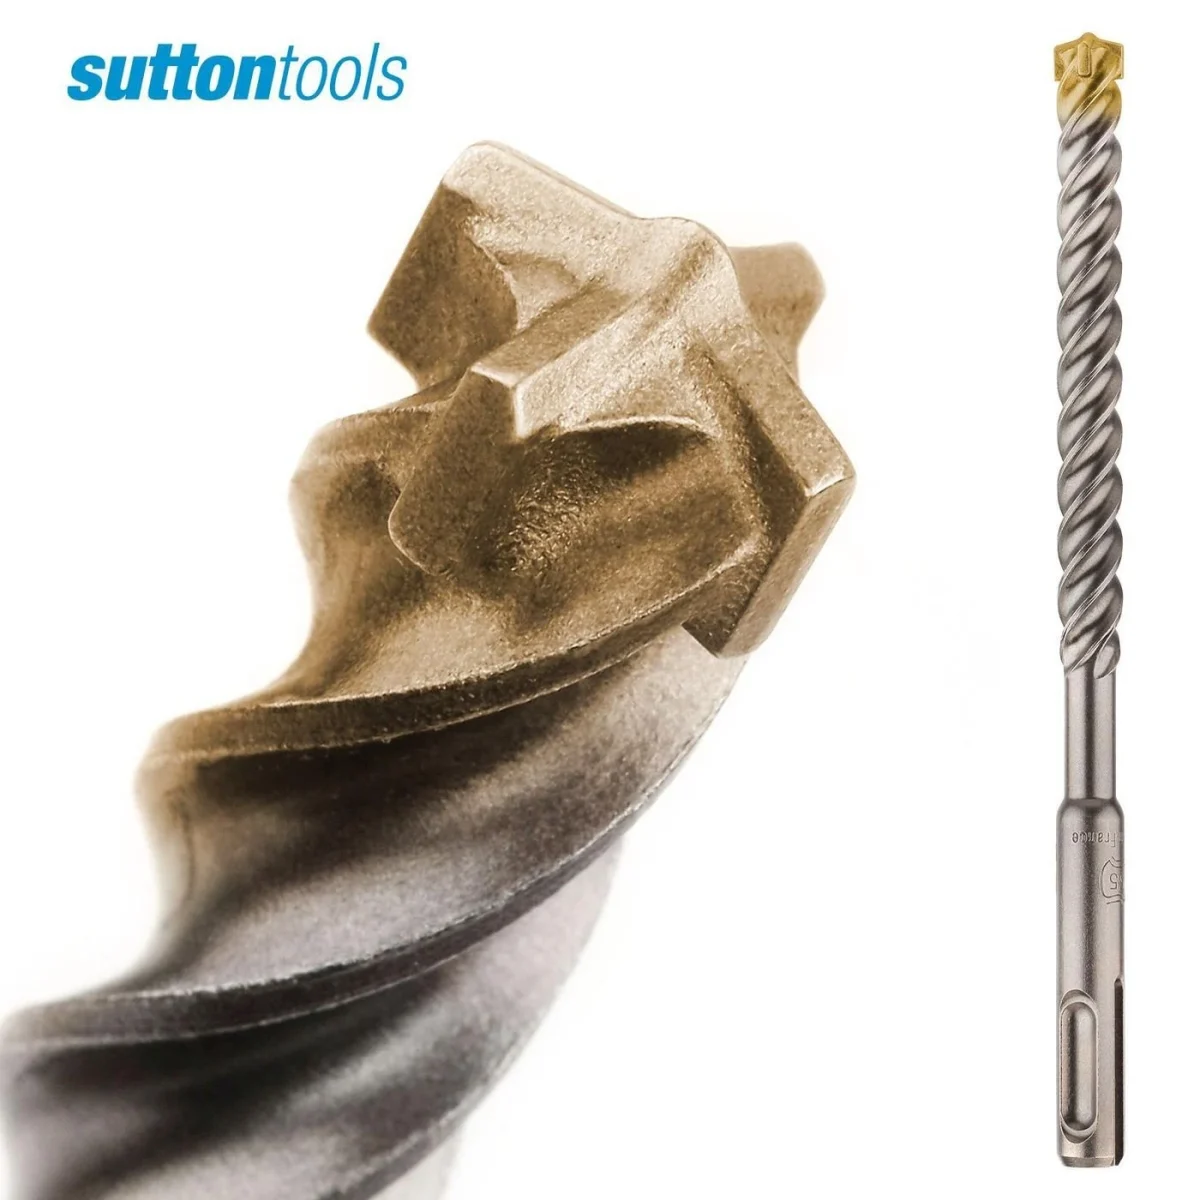
Not all masonry drill bits are created equal. Traditional masonry bits typically feature a 2-cutter tip, which can cause vibration, chipping, and uneven holes—especially in harder brick or concrete.

4-cutter masonry bits (also known as 4-cross or quad-head bits) offer several advantages:

1. Cleaner, More Accurate Holes

The four cutting edges stay centred as the bit drills, reducing wobble and producing cleaner, rounder holes.

2. Less Vibration and Chipping

With cutting forces spread evenly across four edges, there’s less stress on the brick, helping prevent cracking or blow-out.

3. Faster Drilling in Hard Masonry

4-cutter bits are designed to work efficiently with hammer drills, allowing the bit to break and clear material more effectively.

4. Longer Bit Life

Because the load is distributed across multiple cutting edges, wear is reduced, meaning the bit stays sharper for longer—especially important when drilling multiple holes.

The Right Combination for Safe, Secure Fixing

When drilling into brick walls—particularly for load-bearing installations like garage wall storage—the best results come from:

  • A hammer drill with the hammer function engaged
  • A high-quality 4-cutter masonry bit
  • Correct hole depth and appropriate wall fixings

This combination ensures fixings sit properly in the wall, reducing the risk of movement, loosening, or failure over time.

Hammer Drill Tips

  • Cordless vs. corded: Cordless drills offer greater flexibility and are ideal for most DIY jobs, but corded versions often give stronger sustained power for repetitive masonry drilling.

  • Brushless motors: These are more efficient, run cooler and deliver better battery life.

  • SDS or standard chuck: For frequent heavy masonry work, an SDS-plus rotary hammer like the Makita model handles tough brick and concrete more effectively.

  • You can find a great and broad range at your local hardware store. Check out Bunnings and Total Tools.

Final Thoughts

Using the wrong tool for masonry isn’t just inefficient—it can compromise the strength and safety of what you’re installing. A hammer drill paired with a 4-cutter masonry bit delivers faster drilling, cleaner holes, and more reliable fixings, making it the correct choice for brick walls every time.

Whether you’re installing shelving, wall panels, or heavy-duty storage systems, investing in the right drilling setup pays off in performance, durability, and peace of mind.
Categories
Brick Walls garage design Garage Ideas garage makeover Garage Storage On TV Garage Walls Slatwall StoreWALL

Battening out a brick wall

Battening out a brick wall is a common practice in construction and renovation, but it’s not always necessary for every project. Understanding when and why you should batten out a brick wall can help ensure the longevity and stability of your installations, whether you’re adding insulation, installing garage wall panels, or creating a smooth surface for new finishes. In this article, we’ll explore the situations that require battening, the benefits of the process, and a step-by-step guide on how to do it.

What Does Battening Out Mean?

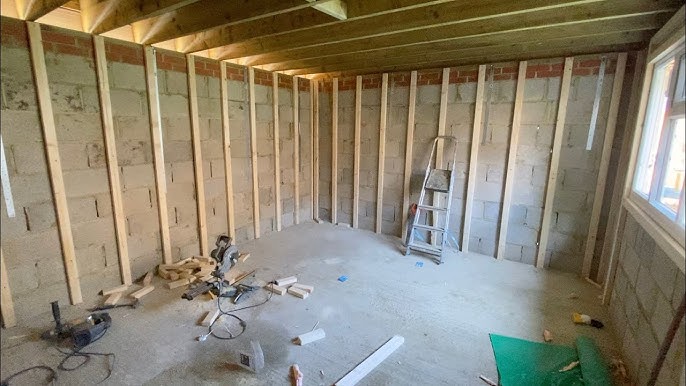
Battening out a brick wall refers to the process of attaching vertical wooden battens (strips of timber) or metal furring strips to a brick or masonry wall. These battens create a framework that allows you to attach various materials, such as plasterboard, insulation, or garage panels, while maintaining an air gap between the wall and the new surface. This method is commonly used when the surface of the wall is uneven, damaged, or needs extra support for the materials being attached.

When is it Necessary to Batten Out a Brick Wall?

Not every brick wall will need battening out, but there are several situations where it becomes essential:

Uneven or Damaged Brickwork

  • If the brick wall is uneven or damaged, it’s challenging to achieve a smooth, level surface using plasterboard or panels alone. Battening out the wall creates a uniform, level framework for attaching these materials, ensuring a better finish and stronger support.
Adding Insulation
  • If you’re renovating an old building or a garage and need to add insulation, battening out the wall is often necessary. Battens create the space needed for insulation boards or rolls to fit securely between the wall and the interior cladding. This not only improves energy efficiency but also helps prevent moisture buildup.

Installing StoreWALL or Similar Garage Wall Panel Systems

  • Heavy-duty slatwall systems like StoreWALL require a stable and even surface to support their weight and functionality. If the brick wall is very uneven, damaged, or if you need to create a gap for wiring and other installations, battening out the wall provides the necessary support and structure for secure installation.

Moisture and Damp Issues

  • If the brick wall is prone to moisture or dampness, battening out the wall can help create an air gap that improves ventilation and reduces the risk of moisture-related damage. This is particularly important in basements, garages, or older buildings where damp issues are common.

Accommodating Electrical and Plumbing Systems

  • When installing electrical wiring, pipes, or other systems that need to run behind the interior surface, battening out the wall creates the space needed to conceal these elements safely and effectively.

Benefits of Battening Out a Brick Wall

  • Creates a Level Surface: Ensures that the final surface, whether it’s plasterboard, panels, or tiles, is level and professional-looking.
  • Improves Insulation: Allows for the addition of thermal or acoustic insulation, enhancing energy efficiency and soundproofing.
  • Provides Support: Offers a stable structure for mounting heavy items like shelving, wall panels, or large installations.
  • Moisture Control: Helps manage moisture by creating an air gap that improves ventilation and reduces the risk of damp issues.
  • Flexibility for Services: Allows for the easy routing of cables, pipes, and other utilities behind the wall surface.

Step-by-Step Guide to Batoning Out a Brick Wall

If you determine that battening out your brick wall is necessary, follow these steps for a successful installation:

Tools and Materials Needed:

  • Wooden battens or metal furring strips
  • Electric drill with masonry bit
  • Wall plugs and screws
  • Tape measure
  • Spirit level
  • Pencil or marker
  • Saw (if cutting battens)
  • Insulation boards or rolls (if insulating)

Steps:

  1. Measure and Mark the Wall
    Begin by measuring the height and width of the wall where you’ll be installing the battens. Mark the positions where each batten will be placed, typically spacing them 400–600 mm (16–24 inches) apart. Ensure that the markings are level using a spirit level. A typical interior wall has studs at 450mm intervals. You can use this as your guide for spacing out your battens.
  2. Cut the Battens to Size
    If using wooden battens, ensure you select wood that is as straight as possible. Cheap bent wooden battens will not fix an uneven brick wall. Cut the battens or furring strips to the required length using a saw. Ensure they are cut precisely so they fit snugly from floor to ceiling.
  3. Drill Holes in the Wall
    Using an electric drill with a masonry bit, drill holes at the marked positions where you’ll attach the battens. These holes should be deep enough to accommodate wall plugs and screws.
  4. Attach the Battens to the Wall
    Insert wall plugs into the drilled holes. Place the batten against the wall and drive screws through the batten into the wall plugs. Check each batten with a spirit level to ensure it is vertical and aligned properly. Tighten the screws securely to hold the battens in place.
  5. Install Insulation (Optional)
    If you’re adding insulation, cut the insulation boards or rolls to fit between the battens. Fit them snugly into place, ensuring there are no gaps that could reduce the effectiveness of the insulation.
  6. Attach the Cladding or Panels
    Once the battens and insulation (if applicable) are securely in place, you can proceed with attaching the cladding, plasterboard, or garage wall panel system. Use the battens as the framework for securing these materials, ensuring they are level and securely fastened.
  7. Final Checks
    Once everything is installed, check that the new surface is level and free of gaps or movement. Make any necessary adjustments before finishing with paint, wallpaper, or other finishing touches.

Conclusion

Battening out a brick wall is a practical solution in many renovation and construction scenarios. Whether you’re dealing with uneven brickwork, adding insulation, or installing a heavy-duty system like StoreWALL, battoning ensures a secure and professional finish. By following the steps outlined in this guide, you can achieve a stable and effective installation, improving both the aesthetics and functionality of your space.

If you’re planning a project that involves battening out a wall, ensure you have the right tools and materials on hand, and always consult a professional if you’re unsure about the wall’s condition or structure.