

If you’ve spent any time researching garage storage in Australia, you’ve probably come across four main options: slatwall panel systems like StoreWALL, rail systems like StorEase from Bunnings, pegboards, and Rack or DIY shelving. Each has genuine strengths and real limitations. This post compares all four honestly — including the cases where StoreWALL is not the right choice.
Quick summary: For one or two hooks and a handful of tools, StorEase or pegboard is cheaper and perfectly adequate. For a full garage wall, bikes, heavy tools, and a storage system that will last the life of the house, StoreWALL is the stronger investment. Read on for the full breakdown.
The Four Main Options
1. StoreWALL — PVC Slatwall Panel System
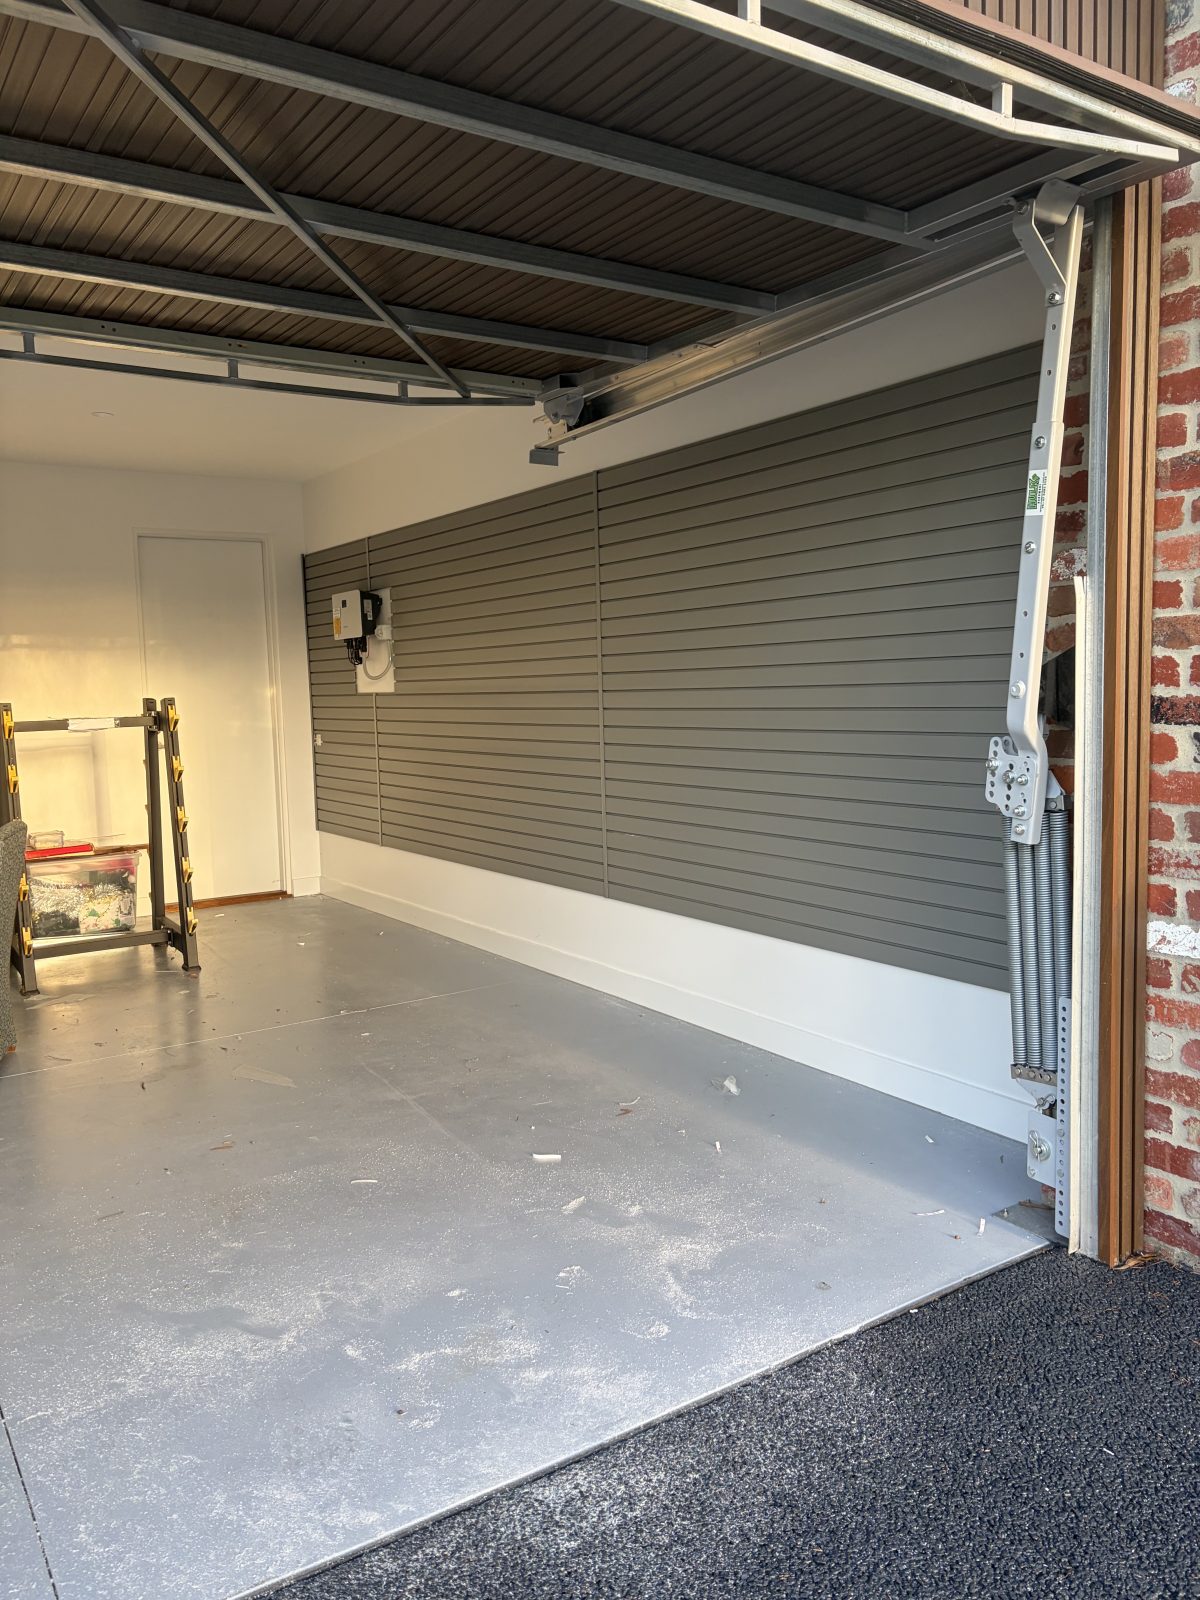
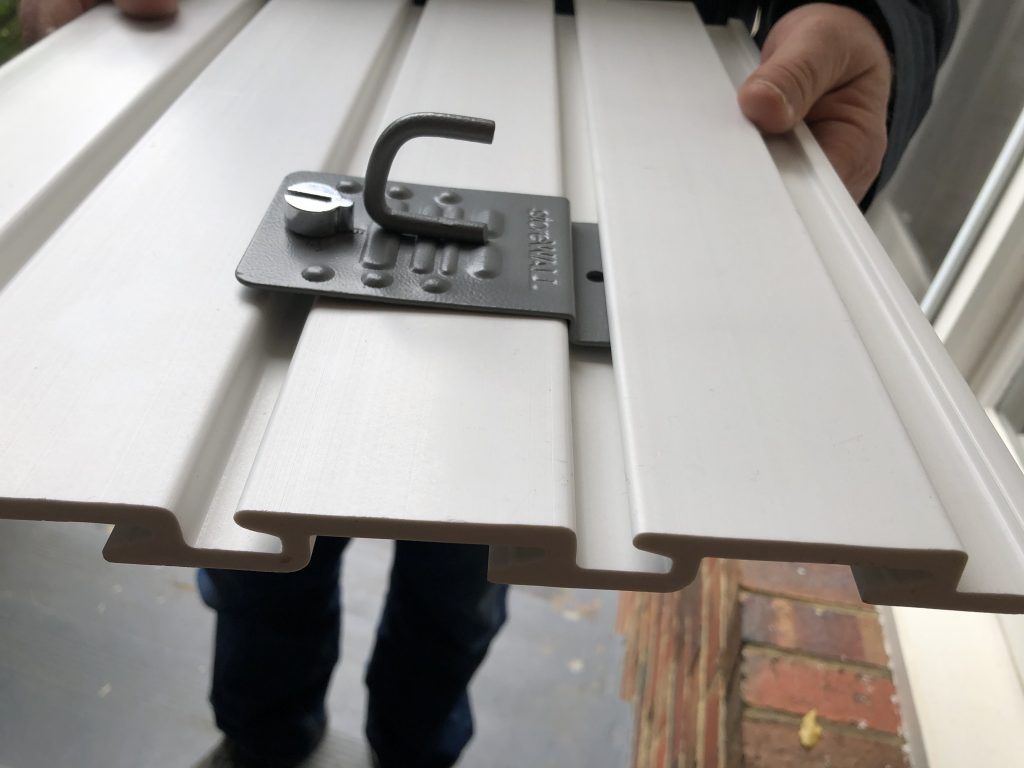
StoreWALL is an Australian-distributed premium slatwall system built from high-density PVC panels available in Standard Duty and Heavy Duty grades. Panels mount to the wall via InstallStrips (a multi-point anchor system) or direct face screws, and accept a range of 45+ CamLok™-locking accessories including hooks, shelves, baskets, brackets, and bike mounts.
The defining feature is CamLok™ — an all-metal rotary locking mechanism built into every accessory that mechanically secures it to the panel. This prevents accessories from tilting, sliding, or detaching under load.
Available: storewall.com.au (online, ships Australia-wide). Not available at Bunnings or hardware stores.
2. StorEase — Aluminium Rail System (Bunnings)
StorEase is a wall-mounted aluminium rail system sold at Bunnings. Rails mount horizontally to the wall using screws, and accessories (hooks, shelves, baskets) slot into the rail via a two-tooth friction-fit mechanism. Available in two formats: the Smart Rail (narrower, lighter) and the Panel (wider, more surface coverage).
StorEase accessories are interchangeable across the rail system and are available individually at Bunnings. This makes it easy to start small and add accessories over time without a large upfront investment.
Available: Bunnings stores Australia-wide, Bunnings website.
3. Pegboard — MDF or Metal
Pegboard is the traditional garage organisation solution — a flat board with a grid of evenly-spaced holes into which hooks and accessories are inserted. Available in MDF and metal versions from Bunnings (Pinnacle brand), IKEA (SKADIS range), and various hardware suppliers.
Pegboard is the lowest-cost entry point for wall storage and is well-suited to lightweight items. The grid system allows hooks to be repositioned freely anywhere on the board surface.
Available: Bunnings, IKEA, hardware stores.
4. Rack or DIY Timber Shelving
Fixed timber shelving — whether freestanding or wall-mounted on brackets — is the most common garage storage approach and requires no specialist system. Shelves are built from DAR pine, plywood, or MDF on standard L-brackets or a timber frame, and can be dimensioned to suit any wall.
DIY shelving is inflexible once built but inexpensive and can be constructed to any specification. It works well for large tubs, boxes, and items that don’t need to be hung.
Rack shelving can be purchased online and from most hardware stores. Construction is DIY and comes are various widths with multiple shelves per rack.
Head-to-Head Comparison
| Feature | StoreWALL | StorEase | Pegboard | DIY Shelving |
| Panel material | High-density PVC | Aluminium | MDF or thin metal | Timber / ply |
| Weight capacity (panel) | 113kg per 2.4m panel (InstallStrips) | 150kg per 1.2m panel (Panel) / 100kg (Smart Rail) | Not rated — lightweight only | Depends on build; typically 50–100kg per shelf |
| Accessory locking | CamLok™ — mechanical rotary lock | Friction fit (2-tooth) | Friction fit (peg insert) | Fixed — screwed or nailed |
| Repositionable? | Yes — tool-free | Yes — along rail only | Yes — anywhere on grid | No — permanent once built |
| Waterproof? | Yes — PVC throughout | Yes — aluminium | No — MDF warps; metal rusts | Partially — depends on finish |
| Covers full wall? | Yes — panels stack vertically | Partial — rails only | Partial — board size limited | Yes — if built that way |
| Colour options | 7 colours (Standard Duty) | Silver, Black aluminium only | White, Black, in MDF can be painted | Paint any colour |
| Accessory range | 45+ hooks, shelves, baskets, brackets, bins, bike mounts | Hooks, shelves, baskets (Bunnings range) | Hooks, small baskets, small shelves | Shelves only |
| Suits bikes / ladders? | Yes — dedicated hooks & brackets | Limited — basic hooks only | No — not rated for this | No — no hanging solution |
| DIY install? | Yes — InstallStrip system | Yes — simple rail mount | Yes — very simple | Yes — requires tools & skill |
| Upfront cost (full wall ~5m x 2.4m) | $$$ — higher upfront | $$ — moderate | $ — lowest | $$ — moderate (materials + time) |
| Long-term durability | Excellent — 5-year warranty, PVC doesn’t degrade | Good — aluminium is durable | Poor — MDF warps; hooks fall out over time | Good if well-built |
Detailed Analysis: Where Each System Wins
Where StoreWALL Wins
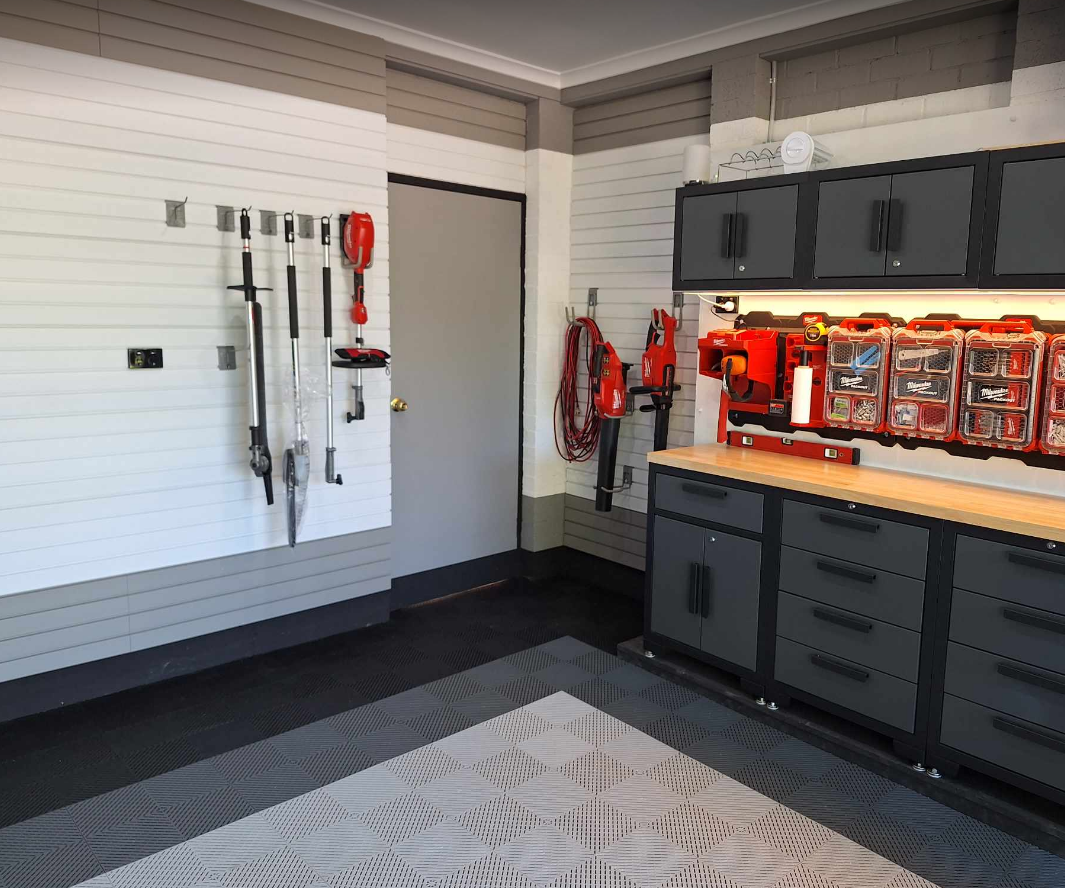
- Full wall coverage — panels stack vertically from floor to ceiling with no gaps or exposed wall between rows
- CamLok™ locking — the only system where accessories are mechanically secured, not friction-fit. Critical for bikes, heavy tools, and homes with children
- Accessory depth and range — 45+ hook types including specialist mounts for bikes, kayaks, surfboards, ladders, and fishing rods. No other system in Australia comes close
- Colour range — 7 colours in Standard Duty that are blended through the full PVC depth, not a surface coating
- Weight capacity with InstallStrips — 113kg per 2438mm panel with Standard Duty, making it suitable for the heaviest residential garage loads
- Waterproof PVC — suitable for coastal, humid, and high-temperature environments where MDF-based systems fail
- Reconfigurability — the entire storage layout can be changed without touching the wall panels
Where StorEase Wins
- Immediate availability — available at every Bunnings store in Australia, including same-day purchase
- Lower entry cost — a basic rail plus a few hooks costs significantly less than a full StoreWALL panel kit
- Accessory availability — replacement and additional hooks can be purchased from any Bunnings without waiting for delivery
- Suitable for light use — for a handful of garden tools or a basic workshop hook setup, StorEase performs adequately
Where Pegboard Wins
- Lowest cost — a pegboard and a packet of hooks is the cheapest wall storage option available
- Grid flexibility — hooks can be placed at any grid intersection, offering fine-grained positioning control
- Familiar and simple — no learning curve, universally understood
- Suitable for very light tools — drills, screwdrivers, small hand tools in a dry, stable environment
Where DIY Shelving Wins
- Large tub and box storage — fixed shelving is the best solution for items that sit rather than hang
- Maximum customisation — bracket depth is limited to what is available at hardware store. Brackets can be installed at any height required.
- No system dependency — not locked into a proprietary accessory ecosystem
- Often combined with slatwall — many builds use DIY shelving for tubs and slatwall above for hanging items
- Rack shelving is usually multi tiered, easy to put together. Dimensions are fixed based on what you purchase (usually 1800mm x 1800mm). Easy to setup and dump items on.
The Gladiator Question
Gladiator Garageworks was a US-brand garage storage system that was distributed in Australia for several years. Gladiator’s Australian distributor closed their business, and the Gladiator range is no longer available through official Australian retail channels. Some Gladiator hook accessories can be purchased via www.gladiatorgaragestorage.com.au
Unfortunately due to the customised design of the Gladiator panels, there are no compatible accessories available in Australia. Our recommendation for existing Gladiator owners considering an upgrade is to plan a full panel replacement rather than attempting to extend a system that can no longer be supported.
Which System Is Right for You?
Use this guide to match your situation to the right system:
| Your situation | Recommended system |
| A few hooks for garden tools, budget under $100 | StorEase from Bunnings |
| Lightweight tool display, craft room or pantry | Pegboard (MDF or metal) |
| Full garage wall, bikes, heavy tools, long-term build | StoreWALL Standard Duty + CamLok™ accessories |
| Workshop with very heavy equipment, motorbikes | StoreWALL Heavy Duty panels + CamLok™ accessories |
| Large tubs, boxes, seasonal gear — shelving only | DIY timber shelving, Rack shelving or StoreWALL shelves on panels) |
| Mixed: tubs on upper shelves + hooks below | StoreWALL panels below + DIY or StoreWALL shelves above |
Pricing Guide
The following ranges are approximate guides only — check current pricing before making purchasing decisions.
| Item | Approximate price | Where to buy |
| StoreWALL Standard Duty 2438mm kit (4 panels, 2.4m x 1.2m) | $699 per kit | storewall.com.au |
| StoreWALL Standard Duty 1219mm kit (4 panels, 1.2m x 1.2m) + 6 Hooks | $429 per kit | storewall.com.au |
| StoreWALL Heavy Duty 1219mm kit (4 panels, 1.2m x 1.5m) | $490 per kit | storewall.com.au |
| StoreWALL Universal Hook (CamLok™) | $28.99 | storewall.com.au |
| StoreWALL Bike Hook (CamLok™) | $28.99 | storewall.com.au |
| StorEase Smart Rail 1.2m | $31 | Bunnings |
| StorEase Panel 1.2m | $31 | Bunnings |
| StorEase hook (single) | $10 – $18 | Bunnings |
| Pinnacle Pegboard 900x450mm | $45 | Bunnings |
| Pegboard hook pack (4 pieces) | $18 | Bunnings |
| DIY Shelving 2 Brackets | $10 – $35 | Bunnings |
| Rack shelving (4 tier) 1800 x 1800 | $178 | Bunnings |
Frequently Asked Questions
Is StoreWALL available at Bunnings?
No. StoreWALL is an online-only product sold through storewall.com.au and ships Australia-wide. It is not stocked at Bunnings, Mitre 10, or other hardware retailers. StorEase is the slatwall product available at Bunnings.
Can I use StoreWALL accessories on my StorEase rails?
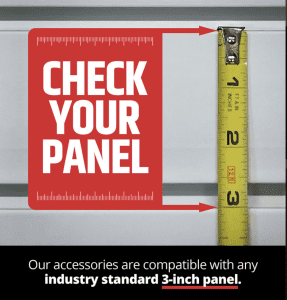
Yes and No. StoreWALL CamLok™ accessories will fit and can be locked into the StorEase aluminium panel (not black rail). StoreWALL accessories will fit into any slatwall panel using a 76mm gauge (distance between grooves). They will also fit into most MDF slatwall panels if the CamLok is removed.
Is Gladiator still available in Australia?
No. Gladiator Garageworks’ Australian distributor closed its business and the Gladiator range is no longer available through official retail channels in Australia. Visit www.gladiatorgaragestorage.com.au for access to access Gladiator hooks in Australia.
What is the most important factor when choosing a garage storage system?
Weight capacity and accessory security are the most important structural factors. Ask yourself: what is the heaviest single item I will store, and does the system’s accessory locking mechanism prevent dislodgement under that load? If you are storing bikes, ladders, or heavy tools, a mechanically-locking system like StoreWALL CamLok™ is significantly safer than a friction-fit system. If you are storing lightweight tools and garden equipment, StorEase is adequate and more cost-effective.
Can I combine systems?
Yes. A common approach is to install StoreWALL panels on the main garage wall for bikes, tools, and frequently accessed items, and use DIY timber shelving or Rack Shelving for bulkier items including for large tubs and seasonal storage.
Is StoreWALL a DIY project or does it require professional installation?
StoreWALL is a DIY project but does require select tools and some skill. Any carpenter or handy person with carpentry (leveling) skills can complete the work for you. We offer an installation service in Melbourne. You can also find some trades to assist you here.

 StorEase Slimline vs StorEase Smart Wall Panel vs StoreWALL — Quick Comparison
 GarageTek vs StoreWALL Garage Storage Systems
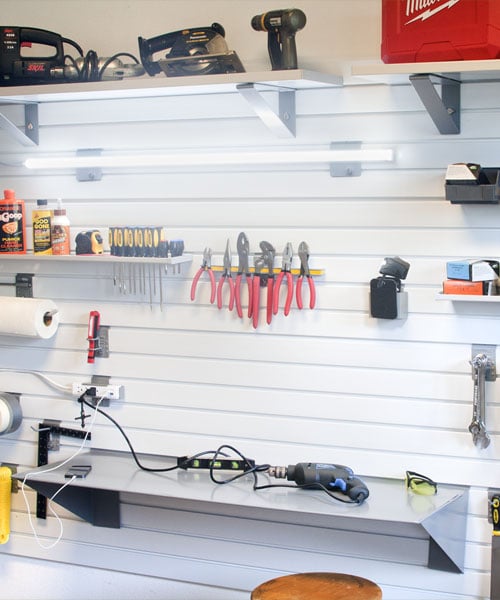
 2. Task Lighting (Workbench Areas)


 PVC for Pressure and Hot Water — What Changes?
 StoreWALL Compatibility