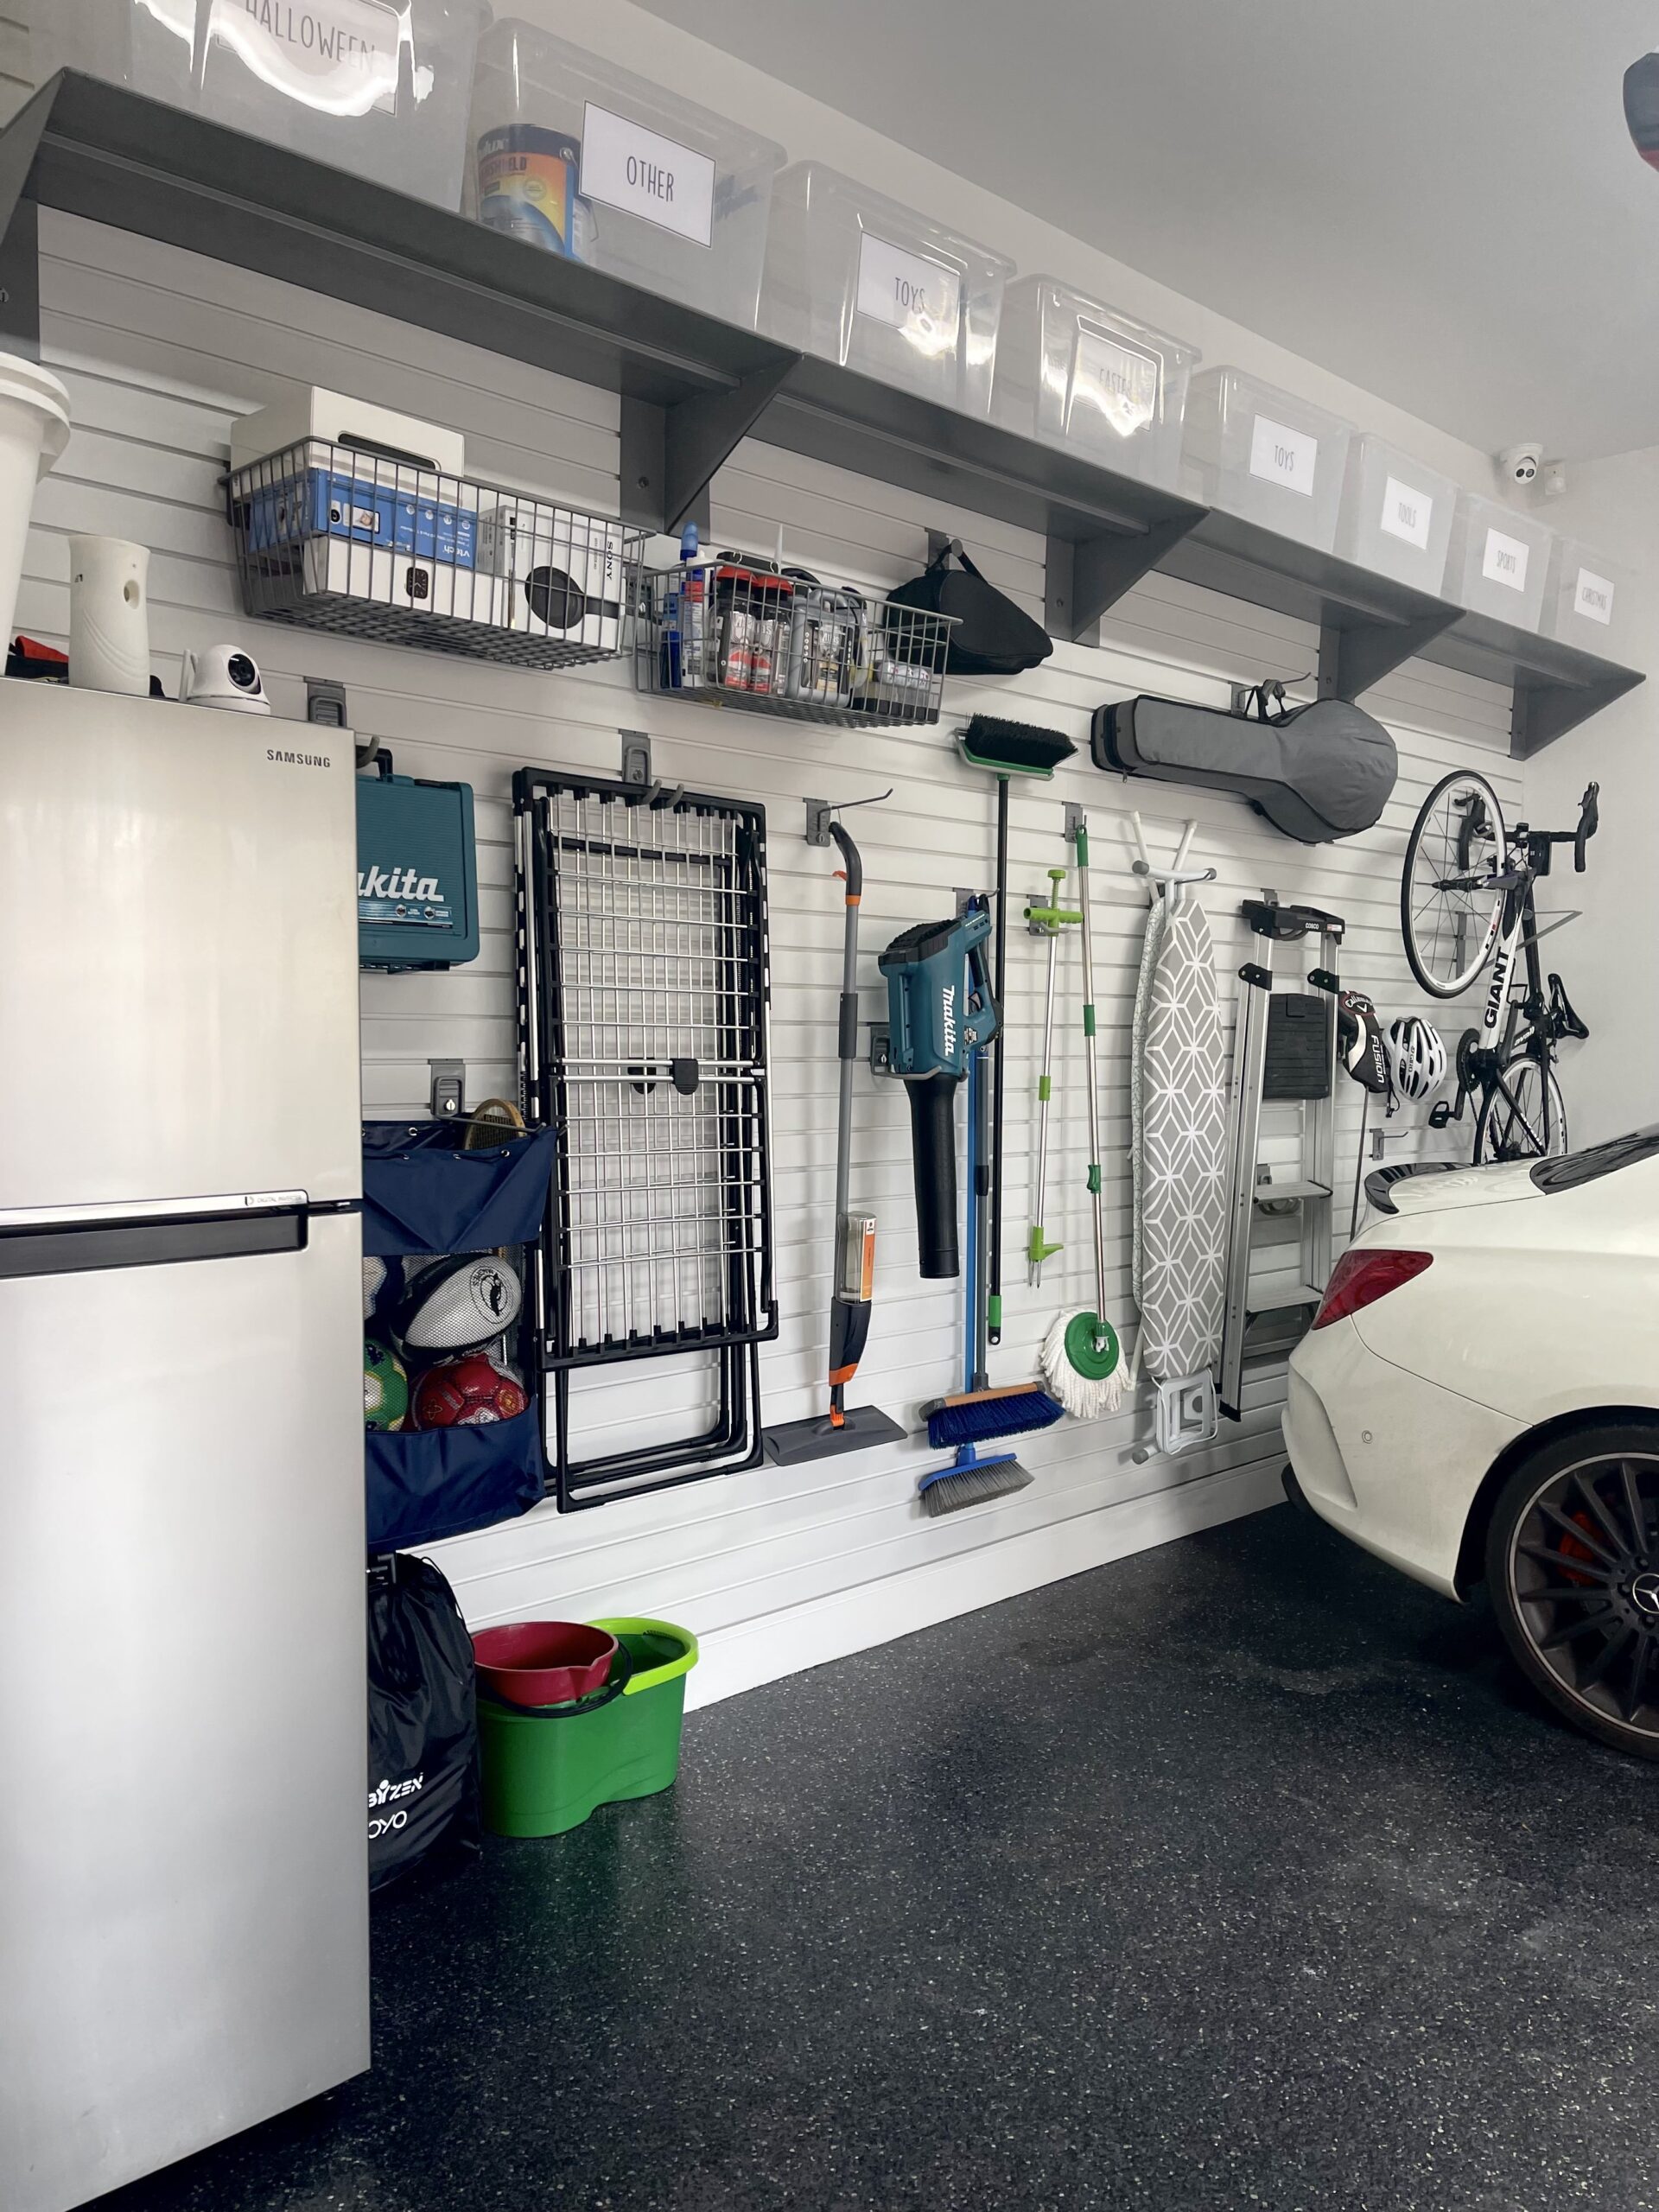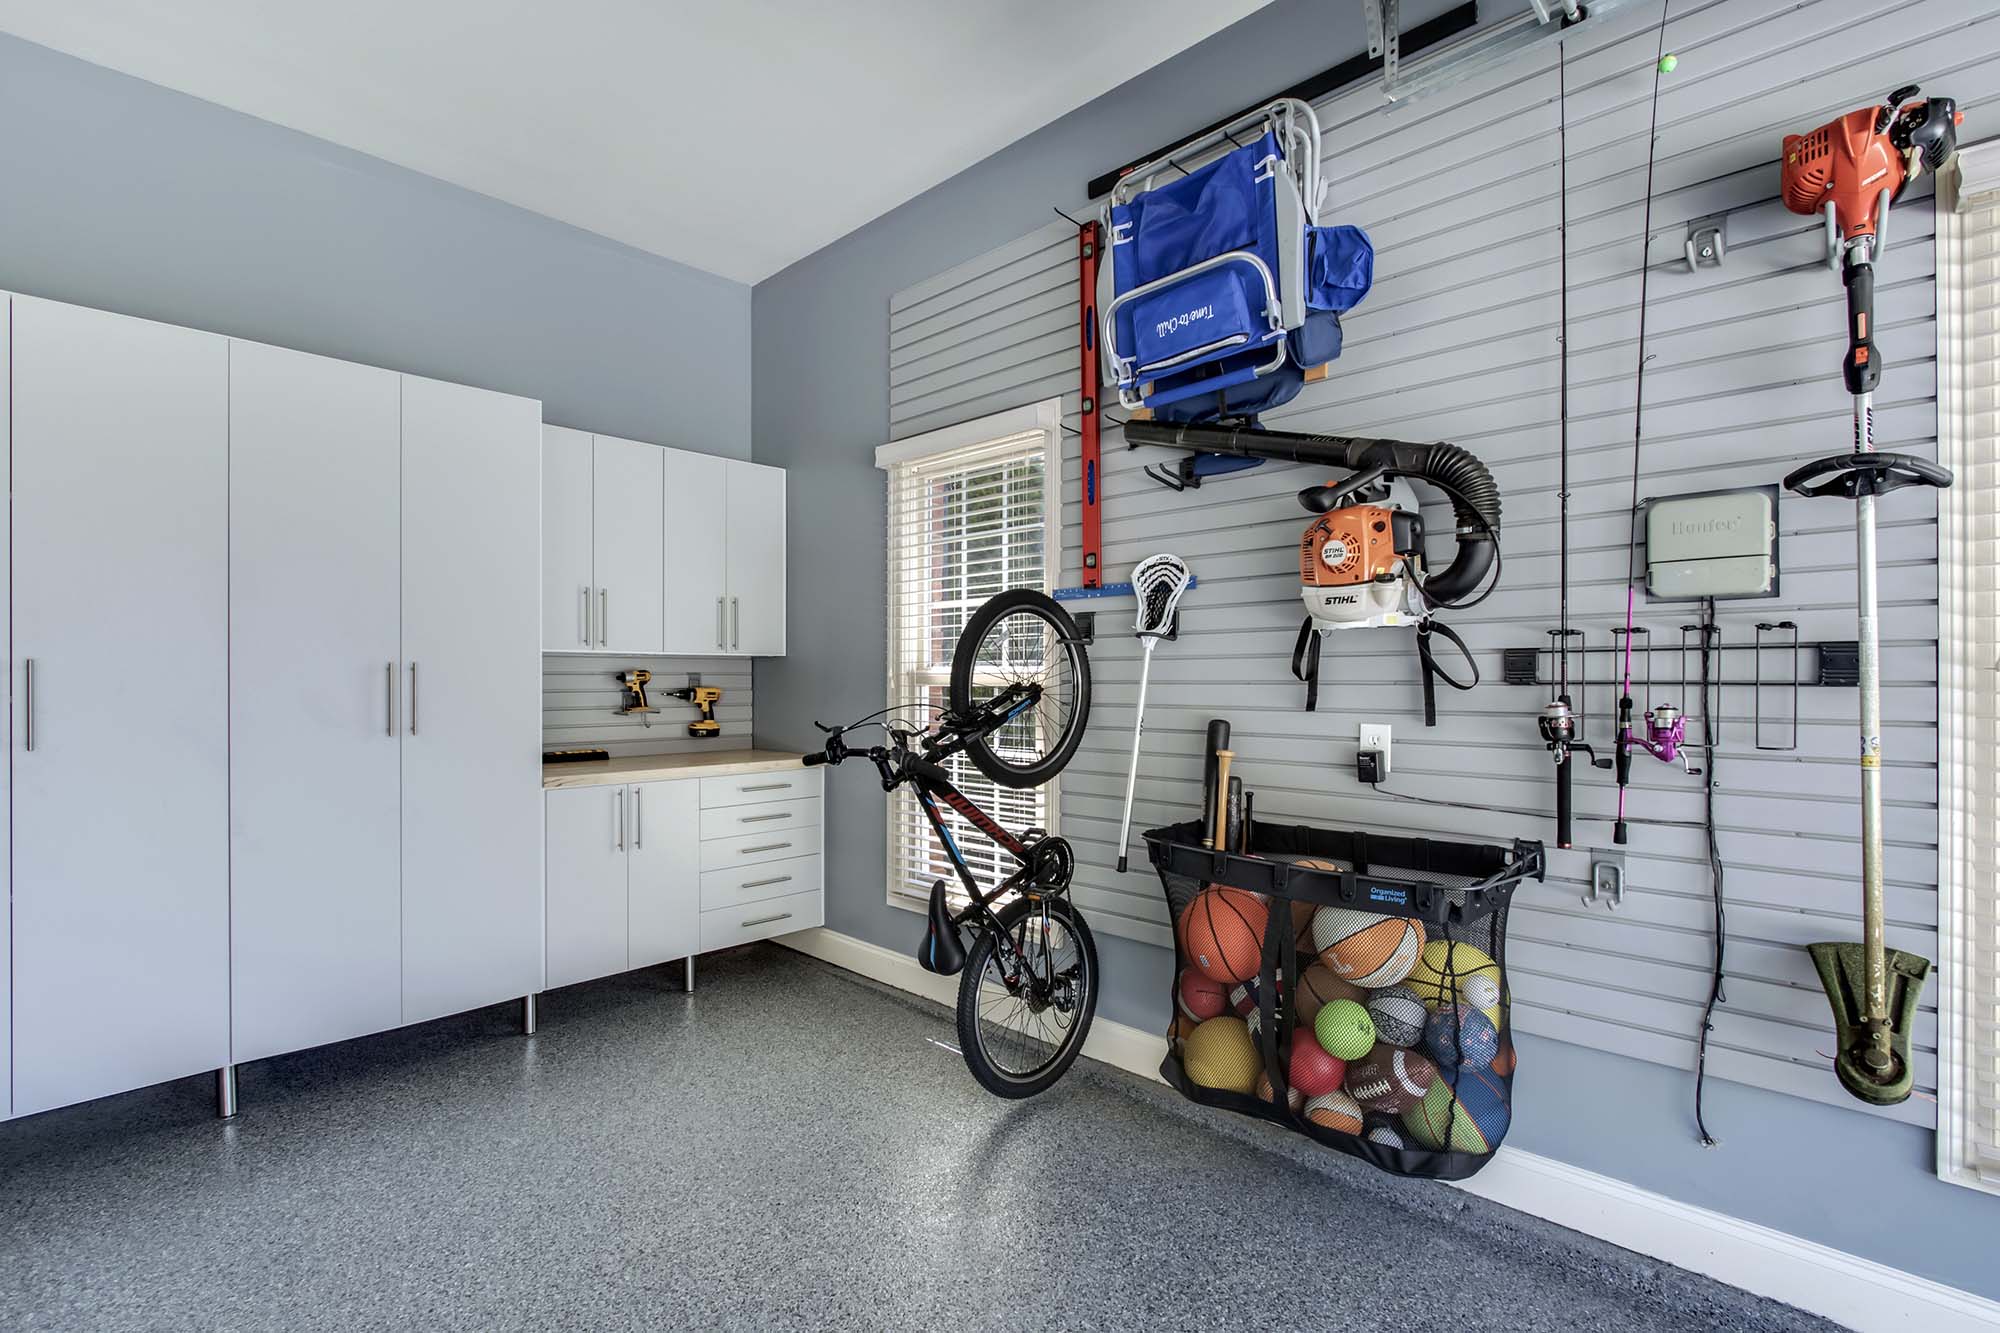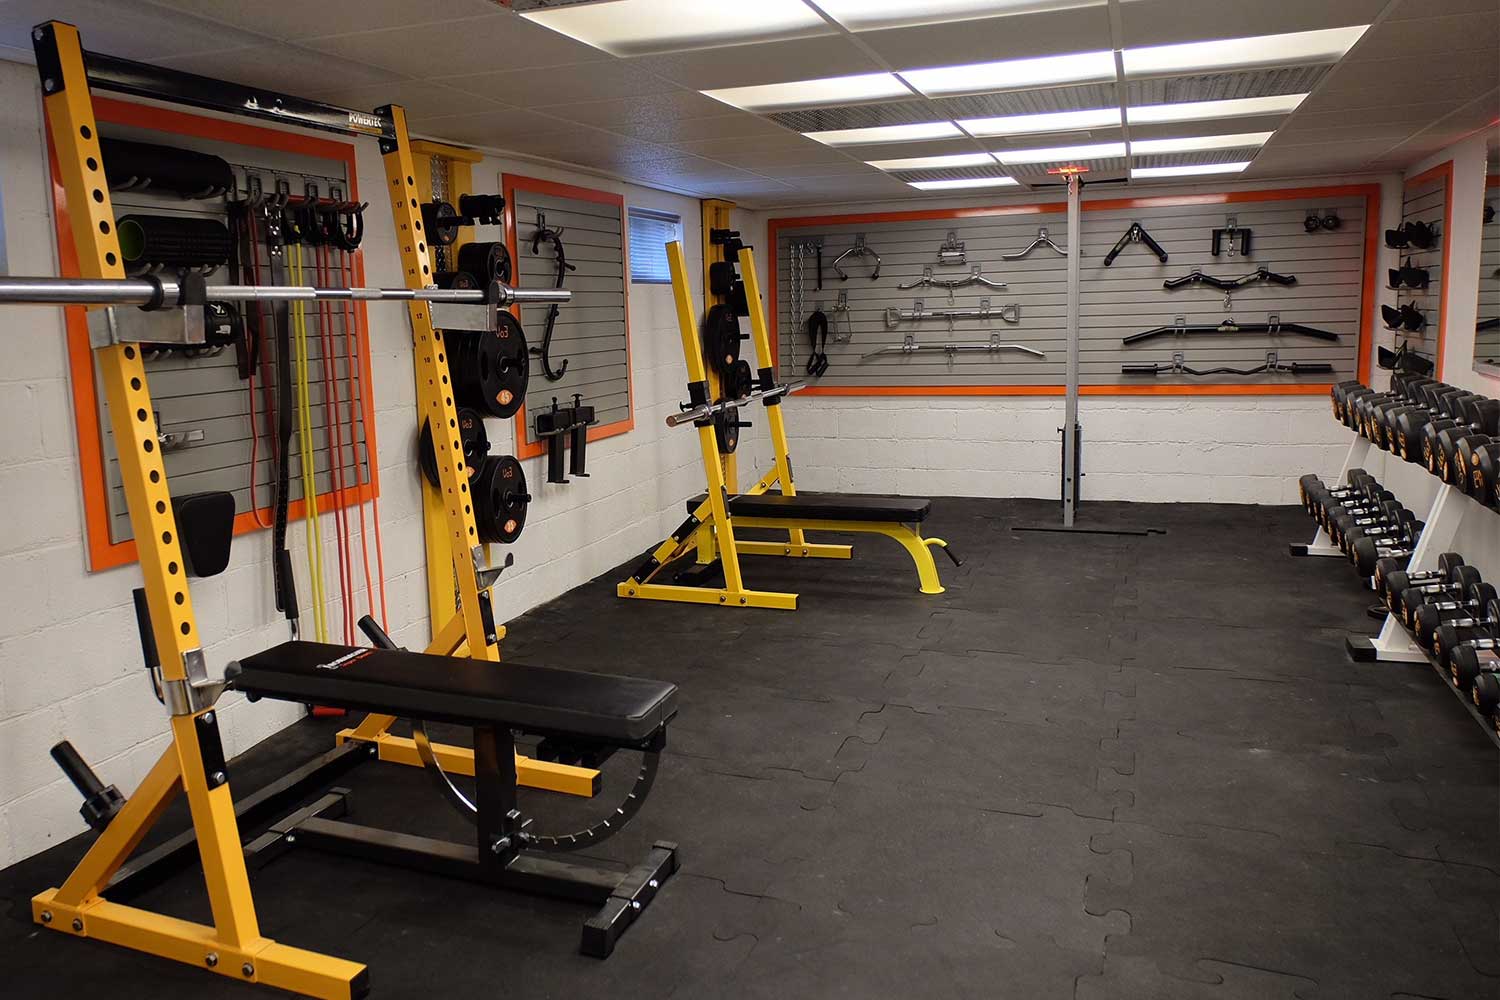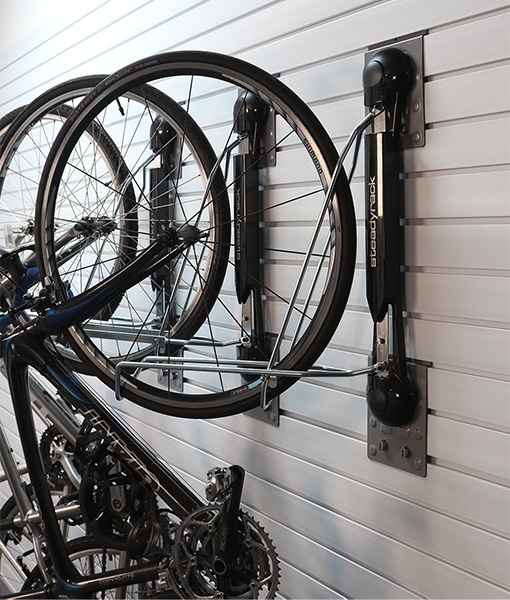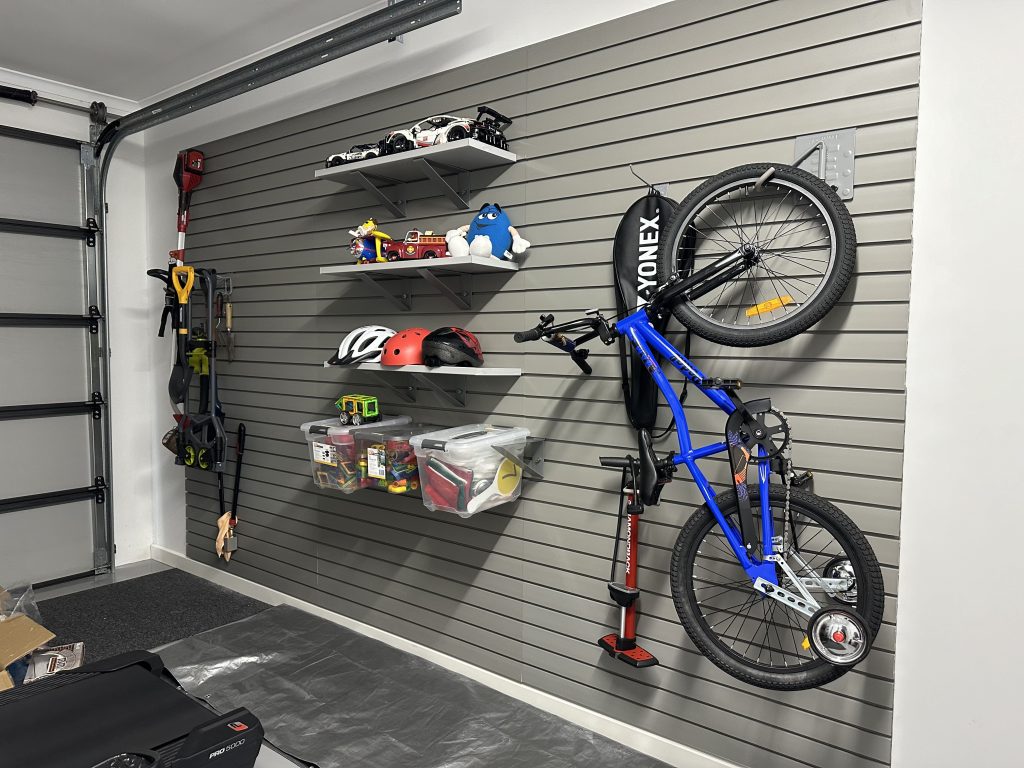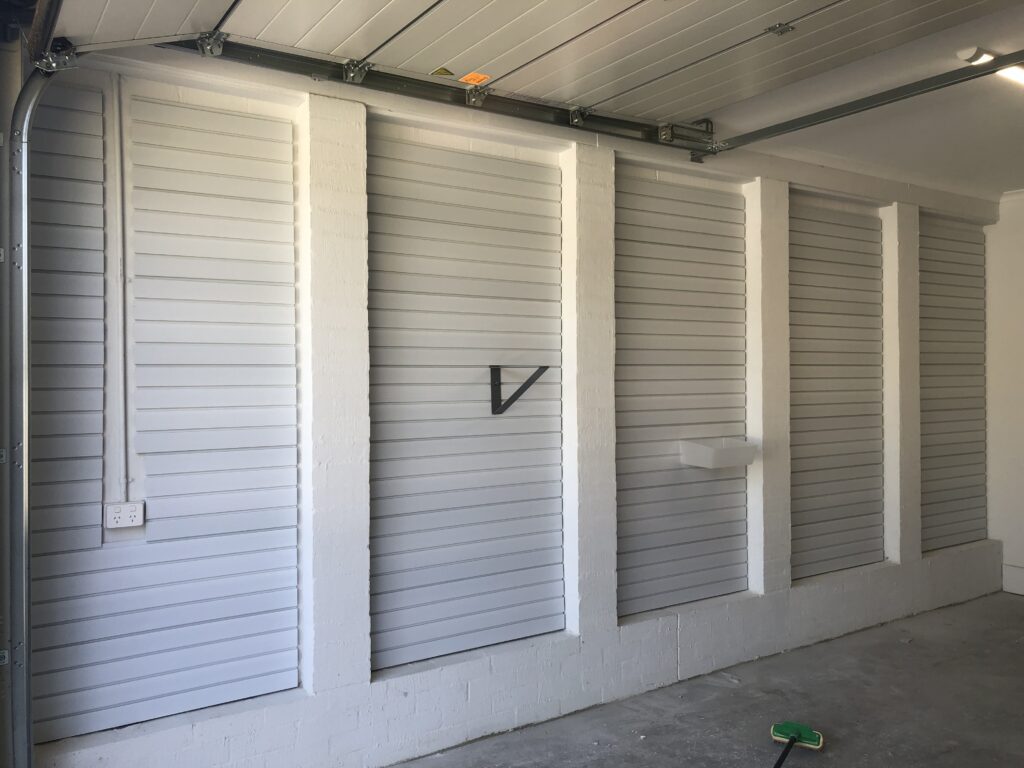
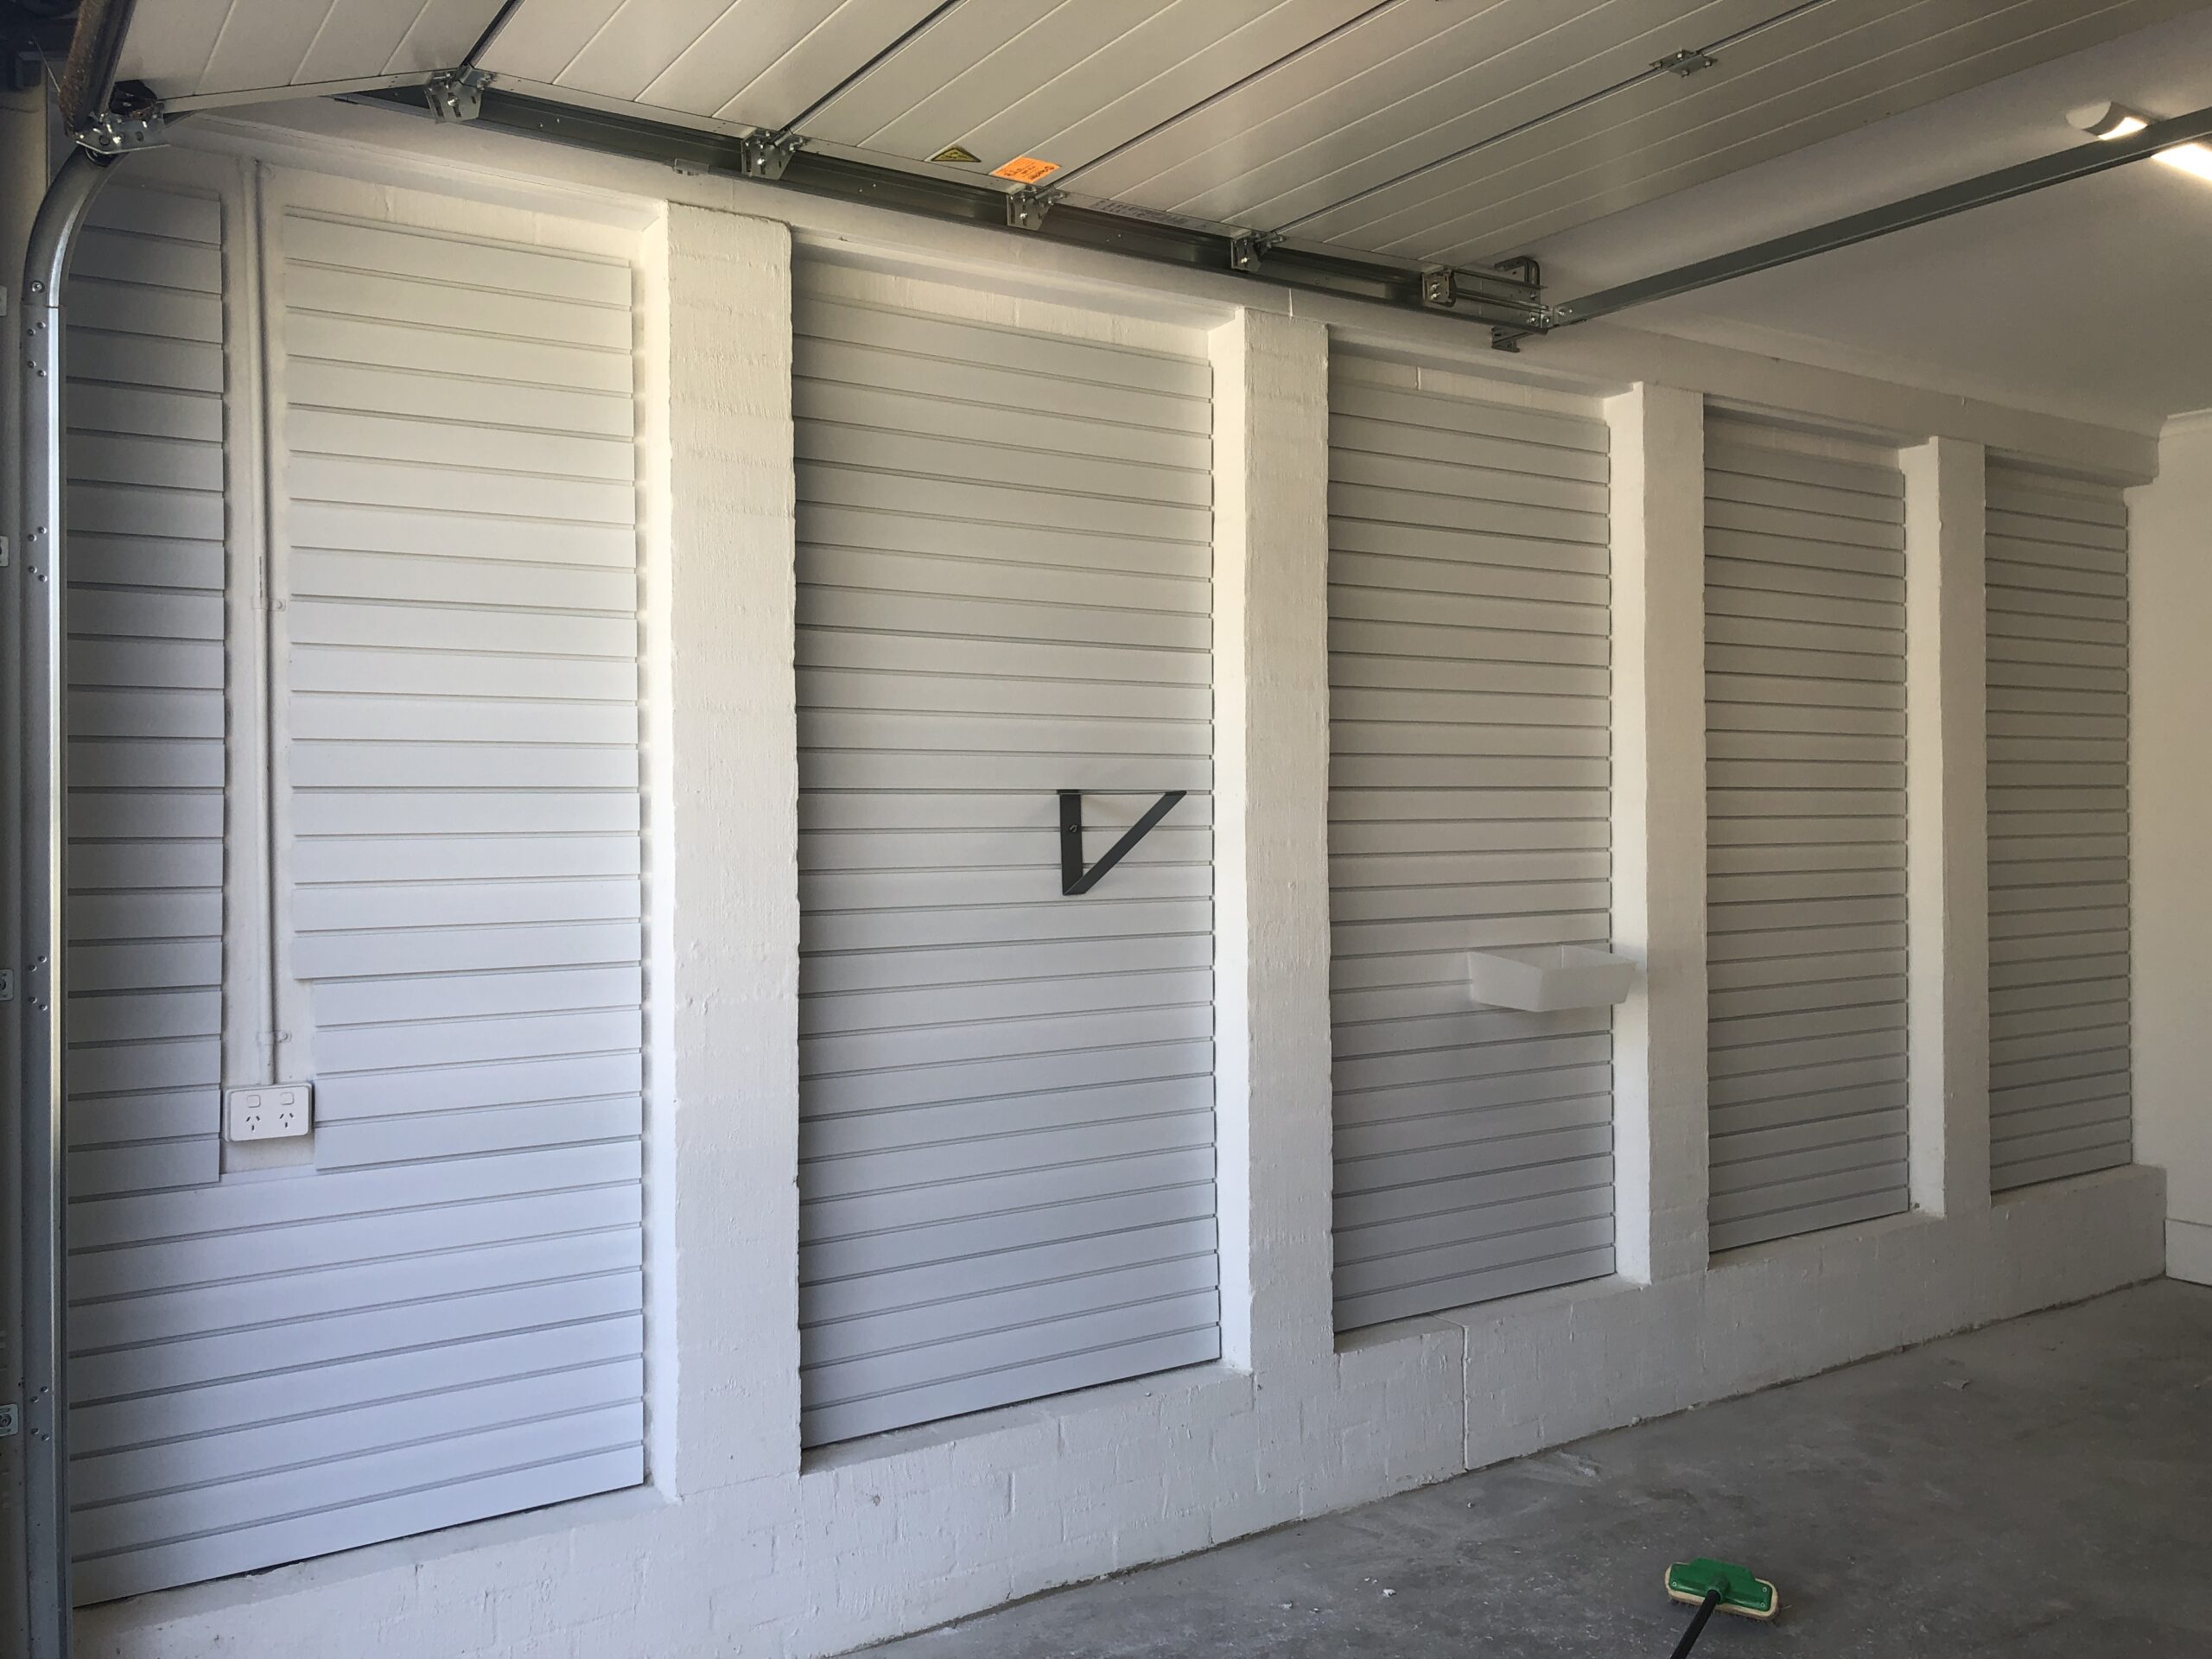
Access an Additional $20 Off All 2438mm Wall Panels!
CALL US

0411 280 646

Categories
garage design Garage Ideas garage makeover Garage Walls

Planning Your Garage Layout: Australian Dimensions, Storage Zones and Wall Systems

Planning Your Garage Layout: Australian Dimensions, Storage Zones and Wall Systems

A well-planned garage does more than park a car. With the right layout, it becomes a functional workshop, a sports equipment hub, a tool room, and a storage solution all in one. But most Australian homeowners start fitting out their garage without a plan — and end up with a cluttered space that frustrates them every time they open the door. This guide walks you through standard Australian garage dimensions, how to think about zones, and how to choose a wall storage system that grows with you.

Standard Australian Garage Dimensions

Before you plan anything, you need to know what you’re working with.

Single Garage

  • Standard size: approximately 3.0m wide x 5.5m deep (minimum)
  • Recommended: 3.5m x 6.0m to allow comfortable door opening and storage along walls
  • Typical wall storage area: one or two walls depending on access door position

Double Garage (2-Car)

  • Standard size: approximately 5.4m–6.0m wide x 5.5m–6.0m deep
  • This is the most common size for Australian homes built since the 1990s
  • Key consideration: width determines whether you have a usable wall down the centre dividing the two bays
  • Wall storage potential: significantly higher — typically 3–4 walls available

Triple Garage (3-Car)

  • Standard size: approximately 8.4m–9.0m wide x 6.0m deep
  • Less common but increasingly popular in new builds
  • Wall storage across 3+ walls is achievable

Basement Garages

  • Common in newer townhouses and apartments
  • Usually tighter dimensions — 2.7m–3.0m wide per bay
  • Height restrictions sometimes limit overhead storage
  • Wall storage becomes even more important as floor space is at a premium

Before You Plan — Four Questions to Answer First

This section guides the reader through self-assessment before diving into layout.

How many cars need to fit?

The car footprint defines everything else. A standard car needs approximately 2.4m wide x 4.8m long of floor space, plus clearance. Plan this first, then work around it.

What else do you need the garage to do?

List everything: bikes, tools, garden equipment, sports gear, a workbench, a second fridge, seasonal items. Most Australian garages need to serve 4–6 functions simultaneously. Writing this list before planning prevents the most common mistake — designing for the car and forgetting everything else.

What are your walls made of?

  • Brick or block — requires battening before slatwall installation (link to battening article)
  • Plasterboard over timber frame — direct installation possible
  • Metal shed frame — requires specific fixing approach
  • Concrete block — similar to brick

Wall type determines your installation approach and should be understood before choosing a storage system.

Where are your fixed elements?

Power points, windows, the door from the house, the garage door mechanism — all of these constrain your layout. Mark them on a rough sketch before planning anything.

Dividing Your Garage Into Zones

Intro: The most functional garages treat wall space and floor space as separate planning problems. The walls handle storage. The floor handles activity and access.

The Car Zone

Define your car footprint first. Mark it on the floor with tape if it helps. Everything else in your planning works around this.

The Wall Storage Zone

Every wall that doesn’t have a window, door or garage door mechanism is a storage opportunity. In a standard double garage, this typically gives you:

  • Full rear wall (most valuable — widest and most accessible)
  • One full side wall
  • Portions of the other side wall
  • Sometimes above the garage door on the front wall

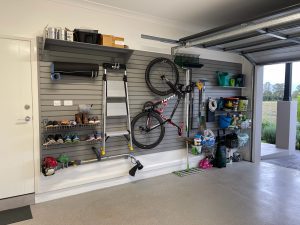
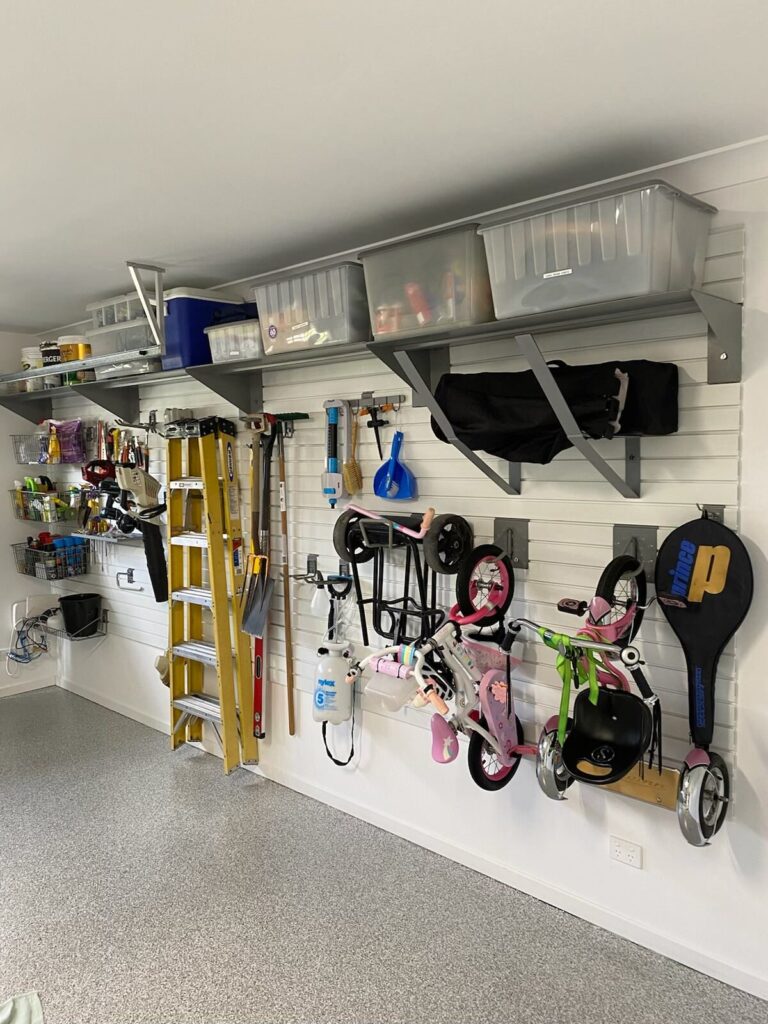
A slatwall system installed across these walls gives you continuous, configurable storage from floor to approximately 2.1m height — the practical reach limit for most adults.

The Workbench Zone

If you need a workbench, plan it along one wall — ideally under a window for natural light, or with dedicated lighting above. A slatwall system above the bench keeps tools within arm’s reach and off the bench surface.

The Overhead Zone

Ceiling space is often wasted in Australian garages. Overhead storage platforms or ceiling-mounted racks work well for seasonal items — Christmas decorations, camping gear, sports equipment used only occasionally. Keep regularly accessed items on walls and rarely accessed items overhead.

The Floor Zone

Anything that needs to stay on the floor — bins, freestanding tools, the car — should be defined and protected. If your wall storage is doing its job, your floor zone should be largely clear.

Choosing Your Wall Storage System

Once you know your zones, you need to choose a wall storage system that can serve all of them. There are three main options for Australian homeowners.

Pegboard

The traditional option. Inexpensive to buy, but hooks fall out constantly, weight limits are low (typically 5–10kg per hook), and MDF versions deteriorate with moisture. Suitable for light tool storage only.

Wire Track Systems (like StorEase from Bunnings)

More durable than pegboard, with a proprietary track and hook system. Limited accessory range compared to slatwall. Weight ratings are lower and the channel spacing is fixed, limiting configuration flexibility.

PVC Slatwall (like StoreWALL)

The premium option for Australian garages. Key advantages:

  • Weight rating up to 75kg per panel
  • 200+ compatible hooks, shelves, baskets and accessories
  • Waterproof — no swelling or warping in humid or wet garage environments
  • Fully configurable — accessories slide and reposition without tools
  • Colour options to suit different garage aesthetics
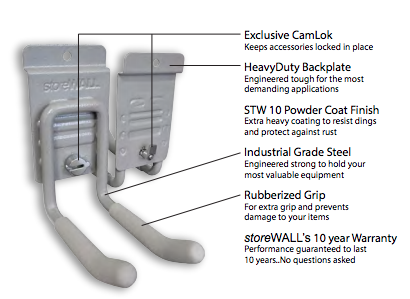
  • CamLok locking mechanism keeps accessories secure even under heavy loads


How Much Wall Storage Do You Need?

A common mistake is underestimating how much wall coverage you need. Here’s a practical way to work it out.

Step 1: Count the number of items you need to store off the floor or bench. Be specific — not “tools” but “drill, jigsaw, circular saw, sander”.

Step 2: Group them by category — power tools, hand tools, garden equipment, sports gear, seasonal items.

Step 3: Assign wall space by category. Power tools near the workbench. Bikes near the garage door. Garden tools near the side door.

Step 4: Use the StoreWALL Wall Panel Estimator to calculate panel coverage for each wall section.

Use the Wall Panel Estimator

A Practical Example — Planning a Standard Double Garage

Walk through a realistic example with a sketch or diagram if possible.

Scenario: 5.8m x 6.0m double garage, two cars, bikes, garden tools, power tools, seasonal storage.

  • Rear wall (5.8m): Full slatwall installation, bike hooks on the left section, power tool storage above bench on the right section
  • Left side wall (6.0m): Full slatwall, garden tools (rakes, shovels, hose reel) and kayak bracket
  • Right side wall: Partial slatwall above workbench, shelves for parts and bins
  • Overhead: Platform for camping gear and seasonal boxes

This configuration removes virtually everything from the floor while keeping all items accessible.

Getting Started

Planning a garage layout takes an hour of thinking but saves years of frustration. Start with dimensions, define your zones, choose a wall system rated for what you need to store, and work category by category. The most important principle: design for what you actually own, not a theoretical tidy version of it. If you have six bikes, plan for six bikes. If you have a large tool collection, plan wall space for it from the start.

Request a StoreWALL quote / Use the wall panel estimator / Shop wall panels.

Categories
garage design Garage Ideas garage makeover Garage Walls PVC vs MDF Slatwall Shelving Slatwall

Understanding Slatwall Weight Capacity

When selecting a wall storage system, understanding slatwall weight capacity is crucial to ensuring your setup is both functional and safe. StoreWALL panels are designed for strength and durability, but the weight they can hold depends on several factors, including panel type, installation method, and load distribution. In this guide, we’ll break down the weight capacities of StoreWALL’s Standard Duty and Heavy Duty panels to help you make an informed choice.

Why Weight Capacity Matters

Every storage solution must be designed to handle the weight of the items it holds. Whether you’re storing tools, sports equipment, or heavy-duty garage items, knowing how much weight your wall panels can support will help you avoid overloading and potential damage.

StoreWALL panels are tested to ensure they provide reliable, long-term support, and their capacity varies based on the panel type and installation method used.

Standard Duty vs. Heavy Duty Panels

StoreWALL offers two main types of wall panels: Standard Duty and Heavy Duty. Each has different weight capacities depending on its size and installation method.

Standard Duty Wall Panel weight capacityStandard Duty Wall Panels

These are the most popular choice for general storage needs, offering a balance of strength and versatility.

1219mm panel

  • 56kg at Panel Surface
  • 26kg at 10cm from Panel Surface
  • 22kg at 15cm from Panel Surface

Capacity assumes installation with InstallStrips.

2438mm panel

  • 113kg at Panel Surface
  • 52kg at 10cm from Panel Surface
  • 45kg at 15cm from Panel Surface

Capacity assumes installation with InstallStrips.

The 2438mm panel can handle double the 1219mm panel because it is twice the length. In both cases, total weight capacity assumes weight is distributed evenly across the panel. It also assumes the accessory you are using can support the weight of the item it is holding. All StoreWALL accessories are also rated for weight capacity.

Heavy Duty Wall Panels

Designed for more demanding storage applications, Heavy Duty panels provide greater weight capacity. These panels are thicker (about 1mm) and the installstrips used to install them are wider.

Heavy Duty Wall Panel Weight Capacity

1219mm panel

  • 68kg at Panel Surface
  • 37kg at 10cm from Panel Surface
  • 31kg at 15cm from Panel Surface

Capacity assumes installation with InstallStrips.

How Installation Method Affects Weight Capacity

InstallStrips vs. Screw Installation

StoreWALL panels can be installed using either InstallStrips or direct screw installation. While both methods provide a strong hold, InstallStrips significantly increase weight capacity by evenly distributing weight across the panel.

For example:

  • Screw installation at 10cm from the panel surface supports only 17kg per panel, compared to 26kg or more when using InstallStrips.
  • InstallStrips allow for higher load-bearing capacity and greater long-term durability. They are made from galvanised steel and provide greater support for the weight being stored than just a screw does. The support is spread along the length of the installstrip, rather than being concentrating directly on the screw.
garage wall panel weight capacity

Distributing Weight for Optimal Performance

Regardless of which panel type or installation method you choose, it’s essential to distribute weight evenly across the wall storage system. Concentrating too much weight on a single hook or accessory can reduce stability and affect performance.

Key Recommendations:

  • Use multiple accessories to spread the weight evenly.
  • Place heavier items closer to the panel surface for maximum support. Some (ie heavy ladders) might also be better to also be touching the ground for best support.
  • Secure installation is key – always follow the recommended installation guidelines for optimal load-bearing performance.

Making the Right Choice for Your Storage Needs

When choosing your StoreWALL panel, consider:

  • What you’re storing – Heavy tools? Sports gear? General household items?
  • Installation method – Using InstallStrips will maximize strength and durability.
  • Weight distribution – Plan your storage layout to evenly distribute loads.

By selecting the right panel and installation method, you’ll ensure a long-lasting, secure, and efficient storage system that meets your needs while maintaining safety and durability.

Final Thoughts

StoreWALL panels are engineered for strength, reliability, and versatility, making them an excellent investment for any storage space. By understanding slatwall weight capacity and proper installation techniques, you can maximize their performance and longevity.

Ready to upgrade your storage? Explore StoreWALL’s Standard Duty and Heavy Duty panels today and find the perfect solution for your space!

Categories
garage design Garage Ideas garage makeover Garage Walls Polystyrene block wall

Installing StoreWALL on a Polystyrene block wall

This week, I received an inquiry about installing StoreWALL on a polystyrene block wall. Since I wasn’t very familiar with this building material, I took the time to explore the process in detail with the customer. Here’s what I learned and the solutions we discussed.

What Are Polystyrene Blocks and Why Are They Popular?

Polystyrene blocks are becoming a go-to material in modern construction for their blend of energy efficiency, light weight, and cost-effectiveness. These blocks are known for their superior insulation, which helps maintain consistent indoor temperatures, leading to reduced heating and cooling costs. Their lightweight nature makes them easy to handle and install, speeding up construction and reducing labor costs. Additionally, polystyrene blocks are moisture-resistant and durable, making them suitable for a variety of climates. They are also recyclable, making them an environmentally friendly choice for sustainable building projects. As energy-efficient and budget-conscious housing solutions continue to gain momentum, polystyrene blocks are emerging as a preferred option for builders.

How Are Polystyrene Block Walls Constructed?

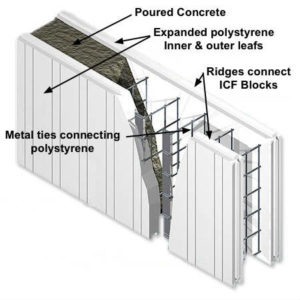
Polystyrene block walls are assembled in a straightforward process, similar to stacking LEGO blocks. These blocks are cut to size and feature a hollow core, which is later filled with concrete, and reinforced with steel, forming a strong, dense wall structure. The polystyrene on the outside remains intact, providing insulation on both sides of the concrete core. This combination of materials creates a highly efficient and durable wall system.

Installing StoreWALL on Polystyrene Block Wall: The Challenges

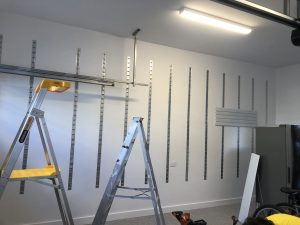
When installing StoreWALL on a polystyrene block wall, the main challenge is finding a way to securely fasten the installstrips to the polystyrene while ensuring they can support the weight of whatever will be stored. I suggested two possible solutions to the customer:

Plasterboard Zinc Anchors

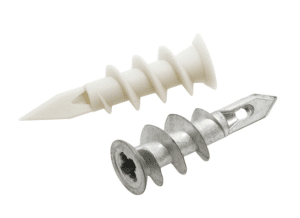
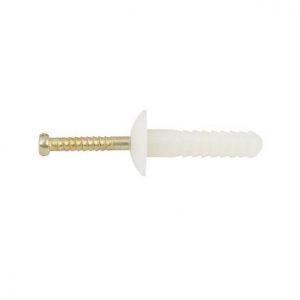
One option is to use plasterboard anchors, which can be placed behind each of the 12 screw holes on the StoreWALL installstrip. Each anchor can support up to 10kg of weight, making it a reliable and efficient method. This approach is also relatively quick and straightforward, using proven fasteners that are easy to source and install.

plasterboard anchorsNail Anchors

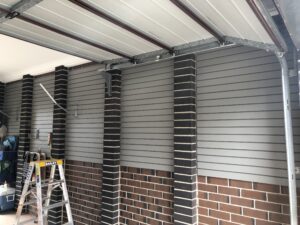
Wall Panels on a Garage Brick Wall

The second option involves using nail anchors long enough to penetrate into the concrete core behind the polystyrene. To determine the correct length of the fastener, you’d first need to puncture the block to measure the thickness of the polystyrene. The fastener should extend at least 20mm into the concrete for optimal hold. While this method provides a stronger, more secure solution, it may require longer and thicker anchors, such as 75mm or even 100mm options. These are readily available and should provide ample support when fastened into the concrete.

Both methods offer viable solutions depending on the specific needs of the installation, with the nail anchors providing a more robust option for heavier loads.

Categories
Best Garage Storage Solutions for 2024 Bike Storage Brick Walls garage design Garage Ideas garage makeover

How to Solve Your Garage Storage Challenges Without Breaking the Bank

Creating an organised, efficient garage is about more than just clearing clutter—it’s about making a smart investment in your home. A well-designed garage storage solution ensures your belongings are secure, easy to access, and stored in a way that enhances the space, not crowds it. In our latest article we will look a recent case study, where we helped a Sydney customer solve her garage storage challenge.

Garage Storage Isn’t Just About Shelving

If your goal is to simply shove items out of sight, a few basic shelves from your local Bunnings might do the trick—until you need something buried at the back. But when you’re looking for long-term efficiency and flexibility, shelves alone fall short. They often become overcrowded, making it hard to retrieve specific items without moving others.

This is where a garage wall storage system shines.

Once installed, StoreWALL’s wall panels transform your garage walls into customisable storage hubs. Need to hang bikes this year and swap to golf gear and water skis next summer? No problem. With the right slatwall system, you can easily change your layout as your needs evolve—without drilling new holes or installing more shelves.

The Smart Way to Plan Garage Wall Storage

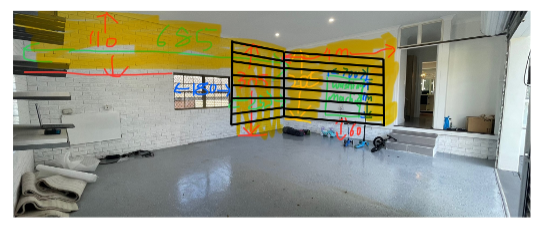
We recently worked with a homeowner in Sydney who had a wide garage with two key usable wall spaces: the rear wall and the right-hand side wall. Their goal? To neatly store plastic tubs, bikes, sports gear, and large items like an ironing board.

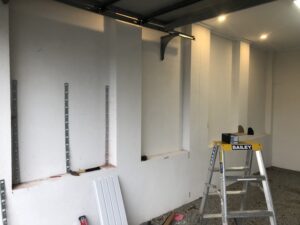
Our initial proposal was to install wall panels across the full height of both walls—covering around 18 square metres with 27 StoreWALL Standard Duty panels (2.4m each). The cost to deliver this was approx $4700. While this would have provided complete flexibility and coverage, the quote exceeded their budget. See above picture of what was originally requested.

Smart Savings Without Sacrificing Function

One of the many advantages of the StoreWALL slatwall system is that it can be dialled down by reducing the amount of wall panels used and therefore the overall initial cost of the project. At a later stage, it can also be dialled back up again with additional panels added to expand the solution.

We took another look at the room for the client, this time focusing on how we can continue to make it functional but with a lower initial investment. By reducing the panel height from full-wall to either 1.8m or 2.1m, and limiting the wall coverage to strategic sections, we delivered a far more cost-effective solution that still met their storage goals.

  • Rear wall (right of window): 2.4m wide x 2.1m or 1.8 high
  • Right-hand wall: 3.6m wide x 2.1m or 1.8m high
  • Total coverage: Over 6m of width at 1.8–2.1m height = approx. 12–13sqm of wall coverage
  • Budget of $3100

By reducing the wall coverage by 30%, we also reduced the budget by a similar figure.

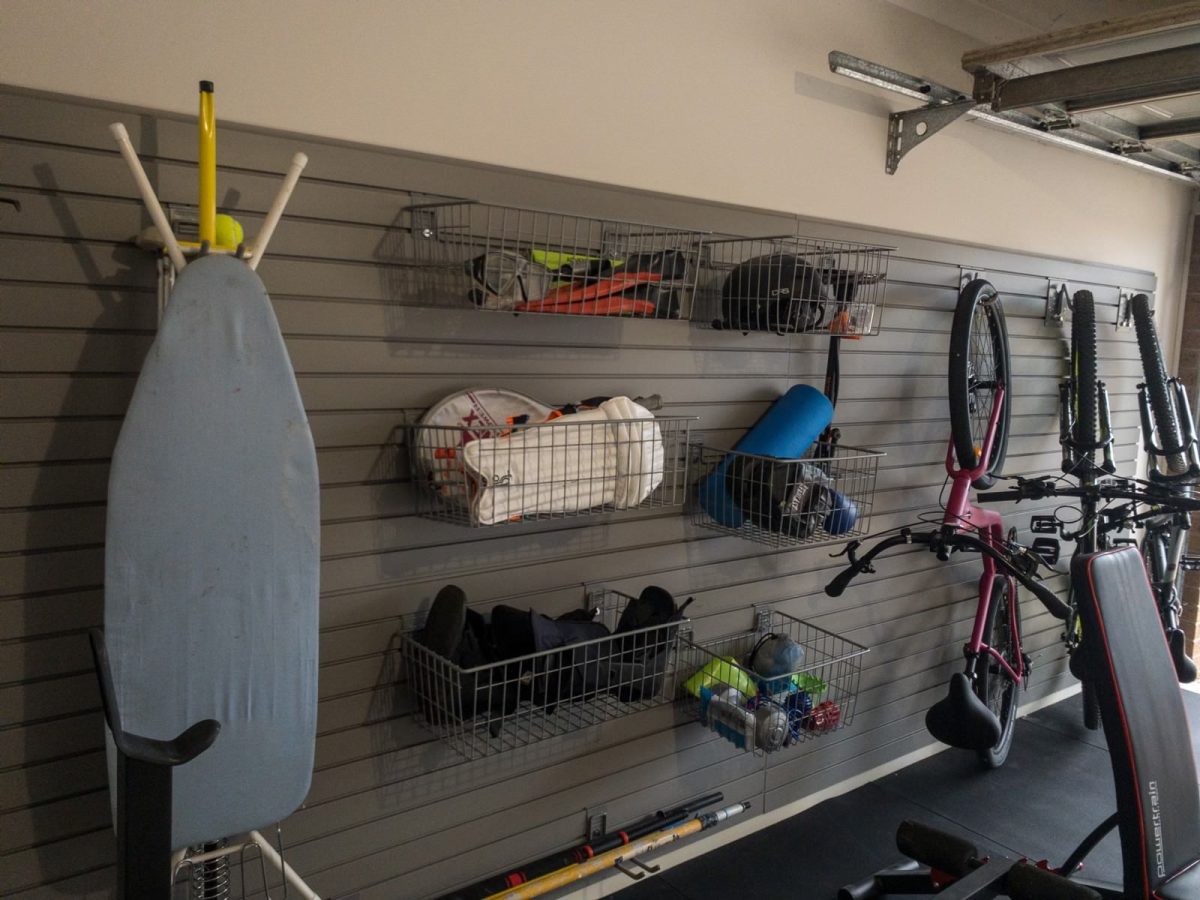
This gave them ample room for high shelving to hold plastic tubs, with bikes stored neatly on the rear wall, and sports gear hung along the side wall.

The Result?

A tailored solution that met their needs without over-investing in unnecessary materials. And best of all, they retained flexibility for future changes—something you simply don’t get with fixed shelves.

StoreWALL Garage Wall Panels offer the ultimate in versatility, durability, and long-term value. Whether you’re starting with one wall or upgrading your entire space, we’ll help you maximise every square metre—on your terms and within your budget.

Categories
Garage Ideas garage makeover Garage Wall Accessories Gardening Tools

The Superior Accessory Locking Mechanism

StoreWALL’s CamLok System: The Superior Accessory Locking Mechanism

In the realm of garage and workshop organization, a secure and efficient locking mechanism is crucial for ensuring that tools and accessories remain in place, easily accessible, and safely stored. StoreWALL, a leading provider of wall storage solutions, has developed the CamLok system—a revolutionary accessory locking mechanism that stands out in the market. This article explores the features, benefits, and advantages of StoreWALL’s CamLok system, demonstrating why it is considered the best accessory locking mechanism available today.

1. Innovative Design and Engineering

The CamLok system is designed with precision engineering, providing a robust and reliable locking mechanism for StoreWALL’s range of accessories. The key components of the CamLok system include:

  • Rotational Locking Mechanism: The CamLok uses a rotating cam to secure accessories in place. When the cam is engaged, it locks the accessory to the wall panel, preventing any movement or slippage.
  • High-Quality Materials: Made from durable and corrosion-resistant materials, the CamLok ensures longevity and consistent performance even in harsh environments.
  • Easy Engagement and Disengagement: The mechanism is designed for ease of use, allowing users to quickly attach and detach accessories with minimal effort.

2. Enhanced Security and Stability

One of the primary benefits of the CamLok system is the enhanced security it provides. Accessories locked with CamLok are securely held in place, reducing the risk of accidental dislodgement. This is particularly important in environments where safety is paramount, such as workshops and garages.

  • Vibration Resistance: The CamLok system is highly resistant to vibrations and impacts, ensuring that accessories remain securely fastened even in busy and dynamic environments.
  • Load-Bearing Capacity: The robust design of the CamLok allows it to support heavy loads, making it suitable for storing bulky and weighty items without compromising on security.

3. Versatility and Compatibility

The CamLok system is designed to be versatile and compatible with a wide range of StoreWALL accessories, including hooks, shelves, and bins. This compatibility ensures that users can fully customize their storage solutions to meet their specific needs.

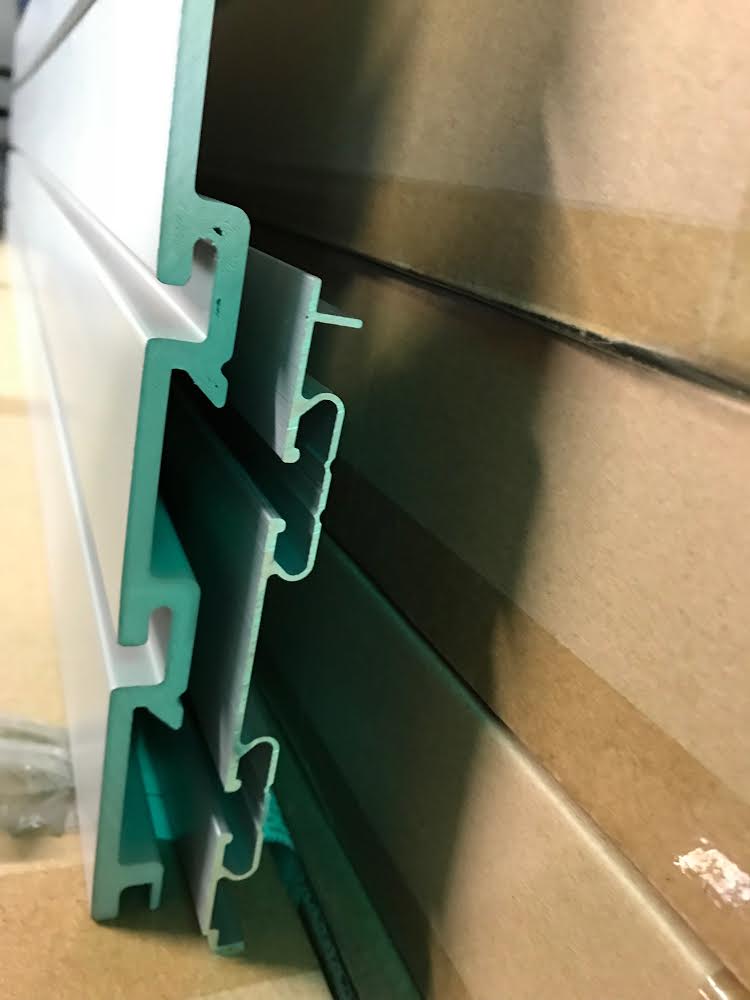
  • Universal Fit: The CamLok can be used with various types of wall panels (74 – 76mm gap between grooves) and accessories, providing a seamless integration with existing StoreWALL systems.
  • Adaptability: The system can be easily adapted for use in different settings, from residential garages to professional workshops, making it a versatile solution for diverse applications.

4. Ease of Installation and Use

StoreWALL’s CamLok system is designed with user convenience in mind, offering a straightforward installation process and easy operation. This user-friendly design ensures that users can quickly set up and adjust their storage solutions without requiring specialized tools or expertise.

  • Tool-Free Installation: The CamLok system can be installed without the need for additional tools, simplifying the setup process and reducing installation time.
  • Simple Operation: The intuitive design allows users to easily lock and unlock accessories with a simple twist, making it easy to rearrange and customize storage configurations.

5. Aesthetics and Organization

In addition to its functional benefits, the CamLok system contributes to a clean and organized appearance. The secure locking mechanism ensures that accessories are neatly arranged and properly aligned, enhancing the overall aesthetics of the storage area.

  • Clutter-Free Environment: By securely locking accessories in place, the CamLok system helps maintain an organized and clutter-free environment, making it easier to locate and access tools and supplies.
  • Professional Look: The sleek and professional appearance of the CamLok system enhances the visual appeal of the storage area, making it an attractive addition to any workspace.

6. Customer Satisfaction and Testimonials

StoreWALL’s CamLok system has garnered positive reviews and testimonials from customers who appreciate its reliability, ease of use, and secure locking capabilities. Users consistently highlight the following aspects:

  • Reliability: Customers praise the CamLok system for its consistent performance and dependable security, ensuring that accessories remain firmly in place.
  • Convenience: The ease of installation and operation is a common theme in customer feedback, with many users noting the simplicity and efficiency of the system.
  • Overall Satisfaction: High levels of customer satisfaction reflect the quality and effectiveness of the CamLok system, cementing its reputation as the best accessory locking mechanism available.

Conclusion

StoreWALL’s CamLok system represents a pinnacle of innovation and design in the field of accessory locking mechanisms. Its combination of security, stability, versatility, ease of use, and aesthetic appeal makes it the ideal choice for anyone seeking a reliable and efficient storage solution. Whether for residential or professional use, the CamLok system delivers unparalleled performance, ensuring that accessories are securely stored and easily accessible. For these reasons, StoreWALL’s CamLok system is widely regarded as the best accessory locking mechanism on the market.

Categories
Bike Storage Garage Hooks Garage Ideas garage makeover garage wall panel colours Garage Walls Gladiator Plastic Containers Power Tools

Compare Garage Storage Solutions from Gladiator, StoreWALL, and StorEase

In the realm of garage organization, three major brands stand out: Gladiator, StoreWALL, and StorEase. Each offers unique features and benefits, catering to various needs and preferences. In this article, we compare garage storage solutions focusing on these 3 brands and basing our evaluation on ease of installation, durability, customization options, and cost-effectiveness.

The article below is based on the video I prepared a few years ago in which I compare garage storage solutions from Gladiator, StoreWALL, and StorEase. Note that the Gladiator solution has very limited availability in Australia as the distributor closed their business. You can however find some Gladiator accessories on eBay, Amazon and via this online store. The availability of StoreWALL and StorEase has not changed.

Garage Storage Review

Ease of Installation

Gladiator:

  • Installation Process: Gladiator offers a straightforward installation with its GearTrack and GearWall systems. Panels can be mounted on studs for drywall installations. They can also be mounted onto brick walls.
  • User-Friendly: Comes with easy-to-follow instructions and requires basic tools.

StoreWALL:

  • Installation Process: The video focuses on StoreWALL Basic Duty wall panel which is equivalent to Gladiator and StorEase. StoreWALL however also offers Standard Duty (its most popular range) and Heavy Duty, a premium range of garage wall panels. StoreWALL’s accessories feature a CamLok system, simplifying the attachment of accessories and panels.
  • User-Friendly: The installation is intuitive, with a focus on secure and robust mounting.

StorEase:

  • Installation Process: StorEase provides a simple rail system that is easy to mount and configure.
  • User-Friendly: Designed for DIY enthusiasts, making it accessible for home users with minimal tools.
compare garage storage solutions

Durability

Gladiator:

  • Materials: Accessories are made from high-strength steel. Panels are made from heavy-duty plastic, offering excellent durability.
  • Weather Resistance: Wall panels are resistant to moisture, rust, and corrosion, suitable for various environments.

StoreWALL:

  • Materials: Its full range of wall panels are constructed from industrial-grade PVC, providing exceptional durability and impact resistance. All accessories are made from heavy steel making them super strong and durable for all light and heavy uses in the garage.
  • Weather Resistance: All wall panels are waterproof and resistant to mold and mildew, making them ideal for all conditions.

StorEase:

  • Materials: Made from light aluminum which is strong and durable. Accessories are robust and also made from metal.
  • Weather Resistance: Made from metal, the panels and accessories are weather resistant but not as hard wearing s the heavier PVC panels offered by StoreWALL and Gladiator.

Customization Options

Gladiator:

  • Flexibility: Offers a wide range of hooks, baskets, shelves, and cabinets, allowing for extensive customization.
  • Aesthetics: Available in various finishes and styles to match different garage decors.

StoreWALL:

  • Flexibility: Highly customizable with an array of accessories, including shelves, bins, hooks, and baskets.
  • Aesthetics: Available in multiple colors and textures, providing a polished and professional look.

StorEase:

  • Flexibility: Offers basic customization options with a focus on essential accessories like hooks and shelves.
  • Aesthetics: Functional design with fewer aesthetic choices compared to Gladiator and StoreWALL.

Cost-Effectiveness

Gladiator:

  • Price Range: Mid to high range, reflecting its robust build quality and extensive accessory options.
  • Value for Money: Good balance of cost and quality, making it a solid investment for long-term use.

StoreWALL:

  • Price Range: Higher price point due to premium materials and durability.
  • Value for Money: Offers excellent longevity and resilience, justifying the higher initial cost.

StorEase:

  • Price Range: More affordable compared to Gladiator and StoreWALL.
  • Value for Money: Cost-effective solution for basic storage needs, though with limited customization and durability.

Conclusion – Compare Garage Storage Solutions

Choosing the right garage storage system depends on individual needs and preferences. Availability and budget are key considerations as is the aesthetic look of your garage and the customisation offered by the accessories.

  • Gladiator: Ideal for those seeking a balance of durability, customization, and ease of installation at a moderate price point.
  • StoreWALL: Perfect for users prioritizing high durability, weather resistance, and a polished aesthetic, despite a higher cost.
  • StorEase: Suitable for budget-conscious users looking for straightforward, functional storage solutions with basic customization options.

Each brand offers distinct advantages, making them suitable for different applications and user requirements. By evaluating your specific needs, you can select the most appropriate system to enhance your garage organization.

Categories
Garage Ideas garage makeover Garage Walls StoreWALL

How to Find Metal and Wooden Stud

Finding studs behind plaster walls can be challenging, but with the right tools and techniques, you can locate both metal and wooden studs effectively. Here’s a detailed guide to help you find metal and wooden stud.

Understanding Plaster Walls

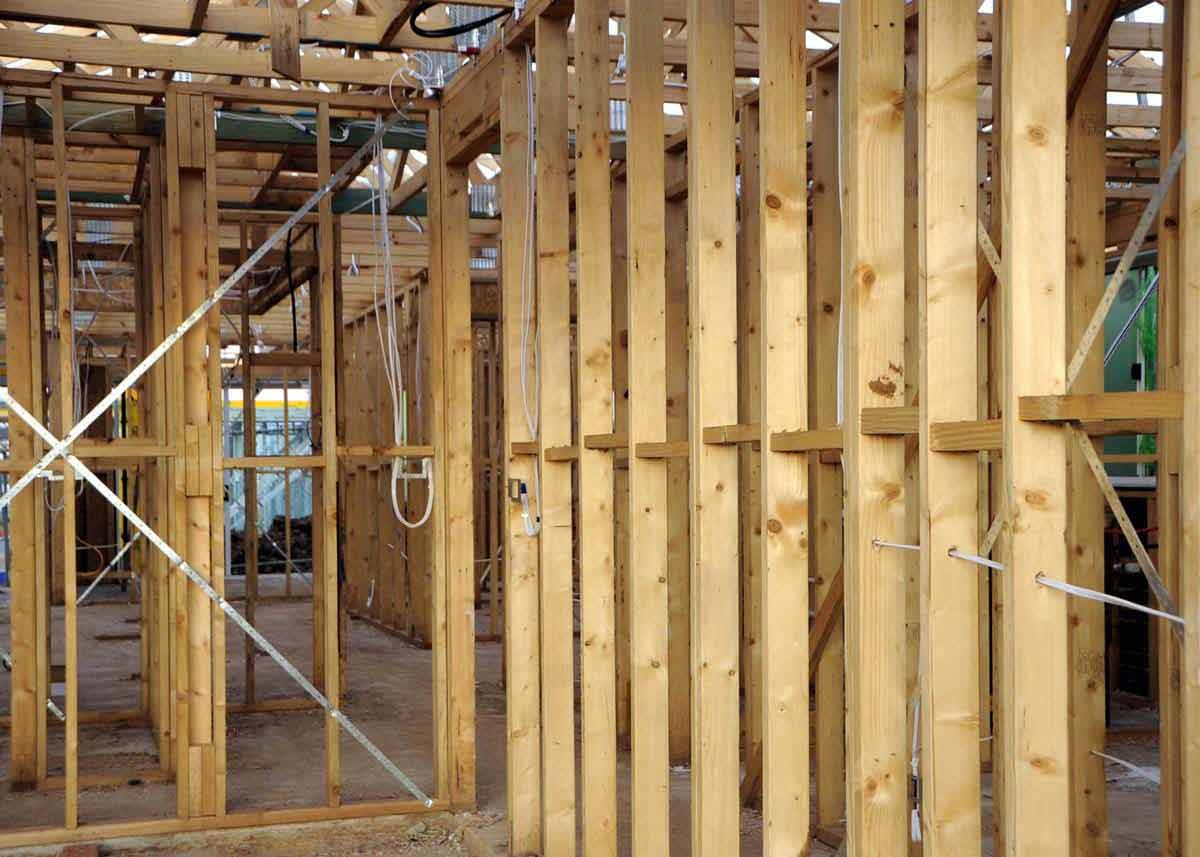
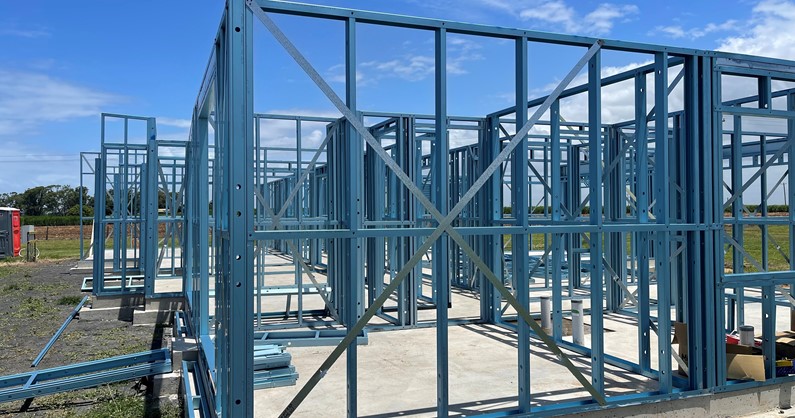
Behind your plaster wall is a frame that looks like the picture below. Your studs (upright pieces) will typically run the full height of your wall. They will be spaced about 450mm and 600mm (maximum) apart. Between the studs, you have horizontal pieces called Noggins. You will have 1 or two between each stud (depending on the height of your wall).

Find Metal and Wooden Stud

Tools You’ll Need – Find Metal and Wooden Stud

  • Stud Finder: Make sure it’s capable of detecting both metal and wooden studs.
  • Tape Measure: Useful for verifying standard stud spacing.
  • Impact Driver: For marking holes in plaster once studs are located.
  • Magnet: Used for locating metal studs if your Stud Finder can’t.

I have both a Stanley and an Ozito stud finder. Unfortunately, they aren’t always consistent with what they locate. A few drill holes usually solves the arguement.

Using a Stud Finder

  • Calibrate the Stud Finder: Place it flat against the wall and turn it on, following the manufacturer’s instructions.
  • Scan the Wall: Move the stud finder horizontally across the wall. Most stud finders will beep or light up when they detect a stud. You will need to repeat this several times to confirm that you have located the stud.
  • Mark the Stud Location: Use a pencil to mark the edges of the stud as detected by the stud finder.
  • Confirm stud location: You should be able to measure the distance between the studs you have located. You should find that the distance should be consistent ie intervals of 450mm.

Visual and Tactile Clues

  • Look for Outlets and Switches: Electrical outlets and light switches are usually attached to studs. Measure 15-20cm from these points to find adjacent studs.
  • Tap the Wall: Lightly tap the wall with your knuckles. A solid sound indicates a stud, while a hollow sound indicates the space between studs. This can be very hit-and-miss approach.
StoreWALL Brite White Garage Wall Panel Installation

Verifying Stud Locations

  • Drill a Small Hole: Use your impact driver to drill a pilot hole at the marked location. If you hit solid wood or metal, you’ve found a stud. Note that sometimes you might just hit the edge of a stud. Therefore a few holes might be needed to find centre.

Finding Metal Studs

  • Stud Finder with Metal Scan Mode: Many stud finders have a metal scan mode specifically designed for detecting metal studs.
  • Magnet Method: A strong magnet can help detect metal studs more reliably than wooden ones.

Tips and Precautions

  • Multiple Checks: Always verify stud locations using multiple methods to ensure accuracy.
  • Be Patient: Finding studs behind plaster walls can be time-consuming. Take your time to avoid mistakes.
  • Avoid Pipes and Wires: Be cautious of plumbing and electrical wiring when drilling into walls. Use a wire detector to check for electrical wires.

ConclusionFind Metal and Wooden Stud

Locating studs in plaster walls requires a combination of tools and techniques. By using a stud finder, magnet, and visual clues, you can accurately find both metal and wooden studs. Always verify your findings and proceed with caution to avoid damaging your walls or hitting utilities.

Categories
Best Garage Storage Solutions for 2024 Bike Storage Garage Hooks Garage Ideas garage makeover garage wall panel colours

Modern Garage Design

Transforming Functional Spaces into Stylish Havens

Garages have evolved from mere storage spaces for vehicles and tools to multifunctional areas that blend style, utility, and innovation. Modern garage design focuses on maximizing space efficiency, incorporating advanced technology, and ensuring aesthetic appeal. Here’s an in-depth look at the key elements that define contemporary garage design.

Space Optimization and Layout

Efficient Layout: Modern garages prioritize efficient use of space. This includes strategic placement of storage solutions, workspaces, and parking areas to ensure ease of movement and accessibility.

Multifunctional Spaces: Garages are increasingly designed to serve multiple purposes beyond parking. They can double as workshops, gyms, home offices, or entertainment areas. The layout is often flexible to accommodate various activities.

Zoning: Effective zoning helps in organizing the garage into distinct areas for different functions. For instance, a specific zone for vehicle maintenance, another for tool storage, and a separate area for hobbies or fitness equipment.

modern garage design

Innovative Storage Solutions

Slatwall Systems: These are versatile wall storage systems that allow for easy customization and reconfiguration. Slatwalls can hold hooks, shelves, and bins, keeping items off the floor and within easy reach.

Overhead Storage: Utilizing the ceiling space for storage can significantly increase the available area. Overhead racks are perfect for storing seasonal items, sports equipment, and bulky items.

Cabinet Systems: Modern garages feature high-quality, modular cabinet systems that are both functional and aesthetically pleasing. These cabinets can store tools, chemicals, and other items securely while contributing to the overall design.

Advanced Technology Integration

Smart Garage Door Openers: Modern garages often include smart technology such as app-controlled garage door openers, which offer convenience and enhanced security. These systems can be monitored and controlled remotely.

Climate Control: To ensure comfort and preserve the condition of stored items, modern garages may include climate control systems. Heating, ventilation, and air conditioning (HVAC) systems help maintain an optimal environment.

Lighting Solutions: LED lighting is commonly used for its energy efficiency and brightness. Task lighting over workbenches, ambient lighting for general illumination, and accent lighting to highlight specific areas enhance both functionality and appearance.

Aesthetic Enhancements

Flooring: Epoxy-coated floors are a popular choice for modern garages. They are durable, easy to clean, and come in a variety of colors and finishes. Other options include interlocking tiles and polished concrete.

Color Schemes: Neutral colors like grey, black, and white dominate modern garage color schemes. These colors provide a sleek and clean look, making the space feel more organized and spacious.

Design Themes: Some homeowners opt for themed garage designs, such as automotive-themed decor, vintage workshop aesthetics, or even a man-cave setup with entertainment systems and comfortable seating.

Safety and Security Features

Robust Security Systems: Modern garages are equipped with advanced security features like motion detectors, surveillance cameras, and alarm systems to protect valuable tools, vehicles, and equipment.

Fire Safety: Fire-resistant materials, proper ventilation, and accessible fire extinguishers are essential safety features in a modern garage. Some designs also include sprinkler systems for added protection.

Ergonomic Considerations: Ergonomic design elements, such as adjustable workbenches and strategically placed storage, reduce physical strain and improve efficiency during tasks.

Sustainability and Green Design

Energy Efficiency: Incorporating energy-efficient appliances, lighting, and insulation helps reduce the environmental impact and operational costs of a garage.

Sustainable Materials: Using recycled or sustainably sourced materials for construction and storage solutions aligns with eco-friendly principles.

Solar Power: Some modern garages integrate solar panels to generate renewable energy, powering the garage and even contributing to the home’s overall energy needs.

Conclusion

Modern garage design transcends traditional boundaries, transforming garages into multifunctional, aesthetically pleasing, and technologically advanced spaces. By optimizing layout, integrating innovative storage solutions, embracing smart technology, and focusing on aesthetics and sustainability, modern garages cater to diverse needs while enhancing the overall value and functionality of the home. Whether for practical use or as an extension of living space, the modern garage is a testament to the fusion of form and function in contemporary home design.

Categories
garage makeover garage wall panel colours Garage Walls Mould in Garage PVC vs MDF Slatwall

PVC vs MDF Slatwall

In the world of wall storage solutions, slatwall systems are a popular choice for both residential and commercial use. Two primary materials used in slatwall systems are PVC (Polyvinyl Chloride) and MDF (Medium Density Fiberboard). This article provides an in-depth comparison of PVC vs MDF slatwall, examining their characteristics, benefits, and applications to help you make an informed decision.

PVC vs MDF Slatwall

Material Composition and Properties

PVC Slatwall:

  • Composition: Made from polyvinyl chloride, a type of plastic known for its durability and resistance to moisture.
  • Properties: Lightweight, waterproof, and resistant to mold and mildew. It can be easily cleaned and maintained.
  • Aesthetics: Available in various colors and finishes, often designed to mimic wood grain or other textures.

MDF Slatwall:

  • Composition: Made from wood fibers bonded with resin under heat and pressure.
  • Properties: Heavier than PVC, with a solid, dense structure. It is susceptible to moisture and may swell or warp if not properly sealed.
  • Aesthetics: Typically comes in a smooth, painted finish, but can also be laminated or veneered to achieve different looks.

PVC vs MDF Slatwall – Durability and Strength

PVC Slatwall:

  • Durability: Highly durable and resistant to impacts, scratches, and chemicals.
  • Load Capacity: Generally supports lighter to moderate loads, depending on the thickness and quality of the PVC.

MDF Slatwall:

  • Durability: Strong and capable of supporting heavier loads. However, it is less resistant to physical damage and moisture compared to PVC.
  • Load Capacity: Typically higher than PVC, making it suitable for heavier items when properly installed.

Installation and Maintenance

PVC Slatwall:

  • Installation: Easier to handle and install due to its lightweight nature. Often features interlocking panels for seamless installation. Can be easily cut to manage powerpoints and garage door brackets. The use of Installstrips makes installation less complicated and safer, delivery a very strong, robust garage storage system.
  • Maintenance: Low maintenance, requiring only occasional cleaning with mild soap and water.

MDF Slatwall:

  • Installation: Heavier and more challenging to install, requiring more robust mounting hardware and support structures. Panels are typically larger and heavier to carry, hold, and fasten to the wall.
  • Maintenance: Requires careful maintenance to avoid moisture exposure. Can be painted or refinished if scratched or damaged.

Cost and Affordability – PVC vs MDF Slatwall

PVC Slatwall:

  • Cost: Generally more expensive than MDF due to the manufacturing process and material properties. Installstrips can add to the price of the solution.
  • Long-Term Value: Offers long-term value due to its durability and low maintenance requirements. Will last over 10 years. Installstrips are galvanised eliminating rust.

MDF Slatwall:

  • Cost: More affordable upfront but may incur additional costs for sealing and maintenance over time.
  • Long-Term Value: Can be a cost-effective solution for dry environments where moisture exposure is not a concern.

Environmental Considerations

PVC Slatwall:

  • Environmental Impact: Made from plastic, which raises concerns about sustainability and recyclability. However, some manufacturers use recycled PVC in their products. StoreWALL wall panels are 100% Recyclable – Class 3 recyclable.

MDF Slatwall:

  • Environmental Impact: Made from wood fibers, which are a renewable resource. However, the production process involves the use of formaldehyde-based resins.
  • Recyclability: Can be recycled, but the presence of adhesives and finishes may complicate the process.
PVC vs MDF Slatwall

Applications and Use Cases

PVC Slatwall:

  • Best For: Environments where moisture and humidity are concerns, such as garages, basements, and retail spaces.
  • Common Uses: Ideal for organizing tools, sports equipment, and retail displays.

MDF Slatwall:

  • Best For: Indoor environments with controlled humidity, such as retail stores, showrooms, and home offices.
  • Common Uses: Suitable for displaying merchandise, organizing household items, and creating decorative wall features.

Conclusion – PVC vs MDF Slatwall

Choosing between PVC and MDF slatwall depends on your specific needs and environment. PVC slatwall offers superior moisture resistance, durability, and ease of maintenance, making it ideal for high-humidity areas and heavy-duty applications. By understanding the key differences and advantages of each material, you can select the slatwall system that best suits your storage and organizational needs.

Categories
garage makeover Man Cave Workbench

DIY Garage Wooden Workbench

Building a wooden bench for your garage can be a rewarding DIY project that not only enhances your workspace but also provides a sturdy and functional piece of furniture. Whether you need a place to sit while working on projects or a surface to hold tools and materials, a wooden bench can be a versatile addition to any garage. Here’s a detailed guide on how to build a DIY Garage Wooden Workbench.

The first step is to review the space you have and determine the size of bench you need that can fit in the space available. You may determine that a 1.8m long bench is big enough for you. The height and depth of the bench are additional considerations. Most benches in your home will 900mm high. When determining your bench, you might want to also decide on the benchtop surface you want to use. If it’s MDF or some form of chipboard, picking a pre-cut size available from your hardware store will save you a lot of time.

Materials Needed:

  • Wood: Make sure your timber is straight. Using old timber to save some money is a great idea, but it has twisted or is a bow in it, you don’t want it. Buy some framing pine from your local store. 90mm x 45mm studs are ideal.
  • Screws: You will require large screws to hold the frame together and smaller screws to secure the benchtop to the frame. For the frame, I recommend something like 14g 75mm Bugle Screws. 2 ½ inch wood screws.
  • Glue: Wood glue for extra bond. This is optional.
  • Sandpaper: Various grits for smoothing.
  • Finish: Paint, stain, or sealant depending on your preference.

Tools Required:

  • Saw: Circular saw or handsaw.
  • Drill: With drill bits.
  • Measuring tape.
  • Square.
  • Clamps: To hold wood in place as you work.
  • Paintbrush or roller (if applying finish).

Instructions for your DIY Garage Wooden Workbench

This is a bench design that I used for my own DIY Garage Wooden Workbench project. It took me 2 full days to complete. I found the instructions on this site. Whilst I used most of the design laid out in this article, I did make some adjustments.

The final measurements were 3600mm long, 950mm high, and 860mm deep. Due to the size I chose, I didn’t put the bench on caster wheels. Had it been 1800mm long, I would have. I also made two shelves under the benchtop of equal length to the bench.

DIY Garage Wooden Workbench
My DIY Garage Wooden Workbench

You will notice that I used a combination of timbers. These were all new timbers I already had and they were also straight. Most of the timber was LVL (Structural). It made the bench very heavy. You don’t need LVL for a benchtop. Your standard framing pine (90×45) is fine. For the top surface, I purchased MDF boards (1200 x 2400) which I cut to size. Three sheets covered all of the surfaces. These I needed to cut to size.

The last step in my garage wooden workbench project is to add StoreWALL Garage Wall Panels to the wall above the bench. This has now been completed. I have added 2 x Heavy Duty Weathered Grey (2438mm) panels along the bench. I have stacked two panels to give me a paneled area of 4876mm x 770mm. At one corner, I have made it slightly higher with a third piece of panel at 1000mm.