Posted on

Reclaim Your Garage

slatwall messy garage

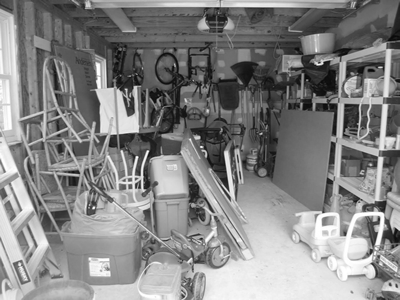
In Australia, the garage has traditionally been a multifunctional space, serving not just as a shelter for cars but also as a storage area for a myriad of household items, tools, and occasionally, even as a workspace or recreational area. However, a common observation across many Australian homes is that garages tend to be particularly cluttered and messy. This phenomenon can be attributed to several factors, ranging from changing lifestyle patterns to architectural design and consumer behavior. This article delves into the reasons behind the messiness of Australian garages, shedding light on the underlying causes and potential solutions. It also introduces a range of solutions that can assist you to reclaim your garage.

reclaim your garage

Shifting Lifestyle Patterns

One of the primary reasons for cluttered garages is the evolving lifestyle of Australians. As people acquire more possessions, from sports equipment to seasonal decorations, the garage often becomes the go-to storage space. The rise of hobbies and home improvement projects has also contributed to the accumulation of tools and materials, often stored in the garage for convenience.

Lack of Adequate Storage Solutions

Many Australian homes, especially older ones, were not designed with sufficient built-in storage. As a result, garages become the overflow space for items that do not fit inside the house. Without proper organization systems such as shelving, cabinets, or racks, these items can quickly accumulate, creating clutter and disorganization.

The Consumer Culture

The surge in consumerism, driven by the ease of online shopping and the allure of sales, has led to an increase in household belongings. Many Australians find themselves purchasing items on impulse or in bulk, which, due to lack of immediate use or space inside the home, end up in the garage. This consumer habit exacerbates the issue of clutter, making garages appear messier than ever.

Multipurpose Use of Garage Space

Garages in Australia are increasingly being used for purposes other than parking cars. They serve as workshops, home gyms, and even entertainment areas. This multipurpose use, while beneficial, contributes to the clutter, as it introduces a variety of items into the space that are not always neatly organized or stored.

Procrastination and Lack of Time

The task of cleaning and organizing a garage can be daunting, especially when the clutter has been accumulating over time. Many individuals postpone this task due to its overwhelming nature or due to a busy lifestyle. This procrastination, combined with a lack of dedicated time to tackle the mess, results in garages remaining cluttered for extended periods.

reclaim your garage

Architectural Design and Planning

The design of some Australian homes does not prioritize garage storage efficiency. Garages are often designed to meet minimum size requirements for vehicles, with little consideration for storage or organization. This lack of foresight in design contributes to the challenge of keeping garages tidy and well-organized.

Seasonal and Infrequently Used Items

Garages often house seasonal items such as holiday decorations, winter clothing, and sports equipment, which are not used year-round. These items take up valuable space and contribute to the clutter, especially when not stored properly.

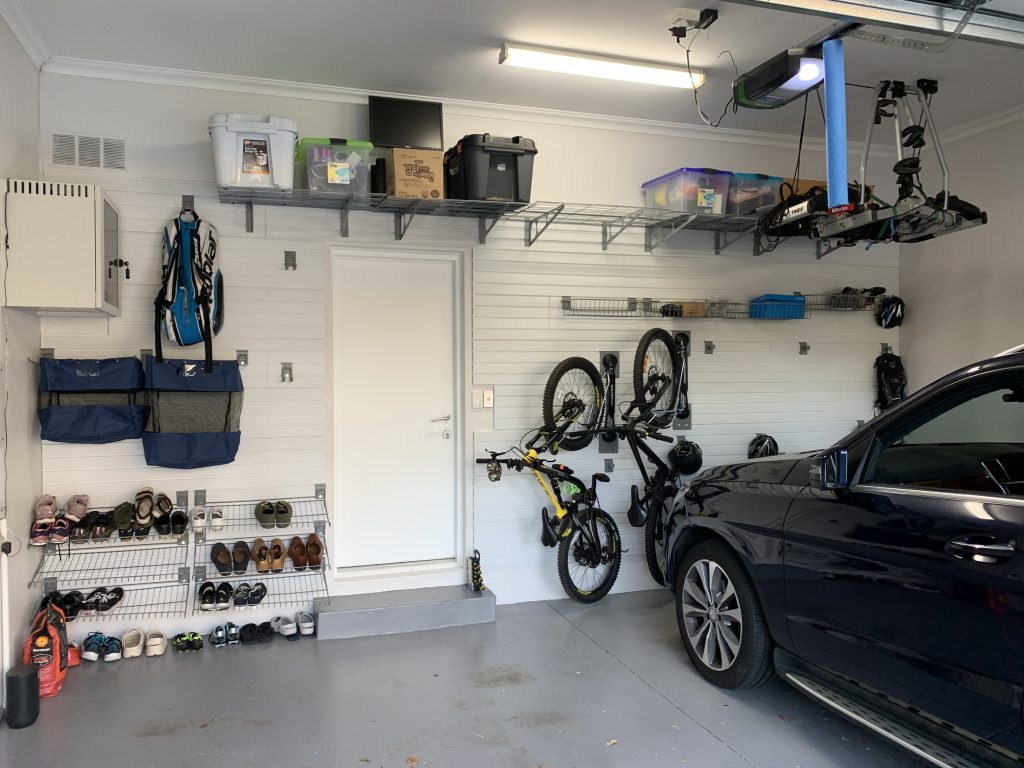
Reclaim Your Garage – Solutions and Strategies

Addressing the messiness of garages requires a multifaceted approach. You can adopt various strategies to mitigate this issue so you can reclaim your garage:

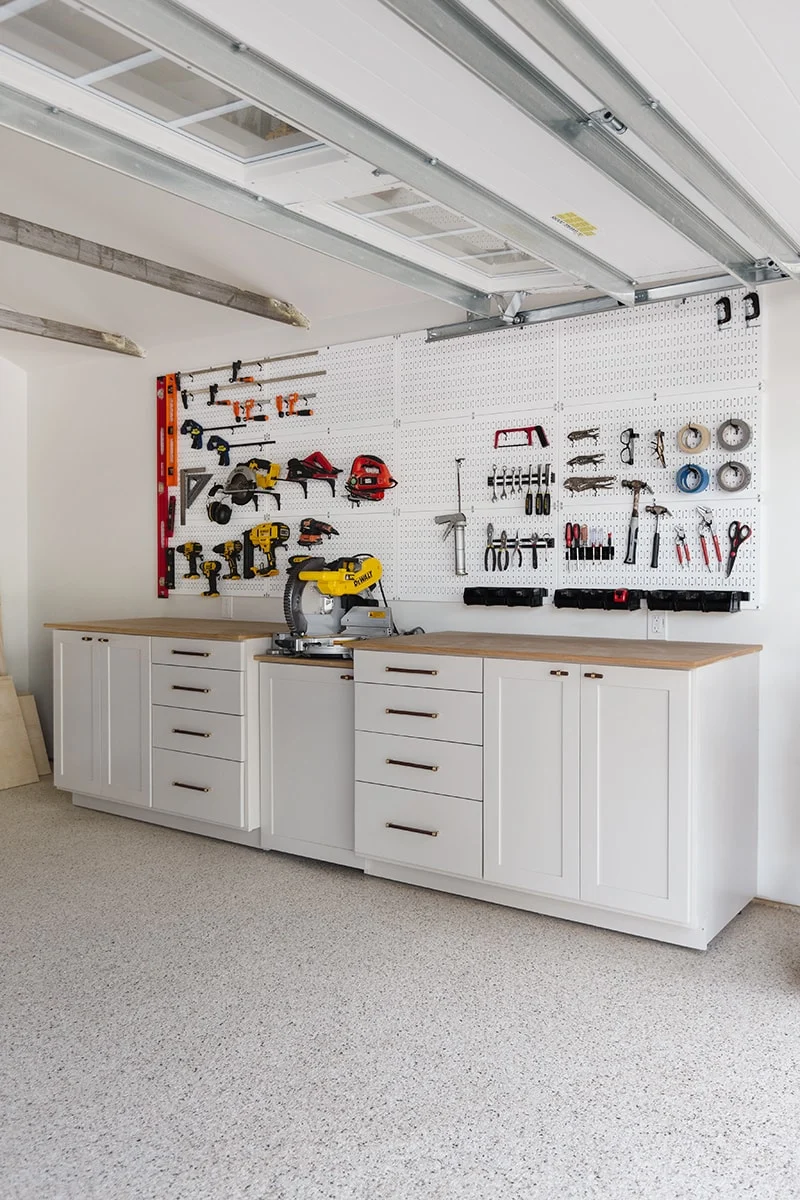
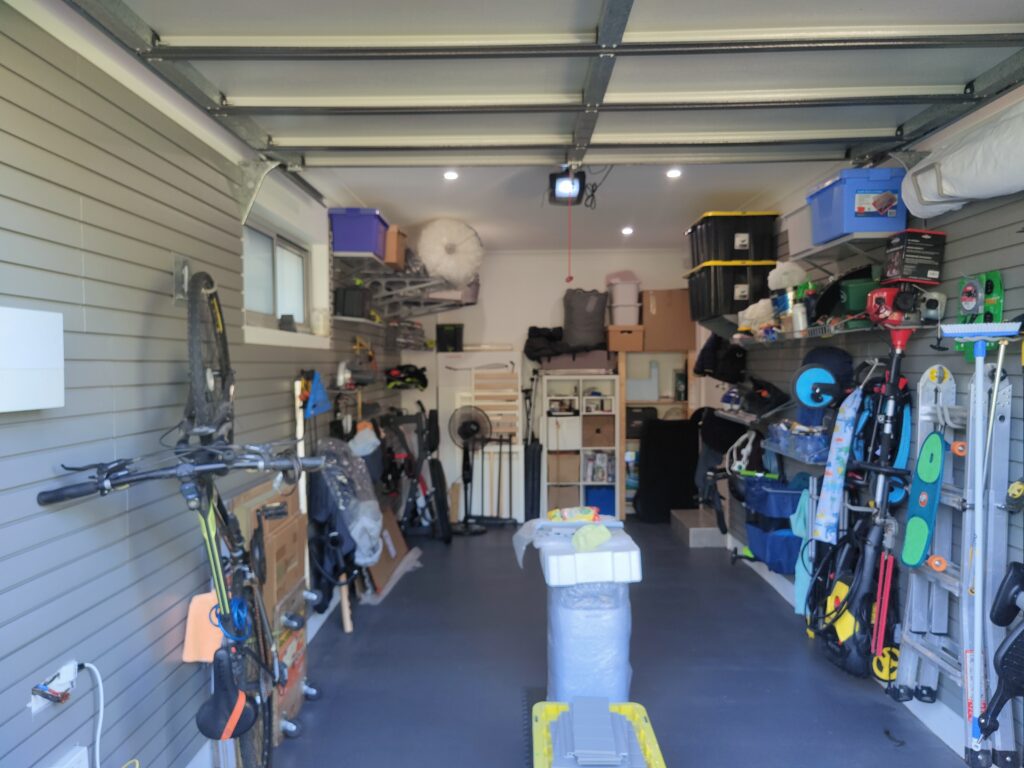
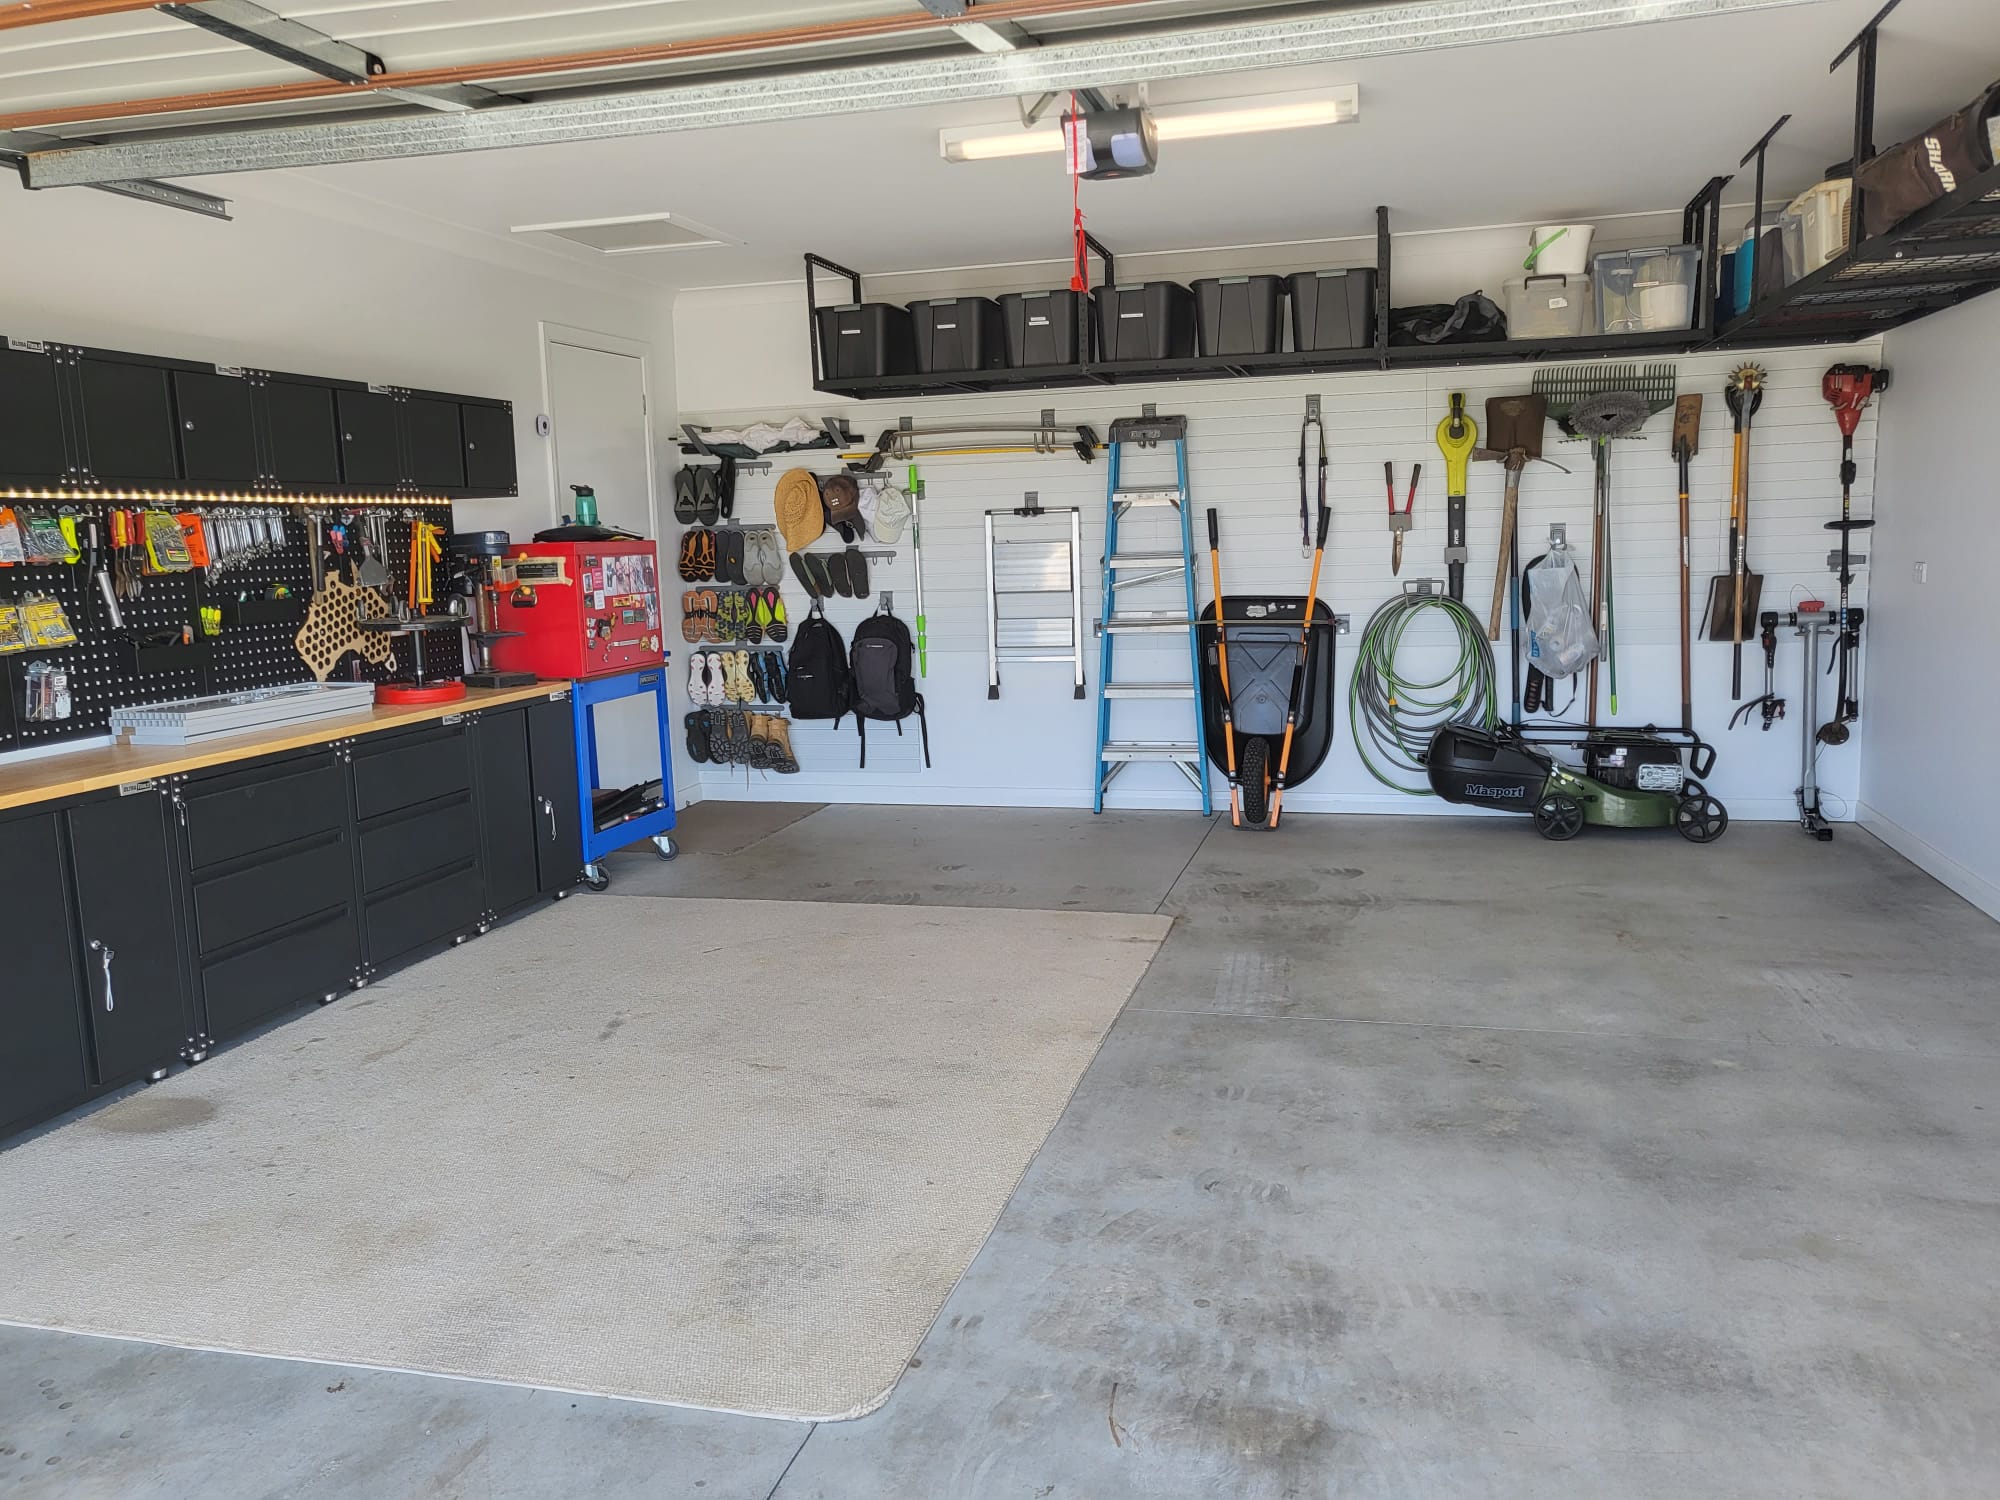
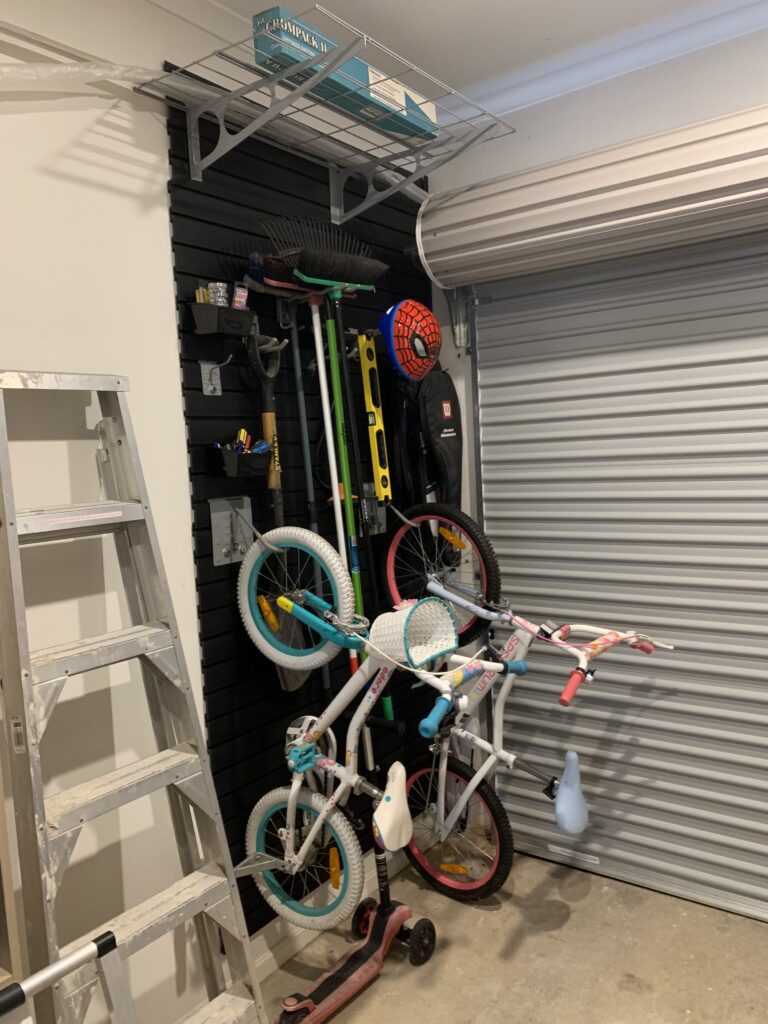
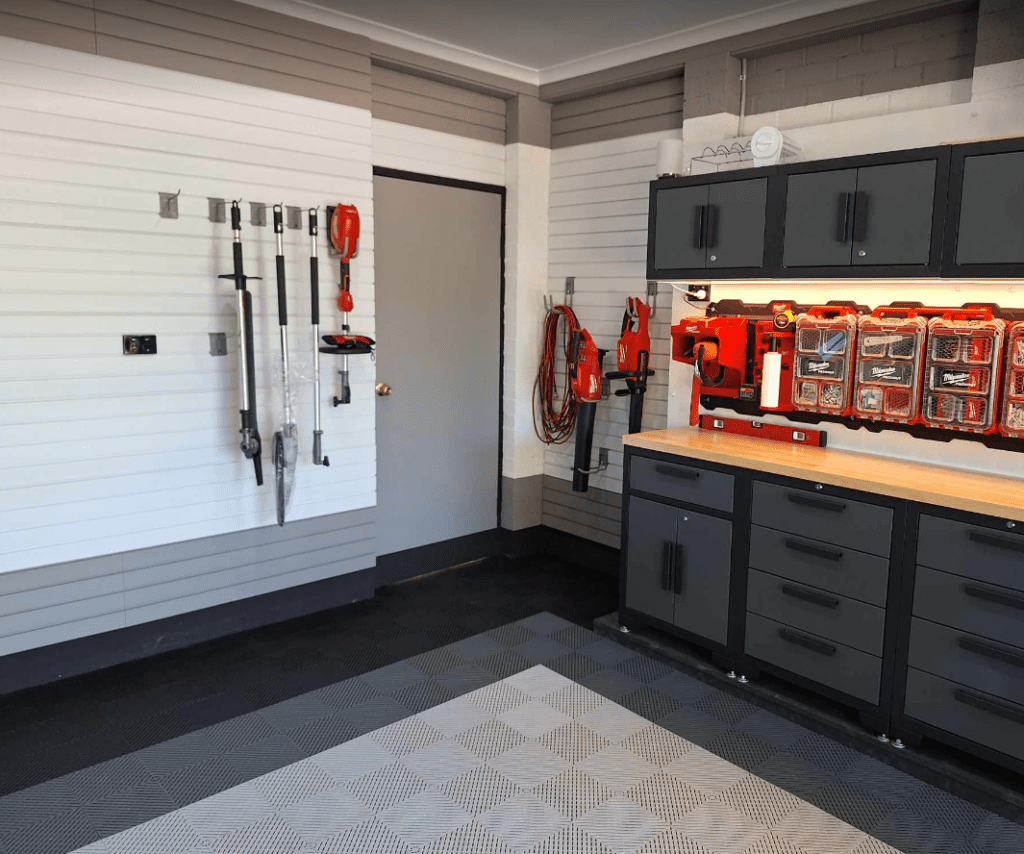
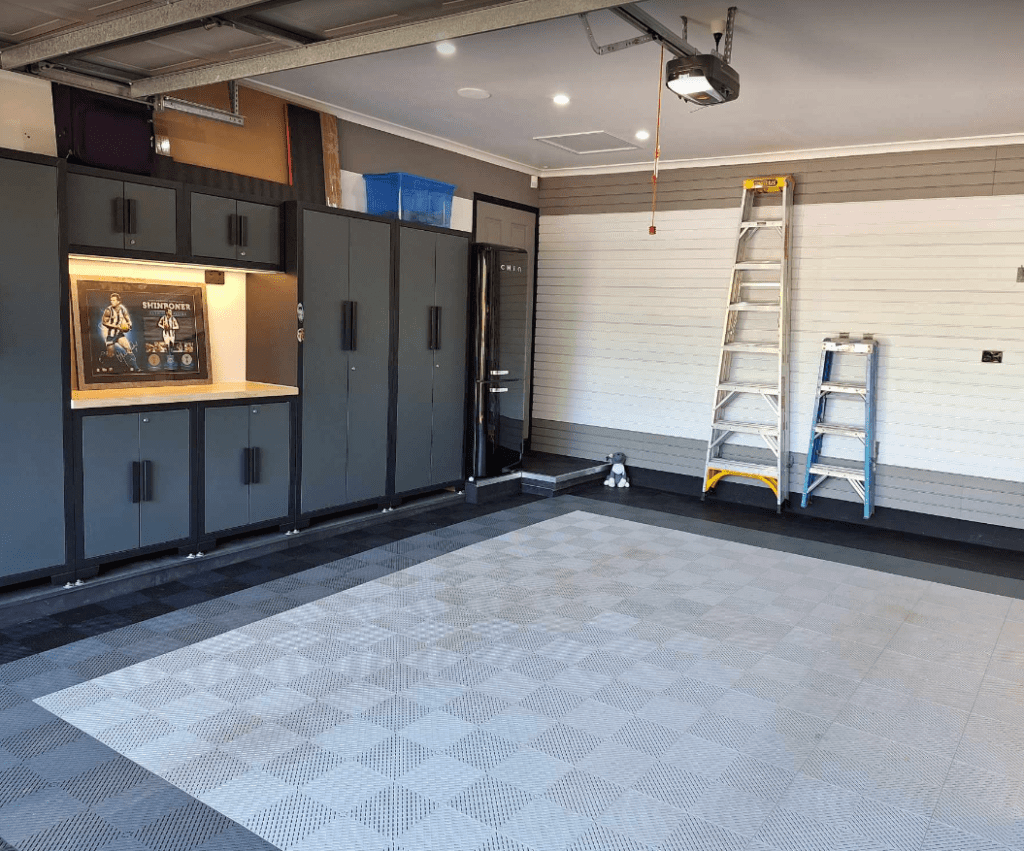
  • Implementing Efficient Storage Solutions: Installing shelving, cabinets, and overhead storage can maximize space and reduce clutter.
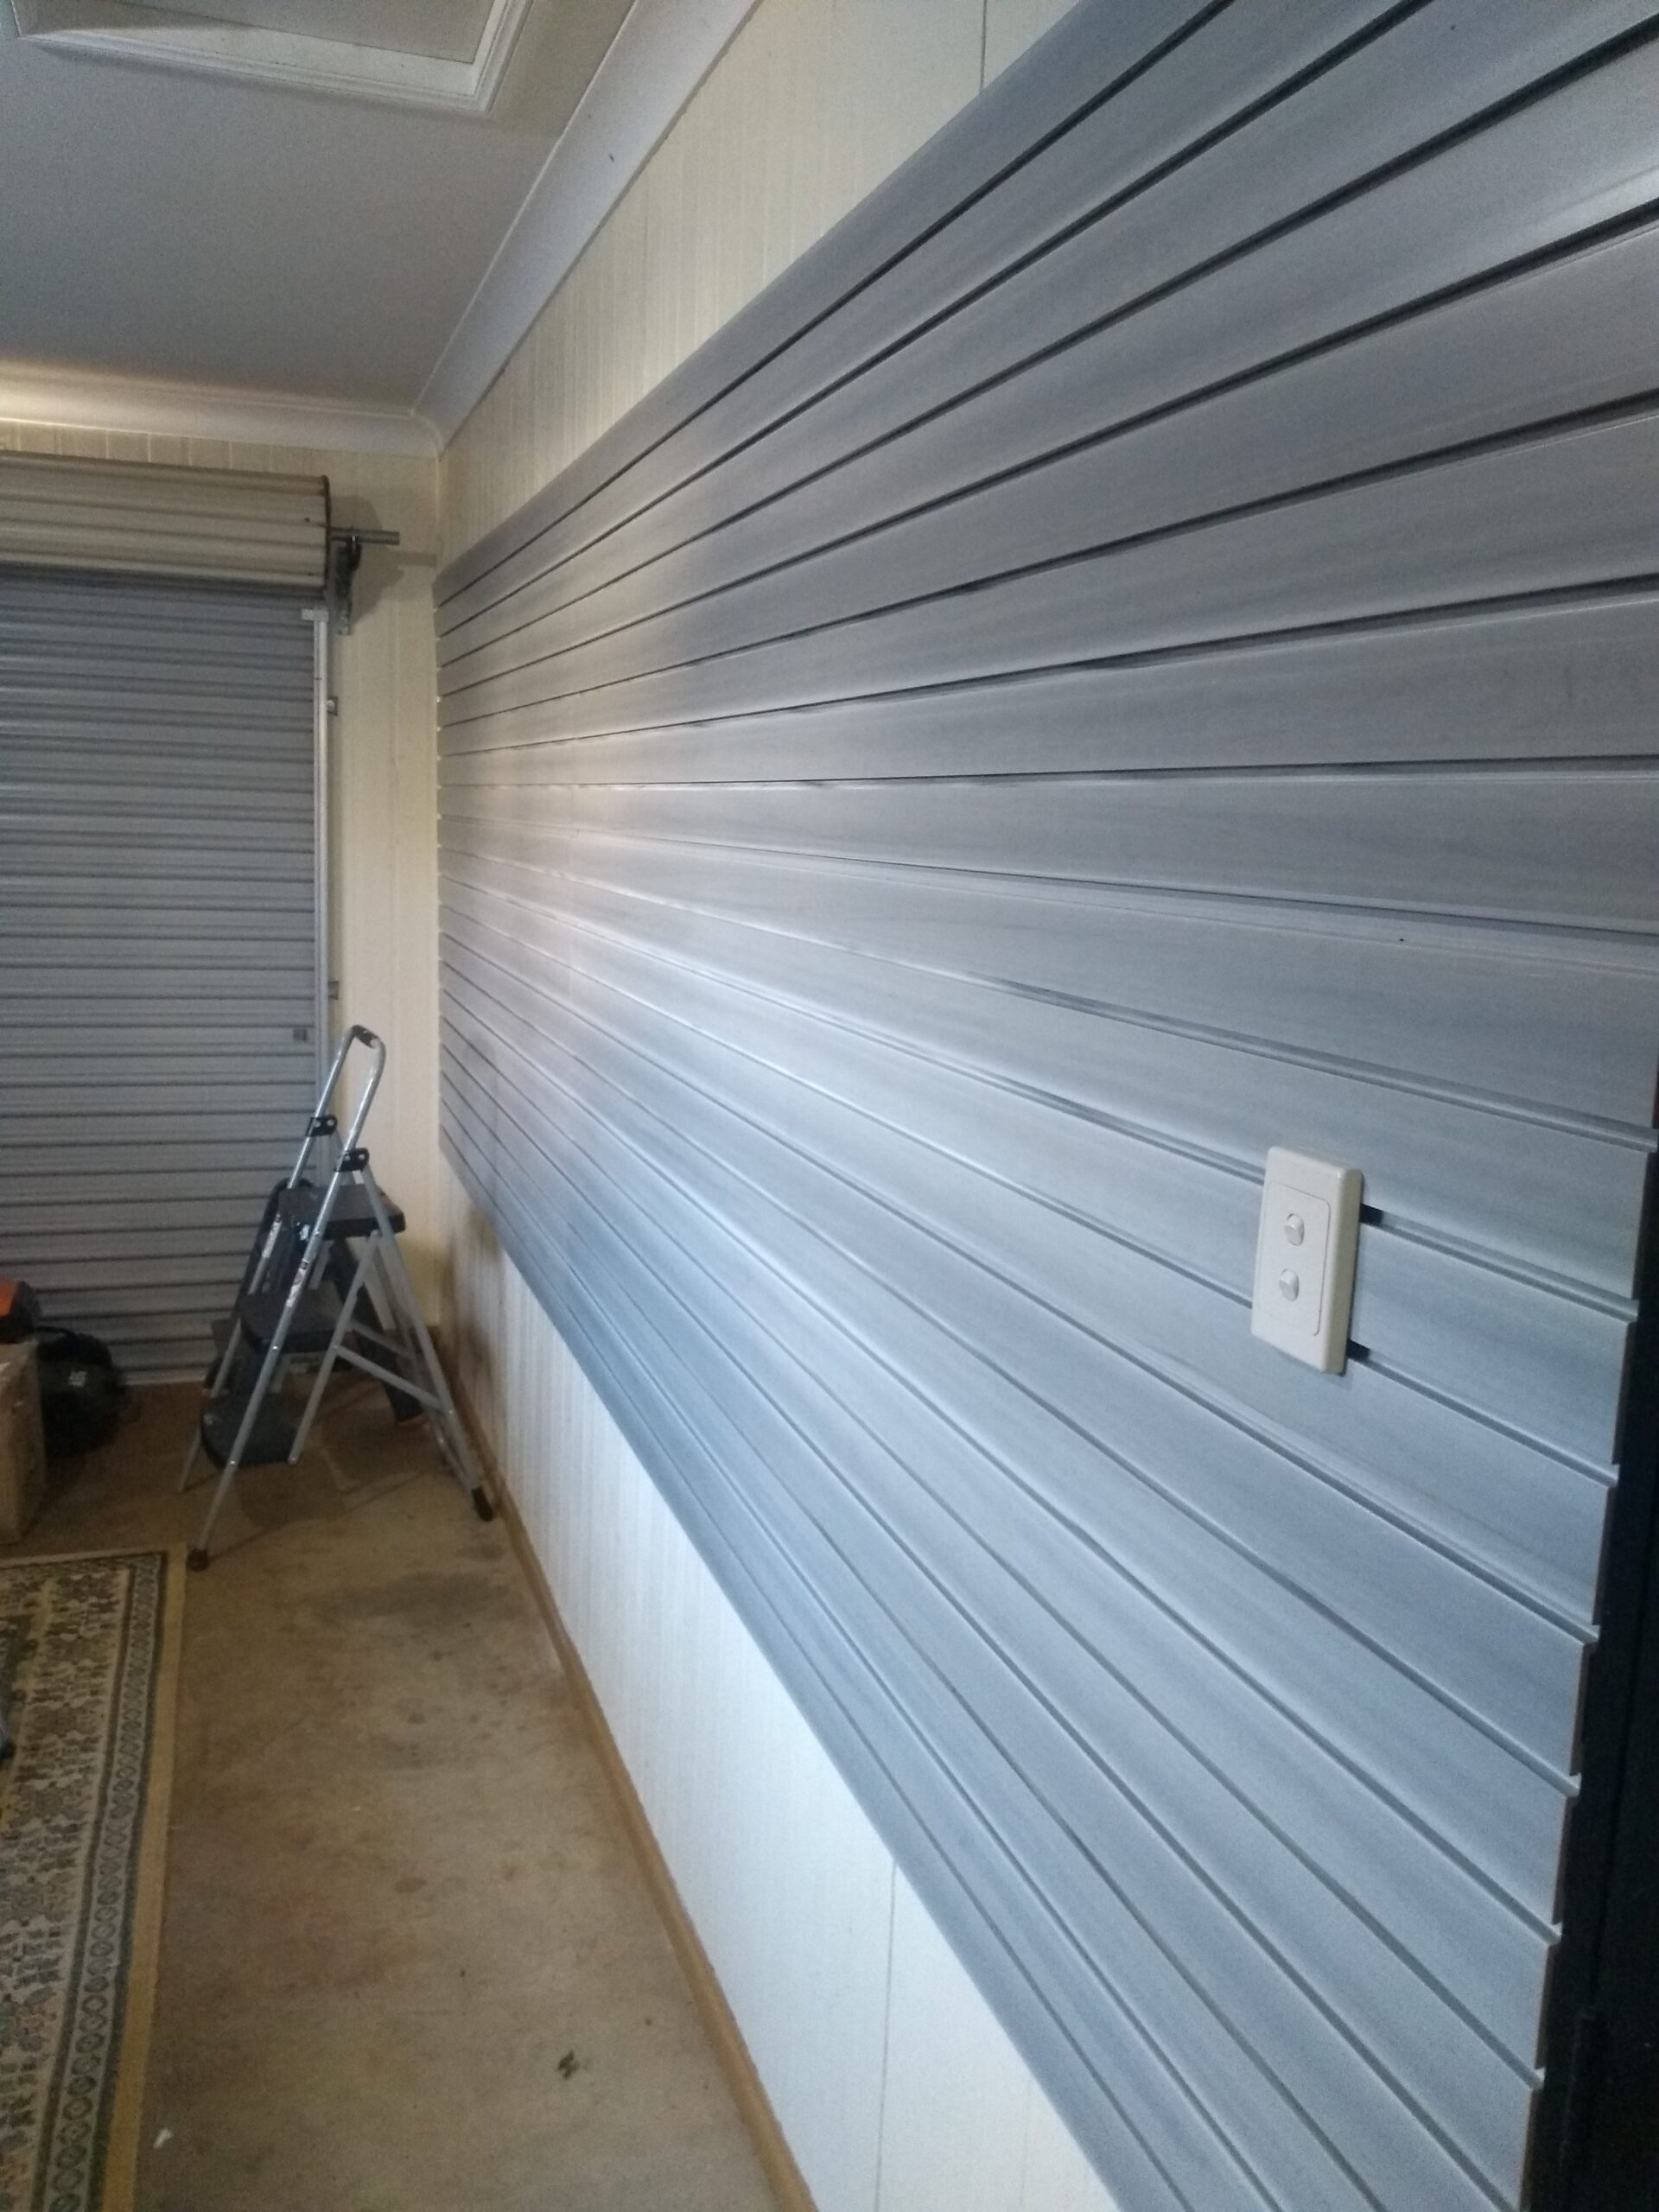
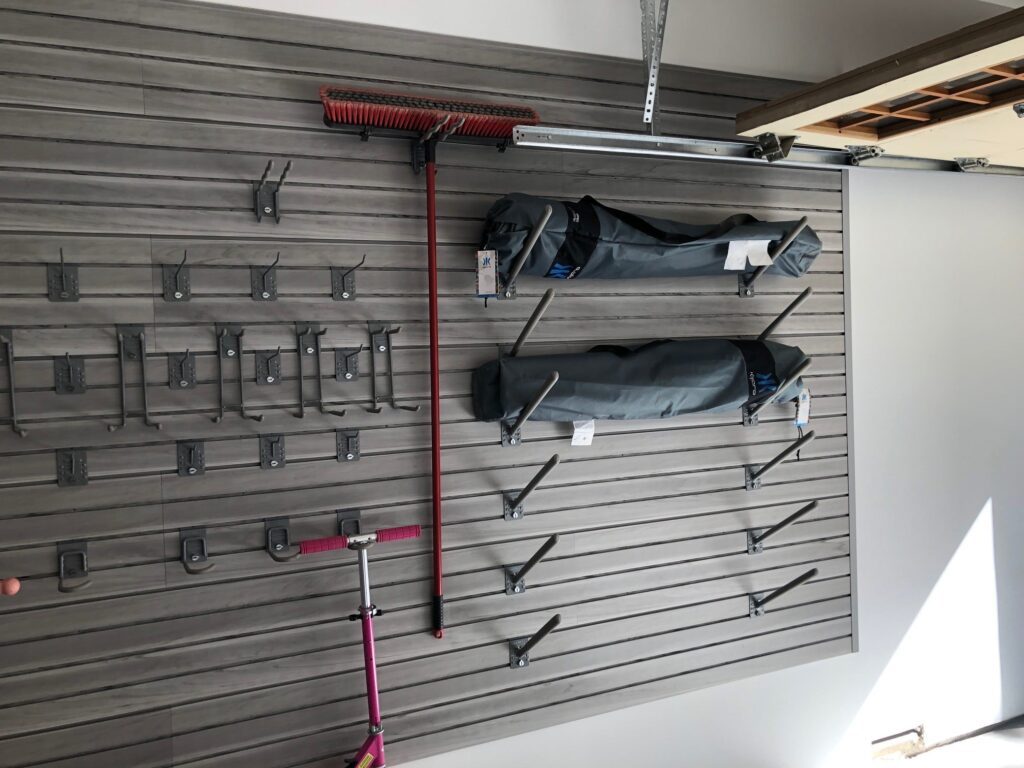
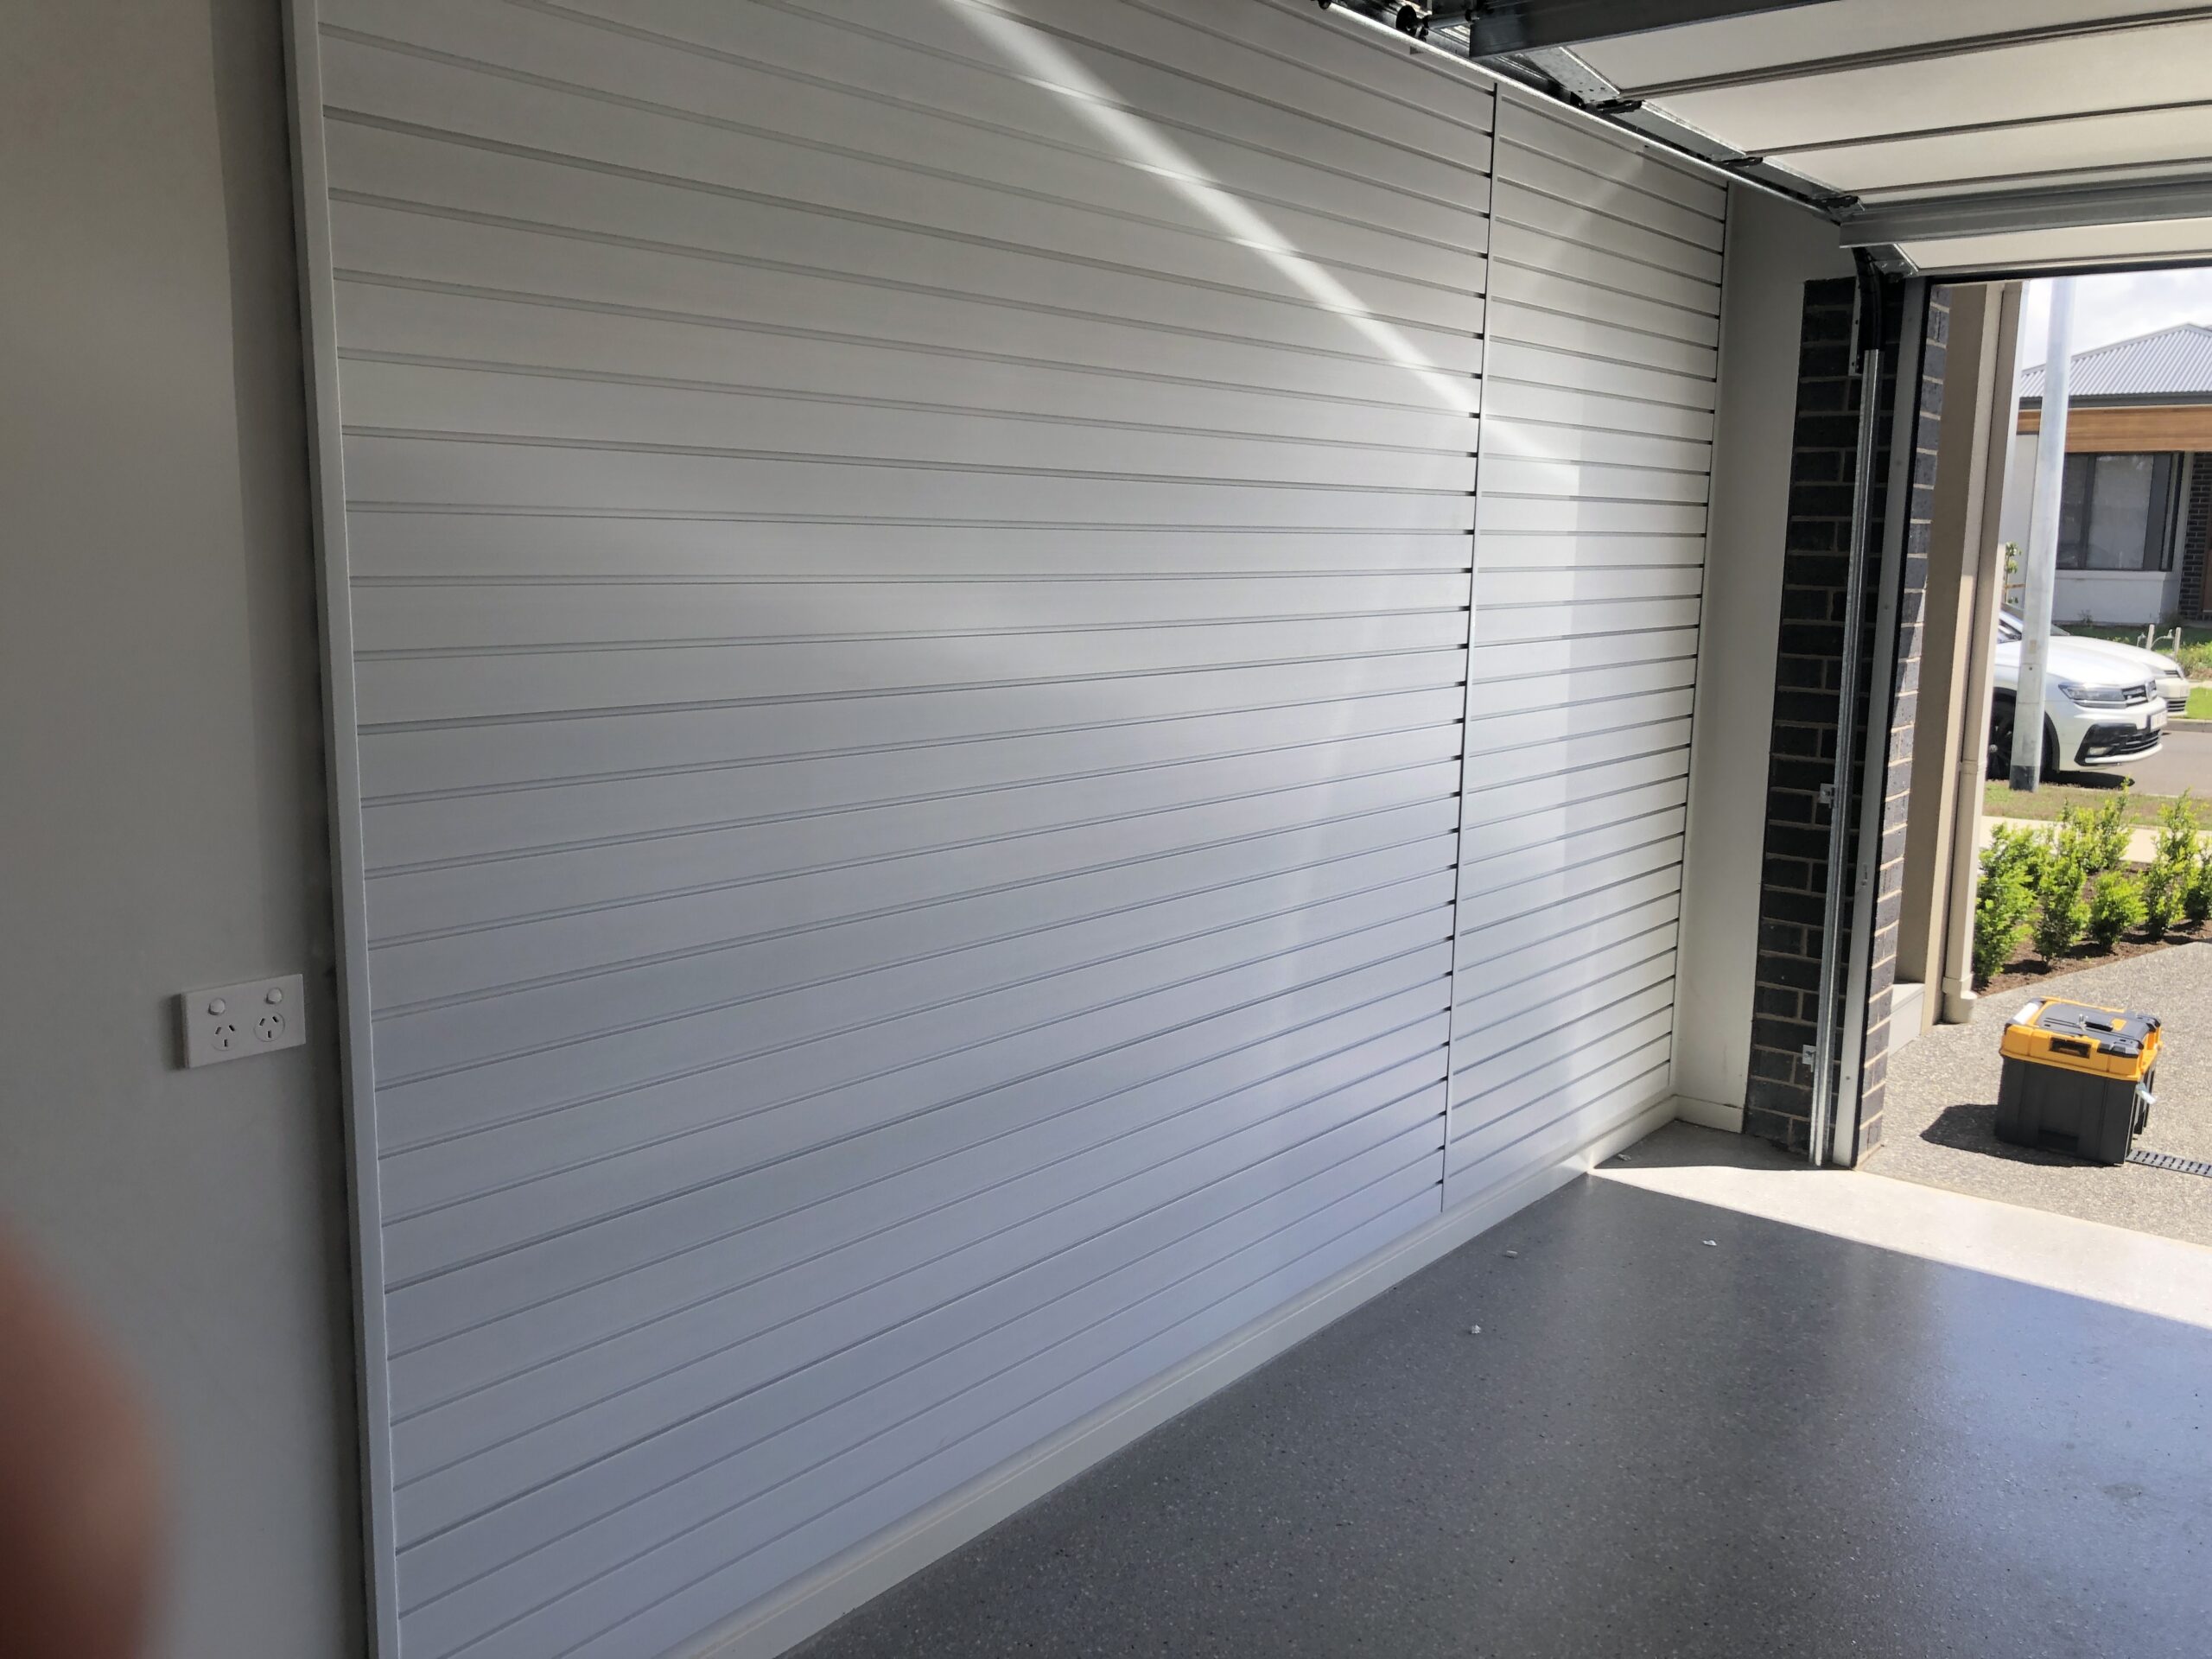
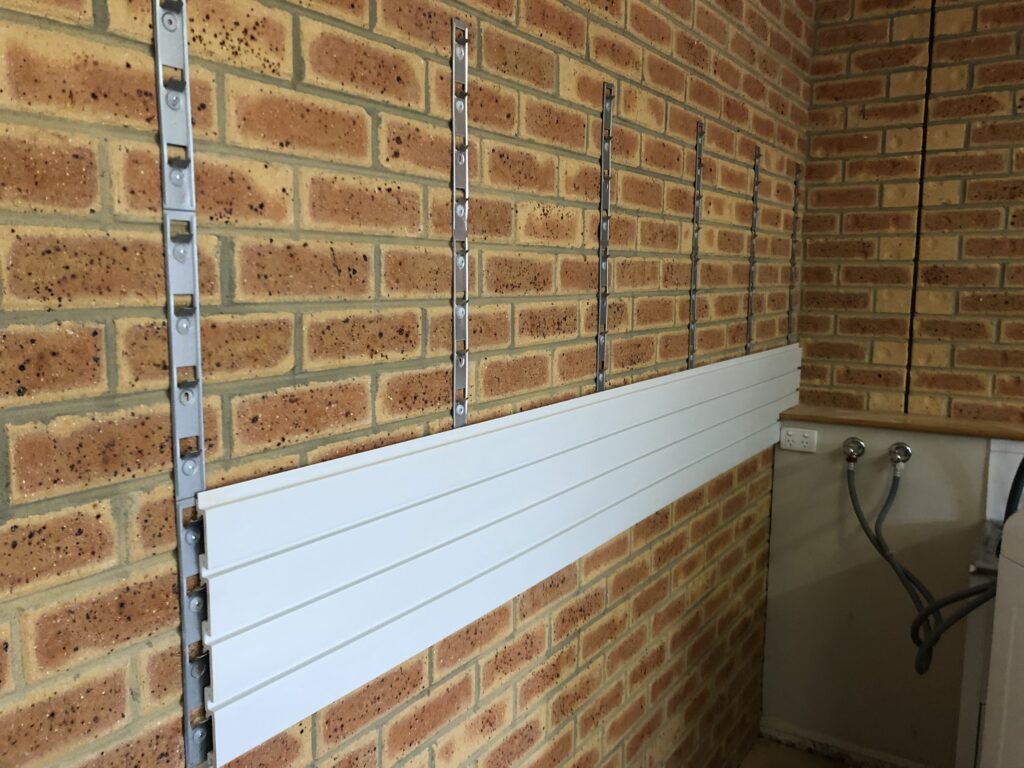
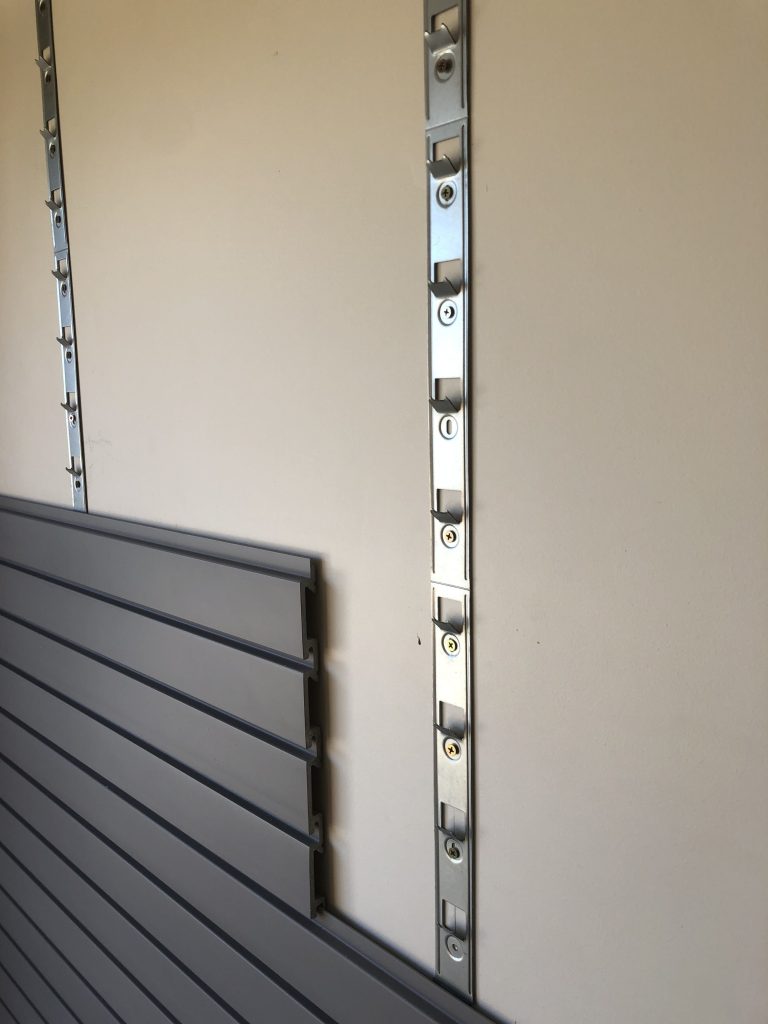
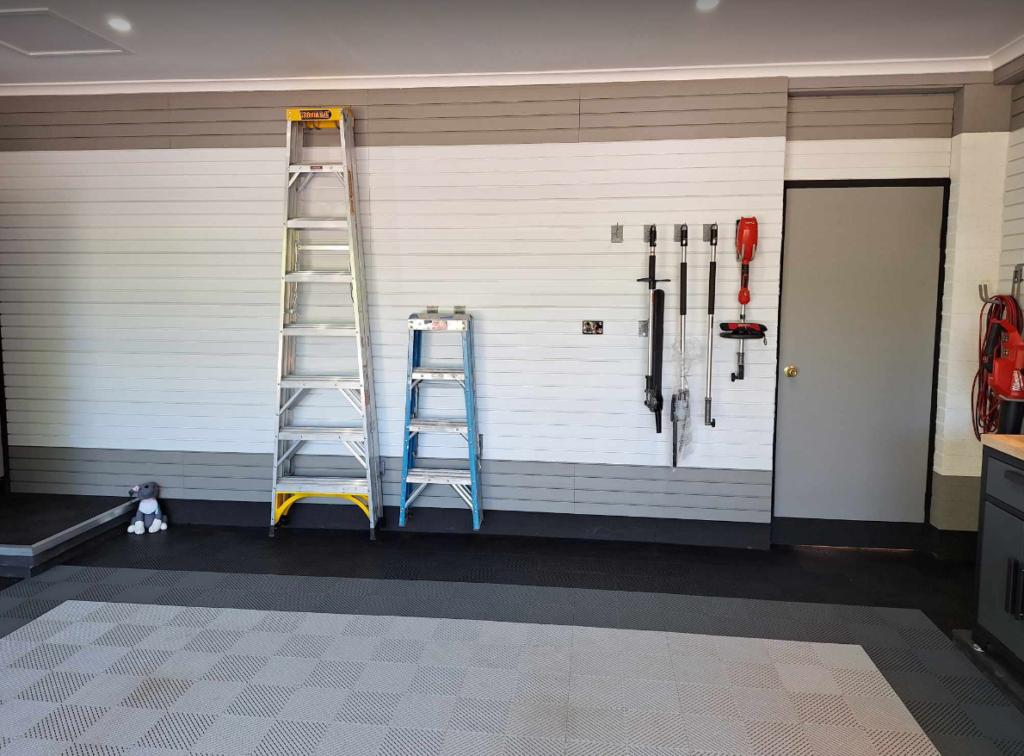
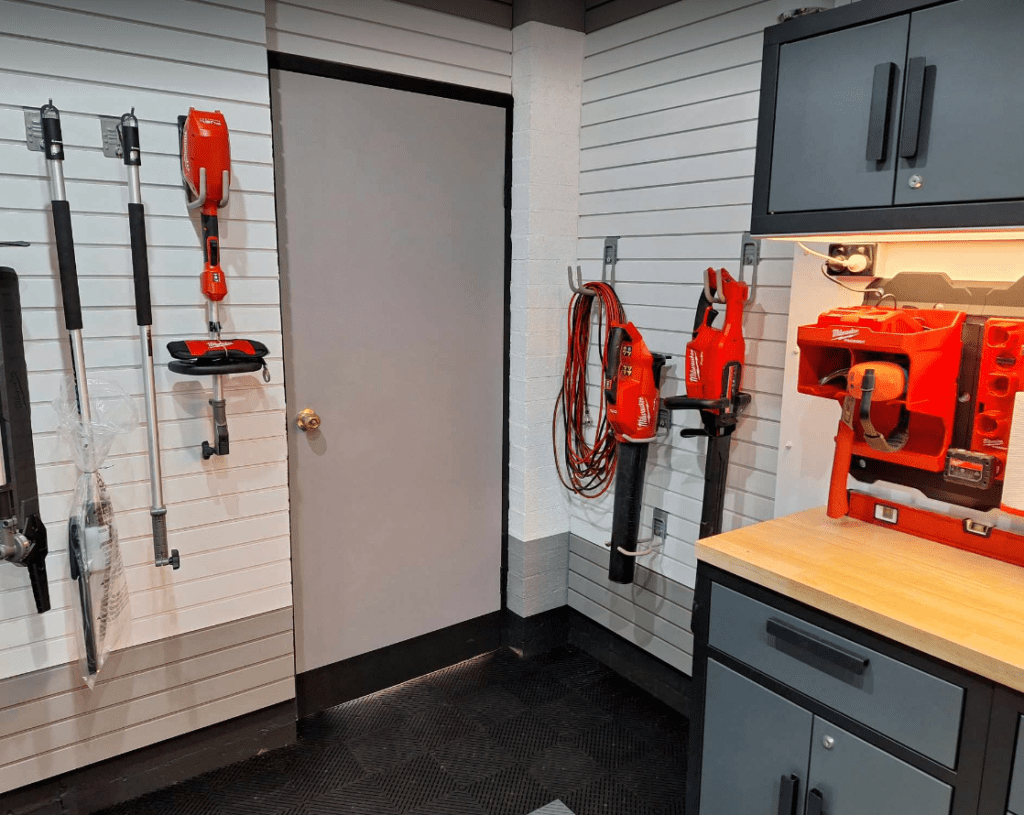
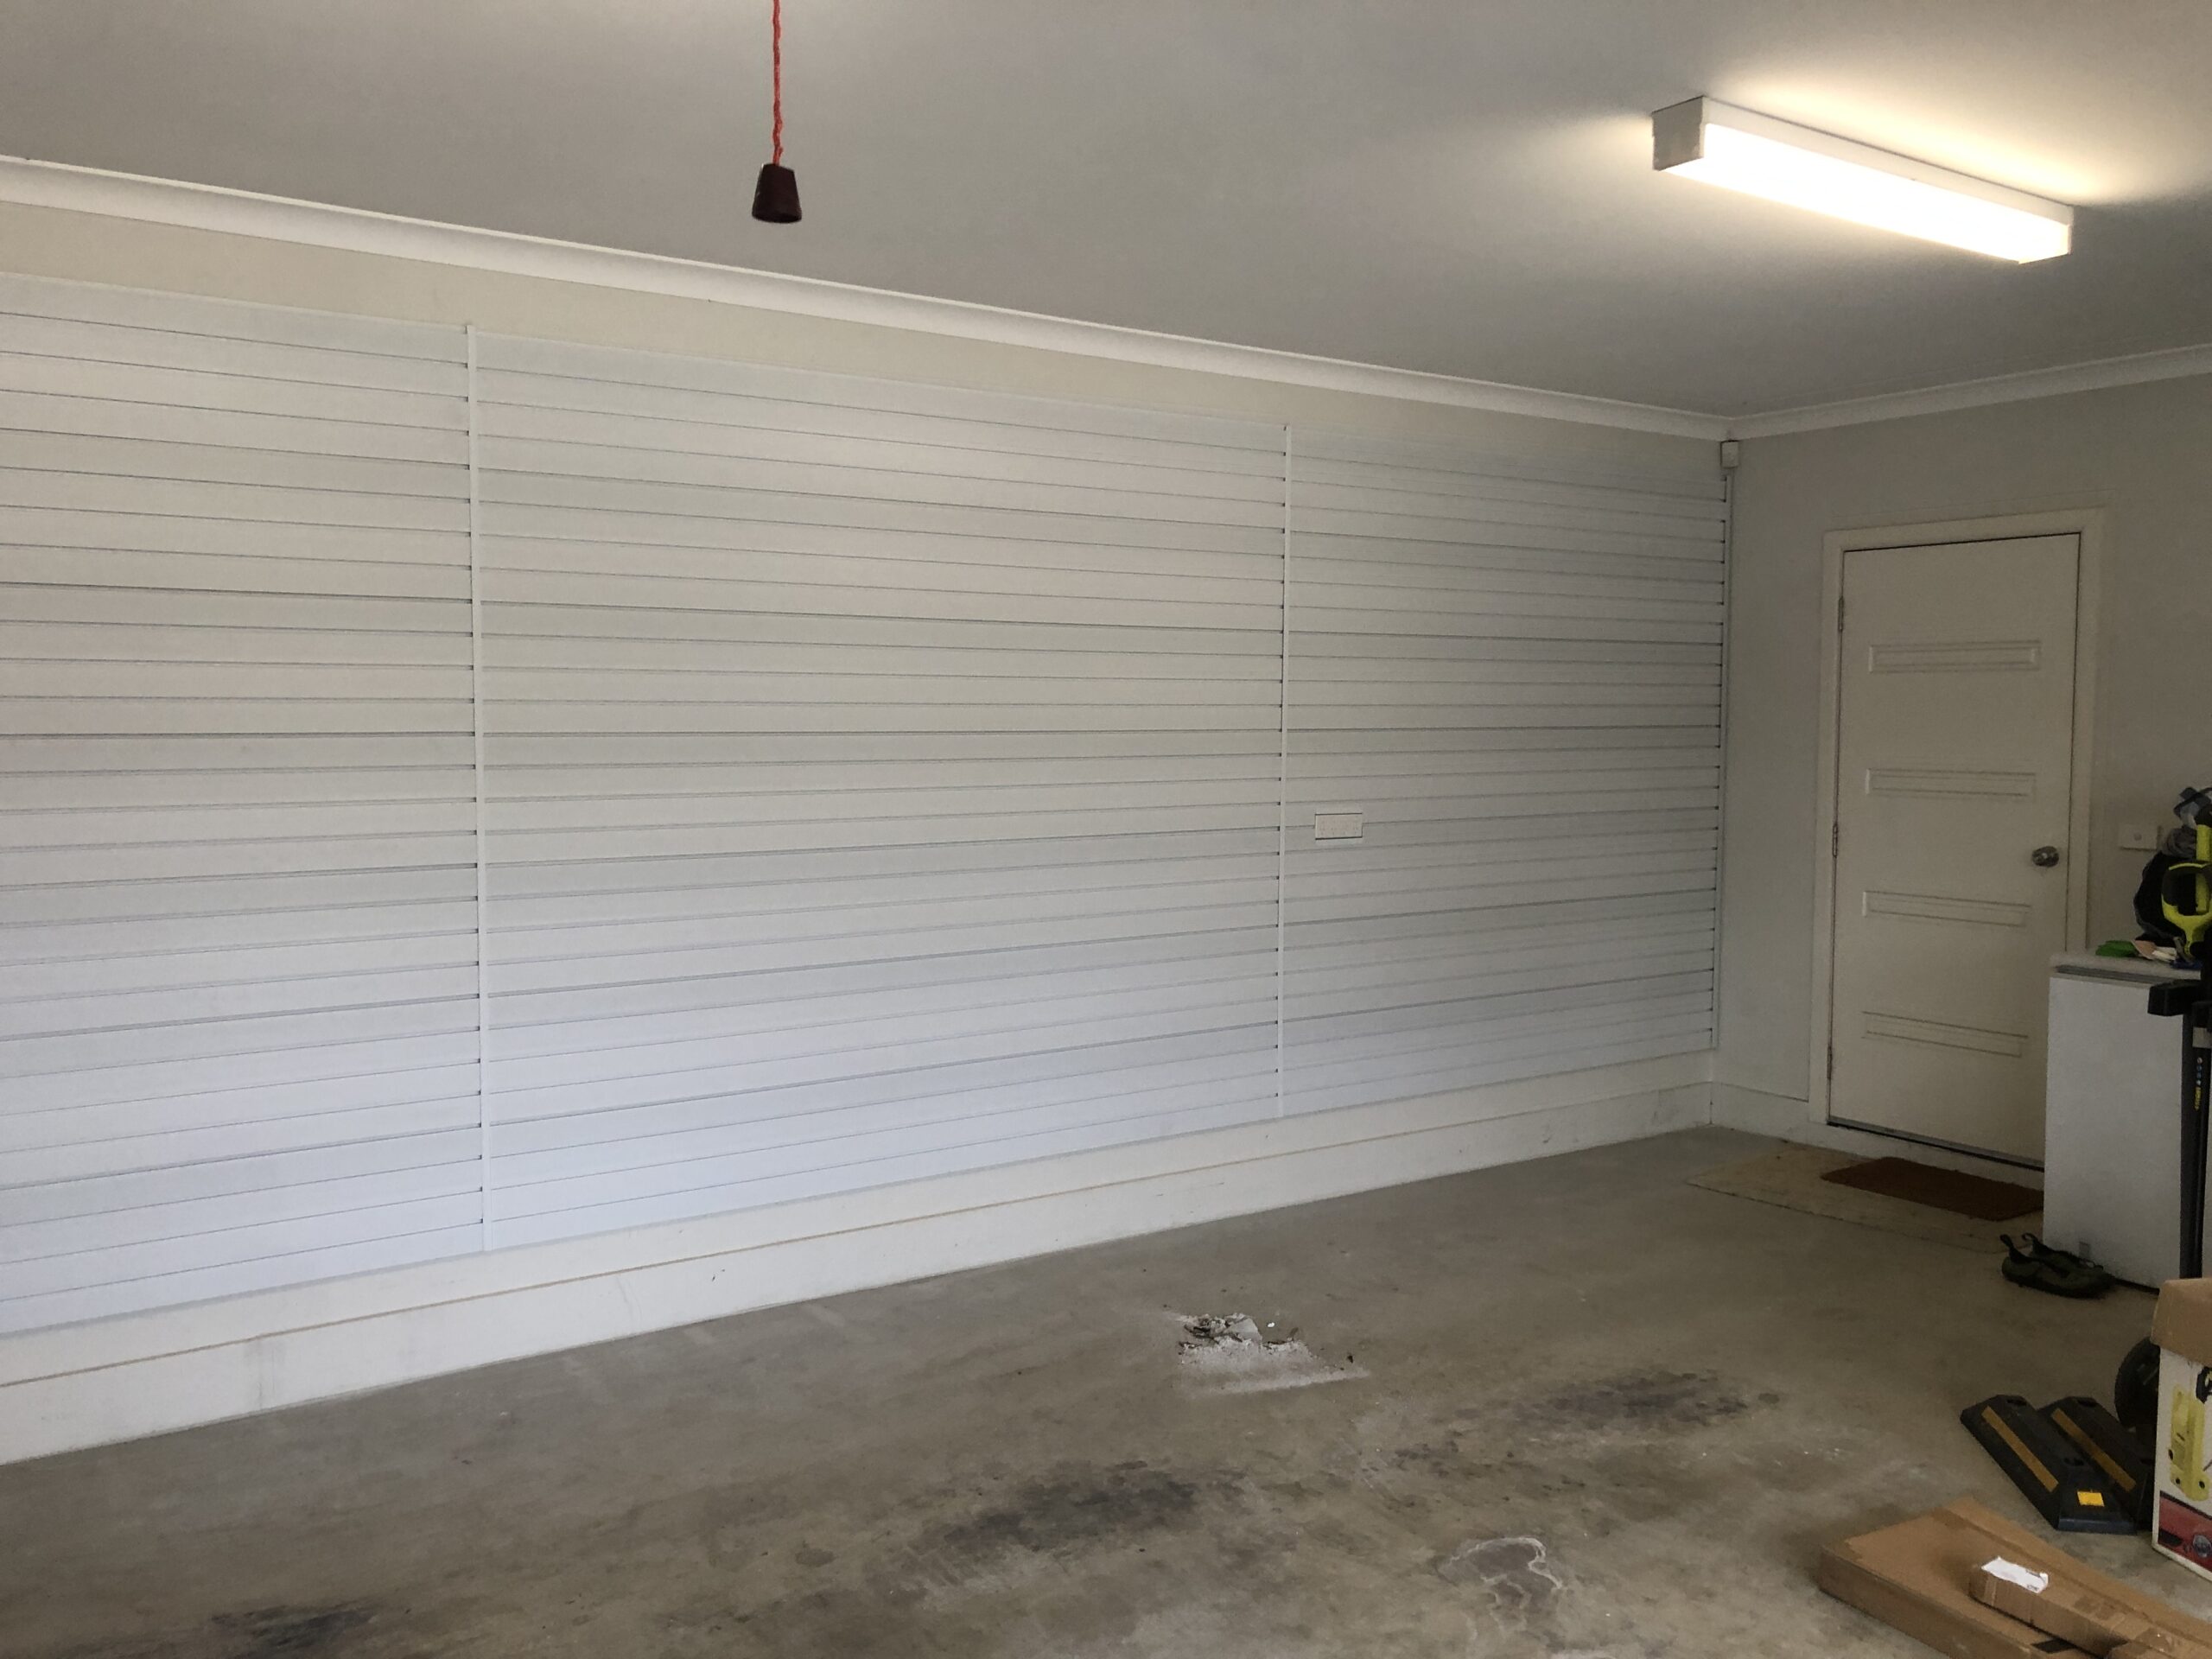
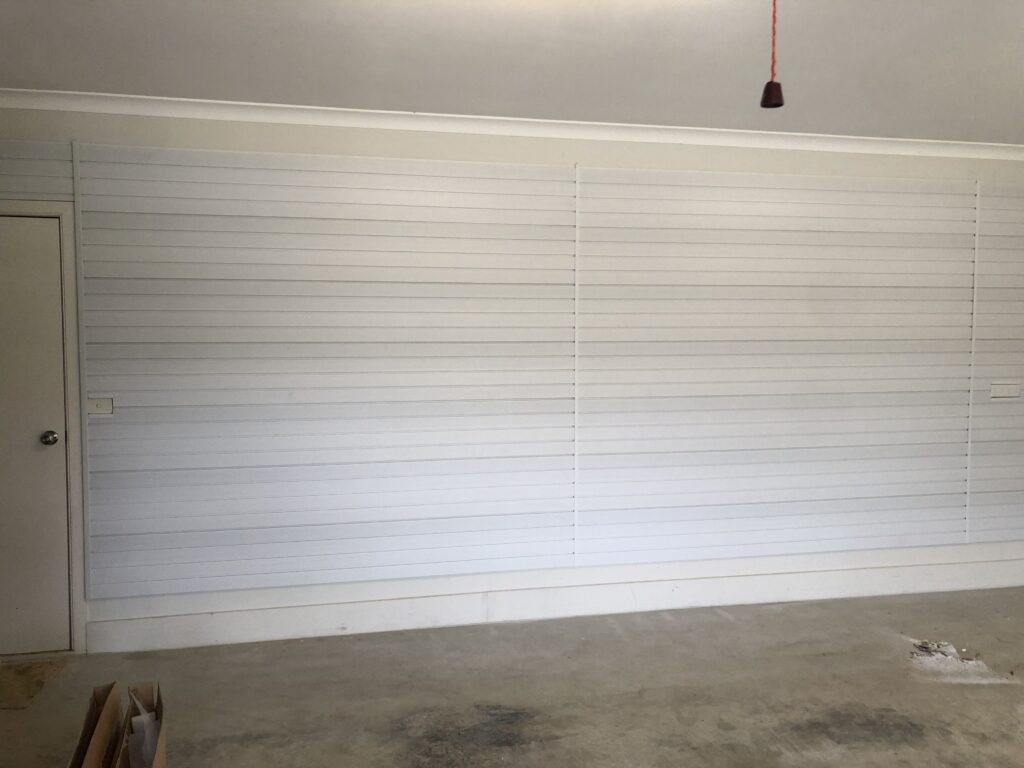
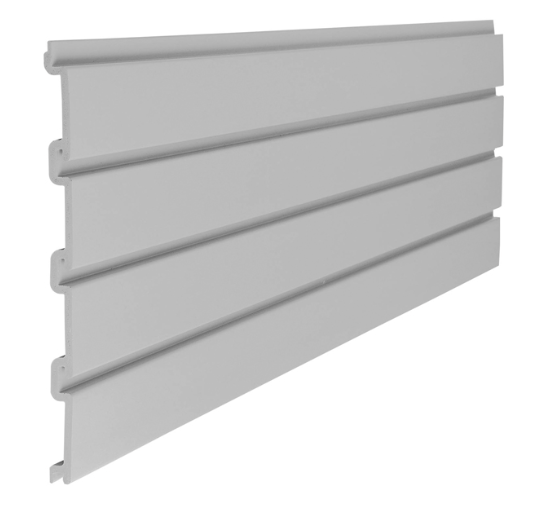
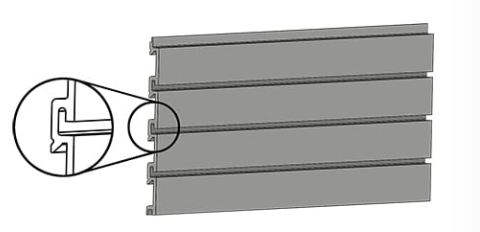
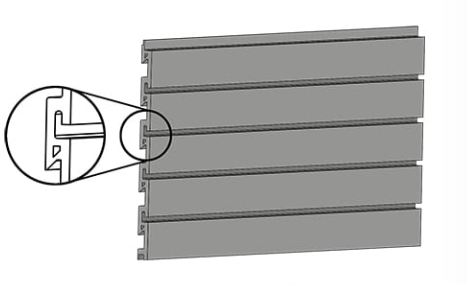
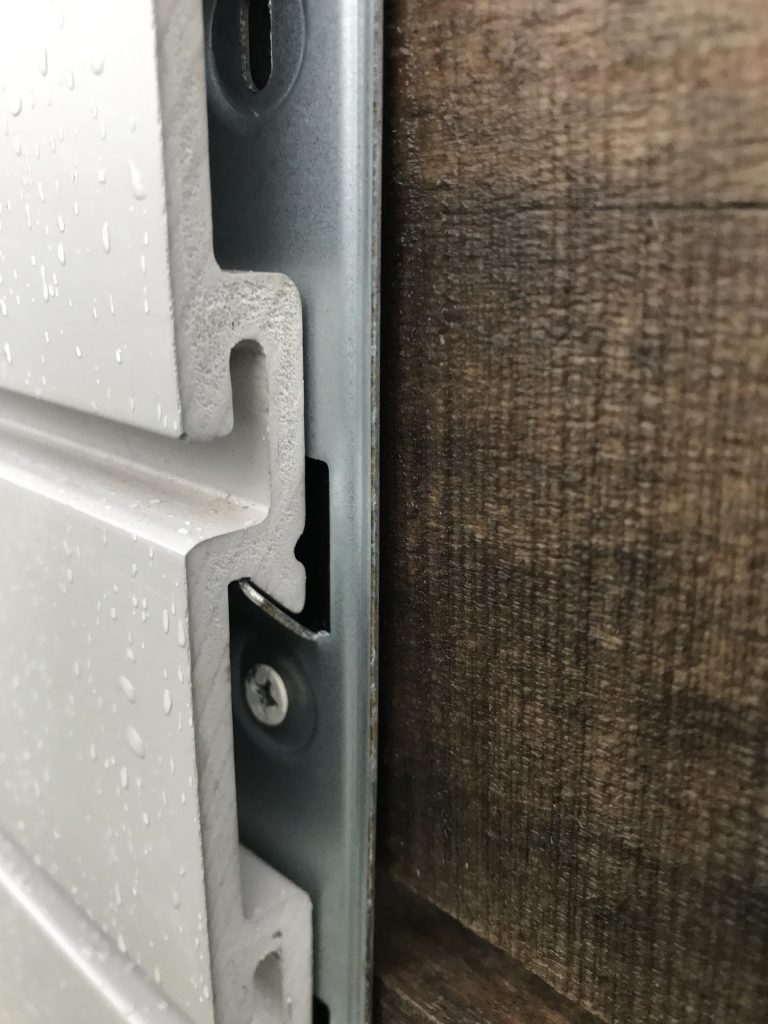
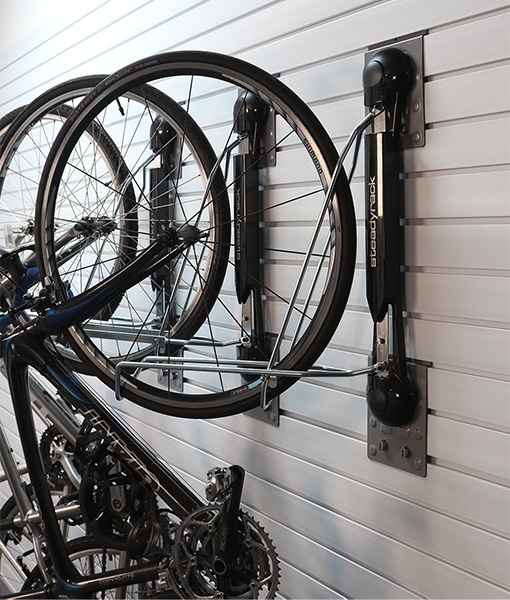
  • Utilise your walls: Wall storage solutions allow you to maximise the height and width of your walls as storage areas. Garage wall storage solutions enable the use of hooks, baskets, and shelves to safely store everything from sporting goods to power tools and even work boots.
  • Regular Decluttering: Setting aside time to sort through items and dispose of or donate those that are no longer needed can significantly reduce clutter.
  • Designating Spaces: Assigning specific areas within the garage for different types of items can help maintain organization.
  • Investing in Multipurpose Furniture: For garages used as multipurpose spaces, furniture that offers storage can be particularly useful.
  • Embracing Minimalism: Adopting a more minimalist approach to possessions can prevent the garage from becoming a catch-all storage space.

In conclusion, the cluttered state of Australian garages is a multifaceted issue influenced by lifestyle changes, architectural design, and consumer habits, among other factors. By acknowledging these causes and implementing practical solutions, you can reclaim your garage, transforming it into an organised, and functional space.

Posted on

Creating a home gym

Creating a home gym in your garage can be an exciting yet challenging project that requires careful planning and execution. A well-designed garage gym not only offers convenience and privacy but can also be tailored to meet your specific fitness goals. This article will guide you through the process, from conceptualisation to completion, ensuring that your home gym is both functional and motivating.

1. Assessing Your Space

The first step in creating a home gym is to assess the available space in your garage. Consider the size and layout to determine what equipment you can accommodate without cluttering the space. It’s important to keep enough room for movement and to perform exercises safely. Measure the area and sketch a rough layout to visualise where everything will fit.

2. Setting Your Fitness Goals

Before purchasing equipment, define your fitness goals. Whether you’re looking to build muscle, improve cardiovascular health, or enhance flexibility, your goals will dictate the type of equipment you need. This focus will help you create a space that serves your needs without unnecessary expenses on equipment that won’t be used.

3. Choosing the Right Equipment

Selecting the right equipment is crucial for a home gym. Opt for versatile, space-saving pieces that offer a wide range of exercises. For strength training, consider adjustable dumbbells, a bench, and a squat rack. For cardio, a treadmill or stationary bike can be great choices. Don’t forget about mats for floor exercises and stretching.

4. Flooring

Proper flooring is essential in a garage gym to protect both your equipment and the garage’s original floor. Rubber mats or interlocking foam tiles are popular choices. They provide shock absorption, reduce noise, and offer a stable surface for workouts.

5. Ventilation and Lighting

Garages can be poorly ventilated and dimly lit, which is not ideal for a workout space. Improve ventilation by installing fans or an air conditioning unit. Ensure there’s ample lighting to create an energising workout environment. Natural light is preferable, but bright, artificial lights can also work well.

6. Temperature Control

Garages can become extremely hot in summer and cold in winter. Consider installing a heating and cooling system or use portable heaters and fans to maintain a comfortable temperature year-round.

7. Storage Solutions

Efficient storage solutions will keep your gym organised and tidy. Use shelves, racks, baskets, and hooks to store weights, bands, and other equipment. This not only helps in maximising space but also ensures safety by keeping the floor clear.

8. Decor and Motivation

The ambiance of your gym can significantly impact your motivation to workout. Consider painting the walls in vibrant colors, adding motivational posters, or installing a sound system for music. Personal touches will make the space more inviting and inspiring.

9. Safety Measures

Ensure your gym is safe to use by regularly inspecting equipment for wear and tear and keeping the area free of hazards. Also, consider installing mirrors to check your form and prevent injuries.

10. Budgeting and Cost

Creating a home gym can be expensive, but there are ways to minimize costs. Start with the basics and gradually add equipment over time. Look for second-hand equipment or discounts and sales at fitness stores.

Creating a home gym – Conclusion

Creating a home gym in your garage is a rewarding project that can enhance your fitness journey. By carefully planning the layout, selecting the right equipment, and creating an inspiring environment, you can build a gym that meets your needs and motivates you to achieve your fitness goals. Remember, the key is to start simple and expand as your needs and interests grow. With dedication and effort, your garage can transform into a personalized fitness haven.

Posted on

The Rise of the Spare Kitchen in the Garage

kitchen in the garage

The concept of a spare kitchen has traditionally been associated with luxury homes, but as residential living spaces become more multifunctional, the trend of installing a secondary kitchen in the garage is gaining traction among homeowners seeking to maximize their space. This article delves into the practicalities and benefits of creating a fully functional spare kitchen in the garage, a trend that’s reshaping how we think about home efficiency and entertaining.

Understanding the Spare Kitchen Concept

A spare kitchen in the garage is more than just an overflow area; it’s a complete setup that replicates the functionality of a primary kitchen. This auxiliary space often includes essential appliances, ample countertop space, and storage solutions, making it an ideal spot for meal prep during large gatherings, canning, brewing, or as a dedicated space for cooking pungent foods that could otherwise permeate the entire house.

Benefits of a Garage Kitchen

1. Entertainment Hub: A garage kitchen serves as the perfect entertainment hub, especially when the garage doubles as a social space for hosting parties, family get-togethers, or sporting events. It keeps the main house free of traffic and mess during large events.

2. Home Value Addition: A well-designed and constructed spare kitchen can add significant value to a property, appealing to potential buyers looking for versatile and functional spaces.

3. Versatility for Hobbies: For those who indulge in culinary hobbies like home brewing, wine making, or preserving, a garage kitchen provides a dedicated area to enjoy these activities without cluttering the main kitchen.

Planning Your Garage Kitchen

1. Space Assessment: Evaluate the available space in your garage to accommodate a kitchen setup. Consider the layout that best suits your needs and available square footage.

2. Appliance Selection: Choose appliances that fit the scale of your garage kitchen. Compact or multi-use appliances can save space while still providing necessary functionality.

3. Storage Solutions: Efficient cabinetry and shelving are vital to keeping your garage kitchen organized. Opt for durable materials that can withstand temperature fluctuations commonly found in garages.

4. Ventilation: Proper ventilation is crucial, especially in a confined space like a garage. Investing in a good range hood and ensuring adequate airflow will maintain a comfortable environment.

5. Utility Access: Ensure that your garage has the necessary plumbing, electrical, and gas lines to support a kitchen. This may require professional installation and adherence to local building codes.

6. Décor and Comfort: A garage kitchen doesn’t have to be purely utilitarian. Adding personal touches with décor, lighting, and comfortable seating can create an inviting atmosphere.

Legal and Safety Considerations

Before embarking on the construction of a garage kitchen, it’s essential to check local zoning laws and building codes. Safety is paramount, so all installations should comply with regulations, and the use of fire-resistant materials is recommended. It’s also wise to consult with an insurance agent to understand how a garage kitchen may affect your home insurance policy.

Conclusion

The addition of a spare kitchen in the garage is a smart solution for homeowners looking to enhance their living space. It offers the convenience of extra cooking space, acts as an alternative gathering spot, and can be tailored to suit various hobbies and activities. With proper planning, design considerations, and adherence to safety standards, a garage kitchen can become one of the most valuable and enjoyed spaces in your home.

Posted on

PVC Slatwall Panels

pvc slatwall panels

The Benefits of PVC-Based Slatwall Panels

In the realm of modern storage and organization, PVC slatwall panels are becoming increasingly popular for their versatility, durability, and aesthetic appeal. These panels offer an ingenious solution to cluttered spaces, particularly in retail, workshops, and garages. This article explores the numerous benefits of PVC-based slatwall panels and why they are an excellent choice for both commercial and residential storage needs.

Durability and Longevity

Resistant to Wear and Tear: PVC, or polyvinyl chloride, is known for its strength and durability. PVC slatwall panels can withstand significant wear and tear, making them ideal for high-traffic areas or spaces that require storing heavy items.

Moisture and Rot Resistant: Unlike traditional wood or MDF (Medium-Density Fiberboard) panels, PVC is impervious to moisture and humidity. This resistance to water ensures that the panels do not rot, warp, or swell, maintaining their structural integrity over time.

Versatility in Usage

Customizable Storage Solutions: PVC-based wall panels are equipped with horizontal grooves that can accommodate a variety of hooks, shelves, bins, and racks. This versatility allows users to customize their storage setup to fit their specific needs and can be easily reconfigured as those needs change.

Wide Range of Applications: From displaying products in retail stores to organizing tools in a garage, PVC slatwalls are adaptable to a multitude of environments and purposes.

pvc garage wall panels

Aesthetic Appeal

Sleek and Modern Look: PVC wall panels offer a clean and modern look that can enhance the aesthetic of any space. With a variety of colors available, they can be seamlessly integrated into any interior design scheme. Checkout our garage gallery for examples of Australian homes using StoreWALL’s garage wall panels.

Hide Clutter Effectively: By providing a designated space for each item, these panels help maintain an organized and clutter-free environment, which is visually pleasing and easier to navigate.

Space Efficiency

Maximizing Wall Space: PVC garage wall panels are an excellent way to utilize vertical space effectively, especially in areas where floor space is limited. By organizing items vertically, these panels free up valuable floor space. Think about ladders, bikes, tubs, and sports equipment. Off the floor and onto the wall makes good sense.

Easy Installation and Maintenance

Simple Set-Up: Installing PVC slatwall panels is relatively straightforward, making them a viable option for DIY enthusiasts. The panels can be cut to fit any space and are generally easy to mount.

Low Maintenance: PVC garage panels require minimal upkeep. They are easy to clean and do not need any special treatments or coatings to maintain their appearance and functionality.

Cost-Effective

Affordable Storage Solution: While offering a multitude of benefits, PVC slatwall panels are also cost-effective. Their durability means they can last a lifetime, and their flexibility reduces the need for additional storage furniture or systems.

PVC Slatwall Panels – Verdict

PVC-based slatwall panels present a compelling solution for efficient, durable, and aesthetically pleasing storage. Their adaptability to various environments, combined with the ease of installation and maintenance, makes them an ideal choice for both residential and commercial spaces. As storage needs continue to evolve, PVC slatwalls stand out as a practical, stylish, and economical option that meets the dynamic requirements of modern organization and display.

Posted on

Organised and clutter-free garage

In the quest for an organised and clutter-free garage, homeowners are turning to innovative storage solutions, and one of the most effective approaches is investing in garage wall storage systems. These systems not only optimize available space but also provide a sleek and efficient way to store tools, equipment, and other essentials. Let’s delve into the benefits and options for garage wall storage solutions.

organized and clutter-free garage

Maximizing Vertical Space

Garage wall storage solutions capitalize on often underutilized vertical space. Slatwall panels, for instance, transform empty walls into versatile storage hubs. With panels constructed from durable materials like PVC Thermoplastic, they offer strength, durability, and the flexibility to accommodate various accessories.

Versatile Panel Options

Homeowners can choose from a range of panel options tailored to their specific needs and budgets. Basic Duty panels serve as an entry-level option, perfect for home applications, while Standard Duty and Heavy Duty panels cater to more robust storage requirements in garages and workshops. These panels are available in an array of colors, providing both functionality and aesthetics.

Customization and Flexibility

One of the key advantages of garage wall storage solutions is the ability to customize and rearrange accessories easily. Hooks, shelves, baskets, and bins can be effortlessly moved around on the slatwall panels, adapting to changing storage needs. This flexibility ensures that the storage system grows with the user and you maintain an organised and clutter-free garage.

Easy Installation

Installing garage wall storage solutions is a straightforward process. Most systems, like StoreWALL, offer simple DIY installations with the option to add InstallStrips for enhanced strength. These panels can be cut to size using basic tools, allowing for a tailored fit to any garage space.

Organizing with Accessories

To further enhance the storage capabilities of garage wall solutions, a variety of accessories are available. From heavy-duty hooks for tools to versatile shelves and baskets for miscellaneous items, these accessories provide a designated place for every tool or belonging, keeping the garage neat and accessible.

In conclusion, garage wall storage solutions offer an efficient and aesthetically pleasing way to conquer clutter and reclaim valuable floor space. Whether it’s a basic system for light home use or heavy-duty solutions for workshop needs, investing in garage wall storage is a strategic step towards an organized and functional space. Transform your garage into a well-ordered haven, where tools and equipment are not only stored but showcased in a systematic and accessible manner.

Posted on

Summer Cleaning: Transform Your Garage Into an Organised Oasis

White Garage Slatwall

As the warmer months emerge and we start to spend more time outdoors, it’s the perfect time to tackle that long-neglected space – the garage. Over the colder months, garages often become a dumping ground for all things seasonal, leaving us with a cluttered and chaotic space. This spring/summer, let’s embark on a journey to reclaim our garages and transform them into organised oases of functionality. Follow these steps to efficiently clean out and transform your garage.

transform your garage

Set a Clear Goal

Before diving headfirst into the cleaning process, set a clear goal for your garage. Determine how you want the space to function and what items are essential to keep. Whether it’s creating a workshop, a storage area, or a home gym, having a vision will guide your decisions throughout the cleaning process.

Empty Everything Out

To effectively clean and organize your garage, start by removing everything from the space. This allows you to see the extent of your possessions and provides a clean slate for reorganization. As you empty the garage, sort items into categories – keep, donate, sell, or discard. Be ruthless in your decision-making to prevent unnecessary items from finding their way back into your newly organized space.

Deep Clean

With the garage emptied, take the opportunity to give it a thorough cleaning. Sweep the floors, dust surfaces, and consider pressure washing if needed. Check for any signs of pest infestations or water damage that may have occurred during the winter months. Addressing these issues early on will contribute to a clean and healthy environment.

Evaluate Storage Solutions

Assess your storage needs based on the categories you’ve established. Invest in shelves, cabinets, and storage bins to keep items off the floor and neatly organized. Utilise vertical space to maximize storage capacity and create a designated area for each category of items. Clear storage bins are particularly useful, allowing you to see the contents without having to open each one.

Organise and Label

As you begin to reintroduce items into the garage, organise them based on frequency of use and functionality. Create zones for specific activities or types of items, such as gardening tools, sports equipment, and seasonal decorations. Labeling bins and shelves will make it easier to locate items when needed and maintain the organization over time.

Create a Maintenance Plan

To ensure your newly organised garage remains clutter-free, establish a maintenance plan. Schedule regular cleanouts and decluttering sessions to prevent items from piling up. Encourage family members to adhere to the organisation system and designate specific places for frequently used items to be returned after use.

Donate, Sell, or Dispose

Dispose of unwanted items responsibly. Donate usable items to local charities, sell items online or at a garage sale, and dispose of non-recyclable or non-donatable items properly. Recycling centers and waste management facilities often have specific guidelines for different materials.

Embarking on a spring/summer cleaning journey for your garage may seem like a daunting task, but the rewards of an organised and functional space are well worth the effort. With a clear vision, strategic planning, and a commitment to maintaining order, you can transform your garage into an oasis of efficiency and accessibility. This spring/summer, reclaim your space and enjoy the benefits of a tidy and well-organised garage.

Posted on

Securing Your Slatwall Panels

Securing Your Slatwall Panels

StoreWALL’s garage wall panels are designed to be installed with Installstrips. Installstrips are what we use to effectively secure your slatwall panels.

I was told earlier this week, that another local supplier of PVC slatwall panels (no affiliation with StorewALL) recommends that they be secured to the wall using Liquid Nails or a similar professional adhesive. Maybe I had misunderstood. I hope so.

Securing Your Slatwalls with Adhesive

Let’s assume it is correct, what is wrong with this approach?

If all I was hanging on my slatwall panels were lightweight screwdrivers, paper rolls, and maybe some clothing, it would probably be OK. However, you must consider what you are securing your Slatwall panels to. If your wall is plastered which most are, then the adhesive is secured to the paper face of the plaster, nothing more. You might add a few screws here and there but all you still have is the paper holding onto the PVC slatwall panel. Not good.

What about securing your slatwall panels using adhesive to a brick wall? This is better, but still not great. At least the brick wall surface is the actual brick wall, not an outer layer that can peel away.

What about the holding capacity of the slatwall panel? The adhesive might hold the panel to the wall but does it do anything to help hold the weight, 12 months from now, 3 years from now?

I would also add that any specifications listed by the supplier for wall panel strength and storage capacity needs to be retested for this novel installation method.

What makes installstrips better?

Installstrips are made from steel. Each one holds a minimum of 12 screw holes. You screw through the installstrip and onto the stud behind the plasterboard. Or you screw into the actual brickwork. Therefore not only do you have the strength of the installstrip supporting the slatwall panel, you also have the fastener and its grip on the wooden stud or brick.

Securing Your Slatwall Panels
Installstrips on a brick wall

Securing Your Slatwall Panels
Installstrips on a plastered wall

Removing Your Slatwalls

Should you ever need to remove your slatwall panels, installstrips allow you to do this with very little effort. You don’t even need a screwdriver. When installed with Installstrips, the panels hang on the installstrips, so they can be lifted and removed. You won’t damage the panels and they can be returned when your work is done.

Let’s assume you used adhesive to secure your slatwall panels, and at some stage you needed to remove one panel? If that panel was at the bottom, the whole wall would need to be ripped off the plasterboard or brickwork. A disaster!

Check Before You Buy

A garage renovation just like any enhancement to your home requires an investment. Before you order your slatwall panels or agree to have a company install them for you, check how they will be installing them.

If the supplier doesn’t use Installstrips, then ensure that they will still fasten the slatwalls to your wall using screws or brick fasteners.

Posted on

Garage Wall Panel Colours

garage wall panels colours

Revitalize Your Garage with StoreWALL’s Diverse Range of Garage Wall Panel Colors

Explore Premium Wall Storage Solutions in Australia

Embark on your garage makeover this spring with StoreWALL, offering an exceptional range of garage wall panels, known for their unique shape, strength, and vibrant color options. StoreWALL is committed to providing top-notch wall storage solutions in Australia, catering to various preferences and needs.

Discover StoreWALL’s Three Grades of Garage Wall Panels:

  • Heavy Duty Panels: StoreWALL’s premium offering, these panels boast the highest weight capacity. Available colors include Brite White, Weathered Grey, and Global Pine, perfect for a robust and stylish setup.
  • Standard Duty Panels: Our most popular range, chosen by 90% of our customers for its excellent value in weight capacity and color variety. Colors include Brite White, Weathered Grey, Barnwood Grey, Whitewood, Rustic Cedar, Graphite Steel, and Black.
  • Basic Duty Panels: An affordable option for those on a budget, available in White and Grey.

You can compare our Garage Wall Panel range here using this comparison chart.

The StoreWALL Garage Gallery provides photos of many garages using StoreWALL Garage Wall Panels. It also offers many great examples of homes that have undertaken a garage makeover.

Success Story Spotlight – Mike’s Garage Makeover in Brisbane:

Mike’s project in Brisbane showcases the Standard Duty range, combining various lengths and two colors (Weathered Grey and Brite White) for a striking effect. Coupled with thoughtful paint choices and custom cupboards, Mike’s garage is a testament to the transformative power of StoreWALL’s solutions. The custom floor covering complements the wall panels, creating a cohesive and visually appealing space.

Elevate Your Garage with StoreWALL:

Whether you’re inspired by successful projects like Mike’s or have your unique vision, StoreWALL’s Garage Wall Panels offer the versatility and quality you need for a stunning garage transformation. Choose StoreWALL for a harmonious blend of strength, style, and functionality.

Posted on

White Garage Wall Storage Panels

Over the weekend we completed our latest installation of White Garage Wall Storage Panels. After several months of discussion with Stephen in Chelsea, we organised the installation of StoreWALL Brite White Wall panels across the back wall of his double garage.

The back wall of Stephen’s garage was 8m wide (which included a door) and 2.4m high. It was a plastered wall backing onto a rear Hebel wall (most likely formed part of his backyard.

White Garage Wall Storage Panels

White Garage Wall Storage Panels – Garage Wall Design

Based on pictures sent through by Stephen, we designed a StoreWALL installation with 3 Brite White panels across the length of the wall to cover the 7000mm plastered area. With a 2.4m total height, we used 7 Standard Duty panels to reach a height of 2150mm.

Finding the Studs

I use two different battery-powered Stud Finders. They both deliver different results. They are both wrong a lot of the time. It is always easier to drill a few holes and then use 450mm or 600mm spacing to test if the next stud is where you expect it. You usually need to drill a few more holes to ensure you find the actual outer edges of the studs.

With Stephens garage, the studs were 550 or so apart but there were some different spacings as well.

Garage Wall Vertical Spacing

Stephen’s garage was about 2.4m in height. The wall had a 150mm skirting board. This left us a total wall height of about 250mm. We split this allowing about 125mm at the top and the same above the skirting board. This is where we started our first Installstrip.

With just over 7000mm in length we marked out where each wall panel would start and end, ie 0, 2438, 2439, 4876, 4877, 7000mm. The first and second panel landed in between two installstrips so they didn’t require any additional support. The third (last panel) started a little too far from its closest Installstrip. In this case, we added an additional installstrip using metal screw-in fasteners.

Stacked Wall Panel Formation

For most Installations I have completed for customers, I have opted for the brickwork design. I have always thought it looked the nicest. It does however come with some challenges when joining wall panels. The issue is that the joins show. Some just have a thin line, others have a heavier one. This can come from the cut that was made to the panel (factory or manual). It can also be due to an uneven wall.

For Stephen’s installation, I opted to try the Stacked Wall formation. We used a Wide Trim at either end of the wall and a smaller joining trim along the wall at the two points where the panels would join.

I can say that using the stacked wall formation is easier than making the brick pattern and the look is just as good. I think having the joining trims on either side of each panel also gives them a little more support.

The joining trim we used was about 3m in thickness. We allowed for this when laying out our panels.

Power Outlets

Stephen’s wall had two power outlets. One was a power switch beside the door, at the beginning of the first panel. The second was a 4-gang PowerPoint at the beginning of the 3rd and final panel along the wall.

You can manage power outlets in 2 ways.

  • You can screw the outlet over the panel. To do this, you can cut a hole in the panel at the location of the outlet. The hole needs to be large enough to pass the power outlet through it.  Once you pass it through the hole, you can use longer screws to screw it back into its original bracket in the wall.
  • You can cut around the power outlet. Using a multi-tool or a jigsaw, you can cut a hole large enough so that it fits around the power outlet. This means you don’t need to unscrew it. You might want to use the joining trims to create a border around it.

For Stephen’s wall, we cut around the power outlet and added trim on the top and bottom of the hole we cut so that it framed it.

Labour Effort

In total, we installed 21 panels for this wall. It took two of us (myself and 15y/o child) about 7-8 hrs to complete the wall. We installed over 32 installstrip, each with 12 screws.

Posted on

Garage Storage Wall Panels

StoreWALL, Slatwall, Storpanels, Flexipanels, Handywall, Smartwall. These are all Garage Storage Wall Panels, but are they the same?

The majority of Garage Storage companies selling Slatwall or Wall Panels sell a solution that looks like the picture below. The panel is about 300mm in height and has grooves spaced every 74mm.

The garage wall panels are designed to sit on top of each other in order to cover an area of your wall. You will notice that the back of this panel has a rounded mold. It is designed to be screwed onto your wall with screws directly through the panel. This type of panel is not designed to be installed with any metal bracket for additional support.

These types of wall panels also have rounded grooves. This rounded profile is easier to produce, resulting in a cheaper wall panel. It also means that accessories locked into these grooves are held less securely as the edges are rounded.

StoreWALL Slatwall Panels

StoreWALL sells 3 grades of Garage Storage Wall Panels. Heavy Duty, Standard Duty, and Basic Duty. What makes StoreWALL different from every other Garage Wall Storage supplier is that our wall panels are designed to be installed with a supporting metal bracket that we call an Installstrip.

StoreWALL has a custom-designed installstrip for its Heavy Duty Panel and a separately custom-designed installstrip for its Standard Duty Panel.

StoreWALL Garage Storage Wall Panels
Standard Duty
Garage Storage Wall Panels
Heavy Duty

When you look at both the Heavy Duty and the Standard Duty panels you will notice that the back of the panel is not rounded. Rather, the mold is designed with a downward-pointing corner. This corner is used to latch onto the installstrip and secure the panel.

All of the weight on the panels from your stored items push downwards onto the installstrip. The strength of the installstrip and its fastening to the wall with 12 -15 screws/nails makes it a far superior installation method to simply screwing into the panel and onto the wall.

Without the installstrip, the strength of the solution relies entirely on the panel and the screws.

Furthermore, StoreWALL’s Standard and Heavy Duty Panels have grooves designed with straight square edges. This ensures that any accessories are securely held into the slatwall groove. In addition, our CamLok locking mechanism ensures they never fall off the wall.

Why do Installstrips Matter?

StoreWALL’s Installstrips are made from rolled steel and are galvanised. They are installed onto your wall with 12-15 screws or nails. Combined they allow your wall panels to securely support a lot more weight than a panel that is installed with just screws through the panel.

How much more weight?

The maximum weight that a 1.2m panel can support is:

  • Standard Duty – 56kgs (1219mm), 113kgs (2438mm)
  • Heavy Duty – 68kgs (1219mm)

Furthermore, using installstrips means you are not screwing through your wall panels, damaging them. They are kept clean with no screw holes.

steadyrack bike hook