
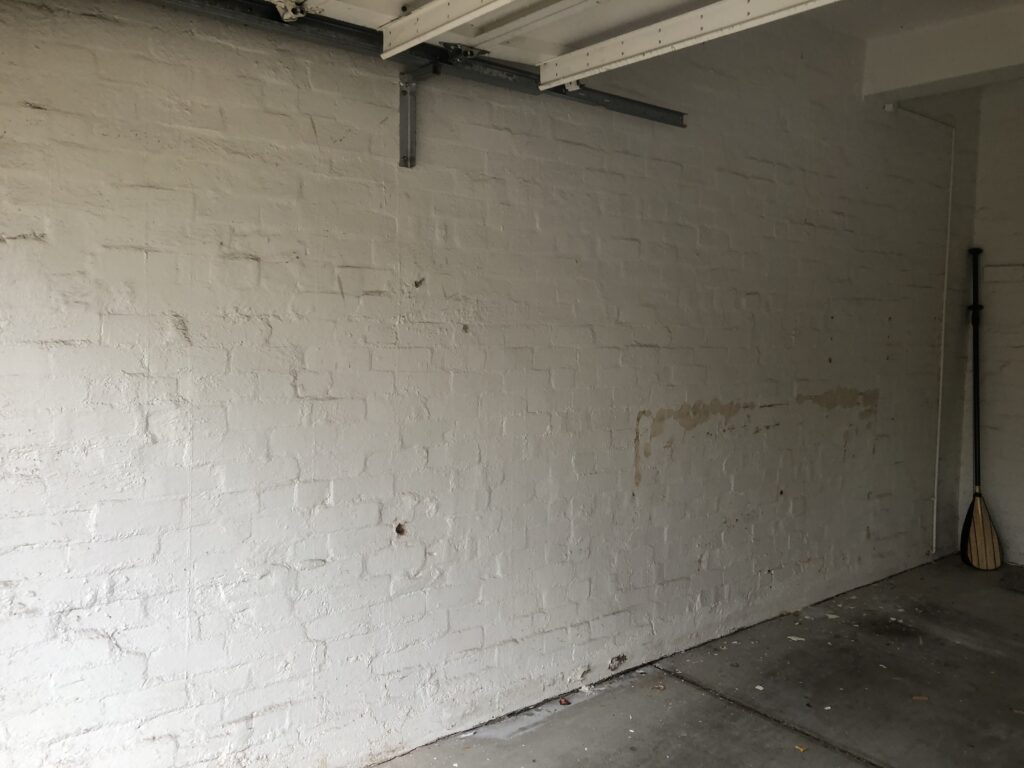
Our latest installation in the suburb of Toorak (Melbourne) was in an old garage made from solid red brick walls.
The garage had a couple of really old StorEase panels and some accessories. They were screwed straight into the wall. We removed these. The owner of this house was in the middle of undertaking some renovations and we were asked to install StoreWALL on both sides of the garage.
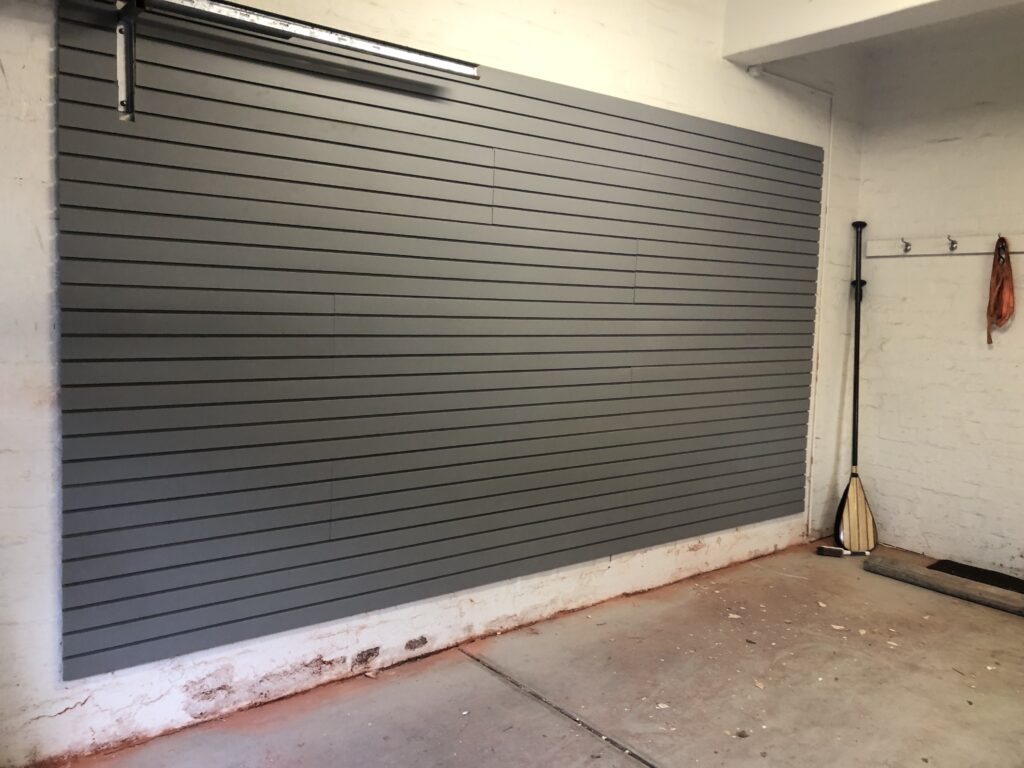
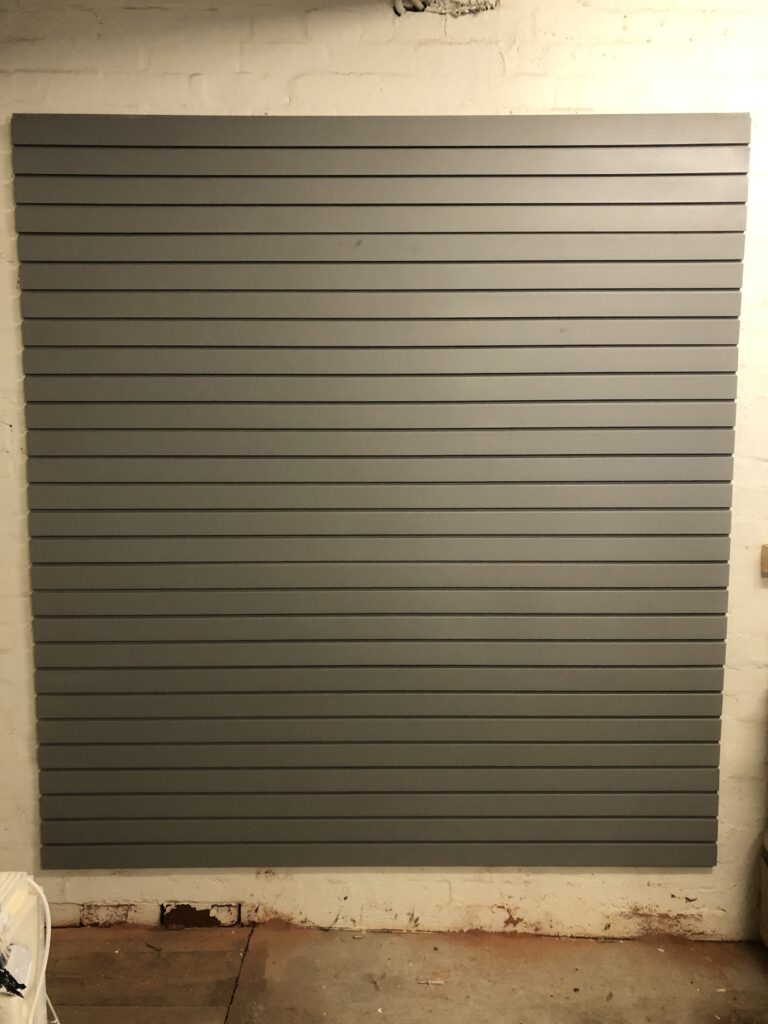
The first wall area measured 4m in length and 2.1m in height. On the opposite side, we installed a smaller section of 2m x 2.1m.
Wall 1 – 4m Solid Red Brick Walls
For Wall 1, we used 1 x 2.4m panel plus a second 1.5m panel. This gave us our 4m. We also used the smaller off-cuts in the wall in order to reduce waste. To reach the 2.1m height we used 7 x Standard Duty Slatwall Panels.
I have installed lots of brick wall garages. Old and new. Many older homes have sold red brick walls. These are tough bricks to drill into. The other challenging feature of these garage walls was just how irregular they were. To cover this up they had semi-rendered the walls and painted them so they looked smooth (kind of).
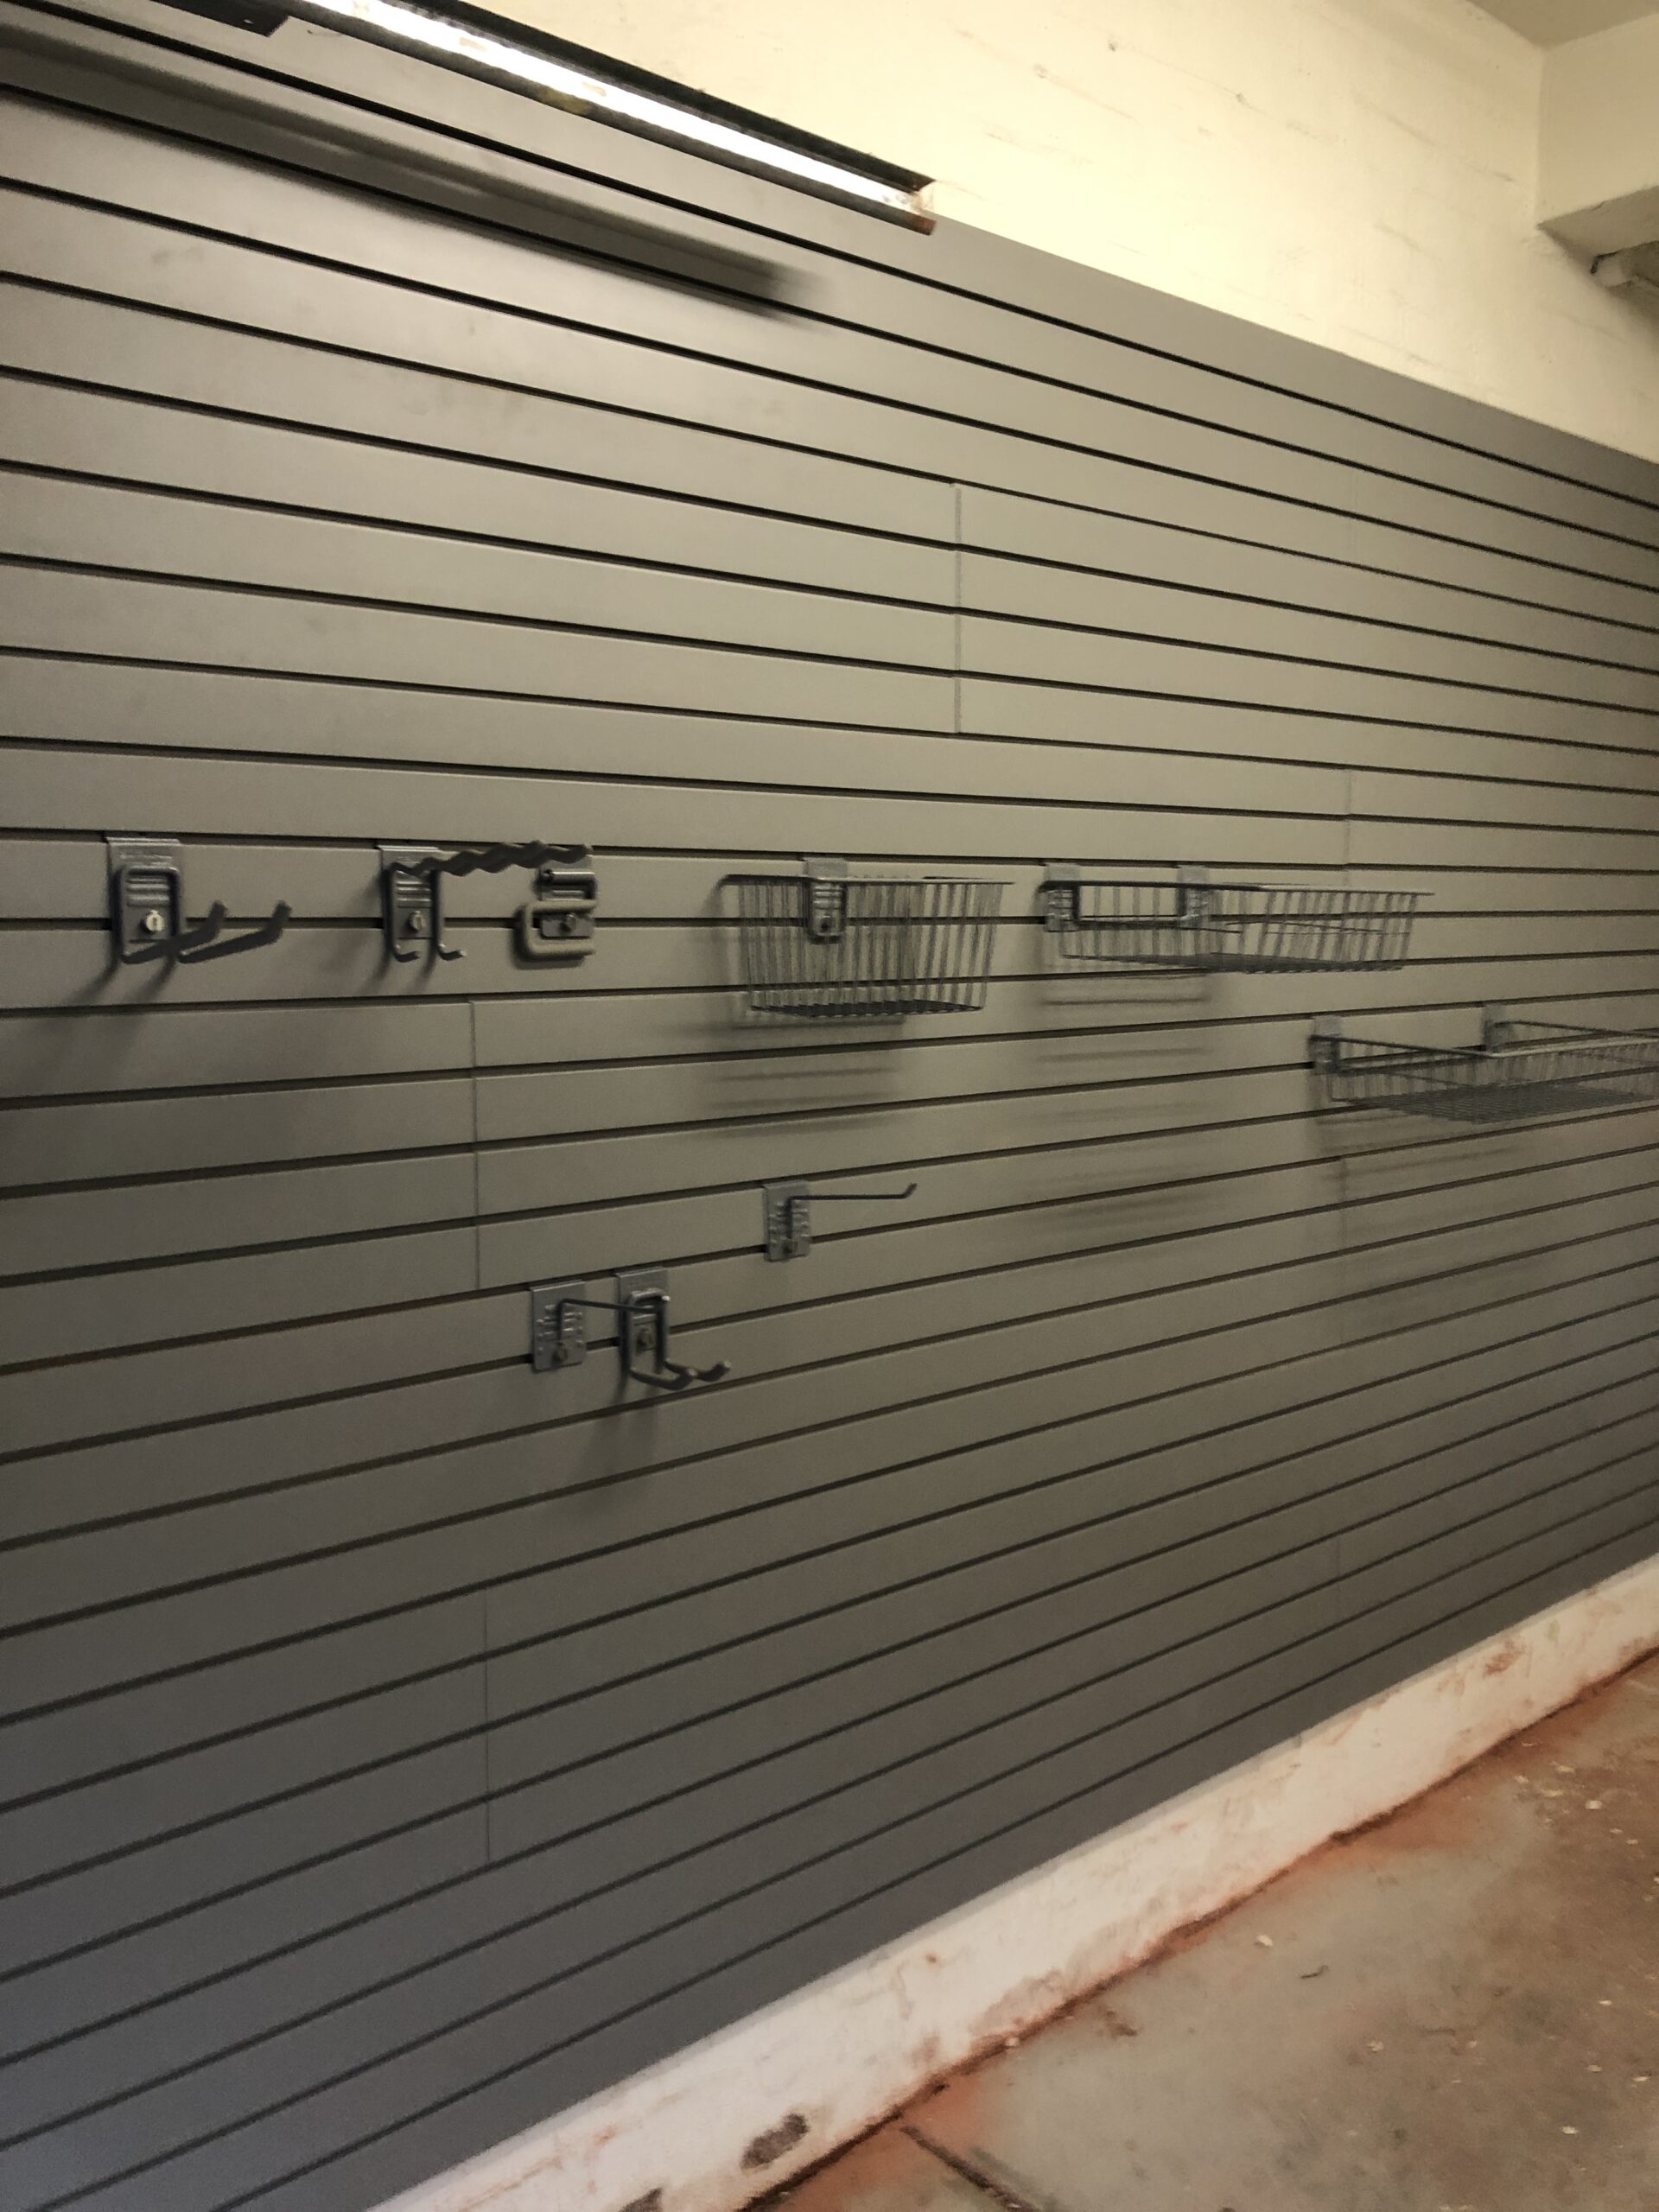
You can also see that above the wall at about 2.1m we also had a bracket which held the garage door.
We started the installation about 245mm from the garage floor. The drilling was tough and we had to pack behind some of the installstrips in order to keep them flat. To fasten the installstrips we used Nail Anchors which we sell on our website but so do all hardware stores. We used 5mm anchors and a 5mm 4-cut drill bit. To be fair, I used several drill bits on this job as the walls chewed them up.
Each installstrip has 12 holes for anchoring to the wall. I hammered a minimum of 9 anchors for each one.
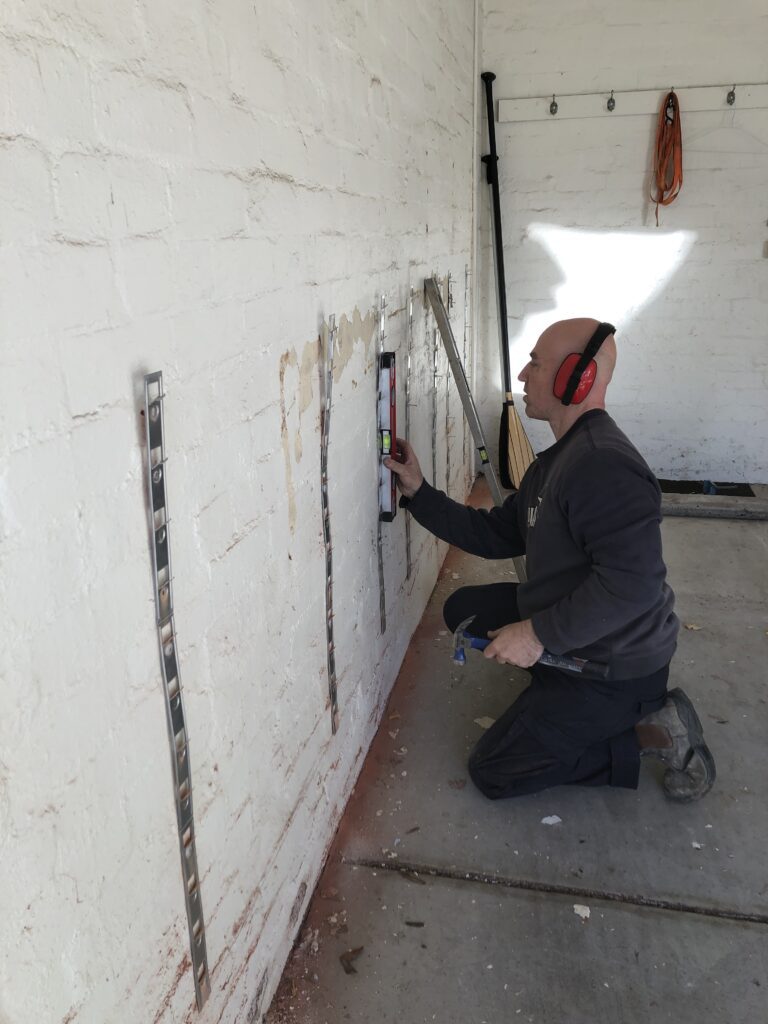
In order to hang the 7 rows of Standard Duty Slatwall Panels, we used 2 rows of installstrips and then a 3rd row of just a single installstrip section. Our installstrips were spaced about 600mm apart and we positioned them so that they sat behind any joins. Having two joining panels share an installstrip delivers a nicer, smoother join. This took a little measuring.
Tips
I am always learning with these installations as no walls are alike and brick walls, specifically Sold Red Brick Walls are the most challenging.
In order to save the customer on waste, we used the smaller offcuts on the wall. It meant more joins. If I was to do this wall again, I would have just used two panels along the wall. 1 x 2438mm + 1562mm. It would have saved a lot of effort in positioning the installstrips in the right location for the joins. The result is more waste.
My second tip relates to the 3rd row of installstrips for the 7th row of panels. Rather than using a single section of the installstrip for this top row, it can be easier to use two sections. In this case, you add the lower section on row 6 and the top section on row 7. This makes it easier when trying to align the installstrips for that top row.
Garage Door Bracket
I had to cut around the bracket in order to fit the 7th row. It was fiddly work as the bracket covered two panels. I used a jigsaw for the cut. The 6th panel was cut at the top, the 7th panel was cut from the bottom.
Wall 2 – 2m x 2.1m Solid Red Brick Walls
The second wall was covered with 1 panel cut to 2m. As per wall one, we had 2 rows of 3 section installstrips to support the first 6 panels. The top row used just one section of the installstrip.
As there were no joins on this wall, it was must quicker to panel. The biggest challenge we had were the bricks. A section of wall 700mm x 700mm was made from much harder bricks and so the drilling took longer.
Conclusion
The red bricks were hard work. This job took 1.5 people (junior support) about 7hrs to complete. I drilled over 120 holes. The outcome is a garage storage solution that will last for years and allow the owner to hang almost anything they store in their garage.