Access an Additional $20 Off All 2438mm Wall Panels!
CALL US

0411 280 646

Categories
Garage Walls

Garage Wall Storage Systems Compared: StoreWALL vs StorEase vs Pegboard vs DIY Shelving

If you’ve spent any time researching garage storage in Australia, you’ve probably come across four main options: slatwall panel systems like StoreWALL, rail systems like StorEase from Bunnings, pegboards, and Rack or DIY shelving. Each has genuine strengths and real limitations. This post compares all four honestly — including the cases where StoreWALL is not the right choice.

Quick summary: For one or two hooks and a handful of tools, StorEase or pegboard is cheaper and perfectly adequate. For a full garage wall, bikes, heavy tools, and a storage system that will last the life of the house, StoreWALL is the stronger investment. Read on for the full breakdown.

The Four Main Options

1. StoreWALL — PVC Slatwall Panel System

StoreWALL is an Australian-distributed premium slatwall system built from high-density PVC panels available in Standard Duty and Heavy Duty grades. Panels mount to the wall via InstallStrips (a multi-point anchor system) or direct face screws, and accept a range of 45+ CamLok™-locking accessories including hooks, shelves, baskets, brackets, and bike mounts.

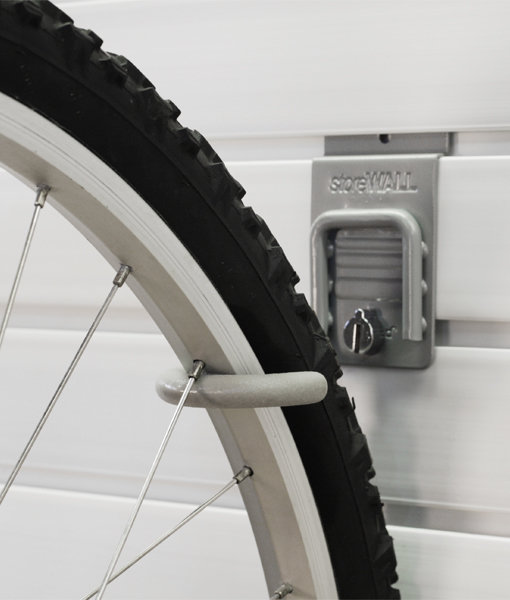
The defining feature is CamLok™ — an all-metal rotary locking mechanism built into every accessory that mechanically secures it to the panel. This prevents accessories from tilting, sliding, or detaching under load.

Available: storewall.com.au (online, ships Australia-wide). Not available at Bunnings or hardware stores.

2. StorEase — Aluminium Rail System (Bunnings)

StorEase is a wall-mounted aluminium rail system sold at Bunnings. Rails mount horizontally to the wall using screws, and accessories (hooks, shelves, baskets) slot into the rail via a two-tooth friction-fit mechanism. Available in two formats: the Smart Rail (narrower, lighter) and the Panel (wider, more surface coverage).

StorEase accessories are interchangeable across the rail system and are available individually at Bunnings. This makes it easy to start small and add accessories over time without a large upfront investment.

Available: Bunnings stores Australia-wide, Bunnings website.

3. Pegboard — MDF or Metal

Pegboard is the traditional garage organisation solution — a flat board with a grid of evenly-spaced holes into which hooks and accessories are inserted. Available in MDF and metal versions from Bunnings (Pinnacle brand), IKEA (SKADIS range), and various hardware suppliers.

Pegboard is the lowest-cost entry point for wall storage and is well-suited to lightweight items. The grid system allows hooks to be repositioned freely anywhere on the board surface.

Available: Bunnings, IKEA, hardware stores.

4. Rack or DIY Timber Shelving

Fixed timber shelving — whether freestanding or wall-mounted on brackets — is the most common garage storage approach and requires no specialist system. Shelves are built from DAR pine, plywood, or MDF on standard L-brackets or a timber frame, and can be dimensioned to suit any wall.

DIY shelving is inflexible once built but inexpensive and can be constructed to any specification. It works well for large tubs, boxes, and items that don’t need to be hung.

Rack shelving can be purchased online and from most hardware stores. Construction is DIY and comes are various widths with multiple shelves per rack.

Head-to-Head Comparison

Feature StoreWALL StorEase Pegboard DIY Shelving
Panel material High-density PVC Aluminium MDF or thin metal Timber / ply
Weight capacity (panel) 113kg per 2.4m panel (InstallStrips) 150kg per 1.2m panel (Panel) / 100kg (Smart Rail) Not rated — lightweight only Depends on build; typically 50–100kg per shelf
Accessory locking CamLok™ — mechanical rotary lock Friction fit (2-tooth) Friction fit (peg insert) Fixed — screwed or nailed
Repositionable? Yes — tool-free Yes — along rail only Yes — anywhere on grid No — permanent once built
Waterproof? Yes — PVC throughout Yes — aluminium No — MDF warps; metal rusts Partially — depends on finish
Covers full wall? Yes — panels stack vertically Partial — rails only Partial — board size limited Yes — if built that way
Colour options 7 colours (Standard Duty) Silver, Black aluminium only White, Black, in MDF can be painted Paint any colour
Accessory range 45+ hooks, shelves, baskets, brackets, bins, bike mounts Hooks, shelves, baskets (Bunnings range) Hooks, small baskets, small shelves Shelves only
Suits bikes / ladders? Yes — dedicated hooks & brackets Limited — basic hooks only No — not rated for this No — no hanging solution
DIY install? Yes — InstallStrip system Yes — simple rail mount Yes — very simple Yes — requires tools & skill
Upfront cost (full wall ~5m x 2.4m) $$$  — higher upfront $$ — moderate $ — lowest $$ — moderate (materials + time)
Long-term durability Excellent — 5-year warranty, PVC doesn’t degrade Good — aluminium is durable Poor — MDF warps; hooks fall out over time Good if well-built


Detailed Analysis: Where Each System Wins

Where StoreWALL Wins

  • Full wall coverage — panels stack vertically from floor to ceiling with no gaps or exposed wall between rows
  • CamLok™ locking — the only system where accessories are mechanically secured, not friction-fit. Critical for bikes, heavy tools, and homes with children
  • Accessory depth and range — 45+ hook types including specialist mounts for bikes, kayaks, surfboards, ladders, and fishing rods. No other system in Australia comes close
  • Colour range — 7 colours in Standard Duty that are blended through the full PVC depth, not a surface coating
  • Weight capacity with InstallStrips — 113kg per 2438mm panel with Standard Duty, making it suitable for the heaviest residential garage loads
  • Waterproof PVC — suitable for coastal, humid, and high-temperature environments where MDF-based systems fail
  • Reconfigurability — the entire storage layout can be changed without touching the wall panels

Where StorEase Wins

  • Immediate availability — available at every Bunnings store in Australia, including same-day purchase
  • Lower entry cost — a basic rail plus a few hooks costs significantly less than a full StoreWALL panel kit
  • Accessory availability — replacement and additional hooks can be purchased from any Bunnings without waiting for delivery
  • Suitable for light use — for a handful of garden tools or a basic workshop hook setup, StorEase performs adequately

Where Pegboard Wins

  • Lowest cost — a pegboard and a packet of hooks is the cheapest wall storage option available
  • Grid flexibility — hooks can be placed at any grid intersection, offering fine-grained positioning control
  • Familiar and simple — no learning curve, universally understood
  • Suitable for very light tools — drills, screwdrivers, small hand tools in a dry, stable environment

Where DIY Shelving Wins

  • Large tub and box storage — fixed shelving is the best solution for items that sit rather than hang
  • Maximum customisation — bracket depth is limited to what is available at hardware store. Brackets can be installed at any height required.
  • No system dependency — not locked into a proprietary accessory ecosystem
  • Often combined with slatwall — many builds use DIY shelving for tubs and slatwall above for hanging items
  • Rack shelving is usually multi tiered, easy to put together. Dimensions are fixed based on what you purchase (usually 1800mm x 1800mm). Easy to setup and dump items on.

The Gladiator Question

Gladiator Garageworks was a US-brand garage storage system that was distributed in Australia for several years. Gladiator’s Australian distributor closed their business, and the Gladiator range is no longer available through official Australian retail channels. Some Gladiator hook accessories can be purchased via www.gladiatorgaragestorage.com.au

Unfortunately due to the customised design of the Gladiator panels, there are no compatible accessories available in Australia. Our recommendation for existing Gladiator owners considering an upgrade is to plan a full panel replacement rather than attempting to extend a system that can no longer be supported.

Which System Is Right for You?

Use this guide to match your situation to the right system:

Your situation Recommended system
A few hooks for garden tools, budget under $100 StorEase from Bunnings
Lightweight tool display, craft room or pantry Pegboard (MDF or metal)
Full garage wall, bikes, heavy tools, long-term build StoreWALL Standard Duty + CamLok™ accessories
Workshop with very heavy equipment, motorbikes StoreWALL Heavy Duty panels + CamLok™ accessories
Large tubs, boxes, seasonal gear — shelving only DIY timber shelving, Rack shelving or StoreWALL shelves on panels)
Mixed: tubs on upper shelves + hooks below StoreWALL panels below + DIY or StoreWALL shelves above

Pricing Guide

The following ranges are approximate guides only — check current pricing before making purchasing decisions.

Item Approximate price Where to buy
StoreWALL Standard Duty 2438mm kit (4 panels, 2.4m x 1.2m) $699 per kit storewall.com.au
StoreWALL Standard Duty 1219mm kit (4 panels, 1.2m x 1.2m) + 6 Hooks $429 per kit storewall.com.au
StoreWALL Heavy Duty 1219mm kit (4 panels, 1.2m x 1.5m) $490 per kit storewall.com.au
StoreWALL Universal Hook (CamLok™) $28.99 storewall.com.au
StoreWALL Bike Hook (CamLok™) $28.99 storewall.com.au
StorEase Smart Rail 1.2m $31 Bunnings
StorEase Panel 1.2m $31 Bunnings
StorEase hook (single) $10 – $18 Bunnings
Pinnacle Pegboard 900x450mm $45 Bunnings
Pegboard hook pack (4 pieces) $18 Bunnings
DIY Shelving 2 Brackets $10 – $35 Bunnings
Rack shelving (4 tier) 1800 x 1800 $178 Bunnings

Frequently Asked Questions

Is StoreWALL available at Bunnings?

No. StoreWALL is an online-only product sold through storewall.com.au and ships Australia-wide. It is not stocked at Bunnings, Mitre 10, or other hardware retailers. StorEase is the slatwall product available at Bunnings.

Can I use StoreWALL accessories on my StorEase rails?

Yes and No. StoreWALL CamLok™ accessories will fit and can be locked into the StorEase aluminium panel (not black rail). StoreWALL accessories will fit into any slatwall panel using a 76mm gauge (distance between grooves). They will also fit into most MDF slatwall panels if the CamLok is removed.

Is Gladiator still available in Australia?

No. Gladiator Garageworks’ Australian distributor closed its business and the Gladiator range is no longer available through official retail channels in Australia. Visit www.gladiatorgaragestorage.com.au for access to access Gladiator hooks in Australia.

What is the most important factor when choosing a garage storage system?

Weight capacity and accessory security are the most important structural factors. Ask yourself: what is the heaviest single item I will store, and does the system’s accessory locking mechanism prevent dislodgement under that load? If you are storing bikes, ladders, or heavy tools, a mechanically-locking system like StoreWALL CamLok™ is significantly safer than a friction-fit system. If you are storing lightweight tools and garden equipment, StorEase is adequate and more cost-effective.

Can I combine systems?

Yes. A common approach is to install StoreWALL panels on the main garage wall for bikes, tools, and frequently accessed items, and use DIY timber shelving or Rack Shelving for bulkier items including for large tubs and seasonal storage.

Is StoreWALL a DIY project or does it require professional installation?

StoreWALL is a DIY project but does require select tools and some skill. Any carpenter or handy person with carpentry (leveling) skills can complete the work for you. We offer an installation service in Melbourne. You can also find some trades to assist you here.
Categories
garage wall storage systems australia

Comparing Garage Wall Storage Systems in Australia

Which One Is Right for You?

If you’ve started researching garage wall storage in Australia, you’ve probably come across several systems — StoreWALL, StorEase from Bunnings, GarageSmart, Garagetek, TidyWall, Ryobi Link and possibly Gladiator GearWall. They all promise to transform your garage, but they differ significantly in how they work, what they can hold, what accessories are available, and what they cost over time. This guide gives you an honest, detailed comparison so you can make an informed decision before spending money on a system that may not suit your needs.

The Five Main Systems Available in Australia

These are some of the wall storage systems you’re most likely to encounter when researching garage storage in Australia. A key consideration is that several including GarageSmart, TidyWall, and GarageTek all use a similar wall panel and installation process. The accessory range however varies considerably.

StoreWALL

Australian-focused PVC slatwall system. Sold direct online. Premium price point with the widest accessory range of any system available in Australia. CamLok locking mechanism is unique to StoreWALL. Wall panels installed with metal installstrip brackets for additional weight management strength.

StorEase (Bunnings)

Available in most Bunnings stores nationally. It seems it is also now available online. Lower price point, limited accessory range. Track and hook proprietary system.

GarageSmart

Australian company offering a slatwall-based system with installation services. Primarily sold as a supply and installation package direct to consumers or via a local agent/reseller.

GarageTek

GarageTek is part of the Attic Group. Australian company with a construction background. Garagetek products can be ordered online or via a supply and installation service.

TidyWall

TidyWALL is sold through local Dealers. Pricing is quote based and usually comes as a supply and installation package.

Ryobi Link

Ryobi’s modular wall storage system. Available through Bunnings and tool retailers. Designed to integrate with Ryobi power tools and accessories. Growing accessory range but still limited compared to full slatwall systems.

Gladiator GearWall

Previously available in Australia through select retailers. Gladiator Garageworks has since exited the Australian market.

[Internal link: link to ‘Gladiator Garageworks has closed’ article]

Side-by-Side Comparison

Here’s how the main active systems compare across the criteria that matter most.

Criteria StoreWALL StorEase GarageSmart Ryobi Link
Material PVC slatwall Steel track PVC slatwall Plastic modular panels
Panel Dimensions 1219/2438mm wide x 304mm height 1200mm wide x 150mm height 2438mm wide x 304mm height 838mm wide x 165mm height
Weight rating per panel Up to 113kg 150kg Varies by install 94kg
Accessory range 200+ items ~30 items 200+ items ~30 items
Australian availability Online direct Bunnings nationally Installer network Bunnings / tool retailers
DIY installation Yes Yes Installer preferred Yes
Price per panel (approx) $131/2438mm $31/1200mm Quote based $43/2 channels
Installation method Installstrip preferred Direct to wall Direct to wall Direct to wall
Waterproof Yes Yes Yes Yes
Locking mechanism CamLok Snap fit Plastic Smartlock Snap fit/screws
Brick wall compatible Yes Yes Yes (best with battens) Yes
StoreWALL compatible Yes Partial Yes No

Note: Price ratings are approximate and relative. Always check current pricing direct from each supplier as these change regularly.

The Detail Behind the Numbers

Material and Construction

StoreWALL and GarageSmart both use PVC slatwall — a rigid extruded plastic panel with horizontal channels that accept hooks and accessories. PVC doesn’t rust, warp with moisture, or deteriorate in the humidity conditions common in Australian garages. It can be cut to size and painted if needed.

StoreWALL panels are moulded to be fitted with Installstrip (metal brackets that are fitted to the wall). StoreWALL offers a Standard Duty, Heavy Duty and the MKE Slatwall range.

StorEase uses a steel track system rather than full panels. The tracks are mounted individually to the wall and hooks clip into the tracks. This is a fundamentally different construction — lighter, cheaper, but with less structural coverage and fewer accessory options.

Ryobi Link uses a modular plastic panel system designed primarily to store and display Ryobi tools. The panels are smaller and the system is built around the Ryobi ecosystem rather than a general storage solution.

Weight Ratings — Why This Matters More Than You Think

Weight ratings are often where budget systems disappoint. If you’re storing garden equipment, power tools, heavy bins or bike hooks, you need a system rated to handle real loads.

  • StoreWALL panels are rated to 113kg per 2438mm panel — a single panel can hold a loaded bike hook, a set of power tools and a wire shelf simultaneously without risk of failure.
  • StorEase states that its panel can support up to 150kgs.
  • Ryobi Link modules are rated to 94kg per module.
  • GarageSmart ratings vary by product and installation type — their installers will advise based on your specific wall and load requirements. GarageSmart system is rated to support heavy items like bikes.

The practical implication: if your storage needs include anything heavier than light tools and small bins, weight rating should be a primary consideration, not an afterthought.

Accessory Range — The Hidden Long-Term Cost

The initial panel purchase is rarely the total cost of a garage storage system. What you spend on accessories over time often exceeds the panel cost. A system with a limited accessory range forces you to work around what’s available rather than building exactly what you need.

  • StoreWALL’s 200+ accessory range includes bike hooks in multiple configurations, power tool racks, deep wire shelves, floating metal shelves, bins of multiple sizes, baskets, kayak and surfboard brackets, golf organisers and speciality items like the magnetic bar and power strip bracket. The full range and pricing is available online.
  • StorEase has a more limited range — basic hooks, a small number of shelf options and bins. If your storage needs go beyond standard hooks and shelves, you’ll hit the limits of this system quickly.
  • Ryobi Link is growing but remains focused on the Ryobi tool ecosystem. It works well if most of what you’re storing is Ryobi equipment, less well as a general garage storage solution.
  • GarageSmart’s accessory range is also extensive and covers most standard use cases. Pricing and the full range is only available via direct contact with the company.

Installation — DIY or Professional?

All four systems can be installed on standard plasterboard walls as a DIY project.

GarageSmart positions itself primarily as an installed solution — you get a professional assessment, design and installation as part of the service. This is convenient but may add significant cost compared to self-installation.

StoreWALL, StorEase and Ryobi Link are all designed for direct consumer installation. StoreWALL provides detailed installation guides and a network of recommended installers for those who prefer professional installation.

Availability in Australia

StorEase and Ryobi Link have the widest physical availability — both are in most Bunnings stores nationally, meaning you can see and touch them before buying, and replace accessories or add to your system immediately.

StoreWALL is primarily sold direct online with fast national shipping. The trade-off is that you can’t inspect it in a store, but the range available online significantly exceeds what any physical store could stock.

GarageSmart is available through their national installer network — primarily in major metro areas.

GarageTek can be purchased online. They may also offer a full quotation and installation service.

Which System Is Right for Your Situation?

Rather than a blanket recommendation, here’s guidance based on common situations.

If budget is the primary consideration

StorEase from Bunnings is the lowest entry cost. It will serve basic hook and shelf storage adequately. Be aware that you’ll likely outgrow the accessory range if your storage needs are more than basic.

If you want the widest accessory range and highest weight ratings

StoreWALL and GarageSmart are the clear choice. The upfront cost is higher but the system grows with you. StoreWALL’s exclusive CamLok mechanism keeps accessories secure under load — something other systems don’t offer.

If you want professional installation and don’t want to DIY

GarageSmart offers a full design and installation service that removes the planning and installation burden entirely. You might pay a little extra for this convenience.

If you have a lot of Ryobi tools

Ryobi Link integrates neatly with the Ryobi tool ecosystem and the accessories are designed to display and store Ryobi products specifically. If that’s primarily what you’re storing, it’s a logical choice. For mixed garage storage it’s more limited.

If you already have Gladiator GearWall panels

Gladiator has exited the Australian market so new panels are no longer available. Hooks can be purchased here.

Frequently Asked Questions

Can I use StoreWALL accessories on StorEase tracks?

Yes on the Smart Wall Panel (Aluminium panel), No for the Smart Wall Rail (black rail).

Can I use Ryobi Link accessories on slatwall panels?

No. Ryobi Link uses a proprietary mounting system that is not compatible with standard slatwall channels.

Is StoreWALL available at Bunnings?

StoreWALL is not currently stocked in Bunnings stores. It is available direct from storewall.com.au with free shipping across Australia (conditions apply).

What happened to Gladiator Garageworks in Australia?

Gladiator Garageworks exited the Australian market. Panels are no longer available new. Hooks can still be purchased.

The Bottom Line

For most Australian homeowners planning a serious garage fit-out, the choice comes down to StorEase if budget is tight and needs are basic, or a premium system like StoreWALL if you want a system that handles real loads, offers genuine flexibility and grows with you over time. GarageSmart suits those who want professional installation without the DIY burden. Ryobi Link suits Ryobi tool owners specifically. Take the time to list what you actually need to store before deciding — the right system for a bike enthusiast with heavy equipment is different from the right system for someone storing lightweight garden tools.

Categories
garage design Garage Ideas garage makeover Garage Walls

Planning Your Garage Layout: Australian Dimensions, Storage Zones and Wall Systems

Planning Your Garage Layout: Australian Dimensions, Storage Zones and Wall Systems

A well-planned garage does more than park a car. With the right layout, it becomes a functional workshop, a sports equipment hub, a tool room, and a storage solution all in one. But most Australian homeowners start fitting out their garage without a plan — and end up with a cluttered space that frustrates them every time they open the door. This guide walks you through standard Australian garage dimensions, how to think about zones, and how to choose a wall storage system that grows with you.

Standard Australian Garage Dimensions

Before you plan anything, you need to know what you’re working with.

Single Garage

  • Standard size: approximately 3.0m wide x 5.5m deep (minimum)
  • Recommended: 3.5m x 6.0m to allow comfortable door opening and storage along walls
  • Typical wall storage area: one or two walls depending on access door position

Double Garage (2-Car)

  • Standard size: approximately 5.4m–6.0m wide x 5.5m–6.0m deep
  • This is the most common size for Australian homes built since the 1990s
  • Key consideration: width determines whether you have a usable wall down the centre dividing the two bays
  • Wall storage potential: significantly higher — typically 3–4 walls available

Triple Garage (3-Car)

  • Standard size: approximately 8.4m–9.0m wide x 6.0m deep
  • Less common but increasingly popular in new builds
  • Wall storage across 3+ walls is achievable

Basement Garages

  • Common in newer townhouses and apartments
  • Usually tighter dimensions — 2.7m–3.0m wide per bay
  • Height restrictions sometimes limit overhead storage
  • Wall storage becomes even more important as floor space is at a premium

Before You Plan — Four Questions to Answer First

This section guides the reader through self-assessment before diving into layout.

How many cars need to fit?

The car footprint defines everything else. A standard car needs approximately 2.4m wide x 4.8m long of floor space, plus clearance. Plan this first, then work around it.

What else do you need the garage to do?

List everything: bikes, tools, garden equipment, sports gear, a workbench, a second fridge, seasonal items. Most Australian garages need to serve 4–6 functions simultaneously. Writing this list before planning prevents the most common mistake — designing for the car and forgetting everything else.

What are your walls made of?

  • Brick or block — requires battening before slatwall installation (link to battening article)
  • Plasterboard over timber frame — direct installation possible
  • Metal shed frame — requires specific fixing approach
  • Concrete block — similar to brick

Wall type determines your installation approach and should be understood before choosing a storage system.

Where are your fixed elements?

Power points, windows, the door from the house, the garage door mechanism — all of these constrain your layout. Mark them on a rough sketch before planning anything.

Dividing Your Garage Into Zones

Intro: The most functional garages treat wall space and floor space as separate planning problems. The walls handle storage. The floor handles activity and access.

The Car Zone

Define your car footprint first. Mark it on the floor with tape if it helps. Everything else in your planning works around this.

The Wall Storage Zone

Every wall that doesn’t have a window, door or garage door mechanism is a storage opportunity. In a standard double garage, this typically gives you:

  • Full rear wall (most valuable — widest and most accessible)
  • One full side wall
  • Portions of the other side wall
  • Sometimes above the garage door on the front wall

A slatwall system installed across these walls gives you continuous, configurable storage from floor to approximately 2.1m height — the practical reach limit for most adults.

The Workbench Zone

If you need a workbench, plan it along one wall — ideally under a window for natural light, or with dedicated lighting above. A slatwall system above the bench keeps tools within arm’s reach and off the bench surface.

The Overhead Zone

Ceiling space is often wasted in Australian garages. Overhead storage platforms or ceiling-mounted racks work well for seasonal items — Christmas decorations, camping gear, sports equipment used only occasionally. Keep regularly accessed items on walls and rarely accessed items overhead.

The Floor Zone

Anything that needs to stay on the floor — bins, freestanding tools, the car — should be defined and protected. If your wall storage is doing its job, your floor zone should be largely clear.

Choosing Your Wall Storage System

Once you know your zones, you need to choose a wall storage system that can serve all of them. There are three main options for Australian homeowners.

Pegboard

The traditional option. Inexpensive to buy, but hooks fall out constantly, weight limits are low (typically 5–10kg per hook), and MDF versions deteriorate with moisture. Suitable for light tool storage only.

Wire Track Systems (like StorEase from Bunnings)

More durable than pegboard, with a proprietary track and hook system. Limited accessory range compared to slatwall. Weight ratings are lower and the channel spacing is fixed, limiting configuration flexibility.

PVC Slatwall (like StoreWALL)

The premium option for Australian garages. Key advantages:

  • Weight rating up to 75kg per panel
  • 200+ compatible hooks, shelves, baskets and accessories
  • Waterproof — no swelling or warping in humid or wet garage environments
  • Fully configurable — accessories slide and reposition without tools
  • Colour options to suit different garage aesthetics
  • CamLok locking mechanism keeps accessories secure even under heavy loads


How Much Wall Storage Do You Need?

A common mistake is underestimating how much wall coverage you need. Here’s a practical way to work it out.

Step 1: Count the number of items you need to store off the floor or bench. Be specific — not “tools” but “drill, jigsaw, circular saw, sander”.

Step 2: Group them by category — power tools, hand tools, garden equipment, sports gear, seasonal items.

Step 3: Assign wall space by category. Power tools near the workbench. Bikes near the garage door. Garden tools near the side door.

Step 4: Use the StoreWALL Wall Panel Estimator to calculate panel coverage for each wall section.

Use the Wall Panel Estimator

A Practical Example — Planning a Standard Double Garage

Walk through a realistic example with a sketch or diagram if possible.

Scenario: 5.8m x 6.0m double garage, two cars, bikes, garden tools, power tools, seasonal storage.

  • Rear wall (5.8m): Full slatwall installation, bike hooks on the left section, power tool storage above bench on the right section
  • Left side wall (6.0m): Full slatwall, garden tools (rakes, shovels, hose reel) and kayak bracket
  • Right side wall: Partial slatwall above workbench, shelves for parts and bins
  • Overhead: Platform for camping gear and seasonal boxes

This configuration removes virtually everything from the floor while keeping all items accessible.

Getting Started

Planning a garage layout takes an hour of thinking but saves years of frustration. Start with dimensions, define your zones, choose a wall system rated for what you need to store, and work category by category. The most important principle: design for what you actually own, not a theoretical tidy version of it. If you have six bikes, plan for six bikes. If you have a large tool collection, plan wall space for it from the start.

Request a StoreWALL quote / Use the wall panel estimator / Shop wall panels.

Categories
garage design Garage Hooks Garage Ideas garage makeover Garage Walls Sports Ball Storage Sports Equipment StoreWALL Workbench

How to Organise a New Garage

How to Organise a New Garage

7 Things to Do Before You Move In

Moving into a new home is one of the few times in life you get to start from scratch. Every room is clean. Every wall is bare. The garage, especially, is a blank canvas — and it won’t stay that way for long.

Most people wait until after moving in to think about garage storage. By then, bikes are already propped against the wall, tools are in a pile on the floor, and there’s a cardboard box graveyard in the corner that no one wants to deal with. The garage becomes a dumping ground because there was no system in place before the dumping started.

The solution is simple: plan your garage storage before moving day. It takes a few hours, costs nothing extra if you buy the right system from the start, and it’s the single best thing you can do to keep your new home organised for years to come.

Here’s exactly what to do — in order.

“Every hook, shelf, and bin in a slatwall system slides in without tools. You can rearrange the entire wall in an afternoon as your life changes.”

How to Organise a New Garage

MEASURE YOUR WALLS BEFORE YOU BUY ANYTHING

Grab a tape measure and spend fifteen minutes in the empty garage. Write down the usable wall width on every wall — accounting for the garage door track, any windows, and the internal door. In a standard double garage, you’ll usually have 5–6 metres of usable wall space. A single garage gives you roughly 2.5–3.5 metres.

Also measure the wall height from floor to ceiling, and note the position of power points and lights. This tells you how many panel rows you can fit and where your working zone sits (typically 1–2 metres off the floor for tools and bikes).

DECIDE WHAT YOU’RE STORING — BEFORE CHOOSING ACCESSORIES

This sounds obvious, but most people skip it. They buy a bundle of hooks and figure it out later. The result is a wall full of accessories that don’t quite match what they need.

Instead, write a quick list of every category of item that will live in the garage: bikes, power tools, garden tools, sports gear, camping equipment, cleaning supplies, the lawn mower. Then sort the list into two groups: daily use (goes at eye level, easy to grab) and occasional use (can go up high or in a corner).

That list is your accessory shopping list. Work from it, not from what looks good in a photo.

ASK YOUR BUILDER TO ENSURE STUDS ARE CENTERED 450MM APART.

If your new home is still under construction, this is a tip that takes thirty seconds to ask for and delivers a sturdier and stronger garage wall on which to install any garage storage solution.

450mm gap between studs which is standard inside the home ensure more installstrips per wall panel and therefore a more robust garage wall storage solution.

INSTALL YOUR WALL PANELS BEFORE THE FIRST BOX ARRIVES

A StoreWALL installation on a single wall takes two to three hours for two people. You need a impact driver (drill), a spirit level, a stud finder, and the right fixing screws for your wall type. The panels go up one row at a time — perfectly level, anchored to studs or masonry, clipped together at the joints.

Once the panels are up, every hook, shelf, bin, and bracket slides onto the rails without any additional drilling. That means you can change the layout as many times as you want without touching a drill again.

The key is to get the panels up before your garage fills up. Working in an empty garage is significantly easier than trying to measure and drill around bikes, tools, and boxes.

How to organise a new garage

START WITH BIKES — THEY’RE THE HARDEST THING TO STORE ON THE FLOOR

Bikes take up more floor space per item than almost anything else in a garage. Two adult bikes leaning against a wall can block a third of a single garage’s floor space. Getting them on the wall immediately changes how usable the garage is.

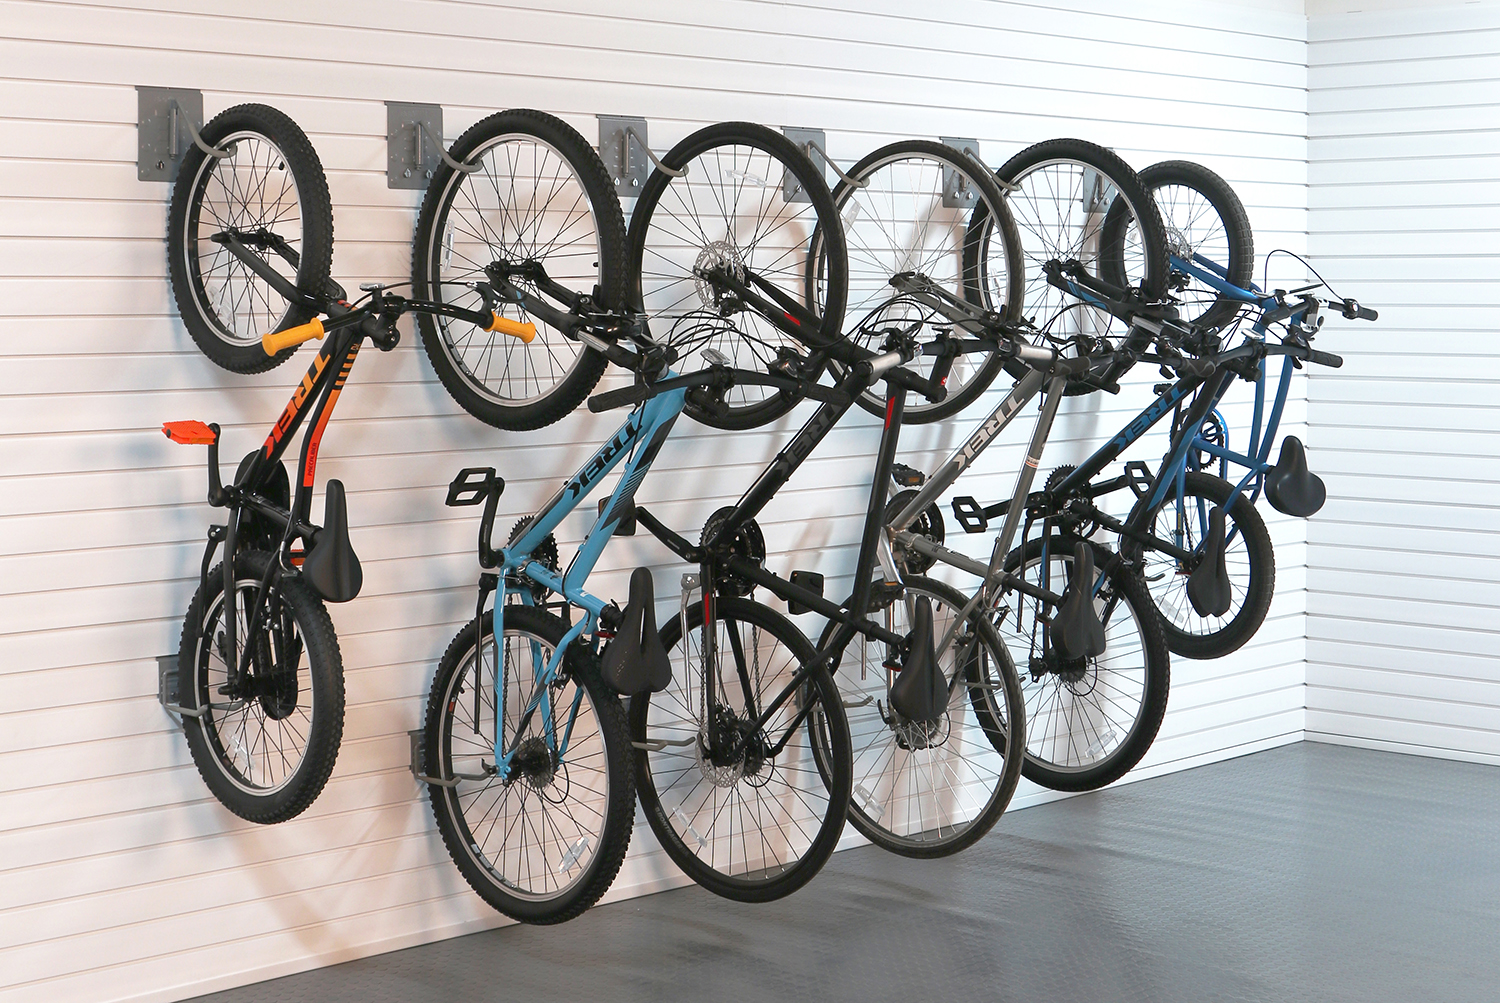
For a double garage with two or more bikes, rotating bike hooks are the most space-efficient option — they fold the bike horizontal to the wall, staggering front and back wheels so two bikes can hang in the space of one. A J hook is ideal for a single bike or a child’s bike at a lower height.

CREATE ONE DEDICATED TOOL ZONE

New homeowners often make the mistake of spreading tools all over the wall — a hook here, a bin there, a shelf in a random spot. A year later, you can’t find anything and the wall looks chaotic.

Instead, dedicate a single zone (usually the centre section of the back wall, around 1–1.5m wide) to your tool setup. A shelf at workbench height holds items you use while standing. Hooks below keep drills, saws, and hand tools visible and reachable. Bins above hold bits, fasteners, batteries, and small accessories.

Keeping everything in one zone means you always know where to look, and you build a mental map of the wall quickly.

LEAVE ROOM TO GROW — DON’T FILL EVERY SLOT IMMEDIATELY

When you install a new garage storage system, the temptation is to fill every available inch immediately. Resist this. Your storage needs will change — a new baby means a pram and a balance bike. A new hobby means camping gear or surfboards or craft supplies. A new car might need its own space.

A slatwall system’s great advantage is that it grows with you. Leave a section of your panels empty for six months and you’ll quickly discover exactly what needs to live there. Accessories slide in and out in seconds — there’s no wrong answer, and no permanent commitment.

The only rule: get the panels on the wall now, while the garage is empty. Everything else is flexible.

“The garage you set up in week one becomes the garage you have for the next five years. It takes a weekend to get right — and it’s worth every hour.”

THE BOTTOM LINE

A new home garage is a rare opportunity. You have a blank wall, no existing clutter, and a fresh start. Spending a few hours before moving day — measuring, planning, and installing a wall panel system — sets you up for a garage that stays organised as your family grows and your storage needs change.

Most new homeowners spend money on furniture, appliances, and garden plants in the first month. The garage comes last. But the garage is where you make most of your mess — and where the right system makes daily life genuinely easier.

Start with the panels. Get the bikes up. Build the tool zone. Leave room to grow. That’s it.

Categories
Garage Walls Power Tools

How to Set Up a Workshop Wall Storage System

How to Set Up a Workshop Wall Storage System — From Blank Wall to Finished

A tool wall changes how you work. Not just how the garage looks — how you actually work. When every tool is visible and accessible in one move, you stop wasting time searching. You stop using the wrong tool because you can’t find the right one. You get more done.

This guide walks through the full process — from choosing panels to loading the last hook — for anyone planning a garage or workshop storage wall for the first time.

Step 1 — Decide What You’re Storing Before You Buy Anything

The biggest mistake people make is buying panels first and figuring out accessories later. Do it the other way around. Start with a list of everything you want off the floor:

  • Power tools: drills, impact drivers, circular saw, jigsaw, angle grinder
  • Garden tools: leaf blower, hedge trimmer, string trimmer, shovel, rake, broom
  • Hand tools: screwdrivers, spanners, pliers, hex keys, files
  • Extension leads, hoses, cords
  • Ladders
  • Anything else that currently lives on the floor or a shelf

This list tells you how much wall you need and which accessories to include. A wall loaded with garden tools and ladders needs heavy-duty hooks and deep panels. A workbench-height hand tool zone needs a magnetic bar and small hooks. Knowing this upfront means you order everything once.

Step 2 — Choose Your Panel Type

StoreWALL offers two panel grades for residential garages:

  • Standard Duty (304.8mm H, 1.2m or 2.4m length): the right choice for the vast majority of home garages and workshops. Handles hooks rated to 56–100kg with InstallStrips. Seven colours. Available in both 1.2m and 2.4m lengths to minimise joins.
  • Heavy Duty (381mm H, 1.2m only): for setups storing very heavy equipment — kayaks, surfboards, ladders with serious loads, or commercial-grade tools. Fewer colour options, larger panel height means fewer rows needed to cover a full wall.

For most Australians setting up a home workshop: Standard Duty in Weathered Grey or Brite White, in a mix of 1.2m and 2.4m lengths to fit the wall cleanly.

Step 3 — Calculate How Many Panels and InstallStrips You Need

Panels are sold in cartons. Each 1.2m carton covers 1.48sqm (0.37sqm per panel, 4 panels per carton). Each 2.4m carton covers 2.96sqm.

Formula: wall width × desired panel height in metres = total sqm. Divide by carton coverage and round up.

Example: a 5.4m wide wall to a height of 2.1m = 11.34sqm. Divide by 1.48sqm (1.2m carton) = 7.7 cartons — order 8 cartons. Or mix with 2.4m cartons to reduce the number of joins.

InstallStrips: order 1 per 1.2m panel (i.e. 1 per panel in a 1.2m carton = 4 per carton), or 2 per 2.4m panel. Standard Duty InstallStrips for SD panels, Heavy Duty InstallStrips for HD panels — they are not interchangeable.

Step 4 — Installation: InstallStrips First, Panels Second

The installation sequence is: mark studs → fix InstallStrips to studs → click panels onto InstallStrips. This is what gives StoreWALL panels their rated load capacity and their clean, screw-free appearance.

Step What to do Products involved
1 Choose your panel type Standard Duty for most garages. Heavy Duty for more weight capacity.
2 Measure and order panels Width × height in metres ÷ 1.48 (per 1.2m carton) = cartons needed. Order 1 InstallStrip per 1.2m panel.
3 Install InstallStrips Mark studs. Fix InstallStrips to every stud using 7g × 40mm screws. Brick/concrete: use mushroom nail anchors.
4 Click panels onto strips Panels hook onto InstallStrip claws from the top. No visible screws. Start from the bottom row and work up.
5 Plan your accessory layout before mounting anything Group by tool type: power tools at eye level, garden tools beside the door, hand tools near the workbench. Lay accessories on the floor first to test spacing.
6 Mount accessories — start with the heaviest HD Tool Hook, HD Universal Hook, Vertical Tool Hook. Mount at comfortable reach height. CamLok: slot in, quarter-turn to lock.
7 Mount shelves and racks Power Tool Storage Rack — lip installation (no CamLok). Wire Shelves with cord holders — CamLok. Position below eye level so tools are easy to see and reach.
8 Add the Magnetic Bar and Slot Bins Magnetic Bar at workbench height for spanners, drill bits, hex keys. Slot Bins below for batteries and chargers.
9 Add trims to finish Wide Corner Trim on exposed ends — Velcro-fixed, no adhesive. Division Trim between panel joins.
10 Load your tools and adjust CamLok allows any hook or shelf to be moved at any time — no tools needed. Adjust layout after a week of use. The wall changes as your toolkit does.

InstallStrips fix to timber studs using 7g × 40mm screws. For brick or concrete walls, use mushroom nail anchors of the appropriate size. The panel hangs on the InstallStrip’s claws — no screws through the panel face, no visible fixings.

The full installation guide with video is at storewall.com.au/installing-storewall — refer to it for wall-specific guidance (brick, concrete, metal stud, bare stud).

Step 5 — Layout Planning: Group by Tool Type

Before mounting a single hook, plan the layout on the floor. The most common mistake is placing hooks wherever they fit rather than where the tools will be used.

A functional layout groups tools by how they’re used and how often:

  • Power tools at eye level, near the workbench — you reach for these most often
  • Garden tools on the wall closest to the garage door — you grab them on the way out, return them coming in
  • Ladders on a side wall or end wall — they’re used infrequently, so they don’t need prime position
  • Hand tools and magnetic bar at workbench height — within easy reach while working
  • Slot bins and small shelves below the main hook zone — batteries, chargers, and small accessories at waist level

Leave gaps between tool groups — they get used together, not as a single mass of accessories on a wall. The magnetic bar typically works best at 1.2–1.5m from the floor. The Power Tool Rack works best at eye level where you can see which tool is which without crouching.

Step 6 — Install Accessories and Load Your Tools

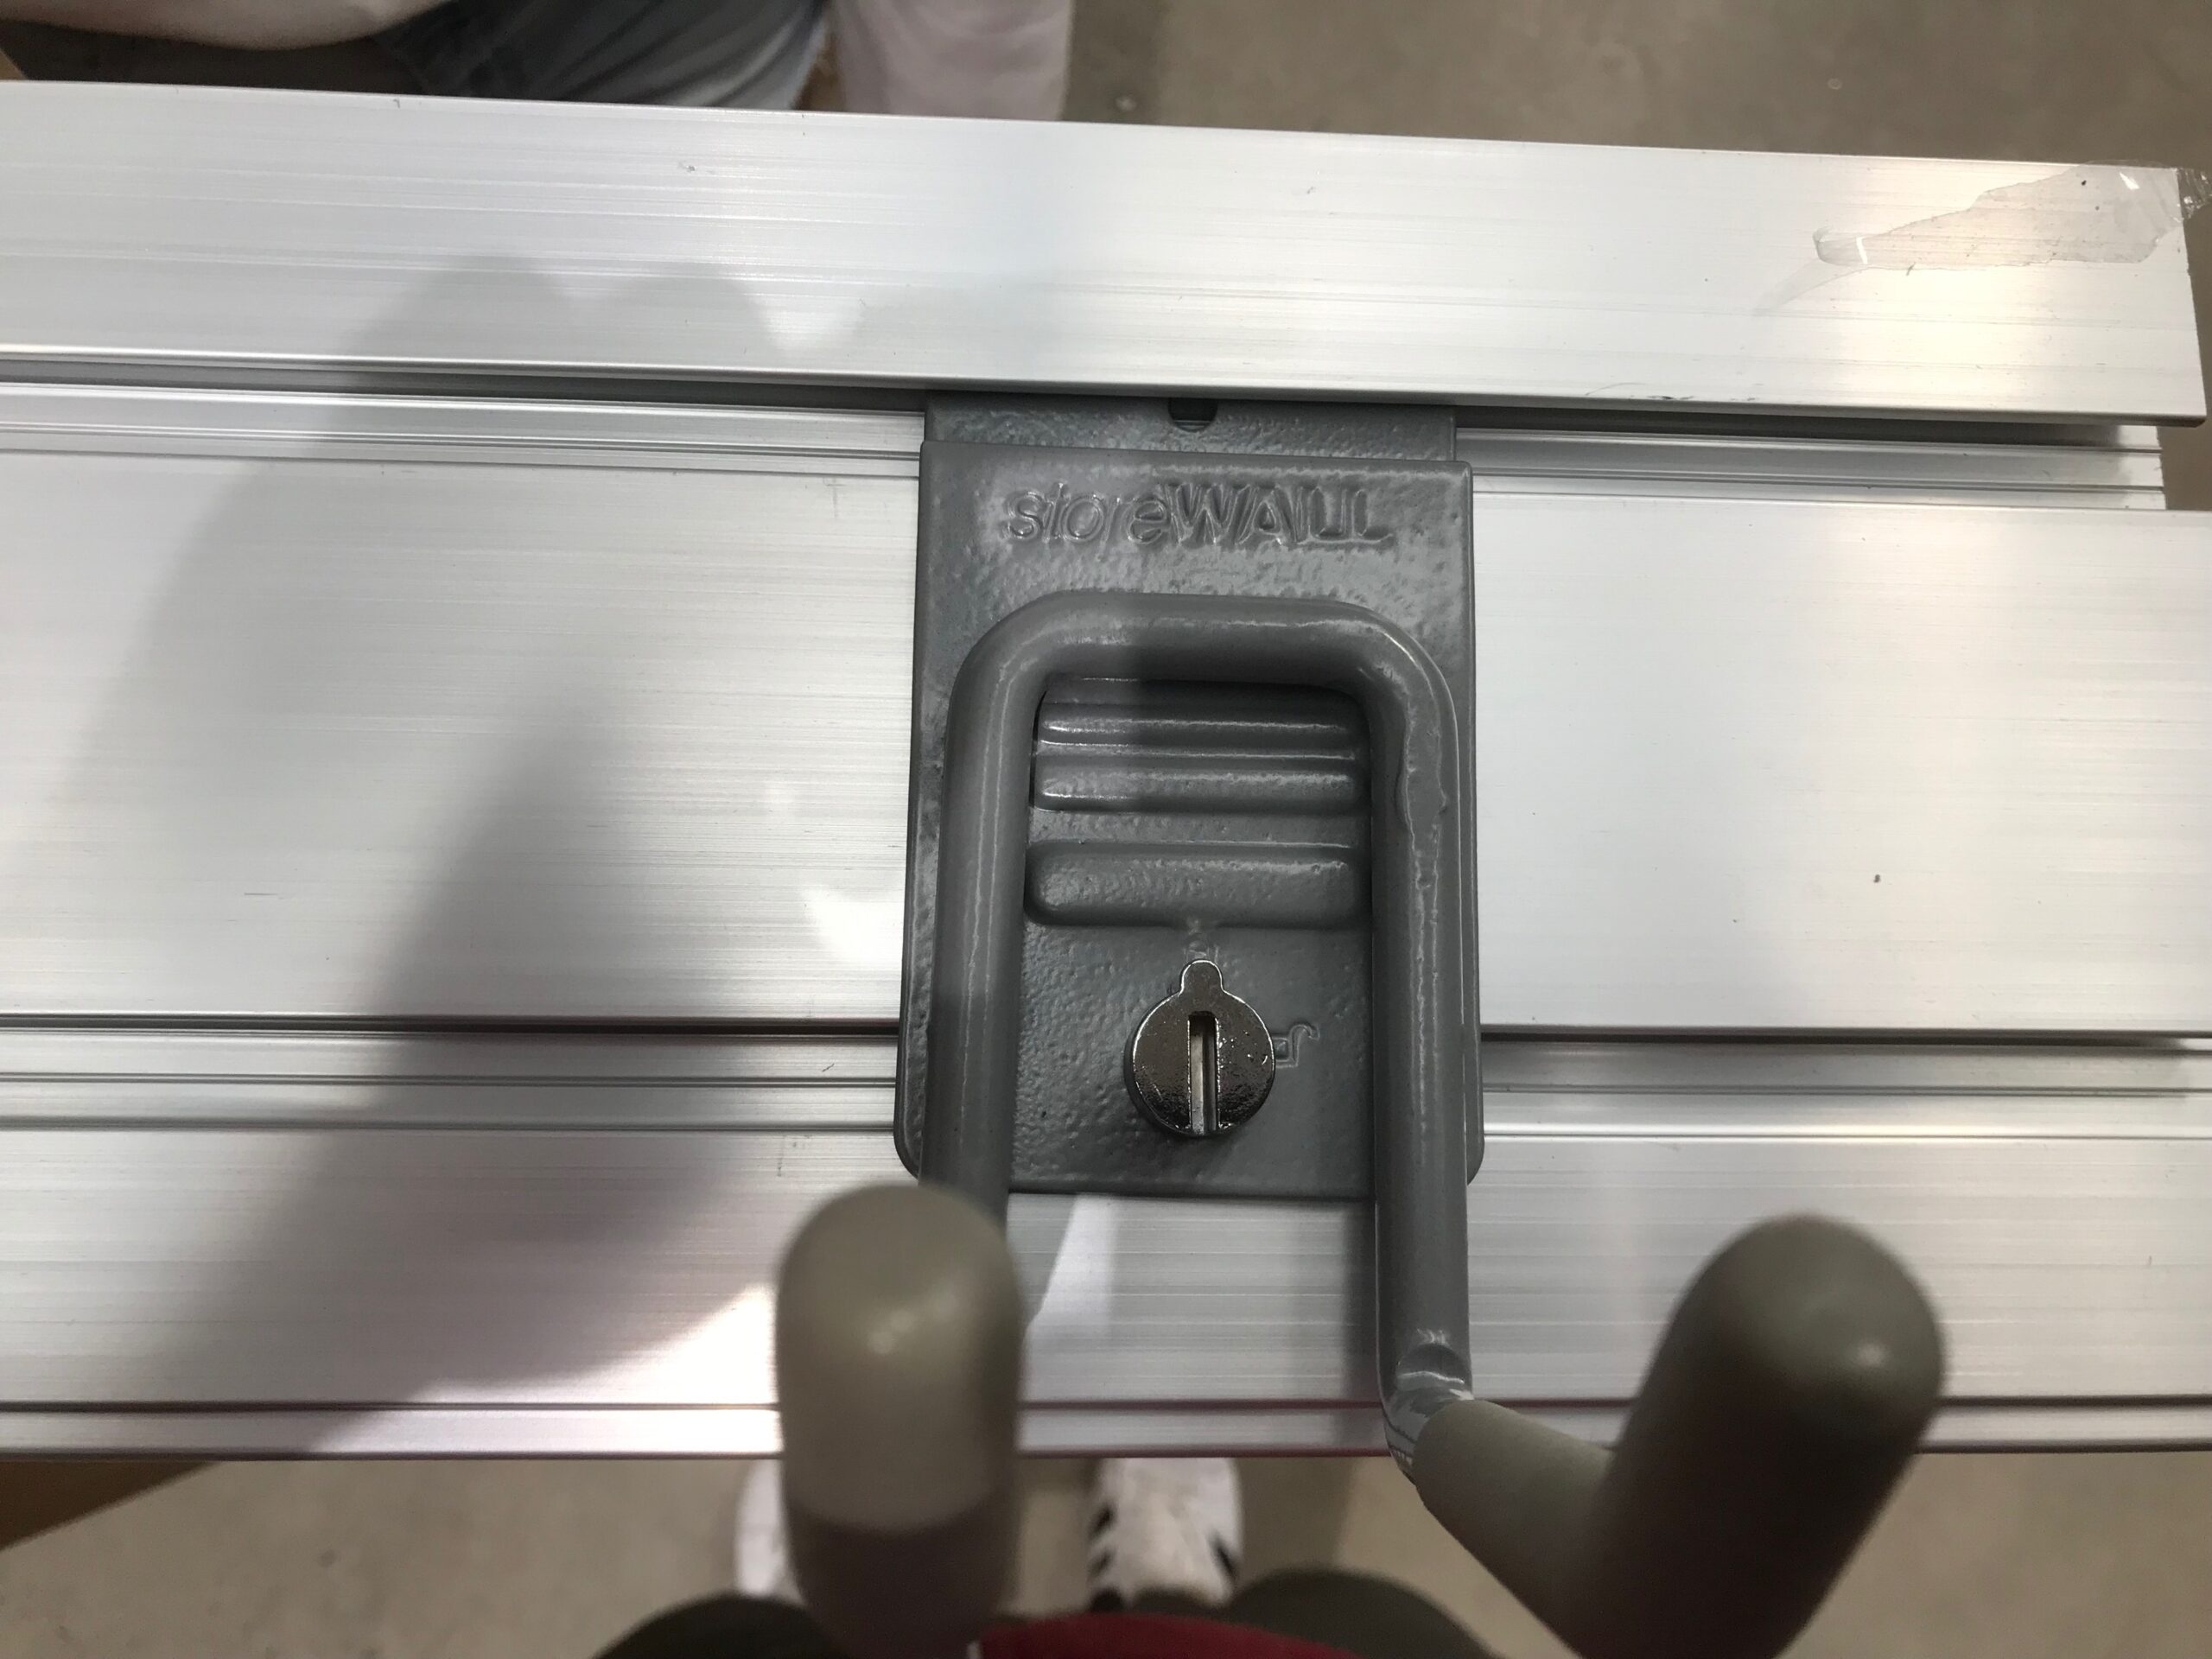
CamLok installation: slot the hook’s L-shaped backplate into the panel groove, then rotate the CamLok dial a quarter-turn. That’s it — locked. To reposition, reverse. No tools, no screws, no holes left in the panel.

The Power Tool Storage Rack and the 812mm Metal Ledge Shelf use a lip rather than CamLok — they slide into the groove and rest there under the weight of the tool. Stable for moderate loads, but don’t load them beyond their rated capacity.

Start with the heavy items — ladders, garden tools, heavy hooks. Confirm positions and lock them with CamLok. Then add power tools, then hand tools, then the magnetic bar and small accessories. It’s easier to adjust once the heavy things are fixed.

What the Finished Wall Looks Like

A complete tool wall for a standard double garage might look like this, working left to right:

  • Left zone: garden tools — HD Tool Hook × 2, Vertical Tool Hook × 1, HD Universal Hook for hose and extension lead
  • Centre zone: power tools — Power Tool Storage Rack at eye level, Wire Shelves with Cord Holders below for circular saw and jigsaw, Power Tool Hook × 2 for spare drills
  • Right zone: hand tools — 609mm Magnetic Bar at workbench height, Tool Organiser × 1 for screwdrivers, Slot Bins × 2 for batteries and chargers
  • Side wall: ladder on 2 × HD Utility Hooks

The whole setup takes a weekend to install and typically costs less than a comparable set of tool cabinets — with the added benefit that every tool is visible and the layout changes whenever your toolkit does.

Ready to Plan Your Tool Wall?

Start with the Garage Tool Storage hub page — it has a quick-find table matching every tool type to the right accessory, with links to each product. For questions, call Arthur on 0411 280 646 or email [email protected].

Categories
Ryobi Link Wall Storage System

Ryobi Link Wall Storage — Will StoreWALL Accessories Fit?

Ryobi Link Wall Storage — Will StoreWALL Accessories Fit?

It’s a fair question. Ryobi Link is widely available at Bunnings, Ryobi tools are in half the garages in Australia, and the wall rail system looks similar enough to a slatwall panel that wondering whether the two are compatible makes complete sense.

The short answer: no. StoreWALL hooks, baskets, and accessories won’t fit Ryobi Link rails. And Ryobi Link accessories won’t fit StoreWALL panels. Here’s why — and what your options are depending on what you already have.

Why Ryobi Link and Slatwall Don’t Mix

Ryobi Link is a proprietary system. The rails use octagonal connection points — a unique locking interface that is specific to Ryobi Link accessories only. Accessories press onto the raised octagonal studs and lock in place using a star-head (Torx) locking screw.

Standard slatwall, including StoreWALL, works completely differently. Accessories use an L-shaped CamLok bracket that slides into a horizontal groove and rotates to lock. The groove pitch on StoreWALL panels is 76mm on-centre — an industry standard that is compatible with accessories from a wide range of manufacturers.

These are two entirely different physical attachment systems. There is no adapter, no workaround, and no third-party product that bridges the two. If you have Ryobi Link rails, you need Ryobi Link accessories. If you have StoreWALL panels, you can use any standard 76mm slatwall accessory.

What Ryobi Link Does Well

This is worth saying clearly: Ryobi Link is a good product for what it is. If you’re a Ryobi tool user, the system’s green-and-black aesthetic matches your tool range. The accessory locking screw is a meaningful improvement over similar rail systems like StorEase — accessories stay firmly locked rather than wobbling when you pull a heavy tool off the hook. The rails go up quickly and the hook range covers most common garage storage needs.

Where it runs into limitations is scale. Each rail is 838mm wide. Covering a full garage wall means buying multiple rails and joining them — which works, but the visible rail gaps and the raised octagonal connection points mean the finished look is distinctly ‘rail-based’ rather than a clean wall surface. The accessory range, while growing, is limited to what Ryobi chooses to manufacture. And because it’s proprietary, you’re committed to the Ryobi ecosystem for every future hook or basket.

StoreWALL vs Ryobi Link Wall Storage System | Garage Wall Storage Comparison

Where Ryobi Link Falls Short — and What to Know Before Buying

  • Accessories are Ryobi Link only — you can’t expand with third-party hooks or baskets. As the system grows, your options depend entirely on what Ryobi decides to make and stock.
  • The default fit without the locking screw is loose — accessories can pop off when removing a heavy tool. The locking screw solves this, but requires a Torx driver and adds time to every adjustment.
  • Rails don’t cover the wall — they sit as horizontal strips with gaps between, so the wall behind is still visible. This is fine for a tool zone, less so for a full wall installation.
  • Fasteners are a known weak point — multiple user reports of the included screws stripping or breaking during installation. Using your own #10 x 65mm screws from the start is the advice that consistently appears in Australian and US reviews.
  • No heavy-duty bike storage options — if you want to hang bikes on the wall, particularly with a rotating hook or multi-bike setup, the Ryobi Link hook range is limited. You can hang a bike, but not with the same range of options that a standard slatwall provides.

Already Have Ryobi Link? Here’s What Actually Works With It

If you have Ryobi Link rails installed and want more hooks or accessories, your options are:

  • Ryobi Link accessories — the growing range includes hooks, reversible hooks, J hooks, organiser tubs, shelves, wire shelves, and a wall cabinet. For most standard garage hanging needs this is sufficient.
  • The Ryobi Link ecosystem is expanding — check the current Ryobi Australia website for new releases before assuming a specific accessory doesn’t exist.

What you can’t do is mix in StoreWALL accessories, StorEase accessories, GarageSmart accessories, or any other standard slatwall product. The physical interface is incompatible.

If you’ve outgrown what Ryobi Link offers — you want to hang bikes with a rotating hook, you need deeper baskets, you want to cover the whole wall rather than just run rails across part of it — the most practical path is to add StoreWALL panels in a different zone rather than trying to extend the Link system beyond what it does.

Considering Ryobi Link vs a Slatwall System? Here’s the Honest Comparison

Ryobi Link StoreWALL
System type Proprietary rail system Standard 76mm slatwall panel
Wall coverage Rail strips — covers a portion of wall Full wall panels — covers the whole wall
Third-party accessories No — only Ryobi Link accessories fit the rail Yes — any standard 76mm slatwall accessory
Locking mechanism Locking screw (Torx driver required) CamLok — quarter-turn, no tools
Rail/panel material High-strength polymer (plastic) Solid extruded PVC
Available in AU? Yes — Bunnings Yes — storewall.com.au
Hook range depth Ryobi Link hooks only 30+ hooks, baskets, shelves, bins, totes, brackets
Wall type compatibility Plasterboard, brick (fixings not included) Plasterboard, brick, concrete, metal stud, bare stud
Bike storage options Basic hooks available Rotating hook, vertical hook, J hook — multiple options
Price entry point (AU) 7-piece kit ~AU$69, 12-piece ~AU$99 1219mm panel kit from ~AU$330 inc InstallStrips


The price difference reflects what you’re getting. Ryobi Link is rail-based — you’re covering sections of wall with strips and hanging Ryobi-only accessories. StoreWALL is panel-based — you’re covering the wall fully with a surface that takes any standard 76mm accessory from any manufacturer, locked with CamLok rather than a Torx screw.

For a light-use tool zone where you mainly hang Ryobi power tools and want a system that matches your tool colours — Ryobi Link is a reasonable choice and a more accessible entry price.

For a full garage wall, a heavier accessory load, bikes, or a setup where you want the freedom to choose any hook or basket — standard slatwall panels give you a wider accessory range, better wall coverage, and aren’t locked to a single brand’s product roadmap.

What StoreWALL Works On — Including Systems You Might Already Have

One question we get regularly is the reverse: can StoreWALL accessories be added to wall systems I already have? In some cases yes, in some cases no — the determining factor is whether the panel or rail uses a standard 76mm on-centre groove.

The Bottom Line

Ryobi Link is a closed, proprietary system. If you have Ryobi Link rails, you use Ryobi Link accessories — end of story. StoreWALL accessories won’t fit, and there’s no adapter that changes this.

If you’re still deciding what system to install, the choice between Ryobi Link and StoreWALL comes down to scope. A tool zone where you want to organise Ryobi power tools at a lower entry cost: Ryobi Link is worth considering. A full wall installation with bikes, baskets, heavy tools, shelves, and the freedom to use any accessory: standard slatwall panels are the more capable system.

Questions? We’re happy to help you work out what will suit your garage — call 0411 280 646 or email [email protected]. If you want to see the full StoreWALL accessory range, start with the hooks and baskets pages or browse the wall panels to understand what a panel installation looks like.

Categories
Bike Storage

Rotating Bike Hook vs Vertical Storage

Rotating Bike Hook vs Vertical Storage — Which Is Right for Your Garage?

If you’ve been looking at garage bike storage options, you’ve probably come across a few different hook styles and wondered which one actually makes sense for your space. The short answer is that it depends on your garage dimensions, how many bikes you’re storing, and who needs to access them. This post walks through the main options clearly so you can make a decision without second-guessing.

See our full Garage Bike Storage range.

We’ll focus on the three most popular wall-mounted options: the J Hook (perpendicular storage), the Rotating Bike Hook (perpendicular + swivel to wall), and vertical hanging (front wheel up, bike hanging straight down).

The J Hook — Classic Perpendicular Storage

How it works

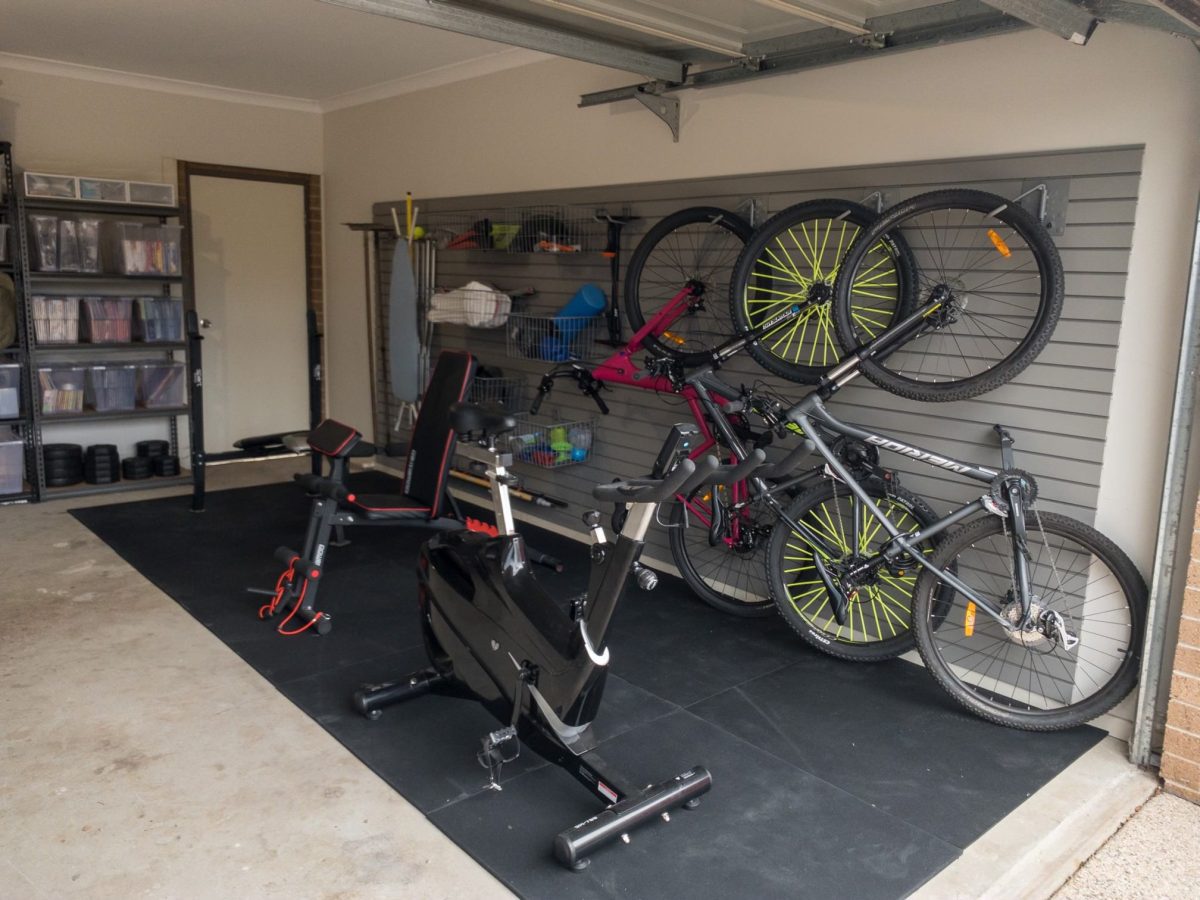
vertical bike hookThe J Hook — StoreWALL’s Bike Hook — holds the front wheel of the bike in the hook, with the bike hanging perpendicular to the wall. One wheel is typically on or near the floor. The bike points out into the garage at roughly 90 degrees to the wall.
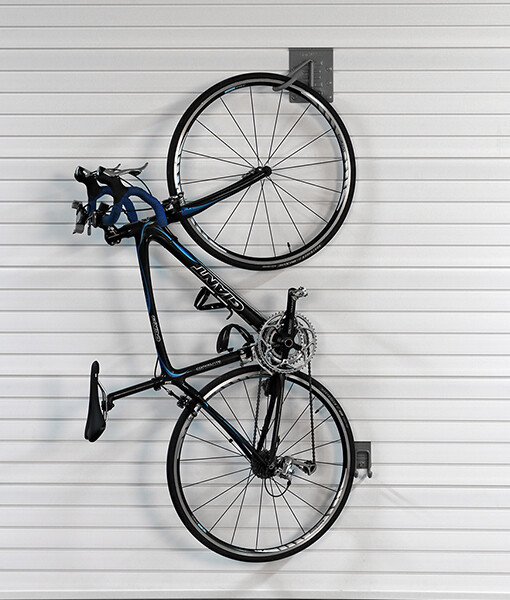
Space it uses

The bike projects about 1m out from the wall (the full height of the bike). Handlebar width is typically 60–70cm, so each bike needs roughly that much wall width as a minimum. If you have two bikes next to each other, plan for a little extra clearance between handlebars. This can be done by slightly adjusting the positioning of the hook on the wall. 1 bike will consume roughly .7sqm (1m x .7m) of floor space.

Who it suits

The J Hook is the simplest, most affordable single-bike hook in the range. It’s a good choice for one or two bikes where floor depth isn’t a concern, and where you’re not constantly shuffling bikes in and out. Taking the bike on and off requires lifting the front wheel to hook height — straightforward for an adult, less ideal for younger kids.

The CamLok advantage

What separates the StoreWALL J Hook from generic bike hooks is CamLok. The hook stays locked to the panel while you put the bike on and take it off — so you’re not fighting the hook while also managing the bike. It also means you can reposition the hook anywhere on the panel without tools.

The Rotating Bike Hook — The Upgrade

rotating bike hookHow it works

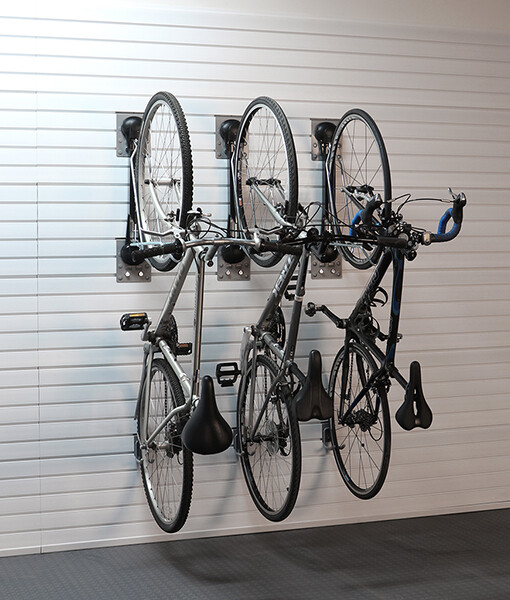
The Rotating Bike Hook works just like the J Hook but adds one important feature: it rotates. Once your bike is on the hook, you can swing the entire assembly — bike and all — so the bike runs flat along the wall rather than pointing out into the garage. It rotates freely. The Rotating Bike Hook is supported by a large plate on which 2 CamLoks are fitted. The bike can be stored swung left, right or perpendicular to the wall if this is required.

Space it uses

In the perpendicular position: identical to the J Hook — 170–180cm of floor depth per bike. In the flat (rotated) position: the bike sits parallel to the wall and uses almost no floor depth. Wall height per bike in the flat position is roughly 170cm (the bike’s length). Wall width is the height of the bike (flat on the wall).

This is why the Rotating Hook is such a significant upgrade for garages with more than one bike: in the flat position, two bikes hung side by side on Rotating Hooks use roughly 1.5 – 2m of wall width (they overlap each other when rotated) and roughly .5m of floor depth. In terms of square meters this is (1.5 x .5 = .75sqm). Compare that to two bikes on J Hooks pointing straight out — .7sqm x 2 = 1.4sqm.

Who it suits

The Rotating Hook is the best choice for most households with two or more bikes. It’s also well suited to narrower garages where you want to reclaim floor space, and any situation where you want the flexibility to swing a bike out for access then flat when done.

It’s also a good option for a single bike in a tight garage — the ability to push the bike flat against the wall when the car needs to fit means you’re not choosing between the car and the bike.

The trade-off

The Rotating Hook costs more than the J Hook (2.5 times more). It also has a small amount of swing resistance — the hook doesn’t spin freely like a lazy susan, it moves with deliberate effort. This is intentional: It is supported by a large plate and 2 x CamLoks to support whatever angle you set it so it doesn’t drift.

Vertical Hanging — HD Universal Hook or Cradle Hook

How it works

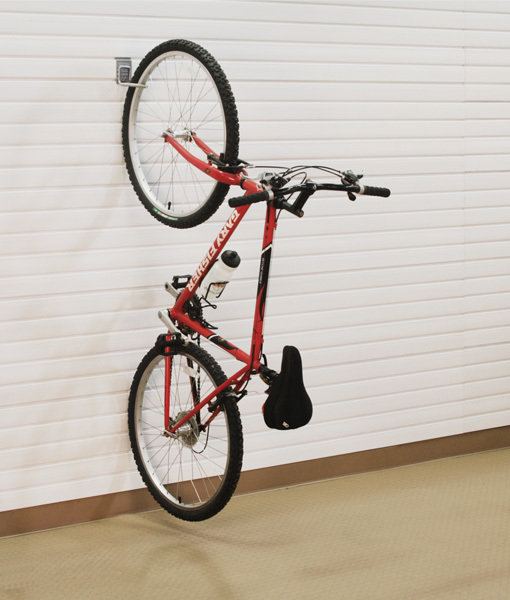
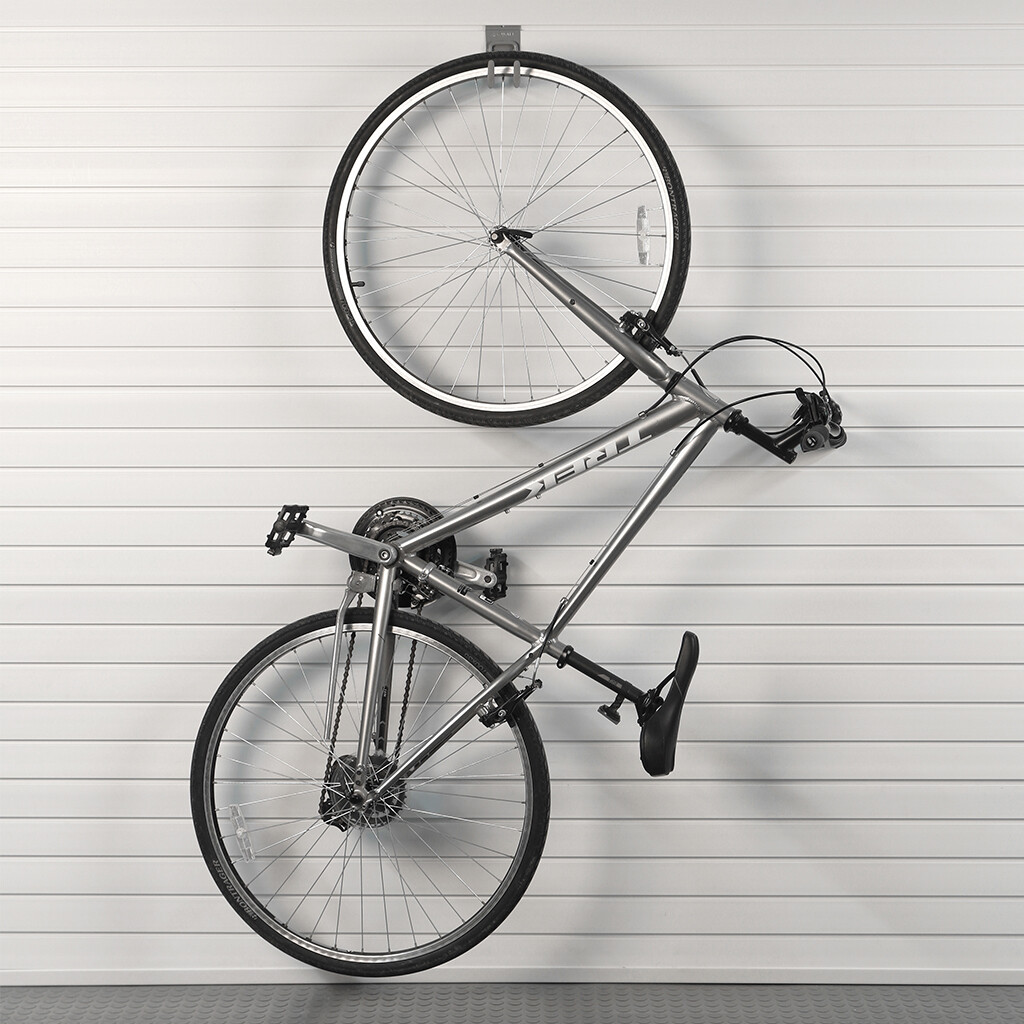
bike storage solutionsVertical hanging means the bike is stored straight up and down — front wheel in the hook at the top, the rest of the bike hanging below. The hook grips the front wheel rim and the bike’s full weight is suspended from the wall.
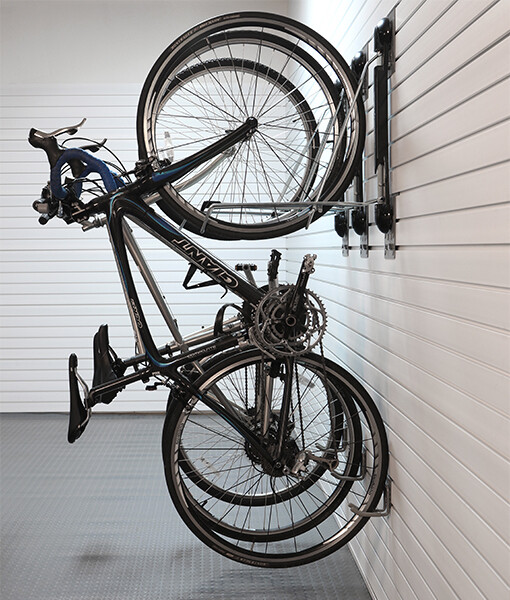
Space it uses

This is the most wall-space-efficient method when measured by floor depth — the bike projects minimally from the wall (roughly 40–50cm for the handlebar width). Wall width per bike is about 70cm – 1m. However, the vertical height requirement is significant — a standard adult bike hanging vertically from the front wheel needs around 200–230cm of wall height clearance.

Who it suits

Vertical storage suits garages with high ceilings and limited wall depth — for example, a long narrow garage wall where you want to stack multiple bikes side by side. The HD Universal Hook rated to 45kg per hook (with InstallStrips) handles any standard adult bike including lighter e-bikes.

The trade-off

Getting the bike up into vertical position requires lifting the front wheel to shoulder height or higher — which is fine for a fit adult but not practical for kids, older riders, or heavier bikes. It’s also harder to load in a hurry. If convenience of access matters to you, this is the least user-friendly of the three options.

Side-by-Side Comparison

  • J Hook: Floor depth 1m | Wall width 60–70cm | Ease of use: Easy for adults | Best for: 1–2 bikes, standard garage
  • Rotating Hook: Floor depth up to 50cm (flat) / 170cm (up) | Wall width 1m (flat) | Ease of use: Easy for adults | Best for: 2+ bikes, tight garages, maximum flexibility
  • Vertical (HD Hook): Floor depth 50cm | Wall width 1m | Wall height – up to 2m. Ease of use: Requires lifting | Best for: High ceilings, narrow wall space, heavier single bikes

What About the SteadyRack?

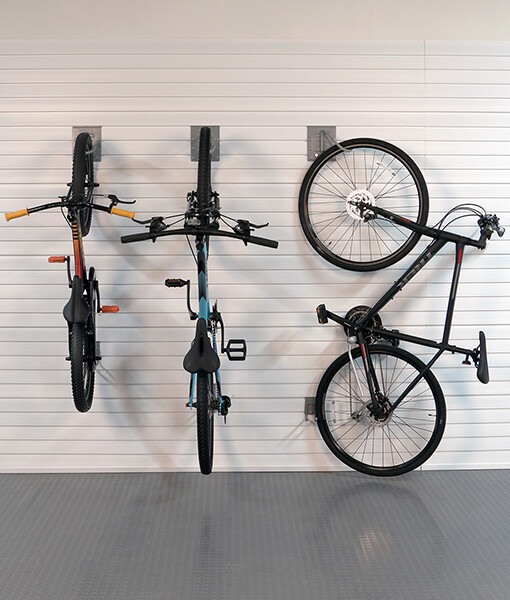
The SteadyRack is a different category altogether — it’s a proprietary pivot bracket rather than a simple hook. It deserves its own mention here because it solves a specific problem: no-lift loading. The SteadyRack rolls in (you push the front wheel onto the bracket) and the bike pivots up at an angle automatically. No lifting required.

steadyrack bike storageIf ease of access is your primary concern — particularly for kids, older riders, or frequent daily use — the SteadyRack is worth considering alongside the hooks above. StoreWALL’s CamLok mounting plates let you install SteadyRack brackets onto your panels and reposition them without drilling into the wall.
Note however, that when combining the StoreWALL plates and the SteadyRack bracket, the price per bike doubles compared to the Rotating Bike Hook.

Which Should You Choose?

Here’s our honest recommendation based on the most common garage setups:

  • One adult bike, decent floor depth: J Hook. Simple, secure, affordable.
  • Two or more bikes in a standard double garage: Rotating Bike Hook for each. The single best all-round option for most Australian households.
  • Family with young kids: SteadyRack brackets for kids bikes (no lifting), Rotating Hooks for adult bikes. Mix and match on the same panel.
  • E-bike or heavy bike: HD Universal Hook with Heavy Duty panels + InstallStrips. Prioritise load capacity over convenience of method.
  • Tight garage, maximum floor space recovery: Rotating Hooks in the flat position are your best bet. In the flat position they’re barely wider than the panel itself.

If you’re still unsure, send us a photo of your garage wall with the dimensions noted and we’ll give you a specific recommendation. We’ve seen enough garages to know what works.

Frequently Asked Questions

Can I upgrade from a J Hook to a Rotating Hook later without replacing my panels?

Yes. Both hooks use CamLok and attach to the same slatwall panel grooves. Swapping a J Hook for a Rotating Hook is a two-minute job — unclip one, clip in the other. There’s no modification to the panel required.

Does the Rotating Hook work for heavier mountain bikes?

Yes. The Rotating Bike Hook is made from heavy-gauge steel with a powder-coated finish and is rated for standard adult bikes including heavier mountain bikes. The StoreWALL plate is supported by 2 x CamLoks. For e-bikes (typically 20–30kg), we recommend checking the specific weight rating and using Heavy Duty panels with InstallStrips.

I have purchased my garage wall panels from another supplier, will your Rotating Bike Hook still work on my garage wall panels?

Yes. If the groove spacing of your garage wall panels is 74-76mm, then all StoreWALL and MKE accessories are compatible and will fit your garage setup.

How many Rotating Bike Hooks can I fit on a 2.4m panel?

In the flat position (bikes running parallel to the wall), you can typically fit 3–4 adult bikes on a single 2.4m panel depending on bike frame width. In the perpendicular position, the limiting factor is floor depth rather than wall width. Most customers with 3–4 bikes use two 2.4m panels side by side.

For further reading visit – How to store multiple bikes

Categories
Bike Storage

How to Store Multiple Bikes in a Garage

How to Store Multiple Bikes in a Garage (Without Losing Your Floor Space)

One bike in a garage is manageable. Two is where it starts to get complicated. Three or more, and suddenly the bikes are stacked against the wall, leaning on each other, getting scratched, blocking the car, and falling over at inopportune moments.

The good news is that a well-planned wall storage system can comfortably hold four or more bikes in the same footprint that two bikes take up on the floor — and make every single one easier to get in and out. Here’s how to plan it.

Looking for our full bike storage range? See our Garage Bike Storage page

Step 1 — Know Your Bikes

Before you think about hooks or panels, take stock of what you’re actually storing. The answers shape every decision that follows.

  • How many bikes? Count them all — include the ones currently in the backyard or laneway.
  • What type? Road bikes, mountain bikes, kids bikes, and e-bikes all have different weights, tyre widths, and handling requirements.
  • Who’s accessing them? Adults can manage a lift to shoulder height. Kids generally can’t — which affects hook height and the type of hook you choose.
  • Are they ridden regularly? Daily-use bikes need quick on-and-off access. Weekend bikes can be stored with slightly more effort involved.
  • Do you have accessories to store too? Helmets, pumps, shoes, lights, and bags all need homes on the wall alongside the bikes.

Step 2 — Understand the Space Each Method Takes

This is where most people get stuck — they don’t realise that different storage methods use wall space and floor depth very differently. Here are the four main options and their real-world space requirements:

Perpendicular (J Hook) — most popular for 1–2 bikes

bike hookThe bike hangs front wheel on the hook, rear wheel on or near the floor, bike pointing out from the wall. Requires approximately 1m of floor depth in front of the wall and about up to 2m of wall height per bike (accounting for the length of the bike when standing upright). Easy on-and-off for adults.
Rotating Hook — best for 3+ bikes

rotating bike hookWorks like the J Hook (bikes standing upright) but the bike can swing flat against the wall once hung, so it runs parallel to the panel rather than pointing out. In the flat position the floor space is minimal and usuallly determined by the outer width of your bike (ie pedal to pedal which is about 60-80cm max). This is the single most space-efficient method for multiple bikes and why it’s our best-selling bike hook. The trade-off is that you need to swing each bike out before you can easily access the ones behind it. Bikes can be staggered at different heights to pack them tighter together.
SteadyRack Brackets — best for kids or no-lift households

steadyrack bike bracketsThe SteadyRack rolls in rather than lifts — you roll the front wheel onto the bracket and it pivots up at an angle. SteadyRack brackets will also rotate left of right and allow you to have the upright bike stand flat against the wall. The amount of floor space used is the same at above (Rotating Bike Hook), ie about 60-80cm. No lifting required, which makes it the most accessible option for children and older riders. Can be staggered at different heights to pack bikes tighter together.
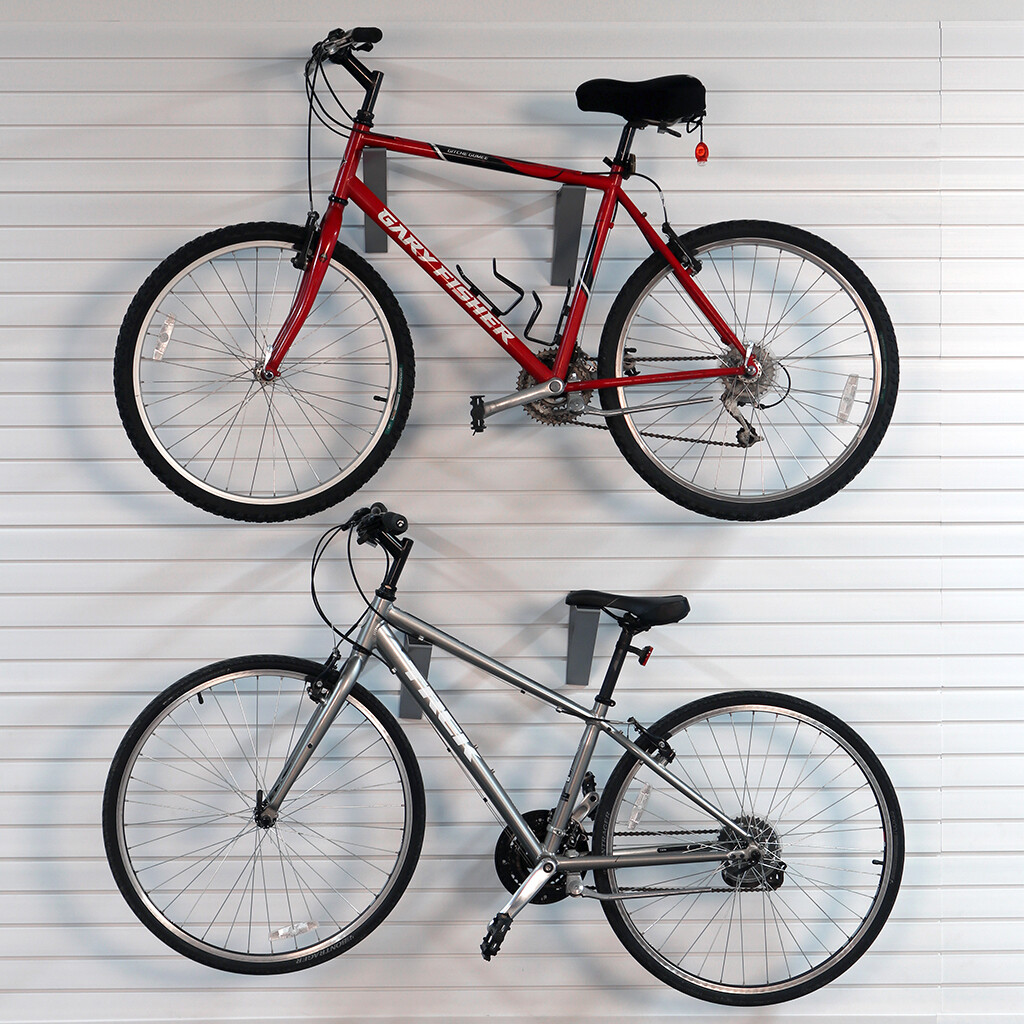
Horizontal brackets — best for aesthetics or tight depth

Horizontal bike bracketsThe bike lies flat on the wall, hung by both wheels on 381mm brackets. Uses about 170cm of wall width per bike but only about 40cm of depth (pedal to pedal). The cleanest-looking option, it however takes up the most about of space. Works well where the garage depth is limited but the wall is wide.
A similar solution but with the bike being hung from the front tyre flat on the wall uses our Heavy Duty Universal Hook. Ideal if you only have 1 or 2 bikes and plenty of wall space to use.

Step 3 — Plan the Wall Layout

Now that you know your bikes and your preferred method, it’s time to map out the actual wall. Here’s a practical process:

  • Measure the usable wall width — subtract any door frames, windows, shelving units, or electrical panels from the total width.
  • Decide on hook type — for most families with 3+ bikes, the Rotating Hook will give you the most bikes in the least space. It is also the most cost effective solution we offer.
  • Sketch the bike positions — mark each bike’s width on the wall with tape. Stand back and check the spacing feels workable.
  • Add the accessories — allow space for a few baskets to hold your helmets and bike pumps. These are small but they matter for day-to-day usability.
  • Work out panel coverage — your bikes and accessories determine how many panels you need. A rough guide: one 2.4m Standard Duty panel can support three hanging bikes using the Rotating Bike Hook. However if you want to also include baskets for accessories, more of the wall will need to be covered.

Step 4 — Real Example: A Family of Four with 5 Bikes

Here’s a real-world example based on a customer in Melbourne — a family of four with two adult road bikes, two kids mountain bikes, and an e-bike that didn’t have a permanent home.

Their garage wall measured 6m wide with a height of 2.4m. They chose Rotating Bike Hooks for the adult bikes and the e-bike (so they could swing flat and keep access clear) and two SteadyRack Classic brackets for the kids bikes (easier for the kids to use independently).

This client chose to panel 6m x 2.1m of the wall surface area. They could however have limited the wall paneling to only the top half of the wall, say 1.2m of height.

In addition to the bike hooks, they also inlcuded 2 Heavy Duty Deep Baskets for the helmets and bike pumps, and some smaller bins for the gloves and lights. All five bikes off the floor, all accessories in one place.

Before the install, the bikes took up the equivalent of about 6 square metres of floor space. After, they used very limited floor space and the family could fit both cars in the garage again.

Step 5 — Heights and Clearances

A few practical numbers that save a lot of frustration:

  • Adult bike hook height: the hook centre should be at approximately shoulder height (140–160cm from the floor) for easiest on-and-off access
  • Kids bike hook height: 80–100cm from the floor — kids can manage a small lift but shouldn’t have to reach above their head
  • SteadyRack height: follow the manufacturer’s guide which is based on your specific bike’s wheel size
  • Rotating Bike Hook: because the bike swings flat, adjacent hooks need at least 10cm clearance between bikes in the flat position. You can also stagger the heights slightly allowing you to squeeze them in.
  • Helmet hook: 10–20cm above the bike hook so helmet is easy to grab as you take the bike off the wall

Panel Quantity Guide

Use our Panel Calculator on the website to enter your exact wall dimensions and get a precise recommendation.

Frequently Asked Questions

Can I mix different bike hook types on the same wall?

Absolutely. It’s actually common to mix Rotating Hooks for adult bikes and SteadyRack brackets for kids bikes on the same panel — the panel accepts any accessory regardless of what else is on it. The most important thing is leaving enough space between each bike so they don’t clash when being loaded or removed.

What if my garage wall isn’t wide enough?

If wall width is the limiting factor, the Rotating Bike Hook will be your best option with bikes rotating left or right and possibly staggered in height to fit them into the wall space you have.

Can I store an e-bike on a standard bike hook?

Yes, but e-bikes are heavier — typically 20–30kg — so the hook and panel setup needs to match the weight. The Rotating Bike Hook and the SteadyRack Brackets are supported by 2 x CamLoks giving your bike more support. I would also recommend have the lower tyre rest on the ground rather than floating. Contact us if you’re unsure — we’re happy to recommend the right setup for your specific bike.

My garage wall is brick. Does that affect installation?

Not significantly. StoreWALL panels can be installed on brick walls using InstallStrips with masonry anchors. The InstallStrips distribute the load across multiple anchor points, which is actually more secure on brick than a single screwed-through approach. We have an installation guide specifically for brick walls on the website.

Need more information? Read our latest post comparing rotating vs vertical options.

Categories
Garage Walls StorEase Accessories

StorEase Slimline Smart Rail Accessories — What Fits?

StorEase Slimline Smart Rail: Which Accessories Fit — and What to Do If They Don’t

Over the past few years we’ve had a steady stream of calls from customers specifically asking about accessories for the StorEase Slimline Smart Rail — the narrow, black powder-coated rail sold by Bunnings. Most of them have the same problem: the accessories that came with the rail feel flimsy, don’t lock properly, or they want a hook or bike rack that StorEase simply doesn’t make.

This post covers exactly what the Slimline Smart Rail is, what accessories will and won’t fit it, and what your options are if you’ve found it frustrating to use.

What Is the StorEase Slimline Smart Rail?

The StorEase Slimline Smart Rail is a wall-mounted rail system sold by Bunnings. It’s the narrower, sleeker-looking of the two StorEase wall products — 105mm in height, 1200mm long, with a black powder-coated finish. It’s designed to be screwed directly to the wall at the height you need, and StorEase accessories clip onto it.

It’s a different product to the StorEase Smart Wall Panel, which is wider (158mm), aluminium-coloured, and uses a different groove design. If yours is black and narrow, you have the Slimline. If it’s silver/aluminium-coloured and wider, you have the Smart Wall Panel — and you should read our StorEase accessories guide instead.

The Problem With the Slimline Rail

When Bunnings first introduced the Slimline Smart Rail, we started getting calls almost immediately. Customers were finding that accessories didn’t feel secure — they’d slot in but could be knocked off with not much effort. We visited our local Bunnings store and tested it ourselves, and the experience matched what customers were reporting.

The issue comes down to the groove design. The Slimline rail has a narrower, shallower groove than the Smart Wall Panel. When you try to attach an accessory, there simply isn’t enough material for the hook to grip. The hook sits in the groove and appears locked, but under lateral load or a firm knock, it can come free. For a light hook holding a garden trowel, that might be fine. For anything heavier — bikes, power tools, heavy baskets — it’s not reliable.

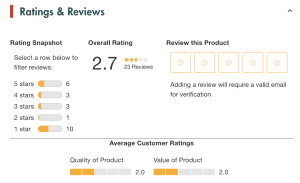
This observation is backed up by a number of reviews on the Bunnings website for the Slimline product, where customers describe accessories falling off under normal use.

StorEase 1200 x 100 x 10mm Wall Bracket Smart Rail Reviews
As at March 2026

Do StoreWALL Accessories Fit the Slimline Smart Rail?

Yes and no — and it’s important to be specific here.

StoreWALL accessories will physically slot into the Slimline rail’s groove. The L-shaped lip at the top of a StoreWALL hook will sit in the upper groove. However, because the groove is shallower and narrower than the StorEase Smart Wall Panel, our CamLok mechanism cannot engage properly with the lower groove. The result is the same problem you’ll have with original StorEase accessories — significant play and movement once the hook is on the rail.

We do not recommend using StoreWALL accessories on the Slimline Smart Rail for anything other than the lightest applications. The CamLok locking mechanism — which is the main reason StoreWALL accessories are so secure on standard slatwall panels — simply cannot do its job on this rail.

📌 Note: This is different to our testing on the StorEase Smart Wall Panel (the wider aluminium one), where CamLok engages correctly and the fit is solid. The Slimline and the Smart Wall Panel are different products with different groove dimensions.

StoreWALL Accessories on StorEase Panels

So What Are Your Options?

Option 1: Use the Slimline rail for lightweight items only

If you’re only hanging light items — garden tools, brooms, small hand tools — the Slimline rail with its original StorEase accessories will probably do the job. Don’t load it with bikes, heavy baskets, or power tools.

Option 2: Add StorEase Smart Wall Panels alongside the Slimline rails

If your Slimline rails are already installed on the wall and you don’t want to remove them, you can fill in between or below them with StorEase Smart Wall Panels (the wider aluminium ones). Those panels are compatible with StoreWALL accessories and CamLok will engage correctly. It’s a patch solution but it works.

Option 3: Replace the Slimline rails with StoreWALL panels

This is what most customers end up doing when the Slimline rail frustrates them enough. StoreWALL Standard Duty panels installed with InstallStrips give you a clean, full-wall panel system with two rows of grooves per panel, access to the full StoreWALL accessory range, and CamLok security on every hook. The InstallStrips mean there are no visible screw heads through the panel, and removal/repositioning of accessories is clean and easy.

Cost-wise, two StorEase Slimline rails side by side (to match the coverage of one StoreWALL 1.2m panel) will cost approximately $61.64. One StoreWALL Standard Duty 1.2m panel is $77.99. For roughly $20 more you will have a per panel, you get a choice of wall panel colour, access to StoreWALL and our large range of accessories that all come with the CamLok locking system. For most customers who’ve called us about the Slimline rail, this is the decision they make.

StorEase Slimline Smart Rail Accessories StorEase Slimline vs StorEase Smart Wall Panel vs StoreWALL — Quick Comparison
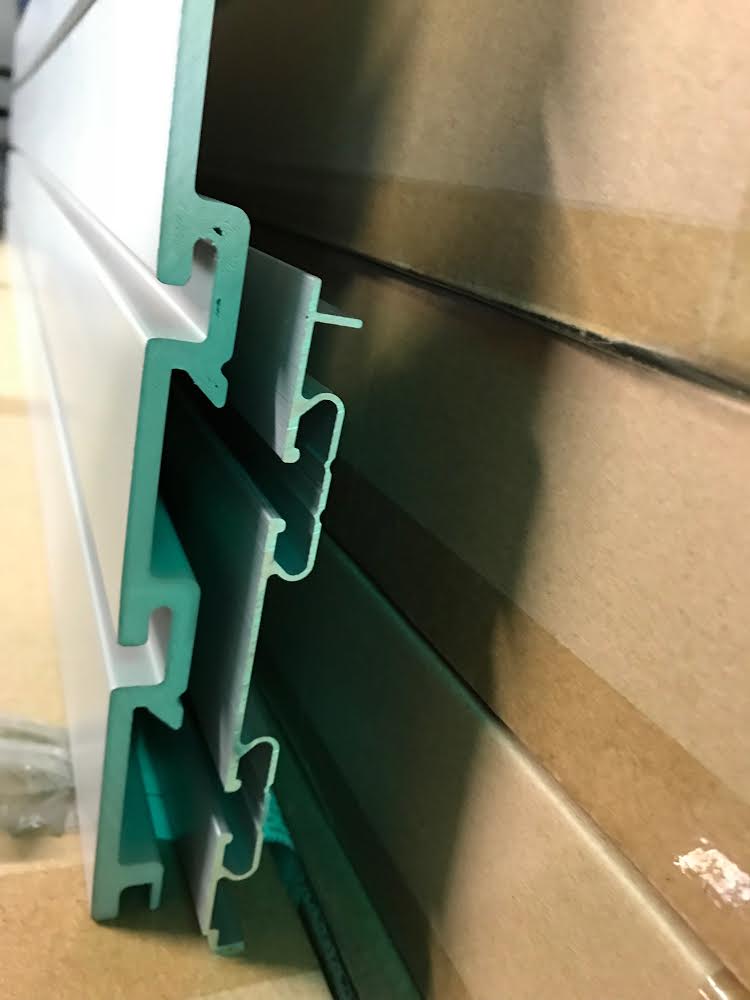
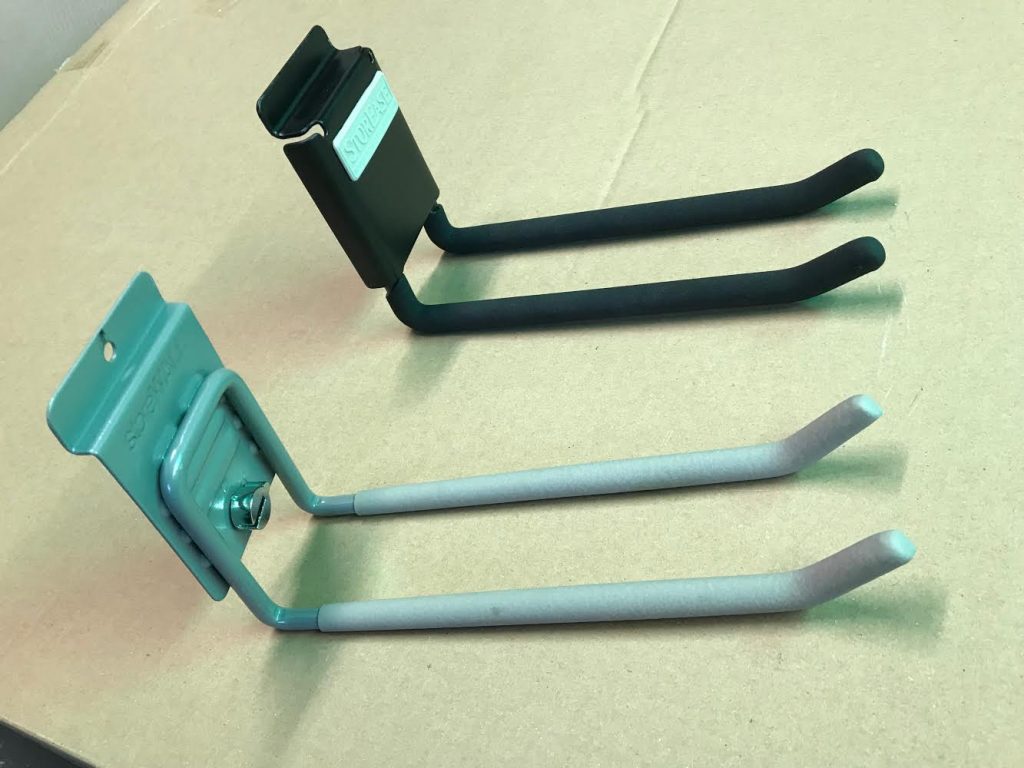
  • StorEase Slimline Smart Rail: 105mm H, black, narrow groove. Accessories have significant play. Not recommended for heavy items.
  • StorEase Smart Wall Panel: 158mm H, aluminium, wider groove. StoreWALL accessories compatible. CamLok engages correctly.
  • StoreWALL Standard Duty 1.2m: 304mm H, PVC, four groove rows. Full CamLok compatibility. Covers twice the wall height of a StorEase panel. Available in 8 colours.

Frequently Asked Questions

I have the StorEase black rail from Bunnings. Will any StoreWALL accessories work on it?

StoreWALL accessories will physically fit the groove but CamLok cannot lock properly due to the shallow groove depth. We do not recommend using StoreWALL accessories on the Slimline rail for heavy items — the fit will have play and is not secure under load.

Can I buy replacement accessories for the Slimline Smart Rail anywhere other than Bunnings?

The Slimline rail uses StorEase’s own accessory system. While StoreWALL accessories technically slot in, they don’t lock securely on this rail. At the moment, Bunnings is the main source for Slimline-specific accessories. If you’re finding the range limited, that’s a genuine constraint of the Slimline system — it’s one of the reasons many customers upgrade to a full panel system.

What’s the easiest way to tell the Slimline and the Smart Wall Panel apart?

Colour and width. If it’s black and narrow (around 105mm), it’s the Slimline. If it’s silver/aluminium-coloured and wider (around 150–158mm), it’s the Smart Wall Panel. They’re different products with different groove specs and different compatibility outcomes.

If I switch to StoreWALL, do I need to remove the Slimline rails first?

It depends on how they’re positioned. If the Slimline rails are at a height that would conflict with where you want to position StoreWALL panels, you’ll need to remove them. If they’re out of the way or can be left as-is, you can install StoreWALL around them. We’re happy to advise on your specific layout — send us a photo of your wall and we can help you plan the best approach.

Can I use StoreWALL accessories on the StorEase Slimline at all — for light things?

Technically yes, with the caveat that CamLok won’t lock properly. For very light items — a single lightweight hook, a small bin — the physical fit may be sufficient. We still don’t recommend it as a general approach, and you should make your own judgement based on the weight of what you’re hanging.

Categories
StorEase Accessories

StorEase Accessories — Compatible with StoreWALL?

Do StoreWALL Accessories Work on StorEase Panels?

If you have a StorEase wall storage system at home from Bunnings and you’re looking for better accessories — more variety, better locking, or heavier-duty hooks — the short answer is yes, StoreWALL accessories are compatible with the StorEase Smart Wall Panel. There are some important caveats depending on which version of StorEase you have, and this page covers all of it.

First — Which StorEase Product Do You Have?

StorEase sells two distinct wall storage products at Bunnings, and they behave differently when it comes to third-party accessories:

  1. StorEase Smart Wall Panel (aluminium, raw finish)

This is the wider of the two panels — 158mm in height, 1200mm long, aluminium in colour. It uses a standard slatwall groove spacing that is compatible with StoreWALL accessories. CamLok engages correctly with this panel and provides a secure, locked fit. This is the one we recommend if you’re looking to add StoreWALL hooks, shelves, bins, or bike racks to your existing setup.

  1. StorEase Wall Track Slimline (black, powder-coated)

This is the narrower rail — 105mm in height, 1200mm long, black in colour. StoreWALL accessories will physically slot into this rail, but the groove design is different enough that CamLok cannot engage properly. The result is significant play and movement once the accessory is on the rail. We do not recommend using StoreWALL accessories on the Slimline rail — for a full breakdown, see our dedicated Slimline post below.

📌 Note: Not sure which one you have? The easiest way to tell: the wider aluminium-coloured panel = Smart Wall Panel (compatible). The narrow black rail = Slimline (not recommended). You can also check the Bunnings product listing — the SKUs are different.

StorEase Accessories — Compatible with StoreWALL? What We Tested

We’ve tested StoreWALL accessories on StorEase panels both in-store at Bunnings, in our workshop and in customer garages over several years. Here’s what we found:

  • StoreWALL Universal or Cradle Hooks: fit the Smart Wall Panel with some minor play depending on the specific hook, but CamLok locks it securely. Functional and safe.
  • StoreWALL Rotating Bike Hook: fits and locks correctly. This is one of the most popular accessories for customers with StorEase walls — StorEase doesn’t offer an equivalent.
  • StoreWALL bins and baskets: compatible with the Smart Wall Panel. CamLok keeps them locked under load.
  • StoreWALL shelves: compatible. Particularly useful given the limited shelf options in the StorEase accessory range.
  • All StoreWALL accessories on the Slimline black rail: physically fits but has significant slack — not recommended for anything other than very lightweight items.
StoreWall hook on StorEase panel

How the Locking Mechanisms Compare

This is the most important practical difference between StorEase accessories and StoreWALL accessories, and it’s worth understanding before you decide what to buy.

StorEase locking mechanism

The StorEase Smart Wall Panel hook uses a front tooth at the top to grip the upper groove, and a rear lip to brace against the lower groove. When installed firmly it holds well for everyday items. The challenge is in adjustment — removing and repositioning the hook requires significant force, which on aluminium panels can scratch the surface. In our testing, the panel showed paint and surface marks after just a few installation and removal cycles.

StorEase Slimline Smart Rail locking mechanism

The Slimline rail uses a different groove design that provides even less contact with the accessory. We tested this in-store at Bunnings and found the original StorEase accessory could be dislodged without much effort at all — not something you’d want for heavier items. This is supported by customer reviews on the Bunnings website.

StoreWALL CamLok

CamLok works differently from either StorEase system. The hook slots into the upper groove as normal, but CamLok then engages a rotating lock inside the lower groove from the front of the hook — securing it at both the top and the bottom. There’s no need to apply force from behind the hook to remove it, which means panel surfaces stay scratch-free through multiple adjustments. And when it’s locked, it stays locked — even under the weight of a full-size bike.

StoreWall hooks on StorEase panel

StorEase vs StoreWALL — Panel Comparison

For context, here’s how the two systems compare at a panel level:

  • StorEase Smart Wall Panel: 150mm H × 1200mm W, aluminium, single row of grooves per panel. Cost approx. $31.11 per panel (covers 0.18m²).
  • StoreWALL Standard Duty Panel: 304mm H × 1219mm W (1.2m) or 2438mm (2.4m), dense PVC, two rows of grooves per panel. Cost approx. $78 per 1.2m panel (covers 0.37m²).
  • To cover the same wall area as one StoreWALL 1.2m panel, you need approximately two StorEase panels stacked. When you factor this in, the price difference between the systems is modest — around $62 for StorEase vs $78 for StoreWALL Standard Duty to cover the same area.
  • StoreWALL panels are made from dense PVC — mould-resistant, weatherproof, and available in 8 colours including Weathered Grey, Brite White, and Autumn Elm. StorEase panels are aluminium.
  • StoreWALL accessories are steel, powder-coated, and significantly heavier duty than StorEase equivalents. The StoreWALL HD Universal Hook weighs approximately twice that of the StorEase equivalent.

Should You Upgrade Your StorEase System or Add StoreWALL Accessories?

StorEase Accessories — Compatible with StoreWALL? If you already have StorEase Smart Wall Panels installed and they’re in good condition, adding StoreWALL accessories is the most cost-effective approach. You get the benefit of CamLok locking and access to a much wider accessory range without replacing your panels.

If your StorEase panels are the old plastic variety — a version Bunnings no longer sells — unfortunately those panels are no longer compatible with any current accessory range including StoreWALL. In that case, replacing the panels is the only real option. We’ve had several customers in this situation and the most practical solution is to remove the old panels and install StoreWALL from scratch.

If you have the Slimline black rail and you’re frustrated with accessories that don’t lock properly, the most practical fix is to replace the rails entirely. StoreWALL Standard Duty panels installed with InstallStrips give you a clean, permanent solution that covers the wall properly and works with the full accessory range.

Frequently Asked Questions

Which StoreWALL accessories work on StorEase Smart Wall Panels?

All StoreWALL standard hooks, cradle hooks, rotating hooks, bins, baskets, shelves, brackets, and bike racks are compatible with the StorEase Smart Wall Panel. CamLok will lock correctly on this panel.

Do StorEase accessories work on StoreWALL panels?

No. StorEase accessories are designed specifically for StorEase panels and do not have the L-shaped lip required to attach to StoreWALL panels. This is a one-way compatibility — StoreWALL accessories fit StorEase, but not the other way around.

I have the old plastic StorEase panels from Bunnings. Can StoreWALL accessories fit?

This depends on the groove spacing and profile of your specific panels. In most cases, no — the old plastic StorEase system used a different groove design that pre-dates the current aluminium range. If you’re unsure, send us a photo and we can advise before you order anything.

Can I mix StorEase and StoreWALL accessories on the same wall?

If you have StorEase Smart Wall Panels, yes — you can run both StorEase and StoreWALL accessories on the same panel. StoreWALL CamLok accessories sit alongside StorEase accessories without issue. Most customers who do this find they gradually replace StorEase accessories with StoreWALL equivalents over time.

What if I’m not sure which StorEase product I have?

The simplest check: if it’s black and narrow (around 105mm), it’s the Slimline rail — StoreWALL accessories are not recommended. If it’s aluminium-coloured and wider (around 150–158mm), it’s the Smart Wall Panel and you’re good to go. You can also find the product name on the Bunnings receipt or look up the product via the Bunnings website.