Posted on

Battening out a brick wall

battening out a brick wall

Battening out a brick wall is a common practice in construction and renovation, but it’s not always necessary for every project. Understanding when and why you should batten out a brick wall can help ensure the longevity and stability of your installations, whether you’re adding insulation, installing garage wall panels, or creating a smooth surface for new finishes. In this article, we’ll explore the situations that require battening, the benefits of the process, and a step-by-step guide on how to do it.


What Does Battening Out Mean?

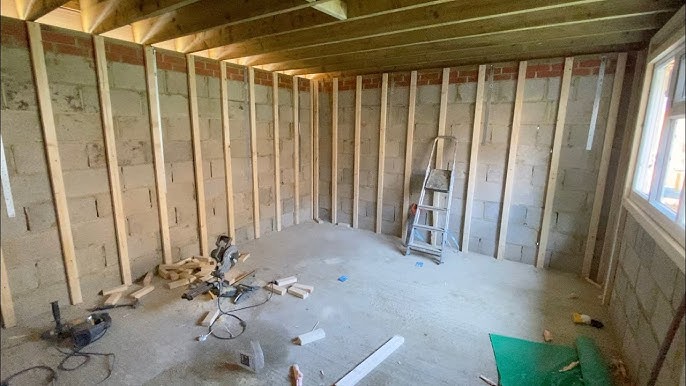
Battening out a brick wall refers to the process of attaching vertical wooden battens (strips of timber) or metal furring strips to a brick or masonry wall. These battens create a framework that allows you to attach various materials, such as plasterboard, insulation, or garage panels, while maintaining an air gap between the wall and the new surface. This method is commonly used when the surface of the wall is uneven, damaged, or needs extra support for the materials being attached.


When is it Necessary to Batten Out a Brick Wall?

Not every brick wall will need battening out, but there are several situations where it becomes essential:

Uneven or Damaged Brickwork

  • If the brick wall is uneven or damaged, it’s challenging to achieve a smooth, level surface using plasterboard or panels alone. Battening out the wall creates a uniform, level framework for attaching these materials, ensuring a better finish and stronger support.

Adding Insulation

  • If you’re renovating an old building or a garage and need to add insulation, battening out the wall is often necessary. Battens create the space needed for insulation boards or rolls to fit securely between the wall and the interior cladding. This not only improves energy efficiency but also helps prevent moisture buildup.

Installing StoreWALL or Similar Garage Wall Panel Systems

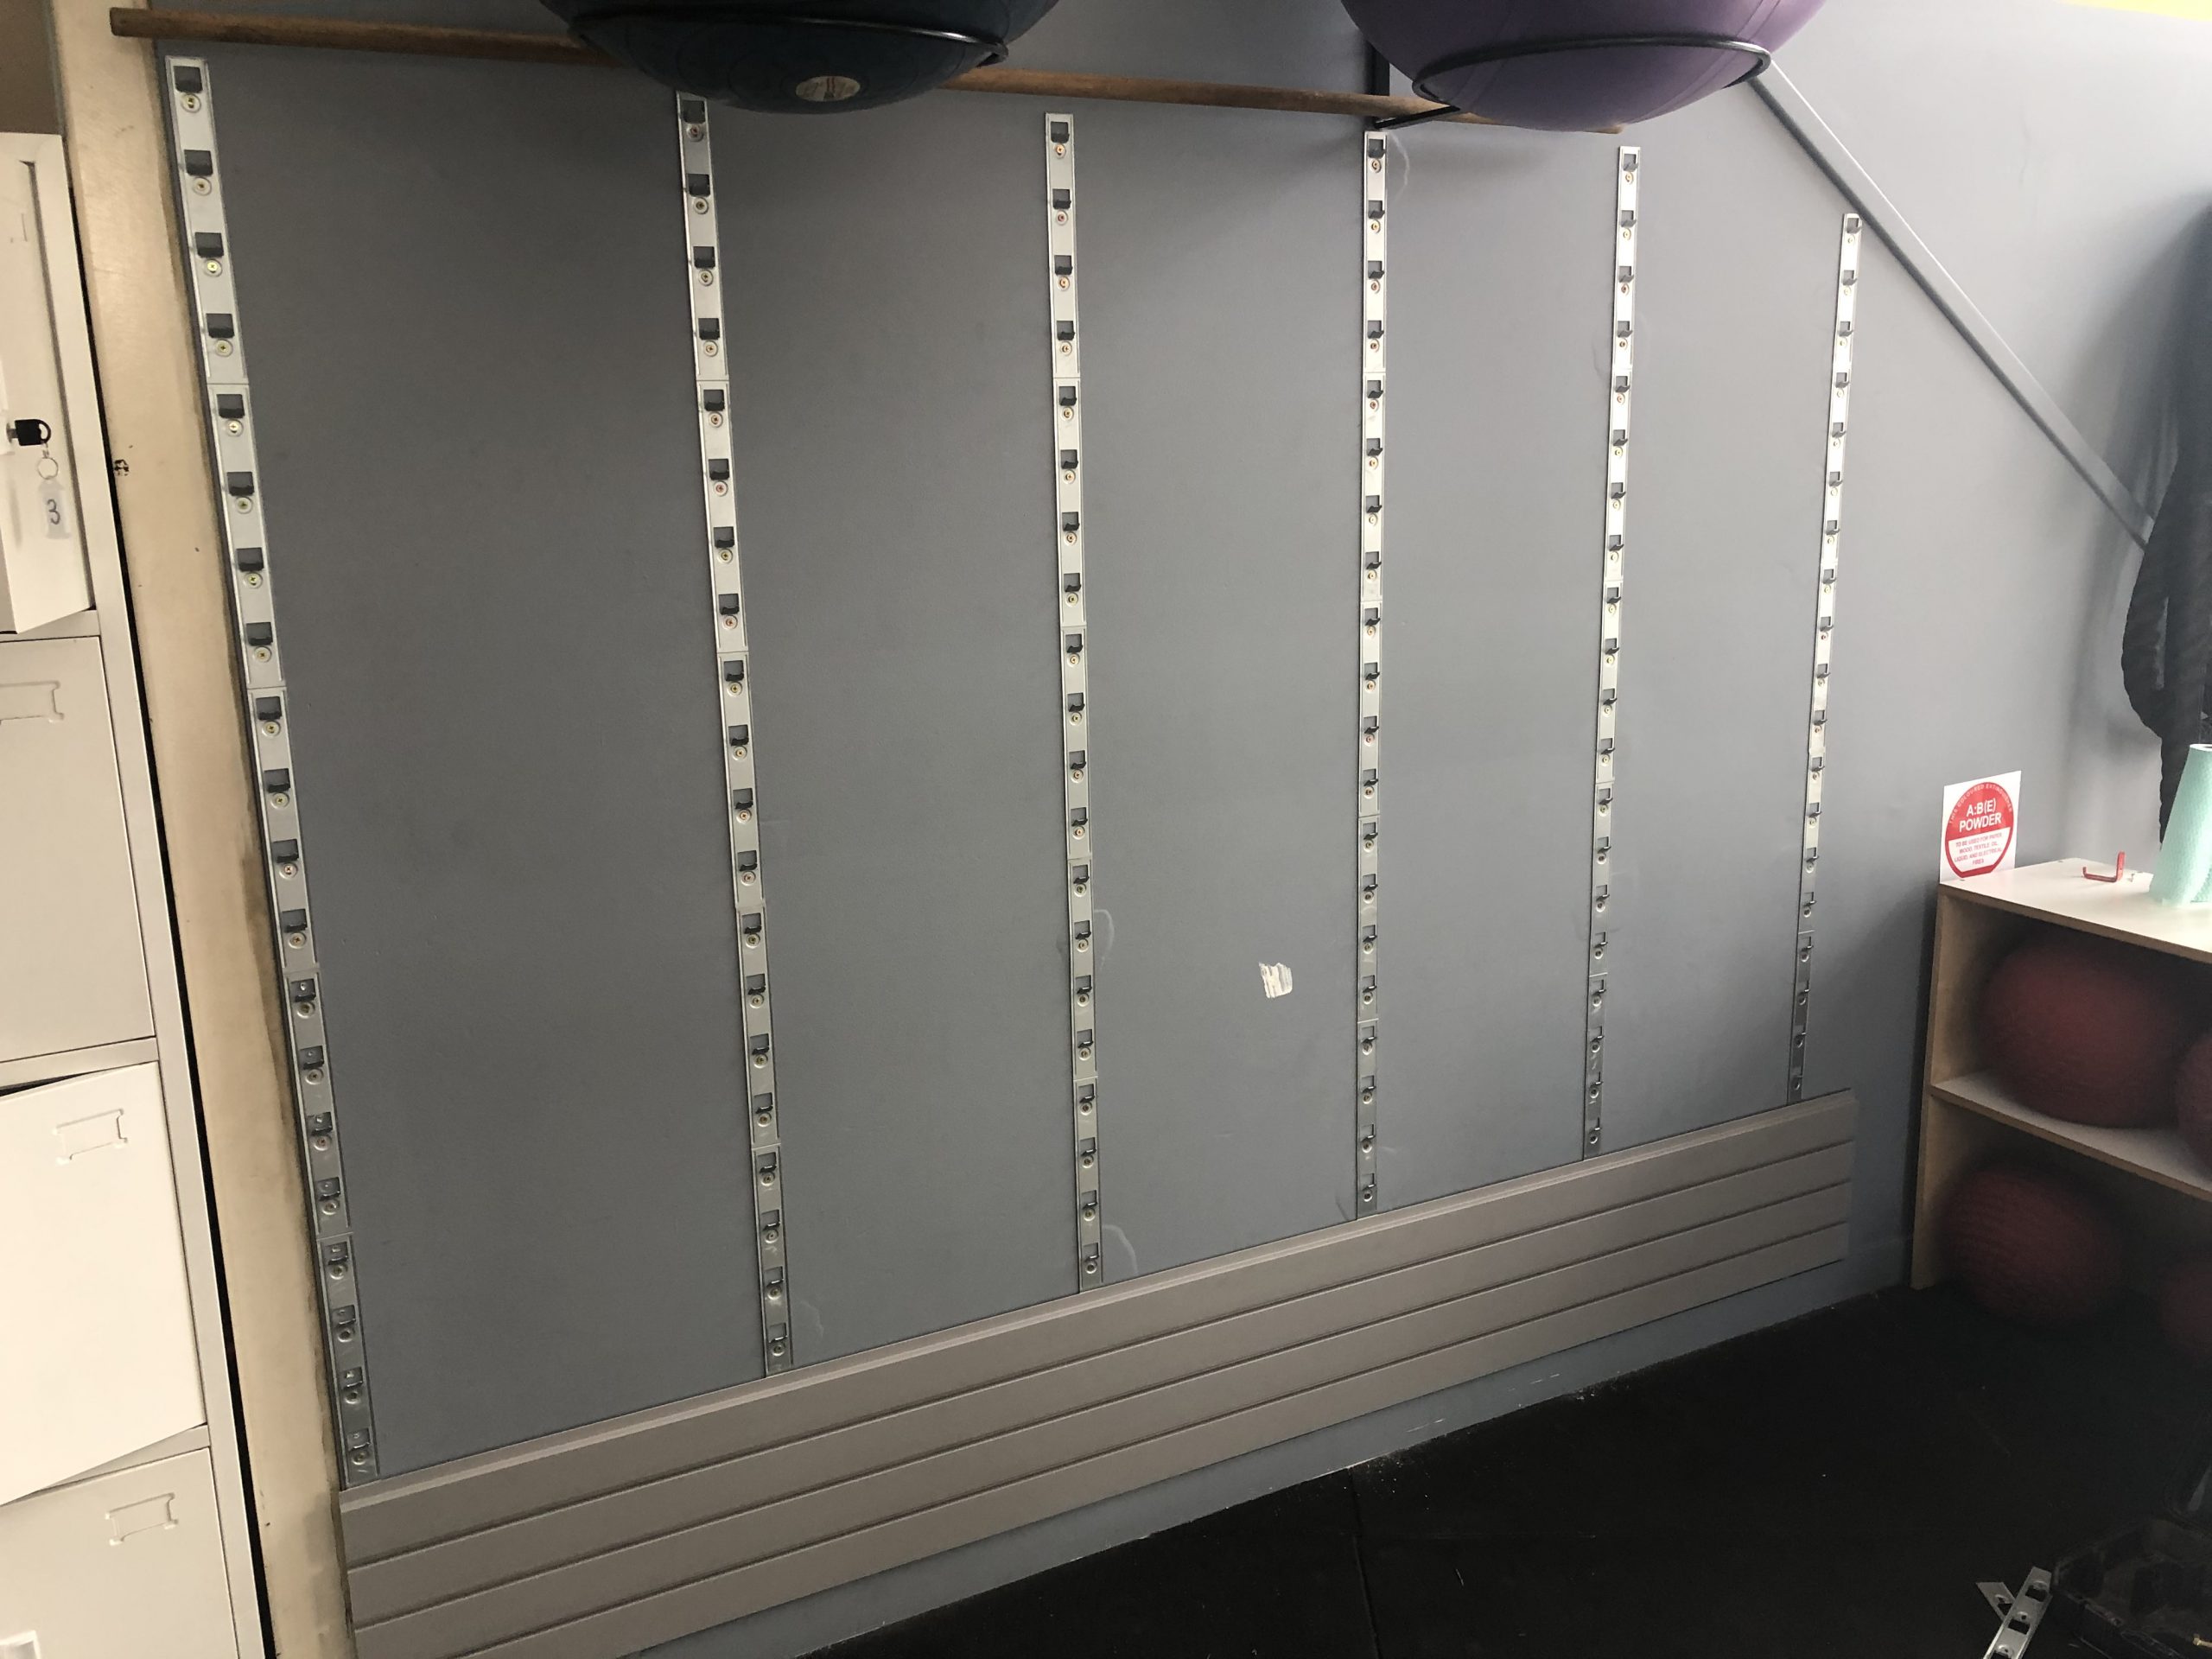
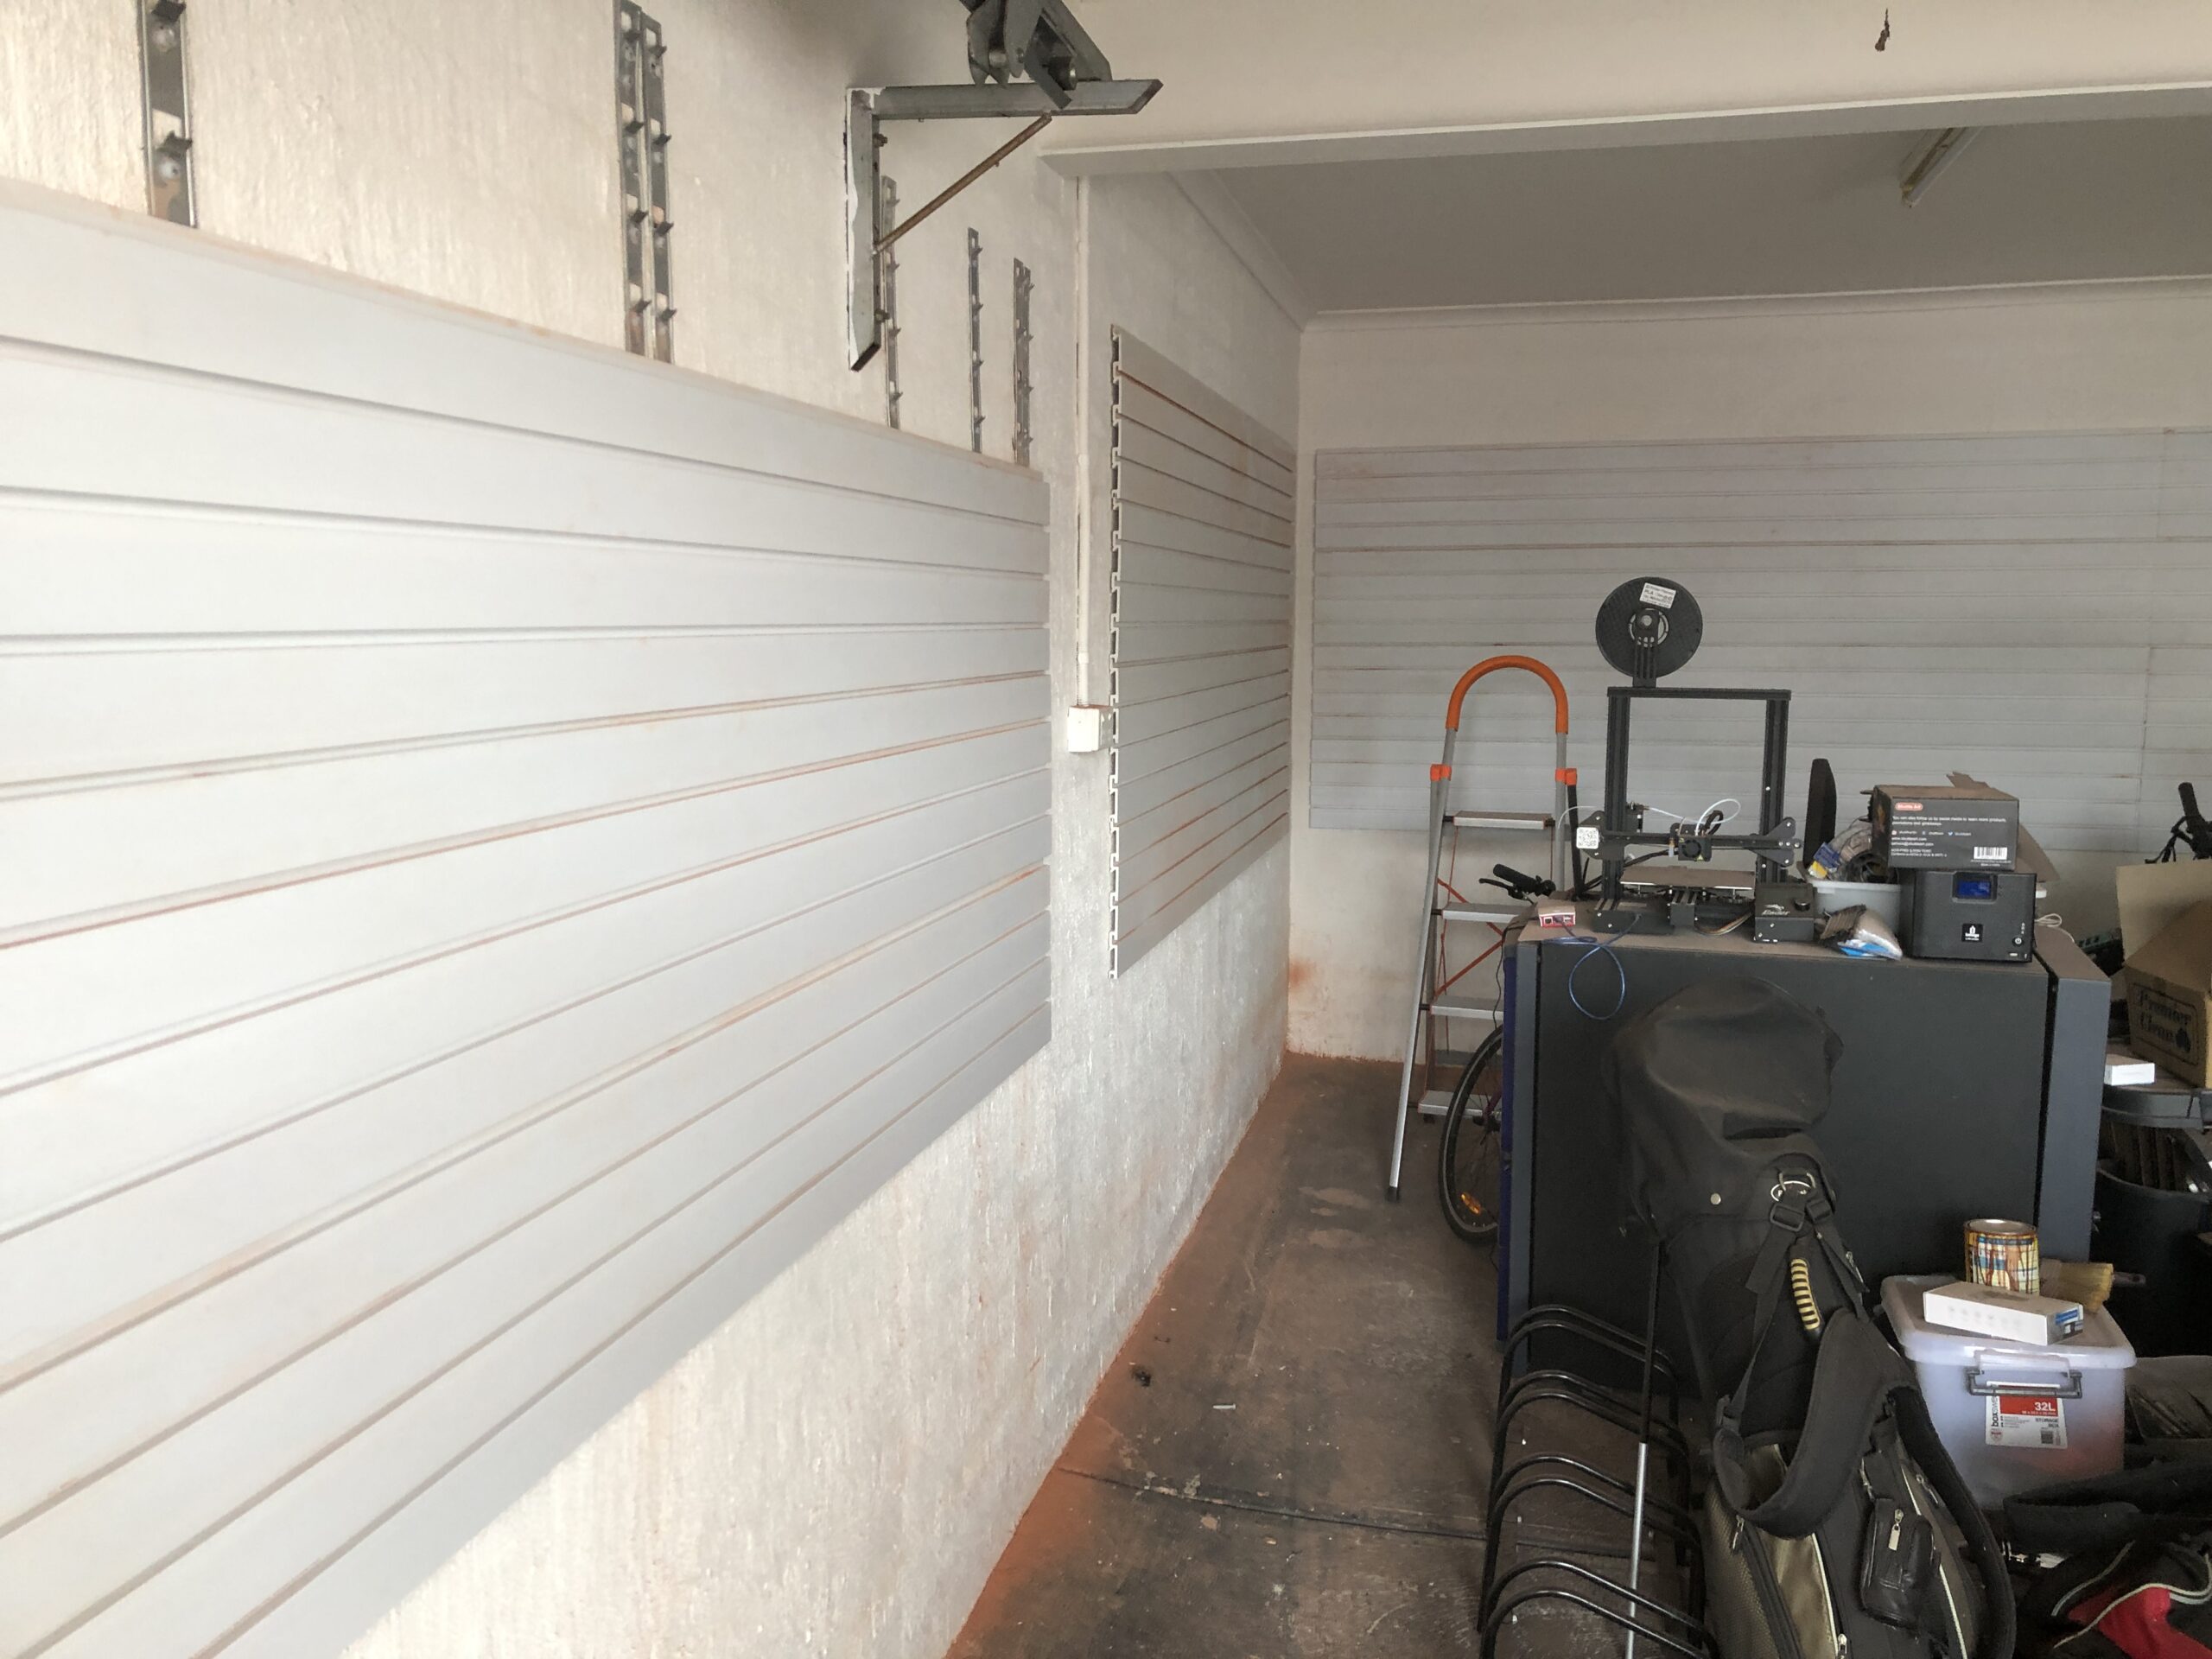
  • Heavy-duty slatwall systems like StoreWALL require a stable and even surface to support their weight and functionality. If the brick wall is very uneven, damaged, or if you need to create a gap for wiring and other installations, battening out the wall provides the necessary support and structure for secure installation.

Moisture and Damp Issues

Accommodating Electrical and Plumbing Systems

  • When installing electrical wiring, pipes, or other systems that need to run behind the interior surface, battening out the wall creates the space needed to conceal these elements safely and effectively.

Benefits of Battening Out a Brick Wall

  • Creates a Level Surface: Ensures that the final surface, whether it’s plasterboard, panels, or tiles, is level and professional-looking.
  • Improves Insulation: Allows for the addition of thermal or acoustic insulation, enhancing energy efficiency and soundproofing.
  • Provides Support: Offers a stable structure for mounting heavy items like shelving, wall panels, or large installations.
  • Moisture Control: Helps manage moisture by creating an air gap that improves ventilation and reduces the risk of damp issues.
  • Flexibility for Services: Allows for the easy routing of cables, pipes, and other utilities behind the wall surface.

Step-by-Step Guide to Batoning Out a Brick Wall

If you determine that battening out your brick wall is necessary, follow these steps for a successful installation:

Tools and Materials Needed:

  • Wooden battens or metal furring strips
  • Electric drill with masonry bit
  • Wall plugs and screws
  • Tape measure
  • Spirit level
  • Pencil or marker
  • Saw (if cutting battens)
  • Insulation boards or rolls (if insulating)

Steps:

  1. Measure and Mark the Wall
    Begin by measuring the height and width of the wall where you’ll be installing the battens. Mark the positions where each batten will be placed, typically spacing them 400–600 mm (16–24 inches) apart. Ensure that the markings are level using a spirit level. A typical interior wall has studs at 450mm intervals. You can use this as your guide for spacing out your battens.
  2. Cut the Battens to Size
    If using wooden battens, ensure you select wood that is as straight as possible. Cheap bent wooden battens will not fix an uneven brick wall. Cut the battens or furring strips to the required length using a saw. Ensure they are cut precisely so they fit snugly from floor to ceiling.
  3. Drill Holes in the Wall
    Using an electric drill with a masonry bit, drill holes at the marked positions where you’ll attach the battens. These holes should be deep enough to accommodate wall plugs and screws.
  4. Attach the Battens to the Wall
    Insert wall plugs into the drilled holes. Place the batten against the wall and drive screws through the batten into the wall plugs. Check each batten with a spirit level to ensure it is vertical and aligned properly. Tighten the screws securely to hold the battens in place.
  5. Install Insulation (Optional)
    If you’re adding insulation, cut the insulation boards or rolls to fit between the battens. Fit them snugly into place, ensuring there are no gaps that could reduce the effectiveness of the insulation.
  6. Attach the Cladding or Panels
    Once the battens and insulation (if applicable) are securely in place, you can proceed with attaching the cladding, plasterboard, or garage wall panel system. Use the battens as the framework for securing these materials, ensuring they are level and securely fastened.
  7. Final Checks
    Once everything is installed, check that the new surface is level and free of gaps or movement. Make any necessary adjustments before finishing with paint, wallpaper, or other finishing touches.

Conclusion

Battening out a brick wall is a practical solution in many renovation and construction scenarios. Whether you’re dealing with uneven brickwork, adding insulation, or installing a heavy-duty system like StoreWALL, battoning ensures a secure and professional finish. By following the steps outlined in this guide, you can achieve a stable and effective installation, improving both the aesthetics and functionality of your space.

If you’re planning a project that involves battening out a wall, ensure you have the right tools and materials on hand, and always consult a professional if you’re unsure about the wall’s condition or structure.

Posted on

How to Manage Weight on Your Shelves

When installing shelves, it’s essential to understand how to manage the weight they will hold to prevent damage or accidents. Here’s a guide on how to effectively manage weight on your shelves and how brackets contribute to their stability.

Understanding Shelf Load Capacity

The load capacity of a shelf refers to the maximum weight it can safely support without bowing, sagging, or breaking. This capacity depends on factors such as the material of the shelf, its thickness, length, and the quality of the brackets used for support. Overloading a shelf can cause it to warp, detach from the wall, or collapse entirely, posing safety risks and potential damage to your belongings.

manage weight on your shelves

Distributing Weight Evenly

To maximize the shelf’s durability, distribute weight evenly across its surface. Place heavier items closer to the wall or directly above the brackets, where the shelf is strongest. Lighter items should be positioned toward the front or on the ends. This approach minimizes stress on the shelf and prevents it from tipping or sagging.

The Importance of Brackets in Shelf Support

Brackets play a critical role in supporting a shelf’s weight. They are the primary means of transferring the load from the shelf to the wall. The number, size, and spacing of brackets directly affect how much weight a shelf can handle:

  • Number of Brackets: The longer the shelf, the more brackets it will need. For example, a shelf up to 1.2 meters typically requires two brackets, while a 1.8-meter shelf requires three. Adding more brackets reduces the span of unsupported shelf length, thereby increasing the weight it can bear.
  • Bracket Size and Material: Larger, sturdier brackets provide better support and can hold more weight. Choose brackets that match the depth of your shelf and are made of strong materials, such as metal, to ensure durability.
  • Spacing Between Brackets: Brackets should be spaced evenly to distribute weight efficiently. For heavier loads, reduce the spacing between brackets to increase support. A good rule of thumb is to place brackets no more than 60 cm apart.
manage weight on your shelves

Recognizing Signs of Overloading

Signs that your shelf may be overloaded include bowing or sagging in the middle, the shelf pulling away from the wall, or cracking sounds from the brackets or shelf material. If you notice any of these signs, reduce the load immediately and consider adding more brackets for reinforcement.

manage weight on your shelves

Examples of incorrect spacing, 2 or 3 brackets over 2.4m

Choosing the Right Wall Anchors

The effectiveness of your brackets also depends on the wall anchors used. Anchors should be appropriate for the wall type (drywall, plaster, brick, etc.) and strong enough to handle the combined weight of the shelf and its contents. Heavy-duty anchors, such as toggle bolts or molly bolts, are recommended for heavier loads.

Regular Maintenance and Safety Checks

Periodically check your shelves and brackets for signs of wear, damage, or loosening. Tighten any loose screws, replace damaged brackets, and ensure the shelf remains level and secure. Regular maintenance helps prevent accidents and prolongs the life of your storage solution.

Proper weight management on shelves and the strategic use of brackets is crucial for creating safe and functional storage spaces. By understanding load capacity, distributing weight evenly, and choosing the right brackets and anchors, you can maximize the utility of your shelves while ensuring they remain secure and stable.

Posted on

The Evolution of Slatwall

the evolution of slatwall

From Retail Staple to Home Organization Hero

Slatwall, a familiar sight in retail stores for decades, has evolved significantly since its inception. Originally designed to maximize display space and flexibility in commercial settings, slatwall has transcended its initial purpose, finding new applications in home organization, particularly in garages and workspaces. Let’s explore the evolution of slatwall from its humble beginnings to its current status as a versatile and essential storage solution.

The Birth of Slatwall

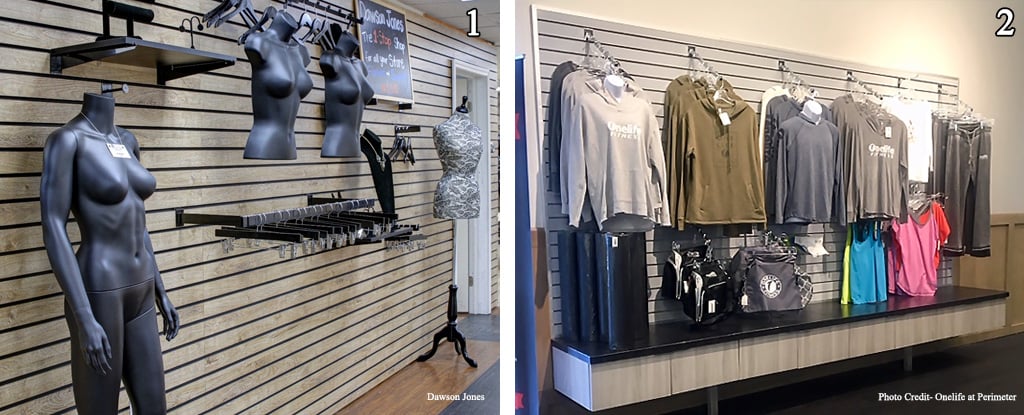
Slatwall, also known as slotwall or slatboard, was first introduced in the 1960s. Its creation was driven by the need for a flexible, durable, and aesthetically pleasing display system for retail environments. The design featured horizontal grooves or slats that allowed for the easy insertion of various accessories such as hooks, shelves, and brackets. This modular system enabled retailers to customize their displays quickly and efficiently, adapting to changing inventory and promotional needs.

the evolution of slatwall

Slatwall in Retail: The Early Years

During the 1970s and 1980s, slatwall gained popularity across various retail sectors. Its ability to display a wide range of products in an organized and attractive manner made it a go-to solution for store owners. Whether showcasing clothing, electronics, or sporting goods, slatwall provided the versatility needed to create eye-catching displays that could be reconfigured without significant effort or expense.

The Evolution of Slatwall – Innovations and Improvements

As slatwall’s popularity grew, so did the innovations surrounding it. The materials used for slatwall panels evolved from basic wood composites to more durable and aesthetically pleasing options like medium-density fiberboard (MDF) with laminate finishes. This development not only enhanced the durability of slatwall but also expanded its aesthetic appeal, allowing it to blend seamlessly with various store decors.

Additionally, a wide array of slatwall accessories emerged, further enhancing its functionality. Specialized hooks, baskets, and shelving units were designed to accommodate specific product types, making slatwall even more adaptable to different retail environments.

Slatwall Enters the Home

While slatwall continued to dominate the retail display market, its potential for home organization began to be recognized. The late 1990s and early 2000s saw a shift as homeowners started to adopt slatwall systems for personal use, particularly in garages, workshops, and home offices. The same attributes that made slatwall a favorite in retail—versatility, durability, and ease of customization—proved invaluable for home storage solutions.

The Garage: A New Frontier

Garages, often the most cluttered and underutilized spaces in a home, became the perfect canvas for slatwall’s capabilities. Homeowners began using slatwall panels to organize tools, sports equipment, gardening supplies, and more. The ability to easily rearrange hooks and shelves meant that the storage system could adapt to changing needs, whether it was a growing collection of tools or seasonal sports gear.

Manufacturers responded to this growing demand by creating slatwall panels specifically designed for residential use. These panels often featured more robust materials to withstand the rigors of garage environments and came in a variety of finishes to suit different aesthetic preferences.

Beyond the Garage: Slatwall in Modern Homes

Today, slatwall has expanded beyond garages and workshops, finding its place in various areas of the home. In home offices, slatwall panels provide a customizable organization system for office supplies, files, and gadgets. In laundry rooms, they offer a practical solution for keeping cleaning supplies and laundry essentials neatly organized. Even in kitchens, slatwall can be used to create an adaptable storage system for pots, pans, and utensils.

The Future of Slatwall

The evolution of slatwall continues as new materials and designs emerge. Innovations such as metal and PVC slatwall panels offer enhanced durability and resistance to moisture, making them suitable for outdoor applications as well. As the trend towards home organization and optimization grows, slatwall is likely to remain a popular choice for both retail and residential environments.

Moreover, the rise of smart home technology presents new opportunities for integrating slatwall with digital storage solutions. Imagine slatwall panels equipped with sensors that help you track inventory or find misplaced tools with the help of a smartphone app.

Conclusion

From its origins as a retail display system to its current status as a versatile home organization solution, slatwall has come a long way. Its evolution reflects the changing needs of both commercial and residential spaces, adapting to new challenges and opportunities along the way. As we continue to seek efficient and customizable storage solutions, slatwall’s legacy of flexibility and innovation ensures it will remain a staple in our homes and businesses for years to come.

Posted on

How to Find Metal and Wooden Stud

Finding studs behind plaster walls can be challenging, but with the right tools and techniques, you can locate both metal and wooden studs effectively. Here’s a detailed guide to help you find metal and wooden stud.

Understanding Plaster Walls

Behind your plaster wall is a frame that looks like the picture below. Your studs (upright pieces) will typically run the full height of your wall. They will be spaced about 450mm and 600mm (maximum) apart. Between the studs, you have horizontal pieces called Noggins. You will have 1 or two between each stud (depending on the height of your wall).

Find Metal and Wooden Stud

Tools You’ll Need – Find Metal and Wooden Stud

  • Stud Finder: Make sure it’s capable of detecting both metal and wooden studs.
  • Tape Measure: Useful for verifying standard stud spacing.
  • Impact Driver: For marking holes in plaster once studs are located.
  • Magnet: Used for locating metal studs if your Stud Finder can’t.

I have both a Stanley and an Ozito stud finder. Unfortunately, they aren’t always consistent with what they locate. A few drill holes usually solves the arguement.

Using a Stud Finder

  • Calibrate the Stud Finder: Place it flat against the wall and turn it on, following the manufacturer’s instructions.
  • Scan the Wall: Move the stud finder horizontally across the wall. Most stud finders will beep or light up when they detect a stud. You will need to repeat this several times to confirm that you have located the stud.
  • Mark the Stud Location: Use a pencil to mark the edges of the stud as detected by the stud finder.
  • Confirm stud location: You should be able to measure the distance between the studs you have located. You should find that the distance should be consistent ie intervals of 450mm.

Visual and Tactile Clues

  • Look for Outlets and Switches: Electrical outlets and light switches are usually attached to studs. Measure 15-20cm from these points to find adjacent studs.
  • Tap the Wall: Lightly tap the wall with your knuckles. A solid sound indicates a stud, while a hollow sound indicates the space between studs. This can be very hit-and-miss approach.

Verifying Stud Locations

  • Drill a Small Hole: Use your impact driver to drill a pilot hole at the marked location. If you hit solid wood or metal, you’ve found a stud. Note that sometimes you might just hit the edge of a stud. Therefore a few holes might be needed to find centre.

Finding Metal Studs

  • Stud Finder with Metal Scan Mode: Many stud finders have a metal scan mode specifically designed for detecting metal studs.
  • Magnet Method: A strong magnet can help detect metal studs more reliably than wooden ones.

Tips and Precautions

  • Multiple Checks: Always verify stud locations using multiple methods to ensure accuracy.
  • Be Patient: Finding studs behind plaster walls can be time-consuming. Take your time to avoid mistakes.
  • Avoid Pipes and Wires: Be cautious of plumbing and electrical wiring when drilling into walls. Use a wire detector to check for electrical wires.

ConclusionFind Metal and Wooden Stud

Locating studs in plaster walls requires a combination of tools and techniques. By using a stud finder, magnet, and visual clues, you can accurately find both metal and wooden studs. Always verify your findings and proceed with caution to avoid damaging your walls or hitting utilities.

Posted on

Wall Mounted Storage for your Garage

compare garage storage solutions

Maximizing Your Space Efficiently

Are you constantly battling with clutter in your garage? Do you find yourself struggling to locate tools, sports equipment, or holiday decorations when you need them? If so, wall mounted garage storage could be the game-changer you’re looking for. By leveraging the vertical space in your garage, you can significantly increase your storage capacity, organize your belongings efficiently, and create a more functional and accessible workspace. Let’s delve into the benefits of wall mounted storage solutions and how you can implement them in your garage.

The Advantages of Wall Mounted Storage

  • Maximized Space Utilization: One of the most compelling reasons to opt for wall-mounted systems is the ability to free up floor space. This approach allows you to store items off the ground, making it easier to clean the floor and move around.
  • Enhanced Organization: Wall-mounted systems often come with a variety of shelving, hooks, and bins that can be customized to suit your storage needs. This means you can have a dedicated spot for every item, from garden tools and sports gear to automotive supplies and woodworking equipment.
  • Improved Accessibility: By keeping items off the floor and at eye level, garage wall systems make it easier to find and retrieve what you need without digging through piles or boxes.
  • Visual Appeal: A well-organized garage wall storage system can significantly improve the look of your garage, transforming it from a cluttered catchall to a tidy and efficient space.
wall mounted storage

Implementing Wall Mounted System in Your Garage

1. Assess Your Needs: Start by taking inventory of what you currently store in your garage. Group items by category and consider how often you use them. This will help you determine the type of storage solutions that will work best for your space.

2. Choose the Right System: There are several types of garage wall storage systems to choose from, including:

  • Slatwall Panels: These are great for versatile storage needs, allowing you to attach hooks, shelves, and bins that can be easily repositioned.
  • Track Systems: Ideal for hanging larger tools and equipment, track systems offer sturdy support and can be customized with various hooks and accessories.
  • Shelving Units: Fixed or adjustable shelving units are perfect for storing boxes, bins, and larger items that don’t hang well.

3. Plan Your Layout: Before installing any system, plan your layout carefully. Consider placing frequently used items at arm’s reach and seasonal or rarely used items higher up or in less accessible spots.

4. Installation: While many wall-mounted systems are designed for DIY installation, ensure you have the right tools and follow the manufacturer’s instructions carefully. It’s crucial to secure storage systems to studs in the wall to provide adequate support for your items.

5. Organize and Label: Once your storage system is in place, organize your items logically and consider labeling shelves, bins, and hooks to make it easy to find and return items to their rightful spot.

wall mounted storage system

Garage Wall System – Conclusion

Wall-mounted garage storage offers a smart and effective way to tackle the clutter in your garage. By taking advantage of vertical space, you can create a more organized, accessible, and visually appealing space. Whether you’re a DIY enthusiast, a sports fanatic, or just looking to declutter, there’s a wall-mounted garage storage solution that can meet your needs. Start planning your garage transformation today and enjoy the benefits of a well-organized space.

Posted on

Transforming Your Garage into a Home Office

home office

In the modern quest for maximizing living spaces, transforming your garage into a home office stands out as a brilliant and practical solution. As more people embrace remote work, the need for a dedicated workspace has become paramount. This guide offers insightful advice on converting your garage into an efficient, comfortable, and stylish home office.

Assessing Your Space

Start With a Plan: Before diving into the transformation, assess the size and layout of your garage. Consider the amount of natural light, the garage door’s location, and the availability of electrical outlets. A detailed plan will help you visualise the office space and identify potential challenges.

Permits and Regulations: Check with local authorities for any permits required to convert your garage into a living space. Compliance with building codes and regulations ensures safety and avoids legal complications.

Home office

Designing Your Home Office

Insulation and Climate Control: Garages are not typically designed for comfort, so adding insulation is crucial. Insulate walls, ceilings, and the garage door to maintain a comfortable temperature year-round. Consider installing a heating and cooling system to ensure your office is conducive to productivity.

Lighting: Optimize natural light by installing windows or skylights. Supplement with artificial lighting solutions like LED desk lamps and overhead lights to create a bright and inviting workspace.

Flooring: Upgrade the garage floor for warmth and comfort. Epoxy coatings, interlocking tiles, or laminate flooring can transform the space and add a professional touch to your home office.

Furniture and Storage: Select ergonomic furniture to enhance productivity and comfort. Incorporate storage solutions such as shelving units and cabinets to organize office supplies, documents, and equipment, keeping the space clutter-free.

Technology and Connectivity

Electrical Upgrades: Ensure your garage has adequate electrical outlets to support computers, printers, and other office equipment. Hiring a professional electrician to upgrade your electrical system is advisable for safety and efficiency.

Internet Connectivity: Strong Wi-Fi is essential for a home office. If your garage has weak signal strength, consider using Wi-Fi extenders or a dedicated internet line for reliable connectivity.

Personalizing Your Space

Decor: Personalize your home office with decor that inspires creativity and productivity. Add plants, artwork, and personal items to make the space welcoming and uniquely yours.

Noise Reduction: Soundproofing your garage can help minimize distractions from outside noise. Use acoustic panels, weather stripping, and door seals to create a quiet work environment.

Final Thoughts

Converting your garage into a home office is a smart way to utilize unused space and enhance your work-from-home experience. By carefully planning and designing your office, you can create a functional and comfortable workspace that boosts productivity and creativity. Remember, a well-thought-out home office not only benefits your work life but also adds value to your home.

Posted on

Reclaim Your Garage

slatwall messy garage

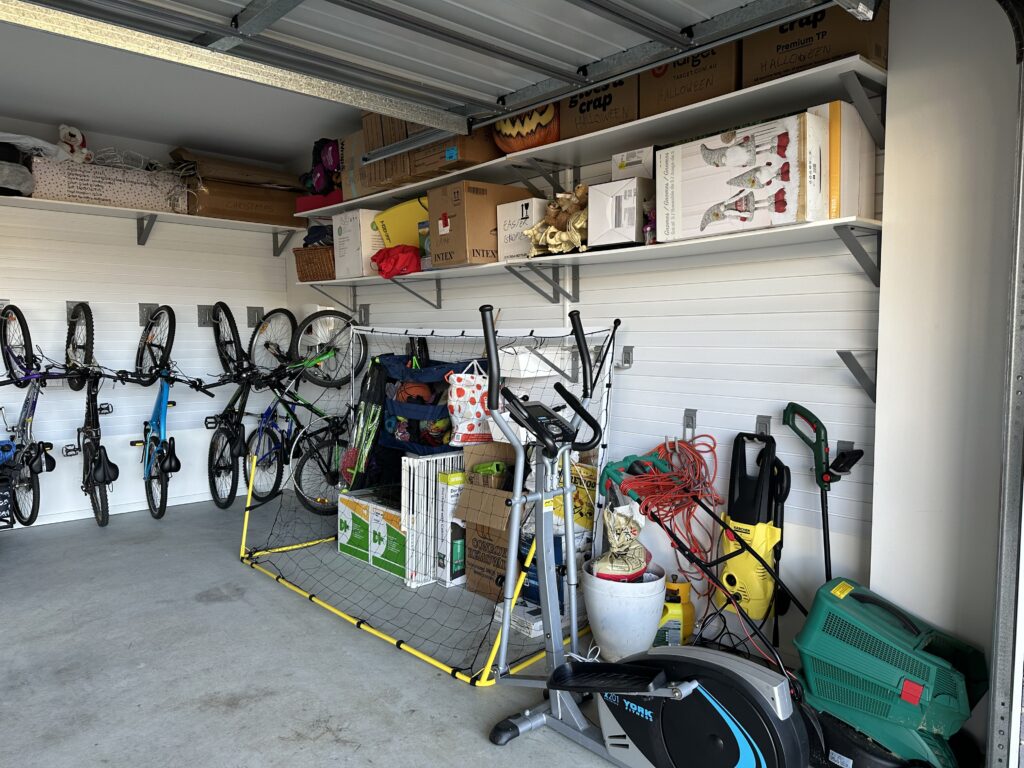
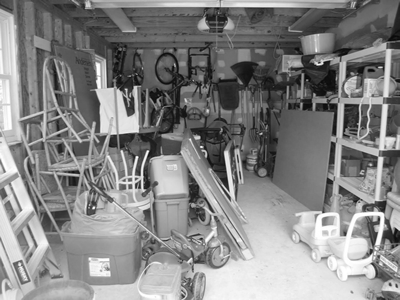
In Australia, the garage has traditionally been a multifunctional space, serving not just as a shelter for cars but also as a storage area for a myriad of household items, tools, and occasionally, even as a workspace or recreational area. However, a common observation across many Australian homes is that garages tend to be particularly cluttered and messy. This phenomenon can be attributed to several factors, ranging from changing lifestyle patterns to architectural design and consumer behavior. This article delves into the reasons behind the messiness of Australian garages, shedding light on the underlying causes and potential solutions. It also introduces a range of solutions that can assist you to reclaim your garage.

reclaim your garage

Shifting Lifestyle Patterns

One of the primary reasons for cluttered garages is the evolving lifestyle of Australians. As people acquire more possessions, from sports equipment to seasonal decorations, the garage often becomes the go-to storage space. The rise of hobbies and home improvement projects has also contributed to the accumulation of tools and materials, often stored in the garage for convenience.

Lack of Adequate Storage Solutions

Many Australian homes, especially older ones, were not designed with sufficient built-in storage. As a result, garages become the overflow space for items that do not fit inside the house. Without proper organization systems such as shelving, cabinets, or racks, these items can quickly accumulate, creating clutter and disorganization.

The Consumer Culture

The surge in consumerism, driven by the ease of online shopping and the allure of sales, has led to an increase in household belongings. Many Australians find themselves purchasing items on impulse or in bulk, which, due to lack of immediate use or space inside the home, end up in the garage. This consumer habit exacerbates the issue of clutter, making garages appear messier than ever.

Multipurpose Use of Garage Space

Garages in Australia are increasingly being used for purposes other than parking cars. They serve as workshops, home gyms, and even entertainment areas. This multipurpose use, while beneficial, contributes to the clutter, as it introduces a variety of items into the space that are not always neatly organized or stored.

Procrastination and Lack of Time

The task of cleaning and organizing a garage can be daunting, especially when the clutter has been accumulating over time. Many individuals postpone this task due to its overwhelming nature or due to a busy lifestyle. This procrastination, combined with a lack of dedicated time to tackle the mess, results in garages remaining cluttered for extended periods.

reclaim your garage

Architectural Design and Planning

The design of some Australian homes does not prioritize garage storage efficiency. Garages are often designed to meet minimum size requirements for vehicles, with little consideration for storage or organization. This lack of foresight in design contributes to the challenge of keeping garages tidy and well-organized.

Seasonal and Infrequently Used Items

Garages often house seasonal items such as holiday decorations, winter clothing, and sports equipment, which are not used year-round. These items take up valuable space and contribute to the clutter, especially when not stored properly.

Reclaim Your Garage – Solutions and Strategies

Addressing the messiness of garages requires a multifaceted approach. You can adopt various strategies to mitigate this issue so you can reclaim your garage:

  • Implementing Efficient Storage Solutions: Installing shelving, cabinets, and overhead storage can maximize space and reduce clutter.
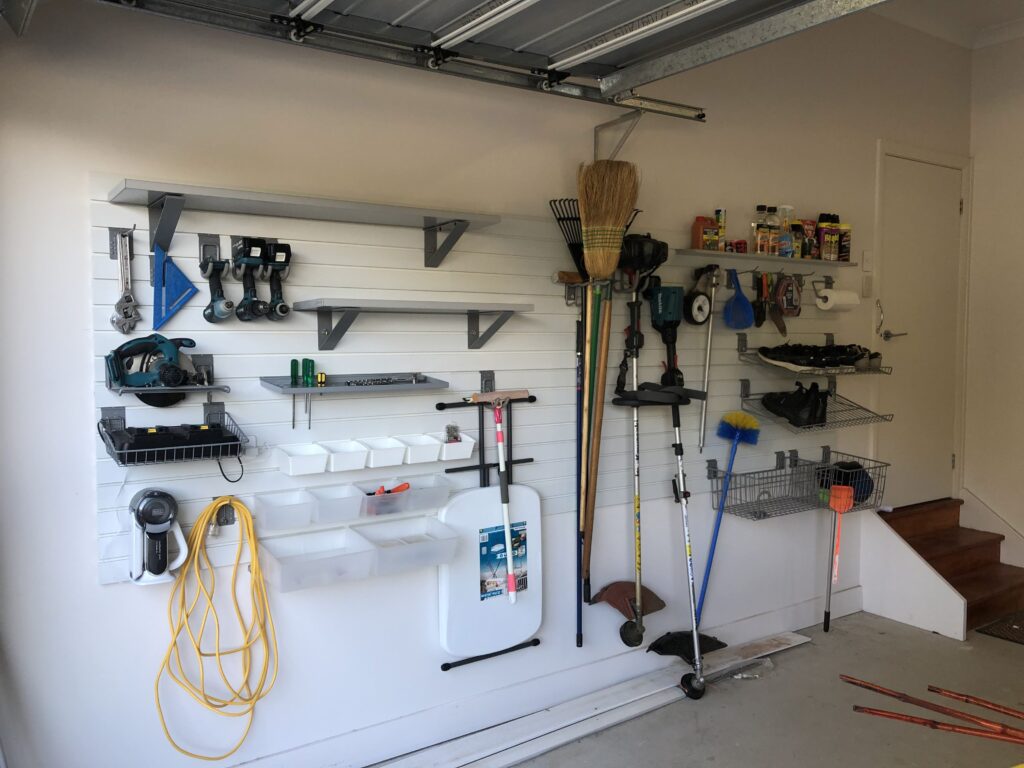
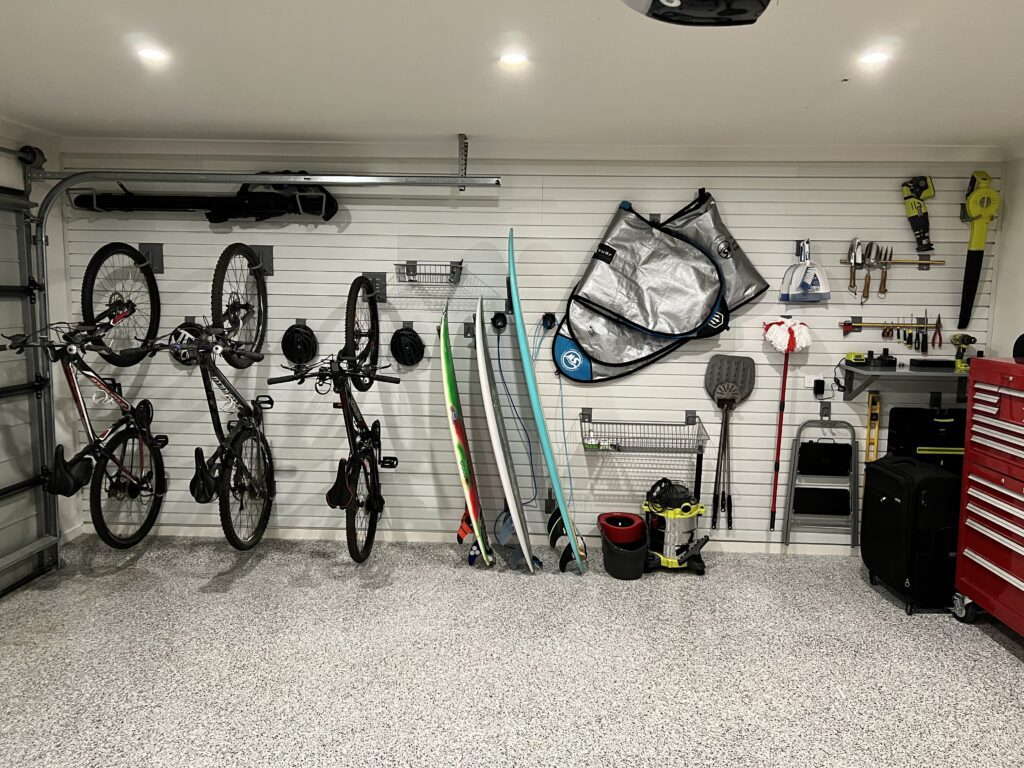
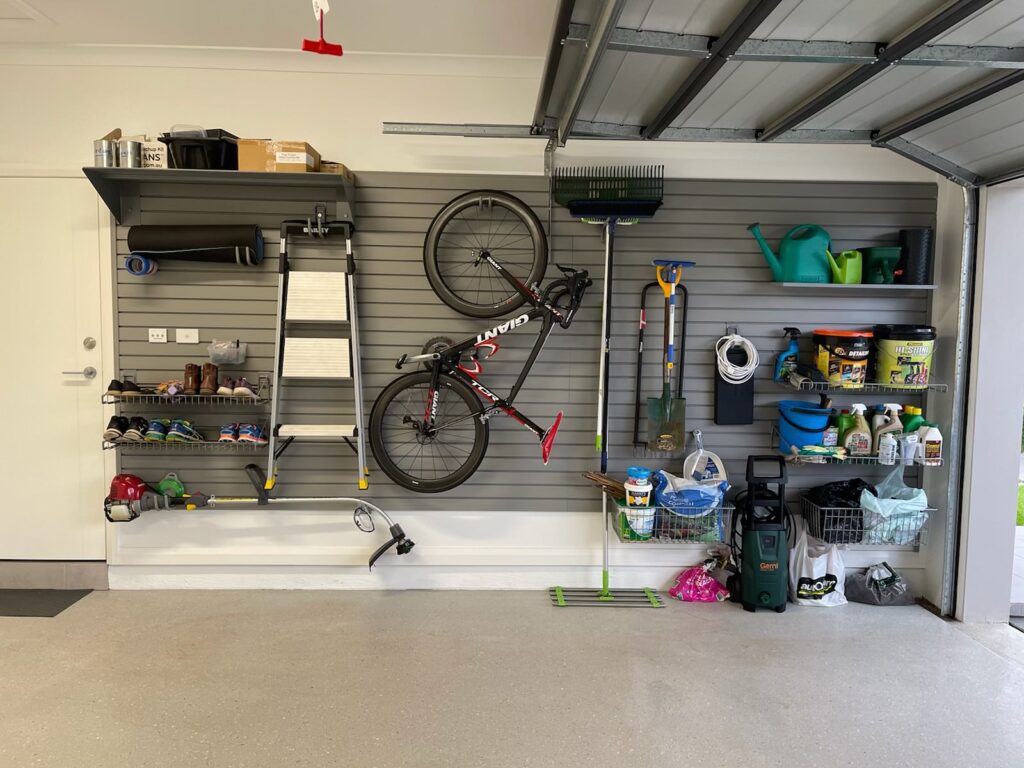
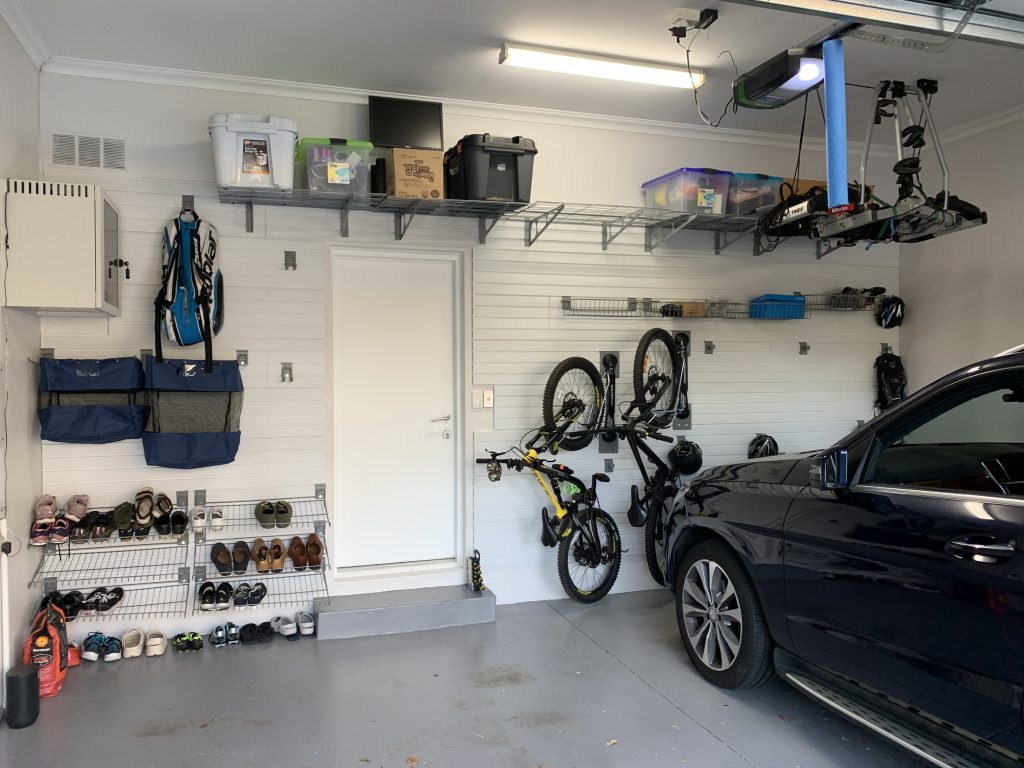
  • Utilise your walls: Wall storage solutions allow you to maximise the height and width of your walls as storage areas. Garage wall storage solutions enable the use of hooks, baskets, and shelves to safely store everything from sporting goods to power tools and even work boots.
  • Regular Decluttering: Setting aside time to sort through items and dispose of or donate those that are no longer needed can significantly reduce clutter.
  • Designating Spaces: Assigning specific areas within the garage for different types of items can help maintain organization.
  • Investing in Multipurpose Furniture: For garages used as multipurpose spaces, furniture that offers storage can be particularly useful.
  • Embracing Minimalism: Adopting a more minimalist approach to possessions can prevent the garage from becoming a catch-all storage space.

In conclusion, the cluttered state of Australian garages is a multifaceted issue influenced by lifestyle changes, architectural design, and consumer habits, among other factors. By acknowledging these causes and implementing practical solutions, you can reclaim your garage, transforming it into an organised, and functional space.

Posted on

Creating a home gym

Creating a home gym in your garage can be an exciting yet challenging project that requires careful planning and execution. A well-designed garage gym not only offers convenience and privacy but can also be tailored to meet your specific fitness goals. This article will guide you through the process, from conceptualisation to completion, ensuring that your home gym is both functional and motivating.

1. Assessing Your Space

The first step in creating a home gym is to assess the available space in your garage. Consider the size and layout to determine what equipment you can accommodate without cluttering the space. It’s important to keep enough room for movement and to perform exercises safely. Measure the area and sketch a rough layout to visualise where everything will fit.

2. Setting Your Fitness Goals

Before purchasing equipment, define your fitness goals. Whether you’re looking to build muscle, improve cardiovascular health, or enhance flexibility, your goals will dictate the type of equipment you need. This focus will help you create a space that serves your needs without unnecessary expenses on equipment that won’t be used.

3. Choosing the Right Equipment

Selecting the right equipment is crucial for a home gym. Opt for versatile, space-saving pieces that offer a wide range of exercises. For strength training, consider adjustable dumbbells, a bench, and a squat rack. For cardio, a treadmill or stationary bike can be great choices. Don’t forget about mats for floor exercises and stretching.

4. Flooring

Proper flooring is essential in a garage gym to protect both your equipment and the garage’s original floor. Rubber mats or interlocking foam tiles are popular choices. They provide shock absorption, reduce noise, and offer a stable surface for workouts.

5. Ventilation and Lighting

Garages can be poorly ventilated and dimly lit, which is not ideal for a workout space. Improve ventilation by installing fans or an air conditioning unit. Ensure there’s ample lighting to create an energising workout environment. Natural light is preferable, but bright, artificial lights can also work well.

6. Temperature Control

Garages can become extremely hot in summer and cold in winter. Consider installing a heating and cooling system or use portable heaters and fans to maintain a comfortable temperature year-round.

7. Storage Solutions

Efficient storage solutions will keep your gym organised and tidy. Use shelves, racks, baskets, and hooks to store weights, bands, and other equipment. This not only helps in maximising space but also ensures safety by keeping the floor clear.

8. Decor and Motivation

The ambiance of your gym can significantly impact your motivation to workout. Consider painting the walls in vibrant colors, adding motivational posters, or installing a sound system for music. Personal touches will make the space more inviting and inspiring.

9. Safety Measures

Ensure your gym is safe to use by regularly inspecting equipment for wear and tear and keeping the area free of hazards. Also, consider installing mirrors to check your form and prevent injuries.

10. Budgeting and Cost

Creating a home gym can be expensive, but there are ways to minimize costs. Start with the basics and gradually add equipment over time. Look for second-hand equipment or discounts and sales at fitness stores.

Creating a home gym – Conclusion

Creating a home gym in your garage is a rewarding project that can enhance your fitness journey. By carefully planning the layout, selecting the right equipment, and creating an inspiring environment, you can build a gym that meets your needs and motivates you to achieve your fitness goals. Remember, the key is to start simple and expand as your needs and interests grow. With dedication and effort, your garage can transform into a personalized fitness haven.

Posted on

The Allure of the Australian Man Cave

australian man cave

Understanding the Popularity of Personal Sanctuaries

In recent years, the man cave has evolved from a trend into a staple of the modern home. These personal sanctuaries offer men a retreat from the pressures of daily life, a space to unwind, engage in hobbies, or socialize. This article explores the multifaceted reasons behind the rise in popularity of the Australian man cave and its significance in contemporary culture.

Origins of the Man Cave

The concept of a man cave is not entirely new. Historical precedents include the study or library of a Victorian home, where the man of the house retreated to ponder important matters or indulge in reading. Today’s man caves, however, have expanded beyond these early iterations into fully realized personal spaces that serve multiple purposes.

The Psychological Appeal

Identity and Self-Expression: Man caves provide a canvas for personal expression. In a world where individuality can often be compromised, these spaces offer men the chance to showcase their interests, collections, and tastes without compromise or judgment.

Stress Relief and Relaxation: They serve as a sanctuary for rest and rejuvenation. The therapeutic nature of a space where one can detach from the stressors of work and family life is invaluable for mental health and overall well-being.

Autonomy and Control: Within the household, decision-making is often a shared responsibility. A man cave gives its owner complete autonomy over one defined area, fulfilling a desire for control and independence.

Australian Man Cave: Whilst the Australian man cave shares all characteristics of the universal man cave, it does have some unique features including a collection of sporting memorabilia, a pool table, a weights or gym area, a collection of water sports equipment, and a fascination with power tools.

australian man cave
Source: slate.com

Social and Cultural Influences

Evolving Gender Roles: As gender roles continue to evolve, the man cave has become a space that respects the need for personal time and space, reflecting a modern understanding of balance in relationships and family dynamics.

Entertainment and Hospitality: Man caves are often equipped for entertainment, with large-screen TVs, gaming consoles, and bars. They serve as an informal setting for social gatherings, sports viewing parties, and a relaxed atmosphere for camaraderie.

Rise of Hobbyist Culture: With the growing popularity of hobbies such as gaming, homebrewing, and collecting, man caves offer the necessary space to engage in these activities without encroaching on communal living areas.

Economic and Real Estate Factors

Home Value Addition: A well-constructed man cave can increase the appeal and value of a property. It is seen as an attractive feature that adds functional living space to a home.

Cost-Effective Leisure: With the rising costs of leisure activities outside the home, man caves offer a cost-effective alternative where one can enjoy similar experiences without recurring expenses.

The Way Forward

Man caves are no longer just a fad but a reflection of the modern man’s desire for a space that caters to relaxation, hobbies, and social interactions. They represent the importance of personal space in today’s fast-paced world and underscore the need for environments that support individual pursuits and mental well-being.

As society continues to recognize the importance of personal space and time, the man cave will likely remain a popular and enduring feature of the contemporary home, evolving with the changing tastes and technologies that define personal leisure and entertainment.

Posted on

PVC Slatwall Panels

pvc slatwall panels

The Benefits of PVC-Based Slatwall Panels

In the realm of modern storage and organization, PVC slatwall panels are becoming increasingly popular for their versatility, durability, and aesthetic appeal. These panels offer an ingenious solution to cluttered spaces, particularly in retail, workshops, and garages. This article explores the numerous benefits of PVC-based slatwall panels and why they are an excellent choice for both commercial and residential storage needs.

Durability and Longevity

Resistant to Wear and Tear: PVC, or polyvinyl chloride, is known for its strength and durability. PVC slatwall panels can withstand significant wear and tear, making them ideal for high-traffic areas or spaces that require storing heavy items.

Moisture and Rot Resistant: Unlike traditional wood or MDF (Medium-Density Fiberboard) panels, PVC is impervious to moisture and humidity. This resistance to water ensures that the panels do not rot, warp, or swell, maintaining their structural integrity over time.

Versatility in Usage

Customizable Storage Solutions: PVC-based wall panels are equipped with horizontal grooves that can accommodate a variety of hooks, shelves, bins, and racks. This versatility allows users to customize their storage setup to fit their specific needs and can be easily reconfigured as those needs change.

Wide Range of Applications: From displaying products in retail stores to organizing tools in a garage, PVC slatwalls are adaptable to a multitude of environments and purposes.

pvc garage wall panels

Aesthetic Appeal

Sleek and Modern Look: PVC wall panels offer a clean and modern look that can enhance the aesthetic of any space. With a variety of colors available, they can be seamlessly integrated into any interior design scheme. Checkout our garage gallery for examples of Australian homes using StoreWALL’s garage wall panels.

Hide Clutter Effectively: By providing a designated space for each item, these panels help maintain an organized and clutter-free environment, which is visually pleasing and easier to navigate.

Space Efficiency

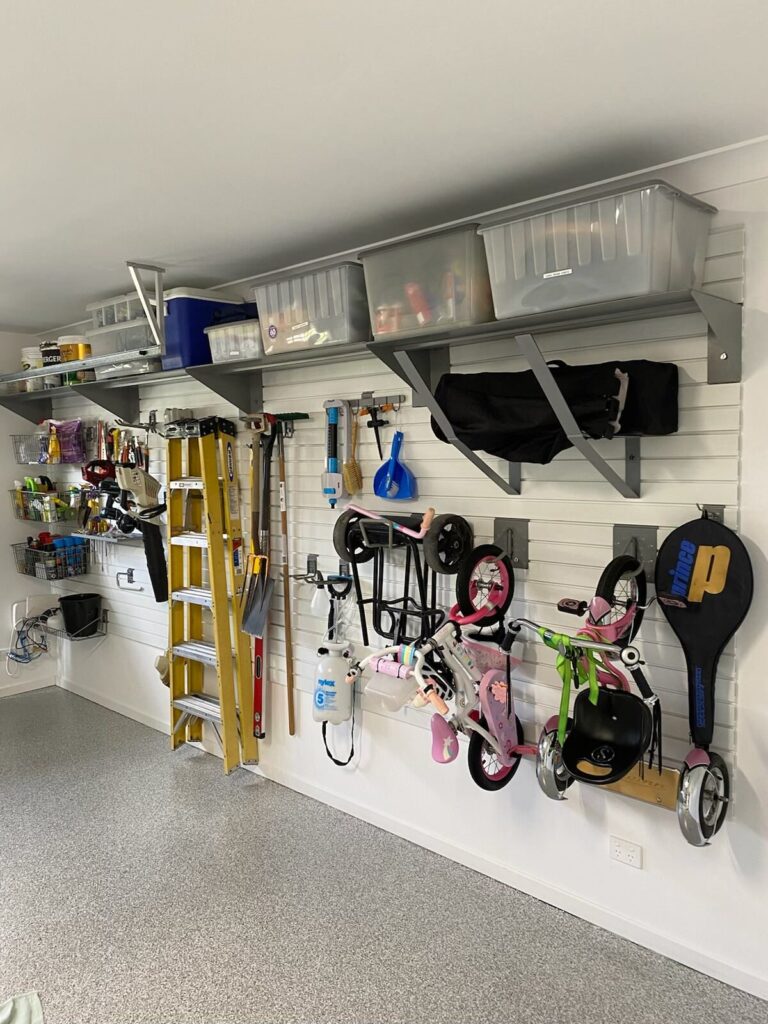
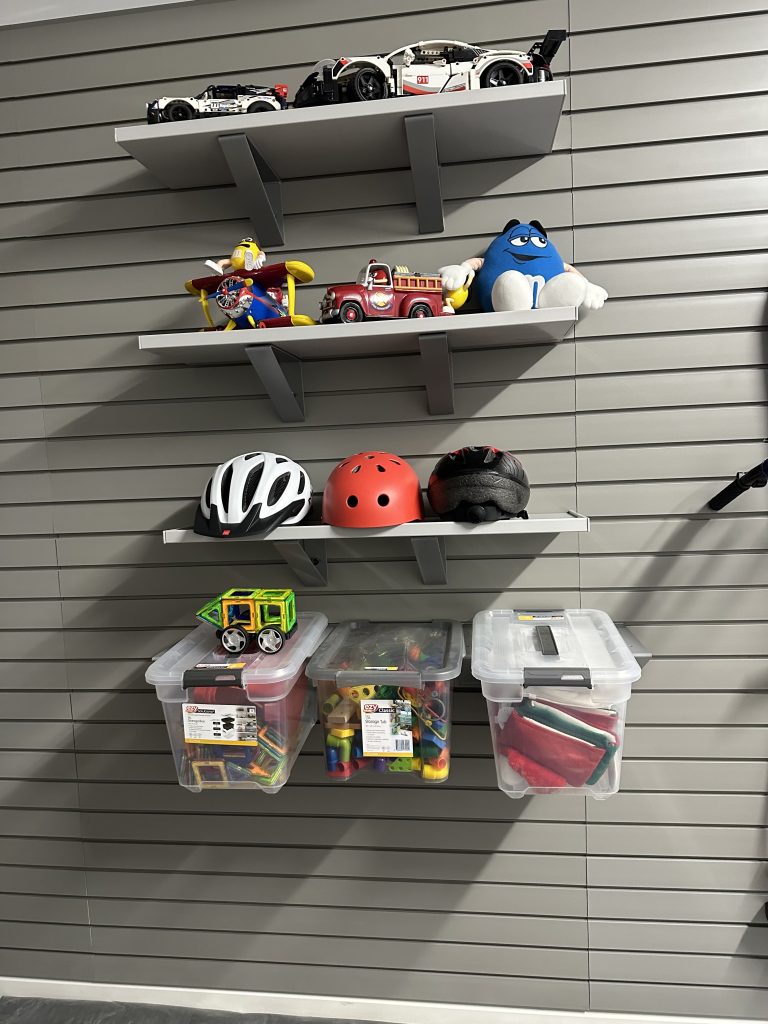
Maximizing Wall Space: PVC garage wall panels are an excellent way to utilize vertical space effectively, especially in areas where floor space is limited. By organizing items vertically, these panels free up valuable floor space. Think about ladders, bikes, tubs, and sports equipment. Off the floor and onto the wall makes good sense.

Easy Installation and Maintenance

Simple Set-Up: Installing PVC slatwall panels is relatively straightforward, making them a viable option for DIY enthusiasts. The panels can be cut to fit any space and are generally easy to mount.

Low Maintenance: PVC garage panels require minimal upkeep. They are easy to clean and do not need any special treatments or coatings to maintain their appearance and functionality.

Cost-Effective

Affordable Storage Solution: While offering a multitude of benefits, PVC slatwall panels are also cost-effective. Their durability means they can last a lifetime, and their flexibility reduces the need for additional storage furniture or systems.

PVC Slatwall Panels – Verdict

PVC-based slatwall panels present a compelling solution for efficient, durable, and aesthetically pleasing storage. Their adaptability to various environments, combined with the ease of installation and maintenance, makes them an ideal choice for both residential and commercial spaces. As storage needs continue to evolve, PVC slatwalls stand out as a practical, stylish, and economical option that meets the dynamic requirements of modern organization and display.