Posted on

Best Garage Floor Tiling Options

Choosing the Right Tile for Your Space

Garage flooring has come a long way from simple concrete slabs. Today, a range of durable, stylish garage floor tiling options can enhance the look, durability, and usability of your garage. Each type of tile offers unique benefits, from impact resistance and slip prevention to easy maintenance. In this guide, we’ll explore the best garage floor tiling options for your garage, covering their pros and cons to help you choose the best flooring solution for your needs.


Interlocking PVC Tiles

Overview
Interlocking PVC tiles are a popular choice for garage floors due to their durability, ease of installation, and resistance to chemicals, oils, and stains. Made from high-quality PVC, these tiles are flexible yet strong enough to withstand the weight of vehicles and heavy equipment.

Benefits

  • Easy Installation: These tiles snap together without adhesives, making it a quick and mess-free DIY project.
  • Durable and Impact Resistant: With high resistance to impact, they’re ideal for garages that see a lot of activity, including the use of heavy tools and machinery.
  • Comfortable and Noise-Reducing: The flexible nature of PVC provides a softer, quieter surface compared to concrete or ceramic tiles.
  • Easy to Clean and Maintain: These tiles resist oil, grease, and chemical spills, making them easy to clean with basic household cleaners.

Drawbacks

  • Price: PVC tiles are generally more expensive than rubber or polypropylene options, especially when opting for thicker, heavy-duty versions.
  • Vulnerable to Heat: PVC can warp under high temperatures, so they may not be ideal in garages with frequent exposure to direct sunlight or extreme heat.

Porcelain and Ceramic Tiles

Overview
For a polished and permanent look, porcelain and ceramic tiles are an attractive, durable option. These tiles offer a sleek, refined appearance that can withstand years of wear, even under the demands of a garage environment.

Benefits

  • Highly Durable: Porcelain and ceramic tiles are extremely tough, resisting cracking and chipping even under heavy loads.
  • Water and Stain Resistant: These tiles are naturally resistant to moisture, stains, and chemical spills, making them easy to maintain.
  • Wide Range of Styles: With various colors, patterns, and finishes, ceramic and porcelain tiles provide numerous design options to complement any style.

Drawbacks

  • Challenging Installation: Installing ceramic or porcelain tiles requires experience, as it involves mortar, grout, and a longer curing process.
  • Cold and Hard Surface: The hardness of these tiles may be uncomfortable underfoot and can cause damage if tools or heavy objects are dropped.
  • Slippery When Wet: Some finishes can be slick when wet, so choose a slip-resistant finish for added safety.

Rubber Garage Tiles

Overview
Rubber garage tiles are made from heavy-duty rubber and are often used in professional workshops and gyms due to their resilience and comfort. They are available in interlocking or adhesive-backed options, and they can be cut to fit any space.

Benefits

  • Comfort and Shock Absorption: Rubber tiles provide a comfortable surface underfoot, reducing fatigue when standing or working for long periods.
  • Slip-Resistant: Rubber’s natural texture provides a non-slip surface, even when wet, making it a safe option for garages.
  • Easy to Clean: Spills can be easily wiped up, and regular sweeping and mopping keep them in good condition.

Drawbacks

  • Limited Color Choices: Rubber tiles are usually available in darker colors, which may limit aesthetic choices.
  • Sensitive to Chemicals: While durable, rubber can be damaged by certain chemicals and oils, so check compatibility before choosing rubber tiles.

Rigid Polypropylene Tiles

Overview
Polypropylene tiles are lightweight, rigid plastic tiles that snap together. They come in a variety of textures and colors and can often be designed with drainage holes, making them popular in garages that are exposed to water or other liquids.

Benefits

  • Easy Installation: Like PVC tiles, polypropylene tiles snap together without adhesives, making them a simple and reversible installation.
  • Chemical Resistant: These tiles are resistant to oils, grease, and most chemicals commonly found in a garage setting.
  • Drainage Options: Available in perforated designs, they allow water, mud, and debris to flow through, keeping the surface dry and slip-resistant.

Drawbacks

  • Less Comfortable: Unlike PVC and rubber, polypropylene tiles are rigid and less forgiving underfoot, which may reduce comfort during extended use.
  • Temperature Sensitivity: Extreme temperatures can cause polypropylene tiles to expand and contract, which may lead to buckling or warping if not installed with proper spacers.

Epoxy-Coated Tiles

Overview
Epoxy-coated tiles are typically porcelain or ceramic tiles coated with a layer of epoxy resin, providing added durability, moisture resistance, and a high-gloss finish. Epoxy-coated tiles combine the durability of traditional tile with the protection and visual appeal of an epoxy finish.

Benefits

  • Increased Durability: The epoxy coating adds an extra layer of protection, making tiles resistant to impact, moisture, and chemicals.
  • Attractive Finish: Epoxy coating provides a glossy, reflective surface, giving your garage a polished, showroom-like appearance.
  • Easy Maintenance: The epoxy layer is easy to clean and resists staining, making it low-maintenance.

Drawbacks

  • Costly and Time-Consuming Installation: Epoxy coating requires precision and curing time, which can make installation more complex and costly.
  • Potential Slipperiness: The glossy finish can become slippery when wet, so it’s best suited to garages where safety isn’t a concern or where a textured finish can be added.

Composite Tiles (Combination of PVC, Rubber, and Polypropylene)

Overview
Composite tiles are made from a blend of materials, such as PVC, rubber, and polypropylene, combining the best qualities of each. These tiles are typically designed to be impact-resistant, slip-resistant, and comfortable underfoot, while also offering flexibility in color and texture.

Benefits

  • Hybrid Durability: Composite tiles provide a balance of strength, flexibility, and comfort, making them a great all-around choice for a garage.
  • Easy Installation: Most composite tiles come in interlocking designs, making them easy to install and replace if necessary.
  • Versatile Aesthetic Options: Available in various colors, textures, and finishes, composite tiles can match a wide range of garage decor.

Drawbacks

  • Higher Cost: Due to their multi-material design, composite tiles tend to be pricier than single-material tiles.
  • Variable Quality: Depending on the materials and manufacturer, composite tiles can vary significantly in durability and performance, so it’s important to choose reputable brands.

Factors to Consider When Choosing Garage Floor Tiles

When considering the best garage floor tiling options for your home, it’s essential to think about your specific needs, budget, and how you use your garage. Here are some considerations:

  • Traffic and Usage: Consider how often you use your garage and for what purposes. Heavier use may call for more durable options like epoxy-coated tiles or porcelain tiles.
  • Climate and Environment: If your garage is exposed to significant temperature changes or moisture, choose tiles that can handle such conditions, such as polypropylene or rubber.
  • Aesthetic Preferences: Choose a style that complements your garage setup, whether you prefer a polished, high-gloss look or a rugged, industrial feel.
  • Budget: The cost of tiles can vary widely, so factor in both the cost per square foot and any additional installation expenses.

Choosing the Best Garage Floor Tiling Options

With so many garage flooring tile options available, finding the best one depends on your personal needs, aesthetic preferences, and budget. Interlocking PVC tiles, porcelain tiles, rubber tiles, and polypropylene options each have their unique advantages and drawbacks. For a versatile, easy-to-install solution, PVC or polypropylene interlocking tiles are ideal, while porcelain or epoxy-coated tiles work well for a more permanent, upscale look.

Investing in quality garage flooring not only enhances the look of your space but also improves its functionality and safety.

Posted on

The Right Garage Size

The right size garage

How Big Should a Garage Be to Comfortably Fit Two Family Vehicles?

When building or renovating a garage for a family with two vehicles, it’s essential to consider how much space you’ll need to park both cars comfortably and allow room for storage, movement, and other activities. The right garage size ensures that you can easily access your vehicles, open doors, and even incorporate storage or workspace without feeling cramped. In this article, we’ll look at the dimensions and factors to consider for a two-car garage that meets your needs.


the right garage size

Standard Dimensions for a Two-Car Garage

A standard two-car garage typically ranges from 20 feet by 20 feet to 24 feet by 24 feet, but the exact size depends on several factors, including the size of your vehicles, additional storage needs, and whether you’ll use the space for other activities. Here are some common garage dimensions and what they can accommodate:

  1. 6m by 6m
  • This is generally the smallest recommended size for a two-car garage and can fit two compact cars snugly. However, maneuvering space will be limited, making it challenging to get in and out of your car, especially if you have larger family vehicles.
  1. 7m by 7m
  • This slightly larger size provides a bit more room around the vehicles, which makes it easier to open doors and move around. It’s ideal if you’re parking two standard sedans or compact SUVs and may allow for a small amount of wall storage.
  1. 7.5m by 7.5m
  • A 7.5m x 7.5m garage offers generous space for two vehicles, with room to spare for doors to fully open, and a small workbench or wall-mounted storage solutions for tools and equipment. This is an ideal choice for families with larger vehicles, such as SUVs or minivans, or those who require more room for storage.
  1. 7.5m x 8.5m
  • If you have especially large vehicles, like large SUVs, or if you plan to use part of the garage for a workshop or additional storage, a garage larger than 7.5m x 7.5m may be a better option. This size also provides more comfort when moving between vehicles and allows for more extensive wall storage or built-in shelving.

the right garage size

Factors to Consider When Determining Garage Size

To decide on the best garage dimensions for your family, it’s important to consider your specific needs and preferences. Here are a few key factors to keep in mind:

Vehicle Size

  • The length, width, and height of your vehicles are major considerations. For example, a standard sedan requires less space than a large SUV. Measure the dimensions of each vehicle, including the side mirrors and the space needed to open doors fully, to ensure your garage can comfortably accommodate both cars.

Storage Needs

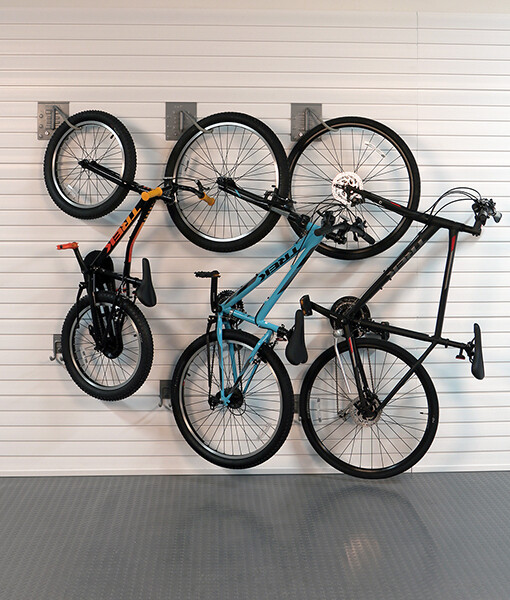
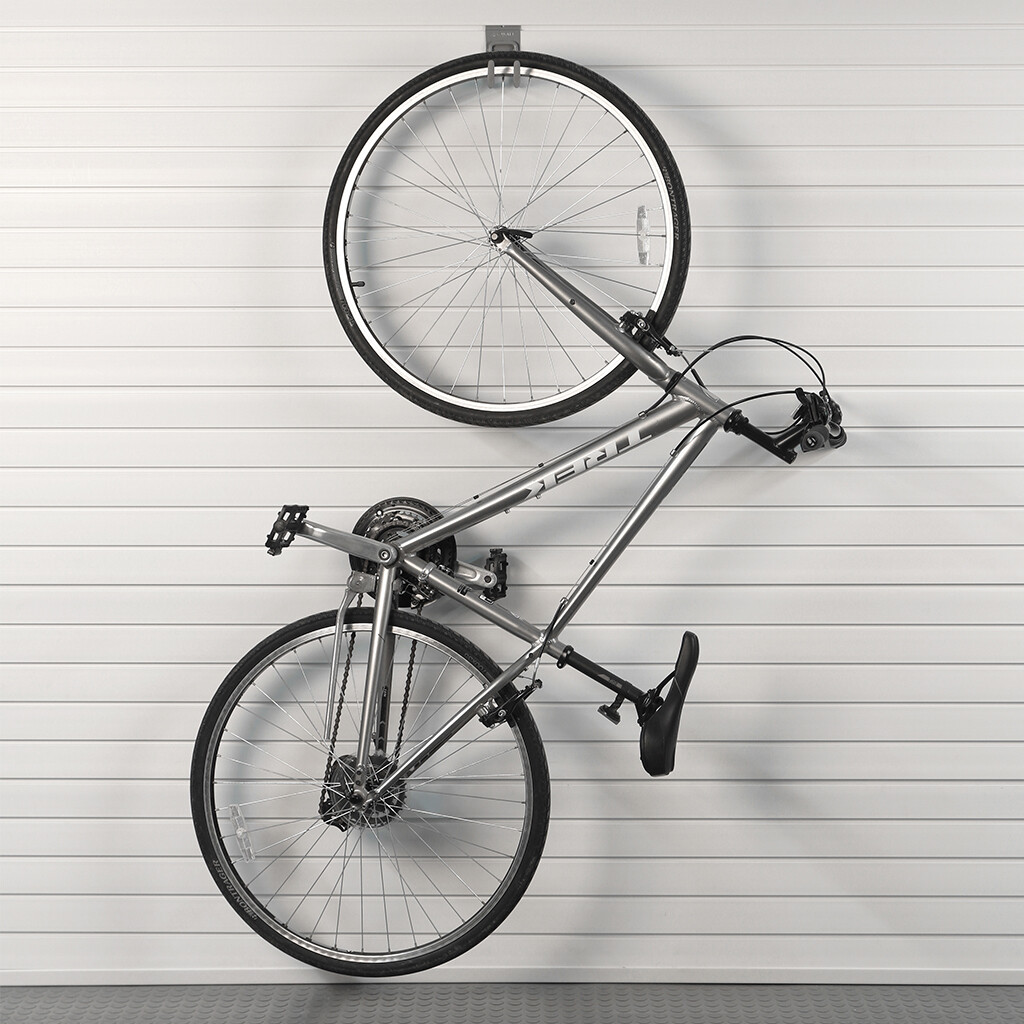
  • Most garages double as storage spaces, so think about what you need to store alongside your vehicles. Items like bicycles, lawn equipment, tools, and seasonal items can take up significant space. Consider incorporating slatwall panels, wall hooks, or ceiling storage to keep the floor clear while maximizing storage potential.

Room to Move and Access

  • Having enough room to comfortably enter and exit your vehicles is essential. Plan for at least 90cm of clearance on each side of the cars for doors and maneuvering. Also, consider pathways to access the back of the garage, which will be useful if you store larger items like lawnmowers or snowblowers.

Additional Uses

  • If you intend to use part of your garage as a workshop, gym, or hobby space, you may need additional square footage. In this case, a garage larger than 7.5m x 7.5m would be ideal, as it allows room for activities without obstructing vehicle access.

Future Flexibility

  • Planning for future vehicle changes is wise. If you anticipate upgrading to a larger vehicle or adding items like motorbikes or recreational equipment, a larger garage will provide flexibility down the road.

Recommended Dimensions Based on Vehicle Types

To help you choose the best garage size, here are some recommended dimensions based on vehicle types:

  • Two Compact Cars
  • Minimum: 6m x 6m
  • Recommended: 6.5m x 6.5m
  • Two Mid-Sized Sedans
  • Minimum: 6.5m x 6.5m
  • Recommended: 7.5m x 7.5m
  • One Mid-Sized Sedan and One SUV
  • Minimum: 6.5m x 7.5m
  • Recommended: 7.5m x 8m
  • Two SUVs or One SUV and One Truck
  • Minimum: 7.5m x 7.5m
  • Recommended: 7.5m x 8.5m

For garages with additional storage or workspace needs, consider going up to 7.5m x 8.5m to ensure sufficient room for both cars and extra features.


Tips for Organizing a Two-Car Garage

Once you’ve chosen the right size for your garage, optimizing the space is the next step. Here are some tips to help you make the most of your two-car garage:

Utilize Wall Space

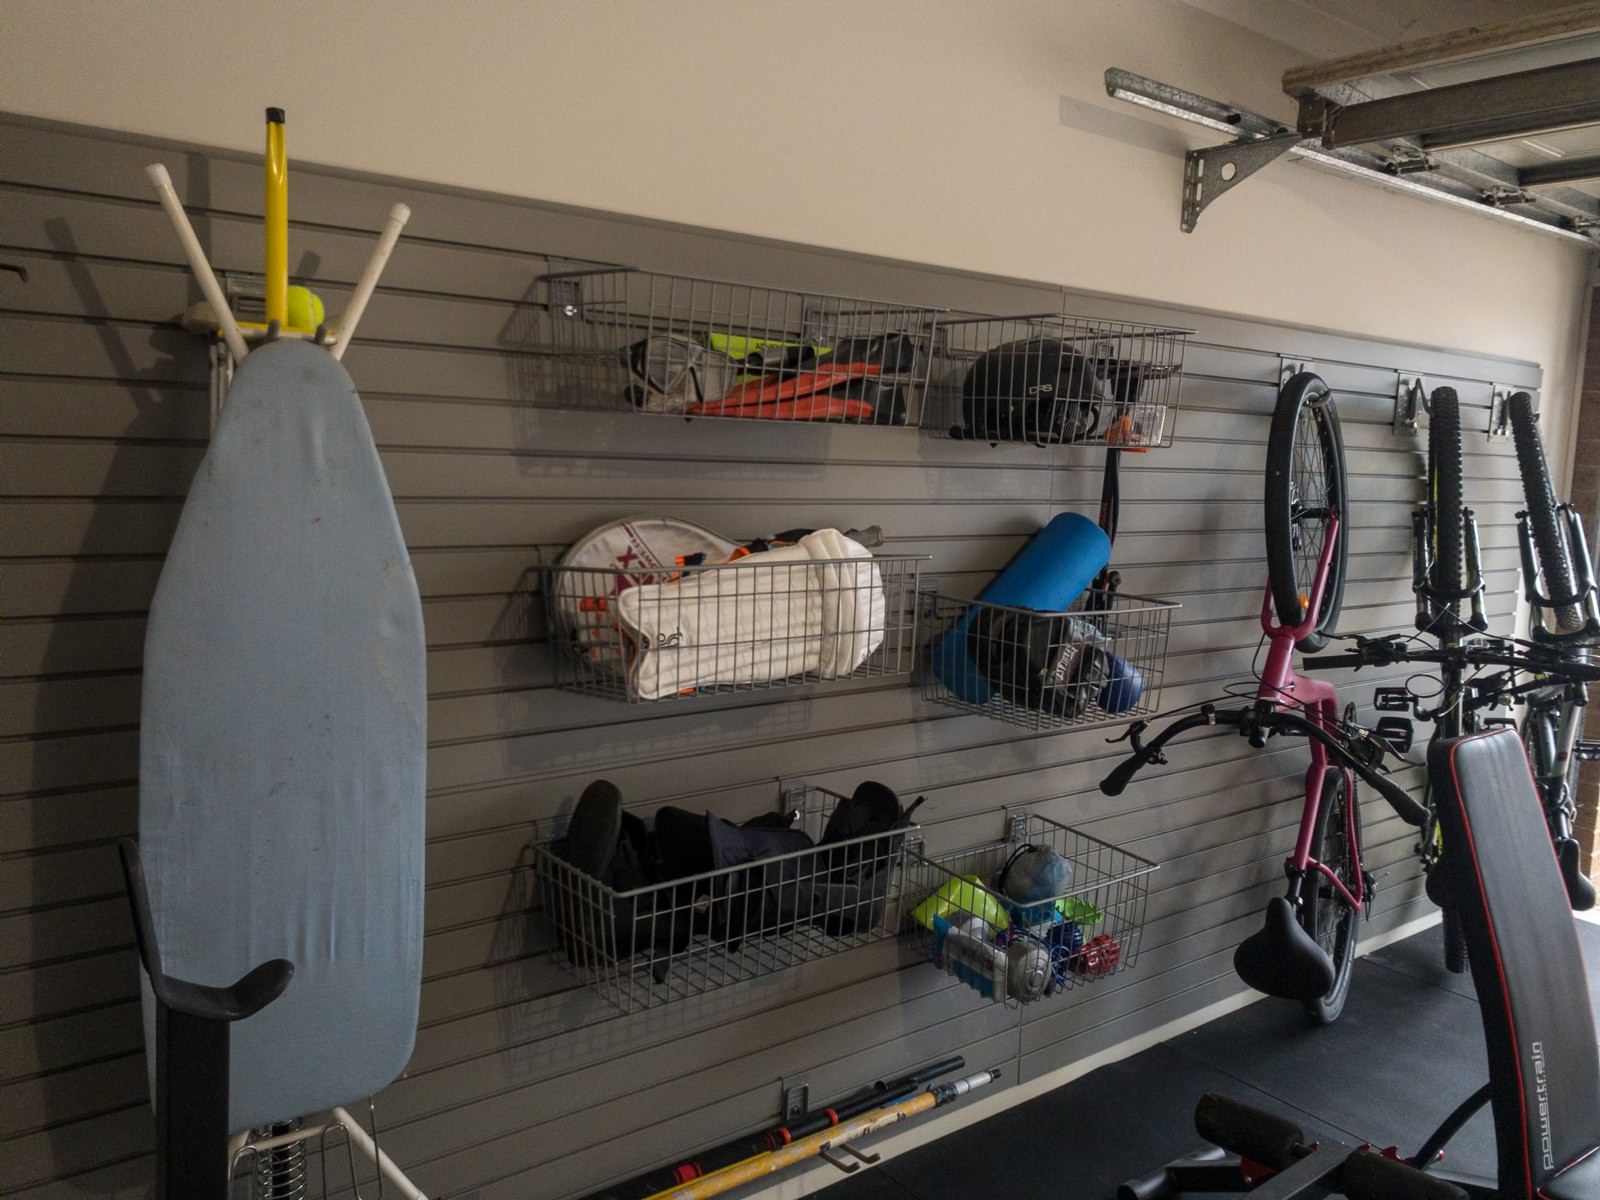
  • Installing a slatwall system on one or more walls is an efficient way to store tools, sports equipment, and other items vertically. This setup keeps your belongings organized and off the floor, freeing up more room for vehicles.

Invest in Overhead Storage

  • Ceiling storage racks are excellent for storing items you don’t use regularly, like seasonal decorations or camping gear. These racks take advantage of the high ceilings often found in garages and provide a convenient place for large, bulky items.

Add a Workbench or Utility Table

  • If space allows, consider including a small workbench for DIY projects or repairs. Place it at the back of the garage or along a side wall where it won’t interfere with parking. Folding workbenches can also be an option for tight spaces, as they can be stored away when not in use.

Use Shelving for Bulk Storage

  • Wall-mounted shelves are ideal for storing bins, boxes, and other bulky items. Opt for adjustable shelves to allow for flexible storage options as your needs change.

Designate Zones for Different Items

  • Designating specific areas for tools, sporting goods, cleaning supplies, and other items can make it easier to stay organized. For example, place frequently used items close to the garage entrance or near the vehicles for quick access.

Final Thoughts: The Right Size for Your Needs

While a standard 6m x 6m garage may be sufficient for two compact cars, many families find that a slightly larger garage—such as 7.5m x 7.5m or larger—offers the convenience, storage, and flexibility they need. Considering your specific vehicle sizes, storage needs, and any additional uses for the space can help you choose the best garage dimensions for your family.

A well-planned garage size, along with efficient organization solutions like slatwall panels, overhead racks, and shelving, will ensure your space is comfortable, safe, and easy to use. Whether you’re building a new garage or updating an existing one, taking time to plan the right dimensions will make a difference in how functional and enjoyable the space is.

For top-quality organization tools and garage storage solutions, explore options at StoreWALL, where you’ll find durable slatwall systems, wall-mounted shelves, and a variety of accessories to help keep your garage organized and efficient.

Posted on

The Limitations of Garage Shelving

Limitations of Garage Shelving

When it comes to organizing your garage, adding a few shelves might seem like the easiest solution. While shelves certainly have their place, relying on shelving alone for garage storage can leave you with limited flexibility, wasted space, and ongoing organization challenges. In this article, we’ll explore the limitations of garage shelving, and what alternatives or additions you might consider to truly maximize your garage storage.


Limitations of Garage Shelving

Garage shelving provides some utility, but it often falls short in addressing the diverse storage needs of a garage. Here are some of the limitations that can arise:

Wasted Vertical Space

Standard garage shelving typically leaves a significant amount of vertical space unused. This space could otherwise be used for storing tools, equipment, or seasonal items. Without utilizing the full height of your walls, you may find yourself quickly running out of space and struggling to keep everything accessible.

It Starts Like This

Difficulty Organizing Small and Medium-Sized Items

Shelves are best suited for large, stackable items or bins, but they can make it difficult to store small and medium-sized items efficiently. When stored on open shelves, items like tools, sports equipment, or cleaning supplies can quickly create clutter and become hard to locate when you need them.

Limited Flexibility

Once installed, traditional shelves can be hard to adjust or reorganize, especially if you’re dealing with fixed or heavy-duty shelving units. Garages often require adaptable storage options that can change with your needs, and shelving alone doesn’t always offer this flexibility.

Risk of Clutter and Accessibility Issues

Shelving alone encourages stacking items, which can lead to clutter, making it difficult to access what’s stored in the back. As shelves fill up, it’s easy for items to become piled or hidden, which not only makes organization harder but can also increase the risk of items falling and causing damage.

Underutilized Wall and Ceiling Space

Shelving takes up valuable floor space while leaving the walls and ceiling areas largely unused. This is a missed opportunity, especially in garages where space is at a premium. Ceiling racks, wall panels, or other modular solutions can make better use of these areas and free up floor space for other uses.


Alternative and Complementary Storage Solutions

To make the most of your garage storage, it’s worth exploring other storage options that can work alongside shelving to create a more comprehensive and efficient setup.

Slatwall and Wall Panel Systems

Slatwall systems, like those from StoreWALL, are versatile wall panel solutions that allow you to hang hooks, shelves, baskets, and brackets. Unlike traditional shelving, these panels make it easy to store items of varying sizes, such as tools, sporting goods, and gardening supplies. Wall panels allow you to use your walls effectively, keep items accessible, and prevent clutter on shelves.

Limitations of Garage Shelving

Pegboards and Tool Racks

Pegboards and tool racks provide customizable storage for smaller and lighter items. By mounting them on the wall, you keep your tools organized and within reach, while also freeing up valuable shelf space for larger, bulkier items.

Overhead Storage

Overhead racks or ceiling storage solutions are ideal for items that aren’t needed regularly, such as seasonal decor, camping gear, or spare tires. By using the ceiling space, you maximize storage without taking up floor or wall space. Overhead storage keeps these items safe, organized, and out of the way until they’re needed.

Limitations of Garage Shelving

Cabinets and Drawer Units

Cabinets and drawer units offer enclosed storage, which helps reduce dust accumulation and keeps items hidden for a tidier look. Cabinets can house a variety of items that don’t need to be on display, and drawer units work particularly well for storing smaller tools, hardware, or crafting supplies. Additionally, locking cabinets can be useful for securing chemicals, paints, and other hazardous materials safely out of reach.

Bins, Baskets, and Specialized Holders

Adding bins, baskets, and specialized holders (e.g., for sports equipment or gardening tools) can help you organize items that are hard to store on shelves alone. Labelled storage bins allow you to categorize items for easy access, while baskets can hold oddly shaped items like balls, hoses, or extension cords. These can be attached to wall panels or placed on shelves in an organized manner.


Benefits of a Mixed Storage System

Incorporating a variety of storage options in your garage enables you to overcome some of the limitations of garage shelving.

Increased Space Efficiency

By utilizing the walls and ceiling alongside shelving, you can dramatically increase your available storage without sacrificing floor space. Combining shelving with slatwall, overhead storage, and cabinets ensures every inch of the garage is working for you.

Better Organization and Accessibility

A mixed storage system allows you to assign specific places for each type of item, so they’re easy to find and access when needed. You can store frequently used items within reach and keep seldom-used items out of the way.

Improved Safety and Clutter Reduction

A well-organized garage reduces the risk of accidents caused by items falling off overcrowded shelves. Hazardous materials can be safely locked away, and bulky or heavy items can be securely stored on racks or in cabinets, making the space safer for family members.

Enhanced Flexibility for Changing Needs

As your storage needs evolve, a versatile system that includes slatwalls, pegboards, and ceiling storage can adapt with you. You can reconfigure your setup to accommodate new tools, equipment, or seasonal items without a complete overhaul.


Getting Started: Creating a Balanced Storage Plan

To get the most out of your garage, start by assessing your storage needs:

Identify What You Need to Store

  • Make a list of the items you currently store in your garage and those you’d like to add. This helps you determine the types and sizes of storage solutions you’ll need.

Map Out Your Space

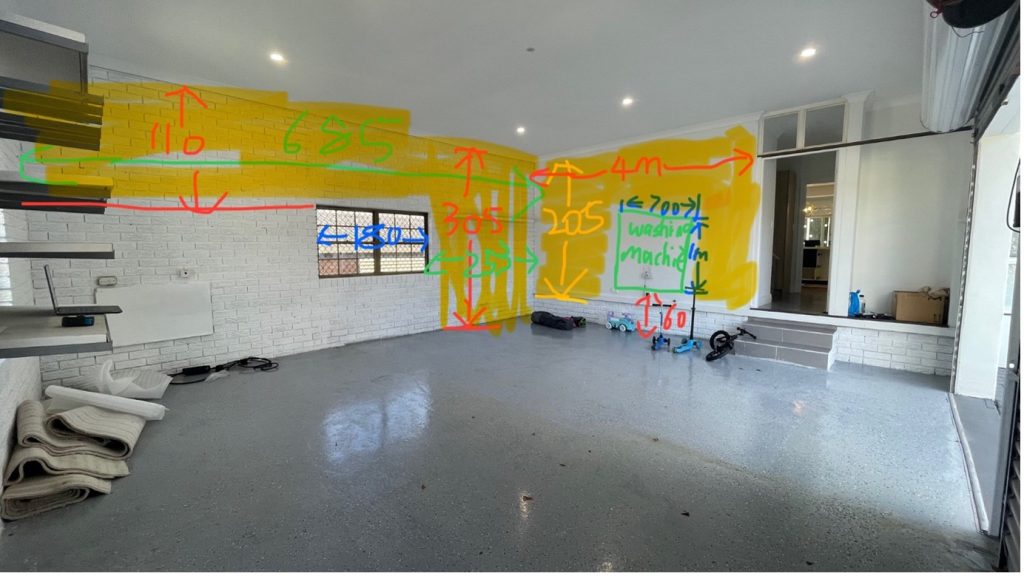
  • Measure your garage and sketch a rough layout, marking where you could install shelving, wall panels, ceiling racks, and cabinets. Aim to balance storage across floor, wall, and ceiling areas to avoid overcrowding any one area.

Choose a Combination of Storage Solutions

  • Based on your list and layout, choose a combination of storage options to fit your needs. If you have many small items, prioritize pegboards or slatwall with baskets. For larger items, consider overhead racks or dedicated shelving.

Install and Organize

  • Start by installing the more permanent fixtures, such as slatwall or ceiling racks, before adding smaller storage accessories. Once everything is in place, arrange your items in a logical, accessible way to ensure easy access and organization.

Conclusion – Limitations of Garage Shelving

While garage shelving is a useful storage tool, relying on it alone can limit your options and lead to a cluttered, inefficient space. By combining shelving with wall-mounted systems, ceiling racks, cabinets, and specialized storage accessories, you can create a well-organized and highly efficient garage that meets all your storage needs.

Explore StoreWALL for high-quality slatwall solutions, hooks, baskets, and other accessories that will take your garage organization to the next level. With a thoughtfully designed setup, your garage can become a clean, accessible, and functional space tailored to you.

Posted on

Battening out a brick wall

battening out a brick wall

Battening out a brick wall is a common practice in construction and renovation, but it’s not always necessary for every project. Understanding when and why you should batten out a brick wall can help ensure the longevity and stability of your installations, whether you’re adding insulation, installing garage wall panels, or creating a smooth surface for new finishes. In this article, we’ll explore the situations that require battening, the benefits of the process, and a step-by-step guide on how to do it.


What Does Battening Out Mean?

Battening out a brick wall refers to the process of attaching vertical wooden battens (strips of timber) or metal furring strips to a brick or masonry wall. These battens create a framework that allows you to attach various materials, such as plasterboard, insulation, or garage panels, while maintaining an air gap between the wall and the new surface. This method is commonly used when the surface of the wall is uneven, damaged, or needs extra support for the materials being attached.


When is it Necessary to Batten Out a Brick Wall?

Not every brick wall will need battening out, but there are several situations where it becomes essential:

Uneven or Damaged Brickwork

  • If the brick wall is uneven or damaged, it’s challenging to achieve a smooth, level surface using plasterboard or panels alone. Battening out the wall creates a uniform, level framework for attaching these materials, ensuring a better finish and stronger support.

Adding Insulation

  • If you’re renovating an old building or a garage and need to add insulation, battening out the wall is often necessary. Battens create the space needed for insulation boards or rolls to fit securely between the wall and the interior cladding. This not only improves energy efficiency but also helps prevent moisture buildup.

Installing StoreWALL or Similar Garage Wall Panel Systems

  • Heavy-duty slatwall systems like StoreWALL require a stable and even surface to support their weight and functionality. If the brick wall is very uneven, damaged, or if you need to create a gap for wiring and other installations, battening out the wall provides the necessary support and structure for secure installation.

Moisture and Damp Issues

Accommodating Electrical and Plumbing Systems

  • When installing electrical wiring, pipes, or other systems that need to run behind the interior surface, battening out the wall creates the space needed to conceal these elements safely and effectively.

Benefits of Battening Out a Brick Wall

  • Creates a Level Surface: Ensures that the final surface, whether it’s plasterboard, panels, or tiles, is level and professional-looking.
  • Improves Insulation: Allows for the addition of thermal or acoustic insulation, enhancing energy efficiency and soundproofing.
  • Provides Support: Offers a stable structure for mounting heavy items like shelving, wall panels, or large installations.
  • Moisture Control: Helps manage moisture by creating an air gap that improves ventilation and reduces the risk of damp issues.
  • Flexibility for Services: Allows for the easy routing of cables, pipes, and other utilities behind the wall surface.

Step-by-Step Guide to Batoning Out a Brick Wall

If you determine that battening out your brick wall is necessary, follow these steps for a successful installation:

Tools and Materials Needed:

  • Wooden battens or metal furring strips
  • Electric drill with masonry bit
  • Wall plugs and screws
  • Tape measure
  • Spirit level
  • Pencil or marker
  • Saw (if cutting battens)
  • Insulation boards or rolls (if insulating)

Steps:

  1. Measure and Mark the Wall
    Begin by measuring the height and width of the wall where you’ll be installing the battens. Mark the positions where each batten will be placed, typically spacing them 400–600 mm (16–24 inches) apart. Ensure that the markings are level using a spirit level. A typical interior wall has studs at 450mm intervals. You can use this as your guide for spacing out your battens.
  2. Cut the Battens to Size
    If using wooden battens, ensure you select wood that is as straight as possible. Cheap bent wooden battens will not fix an uneven brick wall. Cut the battens or furring strips to the required length using a saw. Ensure they are cut precisely so they fit snugly from floor to ceiling.
  3. Drill Holes in the Wall
    Using an electric drill with a masonry bit, drill holes at the marked positions where you’ll attach the battens. These holes should be deep enough to accommodate wall plugs and screws.
  4. Attach the Battens to the Wall
    Insert wall plugs into the drilled holes. Place the batten against the wall and drive screws through the batten into the wall plugs. Check each batten with a spirit level to ensure it is vertical and aligned properly. Tighten the screws securely to hold the battens in place.
  5. Install Insulation (Optional)
    If you’re adding insulation, cut the insulation boards or rolls to fit between the battens. Fit them snugly into place, ensuring there are no gaps that could reduce the effectiveness of the insulation.
  6. Attach the Cladding or Panels
    Once the battens and insulation (if applicable) are securely in place, you can proceed with attaching the cladding, plasterboard, or garage wall panel system. Use the battens as the framework for securing these materials, ensuring they are level and securely fastened.
  7. Final Checks
    Once everything is installed, check that the new surface is level and free of gaps or movement. Make any necessary adjustments before finishing with paint, wallpaper, or other finishing touches.

Conclusion

Battening out a brick wall is a practical solution in many renovation and construction scenarios. Whether you’re dealing with uneven brickwork, adding insulation, or installing a heavy-duty system like StoreWALL, battoning ensures a secure and professional finish. By following the steps outlined in this guide, you can achieve a stable and effective installation, improving both the aesthetics and functionality of your space.

If you’re planning a project that involves battening out a wall, ensure you have the right tools and materials on hand, and always consult a professional if you’re unsure about the wall’s condition or structure.

Posted on

The Durability of PVC

The durability of pvc

A Deep Dive into PVC, One of the Most Resilient Materials

PVC (Polyvinyl Chloride) is one of the most widely used synthetic plastic polymers in the world, known for its versatility, affordability, and, most importantly, durability. From everyday household items to complex industrial applications, PVC’s robust properties make it a go-to material across various industries. In this blog post, we’ll explore the durability of PVC and why it stands out among other materials.

What is PVC?

Polyvinyl Chloride, commonly known as PVC, is a high-strength thermoplastic material commonly used in construction for pipes, wiring, and other applications. Its popularity comes from its long-lasting, corrosion-resistant, and weatherproof nature, which makes it ideal for both indoor and outdoor use.

Key Factors Contributing to the Durability of PVC

Chemical Resistance

    PVC is highly resistant to many chemicals, including acids, alkalis, and salts, which makes it suitable for various applications where other materials might degrade or corrode. This resistance ensures that PVC remains unaffected by the harsh substances it might encounter in industrial settings or even household environments.

    Water and Moisture Resistance

      One of the standout features of PVC is its ability to resist water and moisture, making it perfect for applications in damp environments. This is why PVC is widely used in plumbing, rainwater systems, and even outdoor furniture.

      PVC – Weather Resistance

        Unlike many other materials, PVC can withstand extreme weather conditions, including heavy rain, snow, and UV radiation from the sun. Its ability to endure temperature fluctuations without losing its structural integrity makes it ideal for outdoor use.

        Impact Resistance

          PVC’s high impact resistance means it can absorb shock without cracking or breaking, making it a durable choice for high-traffic areas or places prone to rough use. This is particularly important for products like PVC wall panels or flooring, which need to endure daily wear and tear.

          Longevity

            PVC products are known to last for decades without significant degradation. This longevity is not only a testament to its physical properties but also contributes to its cost-effectiveness. For example, PVC pipes have an expected lifespan of over 50 years, outlasting many traditional materials.

            Low Maintenance

              PVC requires minimal maintenance compared to other materials. It doesn’t need painting, sealing, or frequent repairs, which further enhances its durability and keeps long-term costs down. A simple clean with water and mild detergent is often all it takes to keep PVC products looking new.

              Fire Resistance

                PVC has inherent fire-resistant properties due to its chlorine content, which slows down the spread of fire. This makes it a safer option for applications in environments where fire safety is a concern.

                Mold and Bacteria Resistance

                  Its non-porous surface makes PVC resistant to mold, mildew, and bacteria, contributing to its durability and suitability for hygienic environments such as hospitals and food processing facilities.

                  Applications of Durable PVC

                  The durability of PVC makes it ideal for a wide range of applications, including:

                  • Building and Construction: Pipes, window frames, flooring, wall cladding, and roofing sheets.
                  • Automotive Industry: Used in dashboard components, cables, and trims due to its impact resistance.
                  • Healthcare: Blood bags, tubing, and other medical devices that require a durable, sterile environment.
                  • Home and Garden: Furniture, fences, decking, and storage solutions that need to withstand outdoor elements.
                  • Industrial Uses: Conveyor belts, protective clothing, and other items exposed to harsh conditions.

                  Environmental Impact and Recycling

                  While PVC is highly durable, concerns about its environmental impact have led to significant advancements in recycling processes. Modern PVC can be recycled multiple times without losing its properties, making it a more sustainable option than many alternatives. Recycling PVC not only extends its lifespan but also reduces the environmental footprint of products made from this material.

                  The Durability of PVC – Conclusion

                  PVC’s durability is unmatched when it comes to resisting the elements, chemicals, and daily wear and tear. Its versatility and low maintenance needs make it a popular choice in industries ranging from construction to healthcare. As recycling technologies improve, the environmental footprint of PVC continues to shrink, making it not only a durable but also a sustainable choice for the future.

                  Whether you’re considering PVC for construction, home improvement, or industrial use, its resilience ensures a long-lasting solution that stands the test of time. So, the next time you see PVC in use, you can appreciate the science and engineering that go into making this material a durable, reliable option for a wide range of applications.

                  Posted on

                  Installing StoreWALL on a Polystyrene block wall

                  Installing StoreWALL on a Polystyrene block wall

                  This week, I received an inquiry about installing StoreWALL on a polystyrene block wall. Since I wasn’t very familiar with this building material, I took the time to explore the process in detail with the customer. Here’s what I learned and the solutions we discussed.

                  What Are Polystyrene Blocks and Why Are They Popular?

                  Polystyrene blocks are becoming a go-to material in modern construction for their blend of energy efficiency, light weight, and cost-effectiveness. These blocks are known for their superior insulation, which helps maintain consistent indoor temperatures, leading to reduced heating and cooling costs. Their lightweight nature makes them easy to handle and install, speeding up construction and reducing labor costs. Additionally, polystyrene blocks are moisture-resistant and durable, making them suitable for a variety of climates. They are also recyclable, making them an environmentally friendly choice for sustainable building projects. As energy-efficient and budget-conscious housing solutions continue to gain momentum, polystyrene blocks are emerging as a preferred option for builders.

                  How Are Polystyrene Block Walls Constructed?

                  Polystyrene block walls are assembled in a straightforward process, similar to stacking LEGO blocks. These blocks are cut to size and feature a hollow core, which is later filled with concrete, and reinforced with steel, forming a strong, dense wall structure. The polystyrene on the outside remains intact, providing insulation on both sides of the concrete core. This combination of materials creates a highly efficient and durable wall system.

                  Installing StoreWALL on Polystyrene Block Wall: The Challenges

                  When installing StoreWALL on a polystyrene block wall, the main challenge is finding a way to securely fasten the installstrips to the polystyrene while ensuring they can support the weight of whatever will be stored. I suggested two possible solutions to the customer:

                  Plasterboard Zinc Anchors

                  One option is to use plasterboard anchors, which can be placed behind each of the 12 screw holes on the StoreWALL installstrip. Each anchor can support up to 10kg of weight, making it a reliable and efficient method. This approach is also relatively quick and straightforward, using proven fasteners that are easy to source and install.

                  Nail Anchors

                  The second option involves using nail anchors long enough to penetrate into the concrete core behind the polystyrene. To determine the correct length of the fastener, you’d first need to puncture the block to measure the thickness of the polystyrene. The fastener should extend at least 20mm into the concrete for optimal hold. While this method provides a stronger, more secure solution, it may require longer and thicker anchors, such as 75mm or even 100mm options. These are readily available and should provide ample support when fastened into the concrete.

                  Both methods offer viable solutions depending on the specific needs of the installation, with the nail anchors providing a more robust option for heavier loads.

                  Posted on

                  Essential Gardening Tools for Every Garden Shed

                  Whitewood Wall panels

                  Gardening is a rewarding hobby that not only beautifies your surroundings but also offers a sense of accomplishment and connection with nature. Whether you are a seasoned gardener or a beginner, having the right tools in your garden shed can make all the difference in ensuring your garden flourishes. Here’s a detailed guide to the essential gardening tools that every gardener should have in their shed.


                  Hand Trowel

                  Purpose: A hand trowel is a small, handheld tool perfect for digging small holes, planting seeds or bulbs, and transplanting seedlings.

                  Why You Need It: This versatile tool is indispensable for any gardener. Its small size allows for precise digging and planting in tight spaces. Opt for a sturdy trowel with a comfortable grip and a rust-resistant blade to ensure durability and ease of use.

                  Garden Fork

                  Purpose: Garden forks are used for breaking up soil, aerating lawns, turning compost, and digging up potatoes or other root vegetables.

                  Why You Need It: A garden fork can penetrate tougher soil better than a spade, making it perfect for tasks requiring more leverage. Look for a garden fork with robust, slightly curved tines to avoid bending when used in dense soil.

                  Pruning Shears (Secateurs)

                  Purpose: Pruning shears are essential for trimming, shaping, and cutting back plants.

                  Why You Need It: Proper pruning is key to promoting plant health and growth. A good pair of pruning shears will have sharp, clean-cutting blades and ergonomic handles to reduce hand fatigue. Bypass pruners are great for live plants, while anvil pruners are suitable for dead wood.

                  Garden Hoe

                  Purpose: Hoes are primarily used for weeding and cultivating soil.

                  Why You Need It: A garden hoe allows you to easily remove weeds and shape soil around plants. Choose a hoe with a comfortable handle and a blade suited to your specific gardening needs—whether it’s for weeding between tight spaces or cultivating larger areas.

                  garden shed

                  Garden Rake

                  Purpose: Rakes are used for leveling soil, removing debris, and breaking up clumps of soil.

                  Why You Need It: A garden rake with sturdy, flexible tines can handle tough jobs like spreading mulch or removing stones, while a leaf rake is perfect for lighter tasks such as gathering fallen leaves.

                  Watering Can or Hose

                  Purpose: For watering plants efficiently, whether in pots, beds, or borders.

                  Why You Need It: Consistent watering is crucial for healthy plant growth. A watering can is ideal for targeted watering, while a hose is more suitable for larger areas. Consider a hose with a spray nozzle to control water flow and pressure.

                  Wheelbarrow or Garden Cart

                  Purpose: Used for transporting soil, compost, plants, and other gardening materials around your garden.

                  Why You Need It: A wheelbarrow or garden cart is essential for any gardener, reducing the strain of carrying heavy loads and making garden maintenance more efficient. Choose one with a sturdy frame and durable wheels to navigate uneven terrain.

                  Garden Gloves

                  Purpose: Protects hands from cuts, blisters, and contact with soil and chemicals.

                  Why You Need It: A good pair of garden gloves protects your hands and provides a better grip on tools. Look for gloves that are durable, waterproof, and offer a snug fit for dexterity.

                  Spade

                  Purpose: Spades are used for digging, edging, and moving soil or compost.

                  Why You Need It: A spade is a must-have for more extensive digging tasks, like planting trees or creating new beds. Choose a spade with a sharp blade and a comfortable handle that suits your height to avoid back strain.

                  Garden Kneeler or Kneeling Pad

                  Purpose: Provides cushioning and support for your knees while gardening.

                  Why You Need It: Gardening often involves working close to the ground. A garden kneeler or kneeling pad reduces knee pain and supports your lower back, making your gardening experience more comfortable.

                  garden shed

                  Loppers

                  Purpose: Loppers are long-handled pruners used for cutting thicker branches.

                  Why You Need It: For larger branches that are too thick for pruning shears, loppers provide the extra leverage needed for clean cuts. Look for loppers with a lightweight design and telescopic handles for extended reach.

                  Garden Hose with Nozzle or Sprinkler System

                  Purpose: Efficient watering of larger garden areas.

                  Why You Need It: While a watering can is great for smaller areas, a garden hose with an adjustable nozzle or a sprinkler system is essential for covering larger spaces. This ensures your plants receive adequate water without the hassle of manual watering.

                  Soil Tester Kit

                  Purpose: Used to test soil pH and nutrient levels.

                  Why You Need It: Understanding your soil’s condition is key to successful gardening. A soil tester kit allows you to determine the pH and nutrient levels, helping you adjust your soil for optimal plant health.

                  Plant Ties and Supports

                  Purpose: Used to support climbing plants and secure them to stakes or trellises.

                  Why You Need It: Plant ties and supports help maintain plant health by preventing breakage and encouraging proper growth. Use soft ties to avoid damaging stems and adjustable supports to accommodate growth.

                  Garden Knife or Hori Hori Knife

                  Purpose: A versatile tool for cutting, digging, and weeding.

                  Why You Need It: A garden knife or Hori Hori knife combines multiple tools into one, making it a versatile addition to your garden shed. It’s perfect for dividing plants, cutting through tough roots, or even opening bags of soil.

                  Compost Bin or Tumbler

                  Purpose: For composting garden waste and kitchen scraps.

                  Why You Need It: Composting is an eco-friendly way to recycle organic waste and enrich your soil. A compost bin or tumbler helps you efficiently manage compost, providing your garden with nutrient-rich material.

                  Garden Dibber

                  Purpose: A pointed tool used for making holes in the soil for planting seeds, bulbs, or seedlings.

                  Why You Need It: A dibber makes planting easier and more precise, ensuring seeds and bulbs are placed at the correct depth and spacing.

                  Garden Shed Storage Solutions

                  Having accumulated your own garden tools, your garden shed will need space and accessories to safely store them. StoreWALL offers a premium range of garage storage options for your garden shed. Combine our weather-proof garage wall panels with our heavy duty range of storage hooks. Safely store your gardening tools for under $200.

                  Having the right tools in your garden shed is essential for maintaining a healthy and beautiful garden. Each tool serves a specific purpose, making your gardening tasks easier and more efficient. Investing in quality tools will save you time, effort, and money in the long run, allowing you to enjoy the fruits of your labor to the fullest.

                  Equip your garden shed with these essential tools, and you’ll be well on your way to cultivating a thriving garden. Happy gardening!


                  Posted on

                  The Art of Unclever Storage Solutions: How to Inefficiently Store Your Stuff

                  Unclever Storage Solutions

                  Are you tired of all those innovative, practical storage solutions that actually help you organize your space? Do you long for the days when a pile of junk was just that—a glorious mess with no sense of order? Look no further! We present to you a guide to Unclever Storage Solutions, where inefficiency meets creativity in the least helpful ways imaginable.

                  Source: Newyorker.com

                  The Suspended Chaos

                  Forget about neat shelves or pegboards. Instead, try suspending random objects from the ceiling with varying lengths of string. Nothing says “I’ve given up” quite like a bicycle hanging just low enough to smack you in the forehead every time you walk by. For added flair, hang your heavy tools above fragile items like glassware. It’s like playing a daily game of “Will It Shatter?”

                  The Misplaced Heirlooms

                  Have valuable family heirlooms that need storing? Perfect! Tuck them away in the least logical places. Grandma’s precious porcelain doll collection? Toss it into an old, dusty cardboard box marked “Holiday Decorations” and shove it into the attic. The thrill of possibly losing priceless memories will add excitement to your otherwise mundane storage routine.

                  Source: Newyorker.com

                  The Mystery Box

                  Nothing beats the old “box of randomness” approach. Simply gather all your odds and ends, throw them into a box without labels, and bury it in the darkest corner of your garage. Finding that one missing screwdriver or your wedding album becomes an adventure, complete with frustration and hours wasted searching. Who doesn’t love a good treasure hunt?

                  The Tetris Fail

                  Instead of neatly stacking items, try cramming everything into a space it clearly doesn’t fit. The trick is to use brute force until the lid almost closes. Bonus points if you manage to wedge things in so tightly that removing one item causes an avalanche. You’ll never know the joy of hearing your stuff crash to the ground until you’ve tried this method.

                  The Decorative Clutter

                  Why hide your clutter when you can make it a centerpiece? Place your unused, bulky items in prominent locations around your home. That old surfboard you never use? Prop it against the dining room wall. Guests will marvel at your ability to blur the line between art and hoarding.

                  The Forgotten Fridge

                  For perishable items you need to store, why not use that old, broken fridge you keep meaning to throw out? Perfect for ensuring that you’ll never actually see those leftovers again. The best part? You’ll rediscover them months later, transformed into a science experiment gone horribly wrong.

                  So, there you have it—our guide to Unclever Storage Solutions, where disorder and inefficiency reign supreme. Whether you’re aiming to waste time, misplace important items, or simply create a tripping hazard, these methods are guaranteed to deliver. Because who needs practicality when you can have chaos?


                  Posted on

                  The Modern Garage: Insights from Australian Architects

                  the modern garage

                  In the realm of contemporary home design, the garage has evolved far beyond its original function as a mere vehicle storage space. Australian architects are at the forefront of reimagining the modern garage, integrating it seamlessly into modern homes while optimizing its utility, aesthetics, and environmental impact. This article delves into how architects in Australia view the positioning and design of modern garages, highlighting key trends and innovative approaches.

                  The Role of Garages in Modern Homes

                  1. Multifunctional Spaces: Modern garages are no longer just for cars. They serve as workshops, storage areas, home gyms, and even entertainment spaces. Architects design garages to be versatile, accommodating various activities and needs.
                  2. Aesthetic Integration: The modern garage is designed to blend seamlessly with the overall architecture of the home. This includes matching materials, colors, and design elements to create a cohesive look.
                  3. Sustainability: There is a strong emphasis on eco-friendly designs. Garages are equipped with solar panels, rainwater harvesting systems, and energy-efficient lighting to reduce their environmental footprint.
                  the modern garage

                  Positioning of Modern Garages

                  1. Front-Facing Garages: Traditionally, garages have been placed at the front of the house. This remains popular due to its convenience. However, architects ensure that front-facing garages do not dominate the facade, often using landscaping and architectural elements to soften their impact.
                  2. Side or Rear Placement: For a more discreet approach, many modern homes feature garages on the side or rear. This positioning allows for a more attractive front facade and better street appeal. It also provides opportunities for larger, more private front gardens.
                  3. Underneath the House: In areas with limited space or sloped terrains, garages are often built underneath the house. This not only maximizes land use but also creates a more streamlined appearance.

                  Design Trends in Modern Garages

                  1. Integrated Design: Garages are designed to blend with the home’s architecture. This includes using the same materials for the garage doors as the rest of the house, creating a unified look.
                  2. Large Windows and Natural Light: Incorporating large windows and skylights is a growing trend. This design element makes the garage feel more like a part of the living space, enhancing its functionality and comfort.
                  3. Smart Technology: Modern garages are equipped with smart technology, including automated doors, security systems, and climate control. These features add convenience and enhance the safety of the home.
                  4. Sustainable Materials: Architects prioritize using sustainable materials for garage construction. This includes recycled steel for doors, eco-friendly insulation, and non-toxic paints.
                  5. Minimalist Aesthetic: Clean lines, simple forms, and uncluttered spaces define the modern garage. This minimalist approach not only looks sleek but also makes the space more functional.
                  the modern garage

                  The Future of Garage Design

                  1. Adaptive Reuse: As car ownership trends shift, garages will be designed for easy conversion into other types of living spaces, such as guest rooms or home offices.
                  2. Community-Oriented Spaces: In urban areas, shared garages that serve multiple homes may become more common, promoting a sense of community and efficient land use.
                  3. Enhanced Connectivity: Garages will increasingly be integrated with smart home systems, allowing for better connectivity and control over security, lighting, and energy use.

                  Conclusion

                  Australian architects are redefining the role and design of garages, transforming them into multifunctional, aesthetically pleasing, and sustainable spaces. By considering the positioning, design elements, and future adaptability of garages, they are setting new standards for modern home design. As these trends continue to evolve, the garage will undoubtedly remain a crucial and innovative aspect of contemporary architecture.