When installing shelves, it’s essential to understand how to manage the weight they will hold to prevent damage or accidents. Here’s a guide on how to effectively manage weight on your shelves and how brackets contribute to their stability.
Understanding Shelf Load Capacity
The load capacity of a shelf refers to the maximum weight it can safely support without bowing, sagging, or breaking. This capacity depends on factors such as the material that the floating shelf is made of, its thickness, length, and the quality of the brackets used for support. Overloading a shelf can cause it to warp, detach from the wall, or collapse entirely, posing safety risks and potential damage to your belongings.
Distributing Weight Evenly
To maximize the shelf’s durability, distribute weight evenly across its surface. Place heavier items closer to the wall or directly above the brackets, where the shelf is strongest. Lighter items should be positioned toward the front or on the ends. This approach minimizes stress on the shelf and prevents it from tipping or sagging.
The Importance of Brackets in Shelf Support
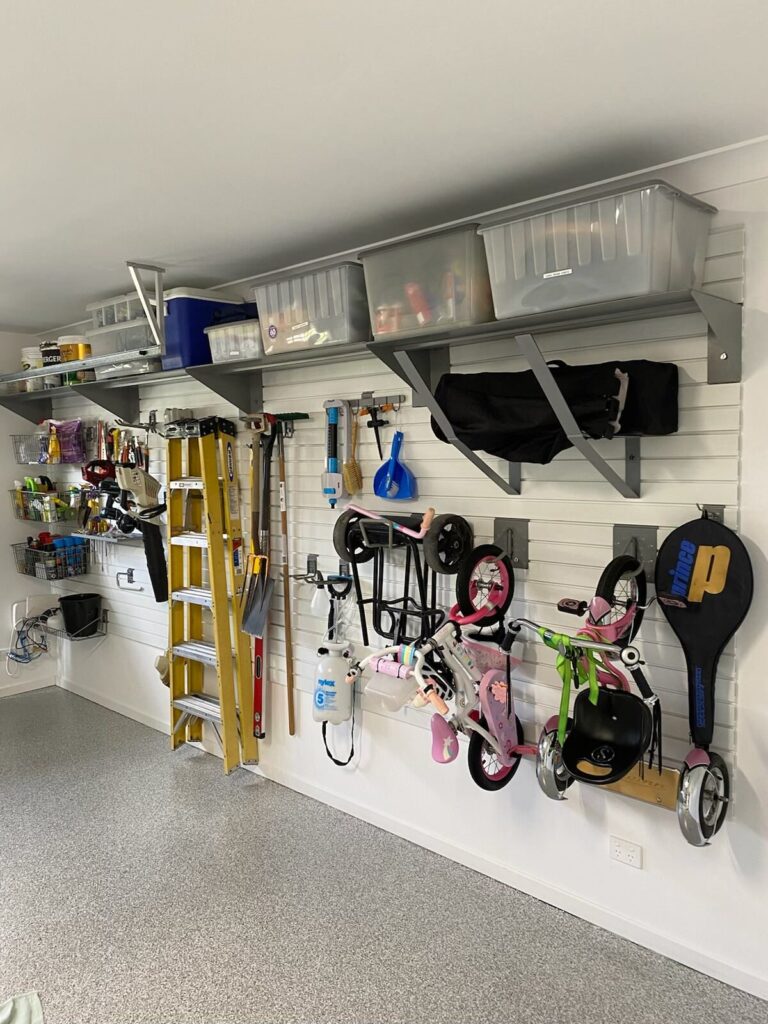
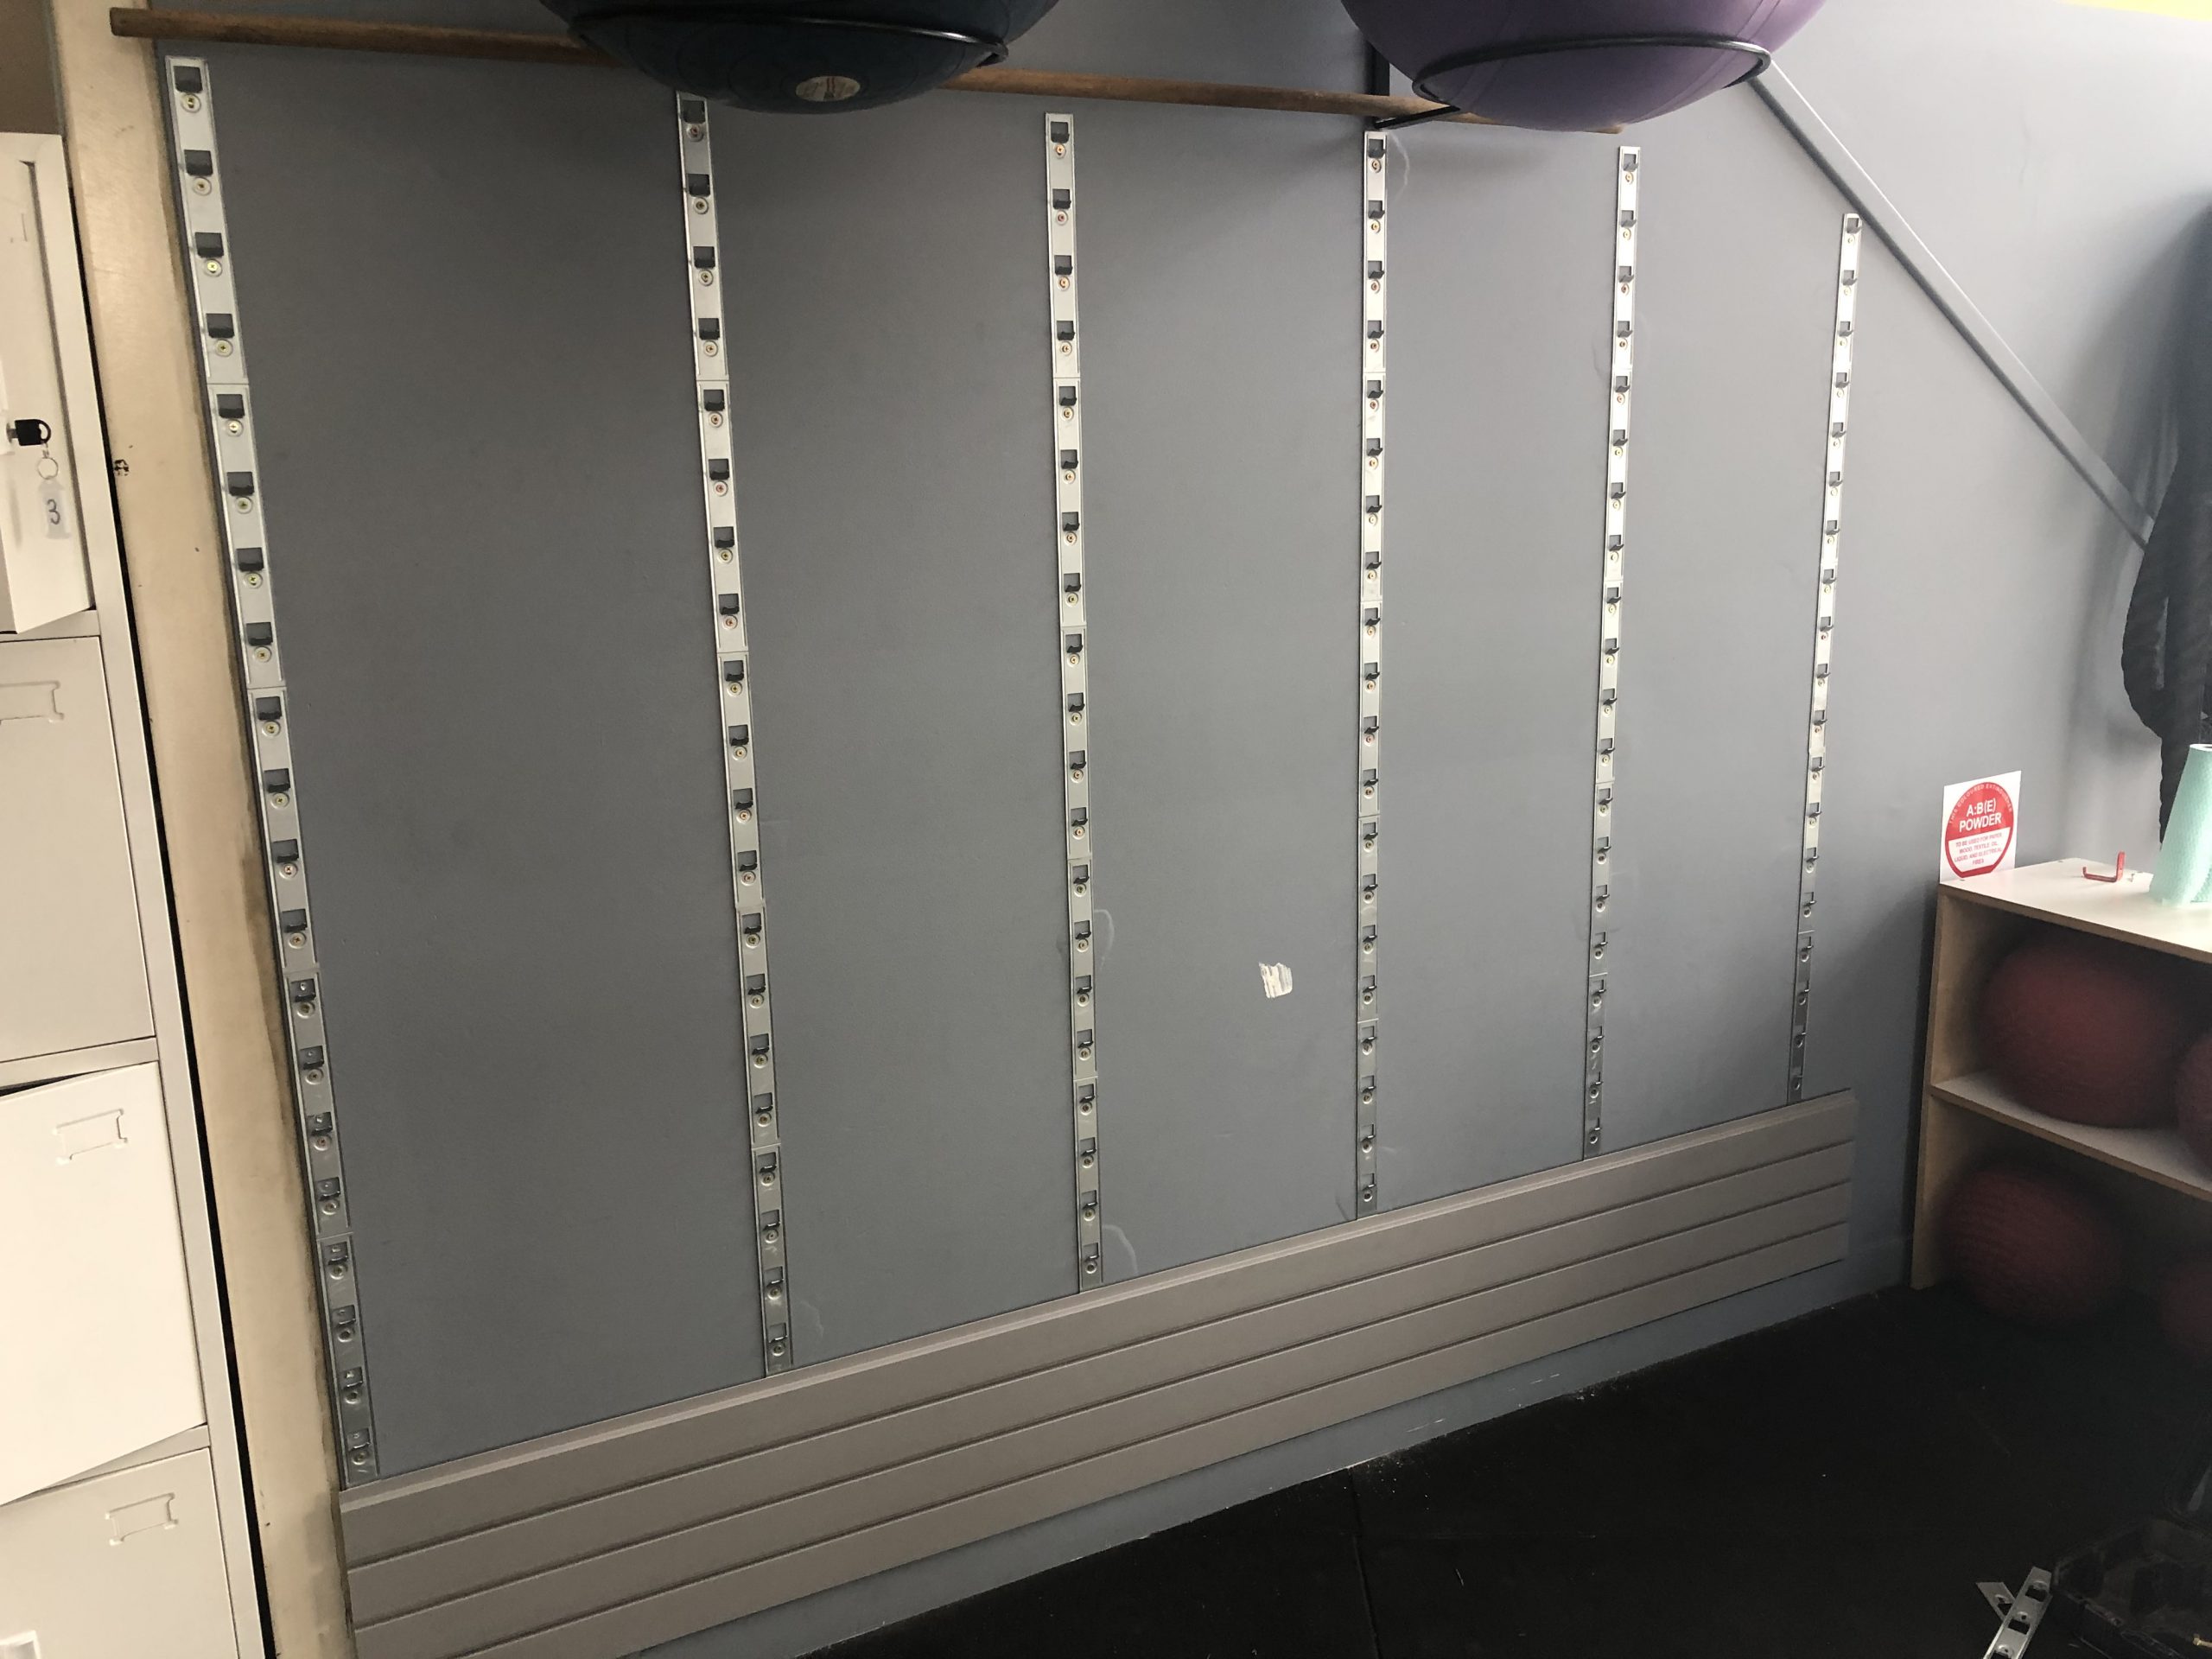
Brackets play a critical role in supporting a shelf’s weight. They are the primary means of transferring the load from the shelf to the wall. The number, size, and spacing of brackets directly affect how much weight a shelf can handle:
Number of Brackets:The longer the shelf, the more brackets it will need. For example, a shelf up to 1.2 meters typically requires two brackets, while a 1.8-meter shelf requires three. Adding more brackets reduces the span of unsupported shelf length, thereby increasing the weight it can bear.
Bracket Size and Material:Larger, sturdier brackets provide better support and can hold more weight. Choose brackets that match the depth of your shelf and are made of strong materials, such as metal, to ensure durability.
Spacing Between Brackets:Brackets should be spaced evenly to distribute weight efficiently. For heavier loads, reduce the spacing between brackets to increase support. A good rule of thumb is to place brackets no more than 60 cm apart.
Recognizing Signs of Overloading
Signs that your shelf may be overloaded include bowing or sagging in the middle, the shelf pulling away from the wall, or cracking sounds from the brackets or shelf material. If you notice any of these signs, reduce the load immediately and consider adding more brackets for reinforcement.
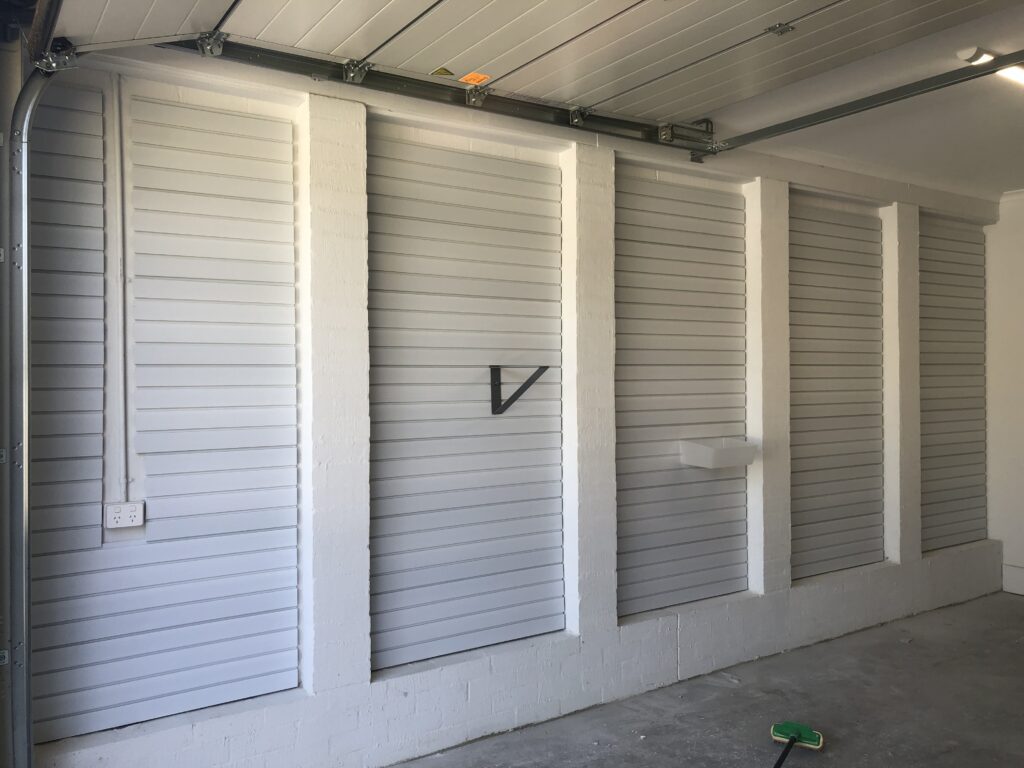
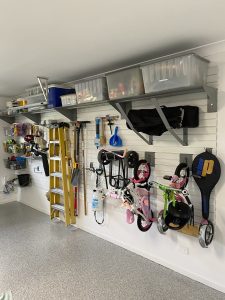
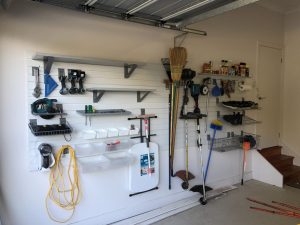
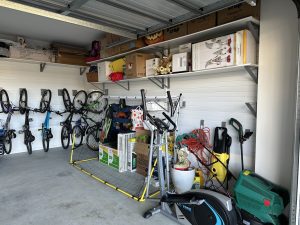
Examples of incorrect spacing, 2 or 3 brackets over 2.4m
Choosing the Right Wall Anchors
The effectiveness of your brackets also depends on the wall anchors used. Anchors should be appropriate for the wall type (drywall, plaster, brick, etc.) and strong enough to handle the combined weight of the shelf and its contents. Heavy-duty anchors, such as toggle bolts or molly bolts, are recommended for heavier loads.
Regular Maintenance and Safety Checks
Periodically check your shelves and brackets for signs of wear, damage, or loosening. Tighten any loose screws, replace damaged brackets, and ensure the shelf remains level and secure. Regular maintenance helps prevent accidents and prolongs the life of your storage solution.
Proper weight management on shelves and the strategic use of brackets is crucial for creating safe and functional storage spaces. By understanding load capacity, distributing weight evenly, and choosing the right brackets and anchors, you can maximize the utility of your shelves while ensuring they remain secure and stable.
This week, I received an inquiry about installing StoreWALL on a polystyrene block wall. Since I wasn’t very familiar with this building material, I took the time to explore the process in detail with the customer. Here’s what I learned and the solutions we discussed.
What Are Polystyrene Blocks and Why Are They Popular?
Polystyrene blocks are becoming a go-to material in modern construction for their blend of energy efficiency, light weight, and cost-effectiveness. These blocks are known for their superior insulation, which helps maintain consistent indoor temperatures, leading to reduced heating and cooling costs. Their lightweight nature makes them easy to handle and install, speeding up construction and reducing labor costs. Additionally, polystyrene blocks are moisture-resistant and durable, making them suitable for a variety of climates. They are also recyclable, making them an environmentally friendly choice for sustainable building projects. As energy-efficient and budget-conscious housing solutions continue to gain momentum, polystyrene blocks are emerging as a preferred option for builders.
How Are Polystyrene Block Walls Constructed?
Polystyrene block walls are assembled in a straightforward process, similar to stacking LEGO blocks. These blocks are cut to size and feature a hollow core, which is later filled with concrete, and reinforced with steel, forming a strong, dense wall structure. The polystyrene on the outside remains intact, providing insulation on both sides of the concrete core. This combination of materials creates a highly efficient and durable wall system.
Installing StoreWALL on Polystyrene Block Wall: The Challenges
When installingStoreWALLon a polystyrene block wall, the main challenge is finding a way to securely fasten the installstrips to the polystyrene while ensuring they can support the weight of whatever will be stored. I suggested two possible solutions to the customer:
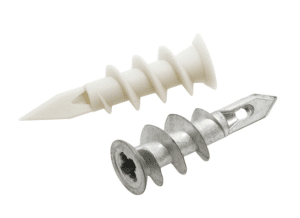
Plasterboard Zinc Anchors
One option is to use plasterboard anchors, which can be placed behind each of the 12 screw holes on the StoreWALL installstrip. Each anchor can support up to 10kg of weight, making it a reliable and efficient method. This approach is also relatively quick and straightforward, using proven fasteners that are easy to source and install.
Nail Anchors
The second option involves using nail anchors long enough to penetrate into the concrete core behind the polystyrene. To determine the correct length of the fastener, you’d first need to puncture the block to measure the thickness of the polystyrene. The fastener should extend at least 20mm into the concrete for optimal hold. While this method provides a stronger, more secure solution, it may require longer and thicker anchors, such as 75mm or even 100mm options. These are readily available and should provide ample support when fastened into the concrete.
Both methods offer viable solutions depending on the specific needs of the installation, with the nail anchors providing a more robust option for heavier loads.
When it comes to organizing your garage, adding a few shelves might seem like the easiest solution. While shelves certainly have their place, relying on shelving alone for garage storage can leave you with limited flexibility, wasted space, and ongoing organization challenges. In this article, we’ll explore the limitations of garage shelving, and what alternatives or additions you might consider to truly maximize your garage storage.
Limitations of Garage Shelving
Garage shelving provides some utility, but it often falls short in addressing the diverse storage needs of a garage. Here are some of the limitations that can arise:
Wasted Vertical Space
Standard garage shelving typically leaves a significant amount of vertical space unused. This space could otherwise be used for storing tools, equipment, or seasonal items. Without utilizing the full height of your walls, you may find yourself quickly running out of space and struggling to keep everything accessible.
Difficulty Organizing Small and Medium-Sized Items
Shelves are best suited for large, stackable items or bins, but they can make it difficult to store small and medium-sized items efficiently. When stored on open shelves, items like tools, sports equipment, or cleaning supplies can quickly create clutter and become hard to locate when you need them.
Limited Flexibility
Once installed, traditional shelves can be hard to adjust or reorganize, especially if you’re dealing with fixed or heavy-duty shelving units. Garages often require adaptable storage options that can change with your needs, and shelving alone doesn’t always offer this flexibility.
Risk of Clutter and Accessibility Issues
Shelving alone encourages stacking items, which can lead to clutter, making it difficult to access what’s stored in the back. As shelves fill up, it’s easy for items to become piled or hidden, which not only makes organization harder but can also increase the risk of items falling and causing damage.
Underutilized Wall and Ceiling Space
Shelving takes up valuable floor space while leaving the walls and ceiling areas largely unused. This is a missed opportunity, especially in garages where space is at a premium. Ceiling racks, wall panels, or other modular solutions can make better use of these areas and free up floor space for other uses.
Alternative and Complementary Storage Solutions
To make the most of your garage storage, it’s worth exploring other storage options that can work alongside shelving to create a more comprehensive and efficient setup.
Slatwall and Wall Panel Systems
Slatwall systems, like those fromStoreWALL, are versatile garage wall storage solutions that allow you to hang hooks, shelves, baskets, and brackets. Unlike traditional shelving, these panels make it easy to store items of varying sizes, such as tools, sporting goods, and gardening supplies. Wall panels allow you to use your walls effectively, keep items accessible, and prevent clutter on shelves.
Pegboards and Tool Racks
Pegboards and tool racks provide customizable storage for smaller and lighter items. By mounting them on the wall, you keep your tools organized and within reach, while also freeing up valuable shelf space for larger, bulkier items.
Overhead Storage
Overhead racks or ceiling storage solutions are ideal for items that aren’t needed regularly, such as seasonal decor, camping gear, or spare tires. By using the ceiling space, you maximize storage without taking up floor or wall space. Overhead storage keeps these items safe, organized, and out of the way until they’re needed.
Cabinets and Drawer Units
Cabinets and drawer units offer enclosed storage, which helps reduce dust accumulation and keeps items hidden for a tidier look. Cabinets can house a variety of items that don’t need to be on display, and drawer units work particularly well for storing smaller tools, hardware, or crafting supplies. Additionally, locking cabinets can be useful for securing chemicals, paints, and other hazardous materials safely out of reach.
Bins, Baskets, and Specialized Holders
Adding bins, baskets, and specialized holders (e.g., for sports equipment or gardening tools) can help you organize items that are hard to store on shelves alone. Labelled storage bins allow you to categorize items for easy access, while baskets can hold oddly shaped items like balls, hoses, or extension cords. These can be attached to wall panels or placed on shelves in an organized manner.
Benefits of a Mixed Storage System
Incorporating a variety of storage options in your garage enables you to overcome some of the limitations of garage shelving.
Increased Space Efficiency
By utilizing the walls and ceiling alongside shelving, you can dramatically increase your available storage without sacrificing floor space. Combining shelving with slatwall, overhead storage, and cabinets ensures every inch of the garage is working for you.
Better Organization and Accessibility
A mixed storage system allows you to assign specific places for each type of item, so they’re easy to find and access when needed. You can store frequently used items within reach and keep seldom-used items out of the way.
Improved Safety and Clutter Reduction
A well-organized garage reduces the risk of accidents caused by items falling off overcrowded shelves. Hazardous materials can be safely locked away, and bulky or heavy items can be securely stored on racks or in cabinets, making the space safer for family members.
Enhanced Flexibility for Changing Needs
As your storage needs evolve, a versatile system that includes slatwalls, pegboards, and ceiling storage can adapt with you. You can reconfigure your setup to accommodate new tools, equipment, or seasonal items without a complete overhaul.
Getting Started: Creating a Balanced Storage Plan
To get the most out of your garage, start by assessing your storage needs:
Identify What You Need to Store
Make a list of the items you currently store in your garage and those you’d like to add. This helps you determine the types and sizes of storage solutions you’ll need.
Map Out Your Space
Measure your garage and sketch a rough layout, marking where you could install shelving, wall panels, ceiling racks, and cabinets. Aim to balance storage across floor, wall, and ceiling areas to avoid overcrowding any one area.
Choose a Combination of Storage Solutions
Based on your list and layout, choose a combination of storage options to fit your needs. If you have many small items, prioritize pegboards or slatwall with baskets. For larger items, consider overhead racks or dedicated shelving.
Install and Organize
Start by installing the more permanent fixtures, such as slatwall or ceiling racks, before adding smaller storage accessories. Once everything is in place, arrange your items in a logical, accessible way to ensure easy access and organization.
Conclusion – Limitations of Garage Shelving
While garage shelving is a useful storage tool, relying on it alone can limit your options and lead to a cluttered, inefficient space. By combining shelving with wall-mounted systems, ceiling racks, cabinets, and specialized storage accessories, you can create a well-organized and highly efficient garage that meets all your storage needs.
ExploreStoreWALLfor high-quality slatwall solutions, hooks, baskets, and other accessories that will take your garage organization to the next level. With a thoughtfully designed setup, your garage can become a clean, accessible, and functional space tailored to you.
At StoreWALL, innovation never stops. We’re excited to introduce our latest offering — theUltra Duty Garage Hook range. Built for unparalleled strength and versatility, these hooks and brackets are designed to tackle the heaviest storage needs in your home, garage, or commercial space. With the ability to support up to80kgsper hook, this new range is the strongest yet from StoreWALL.
Here’s a closer look at the four new additions to the Ultra Duty lineup and how they can transform your garage storage solutions.
1. Ultra Duty Wide Hook
If you loved the classic StoreWALL Wide Hook, get ready to be impressed. TheUltra Duty Wide Hookis 2-3 times larger and significantly stronger. Its design allows it to hold bulky and oversized items that the standard hook just can’t handle.
Key Specifications
Dimensions: 304mm (H) x 330mm (W) x 254mm (D)
Weight Capacity: Up to 80 kg
This hook is ideal for holding larger tools, sports equipment, or heavy-duty power tools. Its wide design offers maximum surface contact, ensuring stability and reducing the risk of items falling.
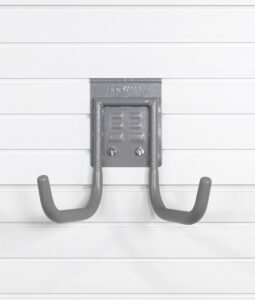
2. Ultra Duty Utility Hook
Say goodbye to storage limits with theUltra Duty Utility Hook. Modelled after the HD Universal Hook, this new version is much larger, making it perfect for items that require deeper, more secure support.
Key Specifications
Dimensions: 304mm (H) x 152mm (W) x 381mm (D)
Weight Capacity: Up to 80 kg
This hook is perfect for securing large gardening tools, electrical cords, hoses, or even sports equipment. Its generous depth (381mm) gives you the flexibility to hang long, oversized items safely and securely.
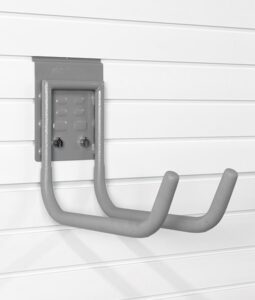
3. Ultra Duty 635mm Surf & Paddle Board Bracket
Water sports enthusiasts will love the new635mm Surf & Paddle Board Bracket. Specifically designed to make it easier to lift and store paddle boards, surfboards, and even canoes, this bracket allows for simple access.
Key Specifications
Dimensions: 203mm (H) x 152mm (W) x 635mm (D)
Weight Capacity: Up to 90 kg (200 lbs)
Unlike previous board brackets, this new design sits flush against the wall, which means no awkward lifting or tilting is required. Simply slide your board in and out with ease.
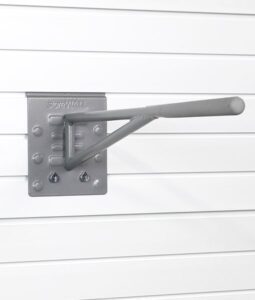
4. Ultra Duty 381mm Surf & Paddle Board Bracket
For those with smaller surfboards or paddleboards, the381mm versionof the Surf & Paddle Board Bracket is a perfect fit. It’s a more compact option for people who have limited wall space but still want the same easy access.
Key Specifications
Dimensions: 203mm (H) x 152mm (W) x 381mm (D)
Weight Capacity: Up to 90 kg (200 lbs)
This version works well in tighter garage spaces or for those with smaller boards. It offers the same flush-to-wall design as its larger sibling but with a shorter depth, making it an ideal choice for compact spaces.
What Makes the Ultra Duty Garage Hook Range Unique?
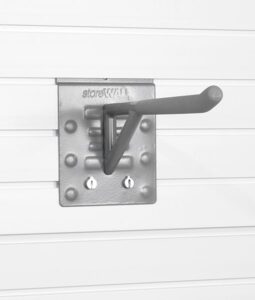
TheUltra Duty Garage Hook rangeisn’t just bigger and stronger — it’s smarter too. These hooks feature:
Two CamLoks for extra security: Unlike standard hooks with a single CamLok, the Ultra Duty hooks have two. This dual lock system provides increased grip, ensuring the hook stays firmly in place even under maximum load.
Larger backplates for stability: The wider backplate spreads the weight more evenly, reducing pressure on any single point of the wall panel.
Compatible with StoreWALL Heavy Duty Wall Panels: While these hooks work with standard StoreWALL panels, we recommend pairing them withHeavy Duty Wall PanelsandHD InstallStripsif you plan to load them to their full capacity of 80 kg.
The garage is more than just a space to park your car—it’s a reflection of how we live, what we value, and how residential design has evolved. Over the past three decades, the position and prominence of garages on homes have shifted significantly, shaped by urban development patterns, lifestyle needs, and design aesthetics. We explore 30 years of garage location trends and what it says about how we live today.
1990s: Front and Center
In the 1990s,suburban expansionwas in full swing. As more families moved intotract-style homesin planned communities, garages became a dominant feature—often locatedat the front of the house, facing the street.
Key Characteristics:
Double or triple garage doorswere a focal point of the home’s facade.
Garage doors were oftenprominent and unadorned, prioritizing function over form.
This design catered to families withmultiple vehicles, and commuting was a daily necessity.
Why It Worked Then:
Developers aimed forefficiency and affordability—placing the garage at the front reduced driveway length and allowed smaller lot sizes.
The garage became anextension of the front yard, often used for storage, home projects, or informal entry.
2000s: Garage as a Lifestyle Hub
Ashomes grew largerin the early 2000s, so did the garages. The garage was still front-facing in most suburban neighborhoods, but the trend began to shift towardmore integrated designs.
Key Trends:
Three-car garagesbecame more common, often arranged in L- or tandem layouts.
Builders began tohide garages slightly behind the main front elevation, sometimes offset or recessed.
Homes includedmudrooms or laundry roomsbetween the garage and the interior, reflecting its role as the main entry point for families.
The Lifestyle Factor:
The garage became not just for parking, but amultifunctional space—used for fitness equipment, hobby workspaces, or even secondary living areas.
2010s: De-emphasizing the Garage
In the 2010s,design-conscious homeowners and architectsbegan pushing back against garages dominating curb appeal. The modern homeowner wanted cleaner aesthetics, better street presence, and more usable outdoor space.
Design Shifts:
Inurban infill and townhome developments, garages were often moved to therear of the homeand accessed via alleyways.
Incustom homes or high-end developments, garages were placedside-facing or hiddenbehind landscaping or architectural features.
There was a growing focus ongarage door design, with materials and styles selected to complement the overall home.
Driving Forces:
Walkability and streetscape appealbecame more important.
The rise ofalternative transportation(biking, ride-shares) made large garages less essential in some urban areas.
Storage systems and organization toolslike slatwall panels and overhead racks became popular, helping homeowners maximize garage functionality.
2020s: Flexibility, Function, and Hidden Design
Today, garage design is all aboutblending form with function. While many homes still feature front-facing garages, there’s a clear move towardless visual dominanceand greaterfunctional flexibility.
Current Trends:
Detached garagesare making a comeback in some markets, offering space for ADUs (accessory dwelling units) or home offices above.
Side-entry and rear-facing garagesare favored for upscale homes.
Integrated garageswith seamless interior transitions and smart storage are in high demand.
Garages are increasingly being built withEV charging stations, insulated doors, andclimate control.
Cultural and Technological Influence:
The rise ofremote workandhome-based businesseshas transformed garages into workshops, studios, and gyms.
Design software and 3D modeling toolsallow homeowners to better visualize and customize garage layouts.
Sustainability and energy efficiencyare influencing the materials and positioning of garage spaces.
Why This Evolution Matters
The changing location and role of the garage reflect deeper shifts in how we live:
A move towardintentional design
Increasedfocus on curb appeal and community aesthetics
A broader view of the garage as aversatile, integral space
As we continue to rethink how our homes function in a digital, mobile, and flexible world, the garage is evolving right alongside us.
30 Years of Garage Location Trends – The Future
Over the past 30 years, garages have moved fromfront-facing functional spacestodiscreet, flexible extensions of the home. Whether it’s for storing a vehicle, working on a passion project, or charging your electric car, the garage’s role is no longer one-dimensional.
As homeowners continue to demand more from their living spaces, expect garage design—and location—to keep evolving in creative and thoughtful ways.
Hoarding is a complex behavior that affects millions of people worldwide. While some individuals accumulate items due to sentimental attachment, others do so as a result of deeper psychological or emotional factors. Understanding why people hoard can provide insight into how to manage and address this issue effectively.
What is Hoarding?
Hoarding is the excessive accumulation of items, regardless of their value, and the difficulty in parting with them. This can lead to cluttered living spaces, compromised safety, and emotional distress. Hoarding is often associated with Hoarding Disorder (HD), a recognized mental health condition.
Common Reasons why people hoard
1. Emotional Attachment
Many people develop deep sentimental connections with their belongings. Items may represent memories, relationships, or important life events, making it emotionally difficult to discard them. The fear of losing a connection to the past can result in excessive accumulation.
2. Fear of Scarcity
Some individuals hoard because they fear they might need an item in the future and won’t be able to replace it. This is particularly common among those who have experienced financial hardships, war, or other crises where access to goods was limited.
3. Anxiety and Decision-Making Difficulties
People with hoarding tendencies often struggle with decision-making. They may worry about making the wrong choice, leading to anxiety over what to keep or discard. As a result, they default to keeping everything to avoid regret.
4. Perceived Value of Items
Hoarders may believe that even seemingly insignificant items have potential future value. Whether it’s an old newspaper, broken appliance, or outdated clothing, they may see these objects as useful someday, even when that is unlikely.
5. Trauma and Loss
Hoarding is sometimes linked to traumatic experiences or significant loss. Individuals who have lost loved ones may hold onto their belongings as a way to cope with grief. The clutter provides a sense of comfort and stability in times of emotional distress.
6. Mental Health Conditions
Hoarding is often associated with mental health disorders such as:
Obsessive-Compulsive Disorder (OCD)– The compulsion to save items and difficulty in letting go.
Depression– A lack of motivation or energy to declutter.
Anxiety Disorders– Fear of discarding something important.
Attention Deficit Hyperactivity Disorder (ADHD)– Struggles with organization and impulse control.
The Impact of Hoarding
Hoarding can have significant consequences on an individual’s life, including:
Health Risks: Piles of clutter can create unsanitary living conditions, leading to respiratory issues, pest infestations, and trip hazards.
Social Isolation: Many hoarders feel ashamed of their living conditions and avoid inviting friends or family over.
Financial Strain: Excessive spending on unnecessary items can lead to financial difficulties.
Family Conflicts: Loved ones may struggle to understand or cope with a hoarder’s behavior, leading to tension and strained relationships.
How to Manage and Overcome Hoarding
1. Recognizing the Problem
Acknowledging that hoarding is an issue is the first step toward change. Those affected should reflect on how their behaviour impacts their life and well-being.
2. Seeking Professional Help
Therapists, particularly those specializing in cognitive-behavioral therapy (CBT), can help individuals understand the root causes of their hoarding and develop coping strategies. Visit theAnxiety Recovery Centre Victoria (ARCVic)for assistance. ARCVic is a state-wide, specialist mental health organisation, providing support, recovery and educational services to people and families living with anxiety disorders. We aim to support and equip people with knowledge and skills that will build resilience and recovery and reduce the impact of anxiety disorders.
Decluttering an entire home at once can be overwhelming. Breaking the process into small, manageable tasks, such as organizing one drawer at a time, can make it more achievable.
4. Enlisting Support
Friends, family members, or professional organizers can provide assistance and encouragement throughout the decluttering process.
5. Changing Mindsets
Shifting one’s perspective on possessions is crucial. Understanding that memories exist independently of physical objects can help in letting go.
6. Establishing Organization Systems
Once decluttered, implementing organization strategies such as designated storage spaces, labeling, and periodic clean-ups can prevent relapse into hoarding behaviors.
Conclusion – Why People Hoard
Hoarding is a complex issue with psychological, emotional, and environmental influences. While it can significantly impact an individual’s quality of life, it is a behavior that can be managed with the right support, awareness, and intervention. Recognizing the underlying causes and taking gradual steps toward change can help individuals regain control over their living spaces and overall well-being.
Creating an organised, efficient garage is about more than just clearing clutter—it’s about making a smart investment in your home. A well-designed garage storage solution ensures your belongings are secure, easy to access, and stored in a way that enhances the space, not crowds it. In our latest article we will look a recent case study, where we helped a Sydney customer solve her garage storage challenge.
Garage Storage Isn’t Just About Shelving
If your goal is to simply shove items out of sight, a few basic shelves from your local Bunnings might do the trick—until you need something buried at the back. But when you’re looking for long-term efficiency and flexibility, shelves alone fall short. They often become overcrowded, making it hard to retrieve specific items without moving others.
This is where agarage wall storage systemshines.
Once installed, StoreWALL’s wall panels transform your garage walls into customisable storage hubs. Need to hang bikes this year and swap to golf gear and water skis next summer? No problem. With the right slatwall system, you can easily change your layout as your needs evolve—without drilling new holes or installing more shelves.
The Smart Way to Plan Garage Wall Storage
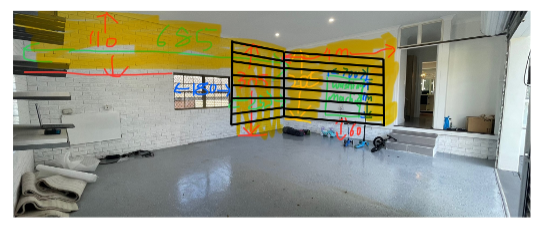
We recently worked with a homeowner in Sydney who had a wide garage with two key usable wall spaces: the rear wall and the right-hand side wall. Their goal? To neatly store plastic tubs, bikes, sports gear, and large items like an ironing board.
Our initial proposal was to install wall panels across the full height of both walls—covering around18 square metreswith27 StoreWALL Standard Duty panels (2.4m each). The cost to deliver this was approx $4700. While this would have provided complete flexibility and coverage, the quote exceeded their budget. See above picture of what was originally requested.
Smart Savings Without Sacrificing Function
One of the many advantages of the StoreWALL slatwall system is that it can be dialled down by reducing the amount of wall panels used and therefore the overall initial cost of the project. At a later stage, it can also be dialled back up again with additional panels added to expand the solution.
We took another look at the room for the client, this time focusing on how we can continue to make it functional but with a lower initial investment. By reducing the panel height from full-wall to either1.8m or 2.1m, and limiting the wall coverage to strategic sections, we delivered a far more cost-effective solution that still met their storage goals.
Rear wall (right of window):2.4m wide x 2.1m or 1.8 high
Right-hand wall:3.6m wide x 2.1m or 1.8m high
Total coverage:Over 6m of width at 1.8–2.1m height = approx.12–13sqm of wall coverage
Budget of $3100
By reducing the wall coverage by 30%, we also reduced the budget by a similar figure.
This gave them ample room for high shelving to hold plastic tubs, with bikes stored neatly on the rear wall, and sports gear hung along the side wall.
The Result?
A tailored solution that met their needswithout over-investingin unnecessary materials. And best of all, they retained flexibility for future changes—something you simply don’t get with fixed shelves.
StoreWALL Garage Wall Panelsoffer the ultimate in versatility, durability, and long-term value. Whether you’re starting with one wall or upgrading your entire space, we’ll help you maximise every square metre—on your terms and within your budget.
Are you looking to revamp your garage but don’t know where to start? One of the easiest and most impactful ways to give your garage a fresh look is by choosing the right color scheme. A well-thought-out color palette can transform a drab, cluttered space into an organized, inviting area that reflects your personal style. In this post, we’ll explore some stunning garage color schemes for your new garage and offer tips on how to implement them.
Why Color Matters in Your Garage
Before diving into specific color schemes, it’s essential to understand why color matters. The right colors can:
Enhance Lighting: Bright colors reflect light, making your garage appear larger and more welcoming.
Increase Value: A well-designed garage can boost the overall appeal and value of your home.
Top Garage Color Schemes for Your Garage
Classic Neutrals
Colors: White, Grey, Black
Why Choose It: Neutral colors are timeless and versatile. They create a clean, modern look that works well with various garage functions, from storage to a workshop.
Implementation Tips:
Paint the walls white or light grey to brighten the space.
Use black or dark grey for cabinets and shelving to create contrast and a sleek appearance.
Add metallic accents to enhance the modern feel.
Bold and Bright
Colors: Red, Yellow, Blue
Why Choose It: Bright colors add energy and personality to your garage. They are perfect if you use your garage for hobbies or as a creative workspace.
Implementation Tips:
Use a bold color on one accent wall to avoid overwhelming the space.
Incorporate complementary bright colors in your storage solutions, such as colored bins or tool chests.
Ensure good lighting to keep the colors vibrant and the space well-lit.
Earthy Tones
Colors: Brown, Green, Beige
Why Choose It: Earthy tones create a warm, inviting atmosphere. They are ideal for garages that double as a mudroom or a place to relax.
Implementation Tips:
Use beige or light brown for the walls to keep the space airy.
Incorporate green through plants or green-colored storage units to bring in a natural element.
Wooden cabinets and shelves can enhance the earthy, rustic feel.
Industrial Chic
Colors: Metallic Grey, Navy Blue, Black
Why Choose It: The industrial chic look is trendy and functional, perfect for a high-use garage that serves multiple purposes.
Implementation Tips:
Use metallic grey or navy blue for walls to create a stylish, modern backdrop.
Black storage units and workbenches add to the industrial vibe.
Exposed brick or concrete floors can enhance the overall aesthetic.
Tips for Choosing the Right Garage Color Scheme
Consider the Purpose: Think about how you use your garage. If it’s primarily for storage, opt for light colors to enhance visibility. For a workshop, consider colors that are easy to clean and maintain.
Assess Lighting: Natural light can greatly influence how colors appear. Test paint samples at different times of the day to see how they look in various lighting conditions.
Coordinate with Your Home: Your garage is an extension of your home. Choose colors that complement your home’s exterior and interior design for a cohesive look.
Test Before Committing: Always test your chosen colors on a small section of the wall before committing. This helps you see how the color works in the actual space and lighting.
Conclusion
Updating your garage with the perfect garage color scheme can make a significant difference in its functionality and aesthetics. Whether you prefer classic neutrals or bold and bright hues, there’s a color palette that can transform your garage into a stylish and organized space. Ready to start your garage makeover? Pick your favorite color scheme and get painting!
In the realm of garage organization, three major brands stand out: Gladiator, StoreWALL, and StorEase. Each offers unique features and benefits, catering to various needs and preferences. In this article, we compare garage storage solutions focusing on these 3 brands and basing our evaluation on ease of installation, durability, customization options, and cost-effectiveness.
The article below is based on the video I prepared a few years ago in which I compare garage storage solutions from Gladiator, StoreWALL, and StorEase. Note that the Gladiator solution has very limited availability in Australia as the distributor closed their business. You can however find some Gladiator accessories on eBay, Amazon and via this online store. The availability of StoreWALL and StorEase has not changed.
Garage Storage Review
Ease of Installation
Gladiator:
Installation Process: Gladiator offers a straightforward installation with its GearTrack and GearWall systems. Panels can be mounted on studs for drywall installations. They can also be mounted onto brick walls.
User-Friendly: Comes with easy-to-follow instructions and requires basic tools.
StoreWALL:
Installation Process: The video focuses on StoreWALL Basic Duty wall panel which is equivalent to Gladiator and StorEase. StoreWALL however also offers Standard Duty (its most popular range) and Heavy Duty, a premium range of garage wall panels. StoreWALL’s accessories feature a CamLok system, simplifying the attachment of accessories and panels.
User-Friendly: The installation is intuitive, with a focus on secure and robust mounting.
StorEase:
Installation Process: StorEase provides a simple rail system that is easy to mount and configure.
User-Friendly: Designed for DIY enthusiasts, making it accessible for home users with minimal tools.
Durability
Gladiator:
Materials: Accessories are made from high-strength steel. Panels are made from heavy-duty plastic, offering excellent durability.
Weather Resistance: Wall panels are resistant to moisture, rust, and corrosion, suitable for various environments.
StoreWALL:
Materials: Its full range of wall panels are constructed from industrial-grade PVC, providing exceptional durability and impact resistance. All accessories are made from heavy steel making them super strong and durable for all light and heavy uses in the garage.
Weather Resistance: All wall panels are waterproof and resistant to mold and mildew, making them ideal for all conditions.
StorEase:
Materials: Made from light aluminum which is strong and durable. Accessories are robust and also made from metal.
Weather Resistance: Made from metal, the panels and accessories are weather resistant but not as hard wearing s the heavier PVC panels offered by StoreWALL and Gladiator.
Customization Options
Gladiator:
Flexibility: Offers a wide range of hooks, baskets, shelves, and cabinets, allowing for extensive customization.
Aesthetics: Available in various finishes and styles to match different garage decors.
StoreWALL:
Flexibility: Highly customizable with an array of accessories, including shelves, bins, hooks, and baskets.
Aesthetics: Available in multiple colors and textures, providing a polished and professional look.
StorEase:
Flexibility: Offers basic customization options with a focus on essential accessories like hooks and shelves.
Aesthetics: Functional design with fewer aesthetic choices compared to Gladiator and StoreWALL.
Cost-Effectiveness
Gladiator:
Price Range: Mid to high range, reflecting its robust build quality and extensive accessory options.
Value for Money: Good balance of cost and quality, making it a solid investment for long-term use.
StoreWALL:
Price Range: Higher price point due to premium materials and durability.
Value for Money: Offers excellent longevity and resilience, justifying the higher initial cost.
StorEase:
Price Range: More affordable compared to Gladiator and StoreWALL.
Value for Money: Cost-effective solution for basic storage needs, though with limited customization and durability.
Conclusion – Compare Garage Storage Solutions
Choosing the right garage storage system depends on individual needs and preferences. Availability and budget are key considerations as is the aesthetic look of your garage and the customisation offered by the accessories.
Gladiator: Ideal for those seeking a balance of durability, customization, and ease of installation at a moderate price point.
StoreWALL: Perfect for users prioritizing high durability, weather resistance, and a polished aesthetic, despite a higher cost.
StorEase: Suitable for budget-conscious users looking for straightforward, functional storage solutions with basic customization options.
Each brand offers distinct advantages, making them suitable for different applications and user requirements. By evaluating your specific needs, you can select the most appropriate system to enhance your garage organization.
Finding studs behind plaster walls can be challenging, but with the right tools and techniques, you can locate both metal and wooden studs effectively. Here’s a detailed guide to help you find metal and wooden stud.
Understanding Plaster Walls
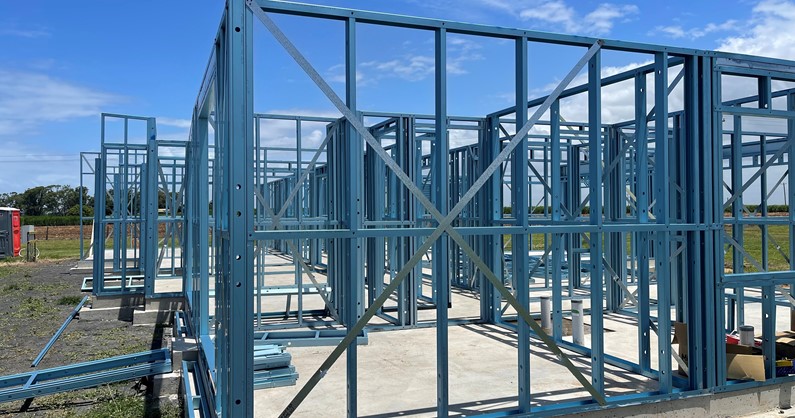
Behind your plaster wall is a frame that looks like the picture below. Your studs (upright pieces) will typically run the full height of your wall. They will be spaced about 450mm and 600mm (maximum) apart. Between the studs, you have horizontal pieces called Noggins. You will have 1 or two between each stud (depending on the height of your wall).
Tools You’ll Need – Find Metal and Wooden Stud
Stud Finder: Make sure it’s capable of detecting both metal and wooden studs.
Tape Measure: Useful for verifying standard stud spacing.
Impact Driver: For marking holes in plaster once studs are located.
Magnet: Used for locating metal studs if your Stud Finder can’t.
I have both a Stanley and an Ozito stud finder. Unfortunately, they aren’t always consistent with what they locate. A few drill holes usually solves the arguement.
Using a Stud Finder
Calibrate the Stud Finder: Place it flat against the wall and turn it on, following the manufacturer’s instructions.
Scan the Wall: Move the stud finder horizontally across the wall. Most stud finders will beep or light up when they detect a stud. You will need to repeat this several times to confirm that you have located the stud.
Mark the Stud Location: Use a pencil to mark the edges of the stud as detected by the stud finder.
Confirm stud location: You should be able to measure the distance between the studs you have located. You should find that the distance should be consistent ie intervals of 450mm.
Visual and Tactile Clues
Look for Outlets and Switches: Electrical outlets and light switches are usually attached to studs. Measure 15-20cm from these points to find adjacent studs.
Tap the Wall: Lightly tap the wall with your knuckles. A solid sound indicates a stud, while a hollow sound indicates the space between studs. This can be very hit-and-miss approach.
StoreWALL Brite White Garage Wall Panel Installation
Verifying Stud Locations
Drill a Small Hole: Use your impact driver to drill a pilot hole at the marked location. If you hit solid wood or metal, you’ve found a stud. Note that sometimes you might just hit the edge of a stud. Therefore a few holes might be needed to find centre.
Finding Metal Studs
Stud Finder with Metal Scan Mode: Many stud finders have a metal scan mode specifically designed for detecting metal studs.
Magnet Method: A strong magnet can help detect metal studs more reliably than wooden ones.
Tips and Precautions
Multiple Checks: Always verify stud locations using multiple methods to ensure accuracy.
Be Patient: Finding studs behind plaster walls can be time-consuming. Take your time to avoid mistakes.
Avoid Pipes and Wires: Be cautious of plumbing and electrical wiring when drilling into walls. Use a wire detector to check for electrical wires.
Conclusion – Find Metal and Wooden Stud
Locating studs in plaster walls requires a combination of tools and techniques. By using a stud finder, magnet, and visual clues, you can accurately find both metal and wooden studs. Always verify your findings and proceed with caution to avoid damaging your walls or hitting utilities.

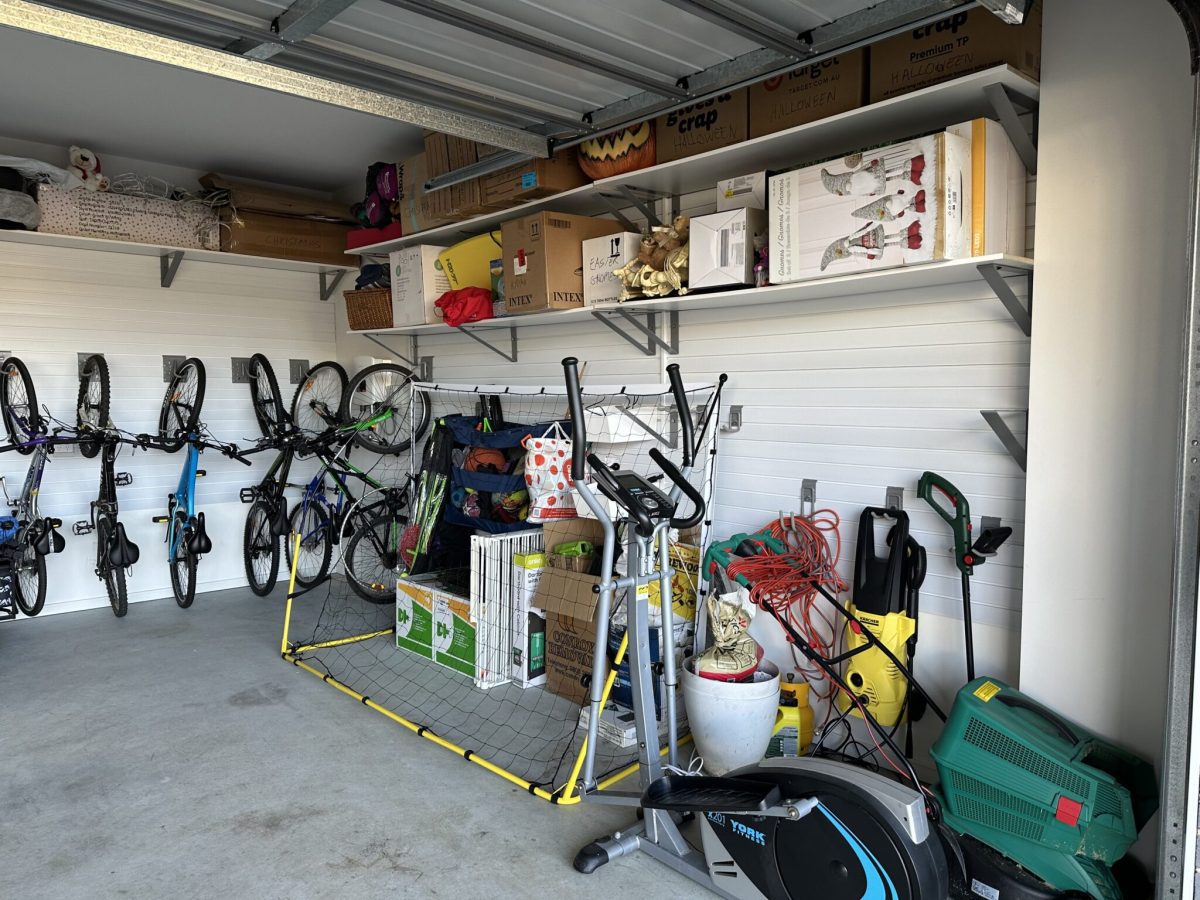
 Examples of incorrect spacing, 2 or 3 brackets over 2.4m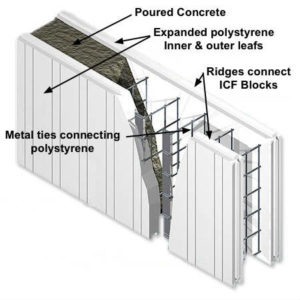


 Nail Anchors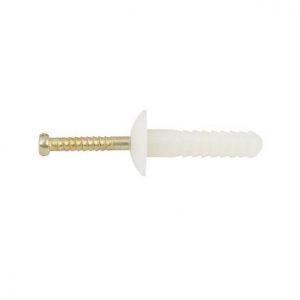

 Risk of Clutter and Accessibility Issues


 2. Ultra Duty Utility Hook
 3. Ultra Duty 635mm Surf & Paddle Board Bracket
 4. Ultra Duty 381mm Surf & Paddle Board Bracket
 What Makes the Ultra Duty Garage Hook Range Unique?