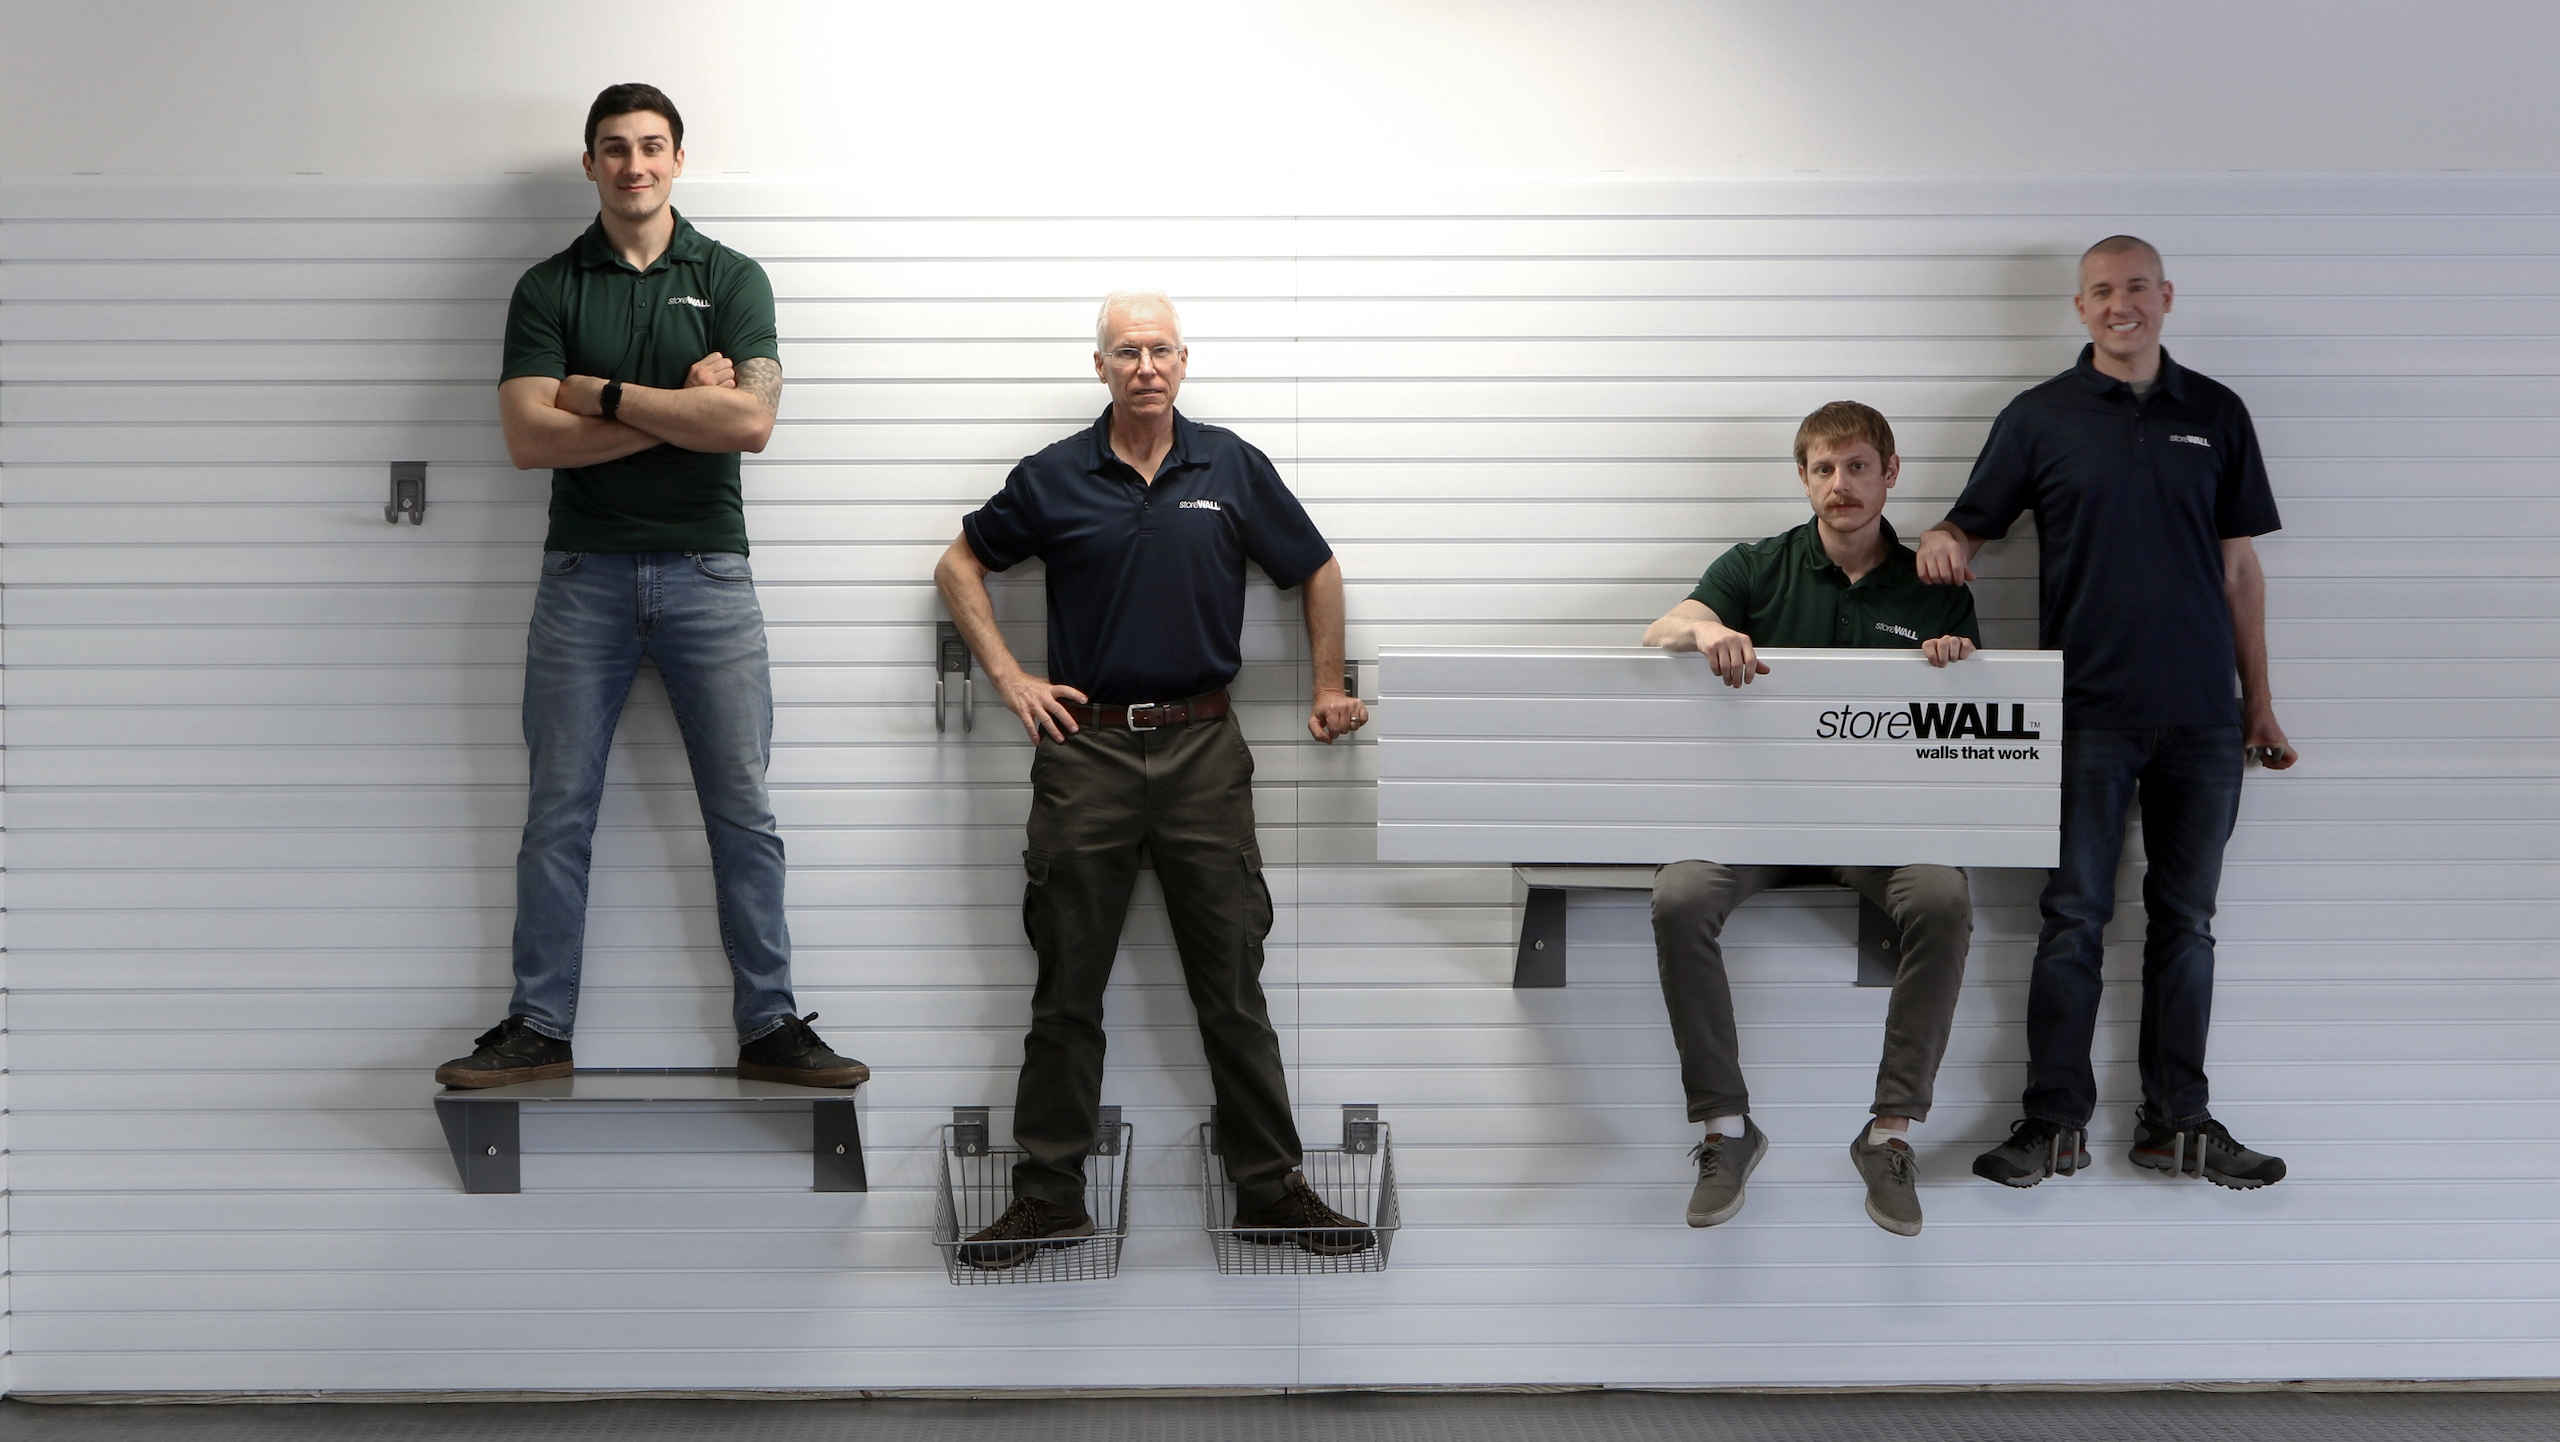
StoreWALL is so confident about the quality of its Heavy Duty Garage Storage Solution that it decided to put it to the test by hanging its own staff on the wall.
I can’t say I have ever seen a Slatwall Garage Storage System supplier go to such extreme lengths to prove the overall strength of its solution.
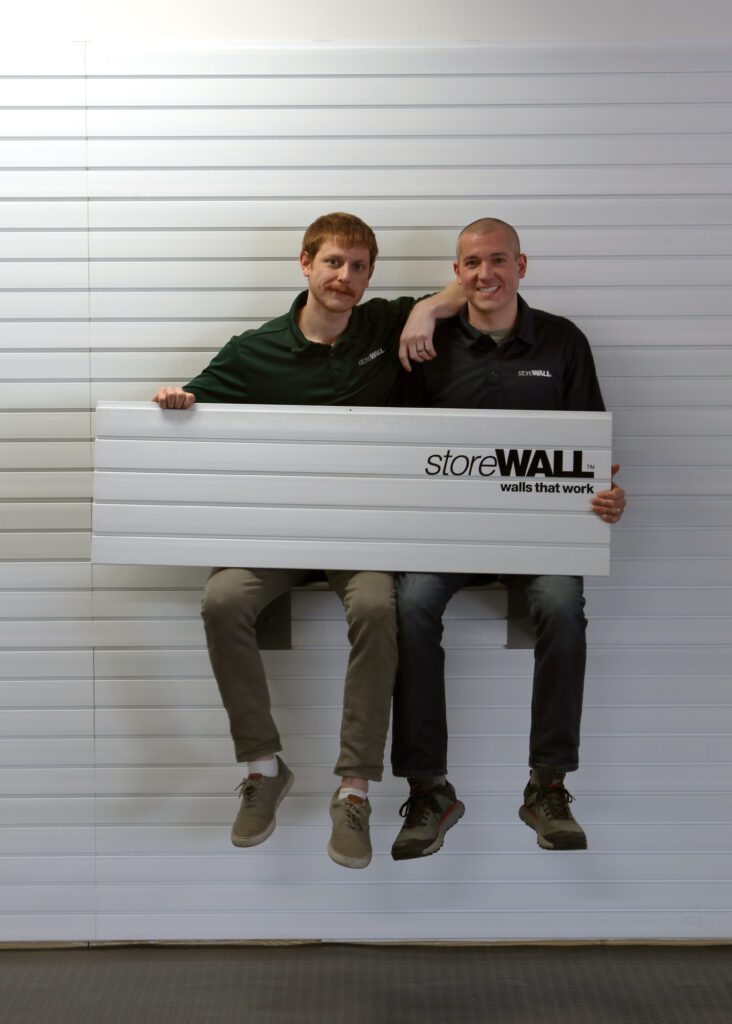
Both these gentlemen from StoreWALL in the US would weigh about 80kg each. They are both sharing a 762mm Heavy Duty Metal Shelf. The wall panels they have installed on this wall are the StoreWALL Brite White Heavy Duty Panels.
However, the test didn’t stop there. This guy decided to do a workout by using two Heavy Duty Cradle Hooks to do chin ups.
Chin Ups on your Wall Panels
StoreWALL’s range of wall panels allow you to store pretty anything and everything on your walls. Our range includes the Basic Duty, Standard Duty and the Heavy Duty. The key differences between the three include:
Basic Duty
Our entry level panel, installed by screwing directly into the panel and onto your wall. Colour range is limited to White and Grey. Panels sizes are 304.8mm (H) x 1219mm (L). All StoreWALL accessories will work with this panel. Max holding weight per 2438mm panel is 75lbs or 34kgs.
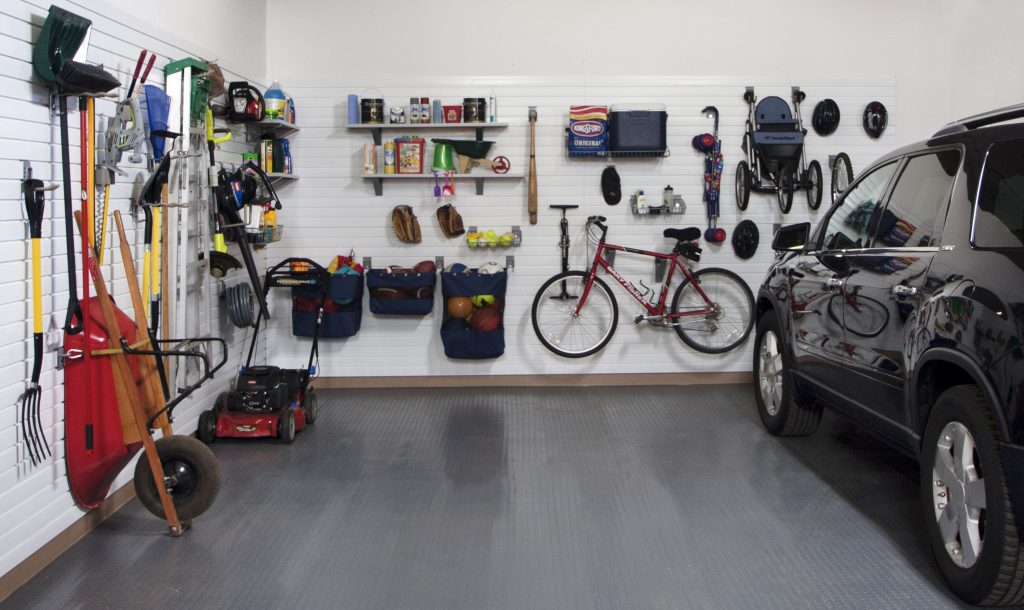
Ideal for your home garage storing everything from gardening tools to bikes.
Standard Duty
Eighty percent (80%) of our customers in Australia purchase Standard Duty. Installed with Standard Duty Metal Installstrips to provide you with a stronger wall and a much cleaner finish (no drill holes in your panels). Panel sizes include 304.8mm (H) x 1219mm (L) and 304.8mm (H) x 2438mm (L). Panel thickness is 16.7mm. Big range of colours, from Whites to Dark Greys and even timber looking finishes. All StoreWALL accessories will work with this panel. Our entry level panel, installed by screwing directly into the panel and onto your wall. Colour range is limited to White and Grey. Panels sizes are 304.8mm (H) x 1219mm (L). All StoreWALL accessories will work with this panel. Max holding weight per 2438mm panel is 250lbs or 113kgs.
Ideal for your home garage storing everything from gardening tools to bikes and heavier shelving needs.
Heavy Duty
This is our premium wall panel. Installed with Heavy Duty Metal Installstrips to provide you with a stronger wall and a much cleaner finish. Panel sizes include 381mm (H) x 1219mm (L). Colour range includes Brite White, Weathered Grey and Global Pine. The Heavy Duty panel is slightly taller than the Standard Duty equivalent, it is also slightly thicker (17.7mm). The Metal Installstrips are slightly wider. Combined, these differences allow it to hold more weight than both the Basic and Standard Duty Panels. All StoreWALL accessories will work with this panel. Our entry level panel, installed by screwing directly into the panel and onto your wall. Colour range is limited to White and Grey. Panels sizes are 304.8mm (H) x 1219mm (L). All StoreWALL accessories will work with this panel. Max holding weight per 2438mm panel is 300lbs or 136kgs.
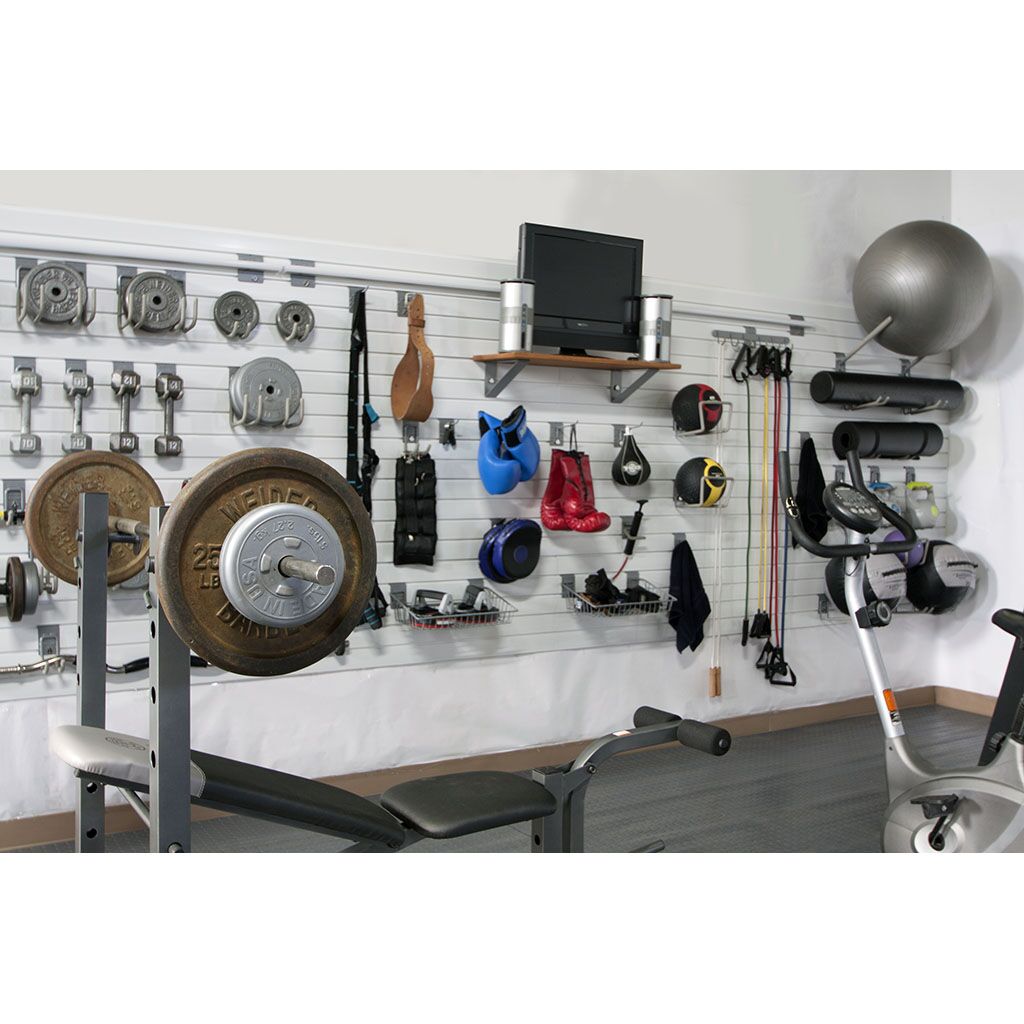
Ideal for your home garage storing everything from gardening tools to bikes and heavier shelving needs. This is also our recommended option if you are looking to build a home gym and want to store weights or heavy balls on your wall.
Wall Panel Performance
The table below provides a great summary of the panel range and its overall strength. Note that the holding capacity is per 8 foot or 2438mm panel. It also assumes that the weight is spread across the panel with a number of accessories.
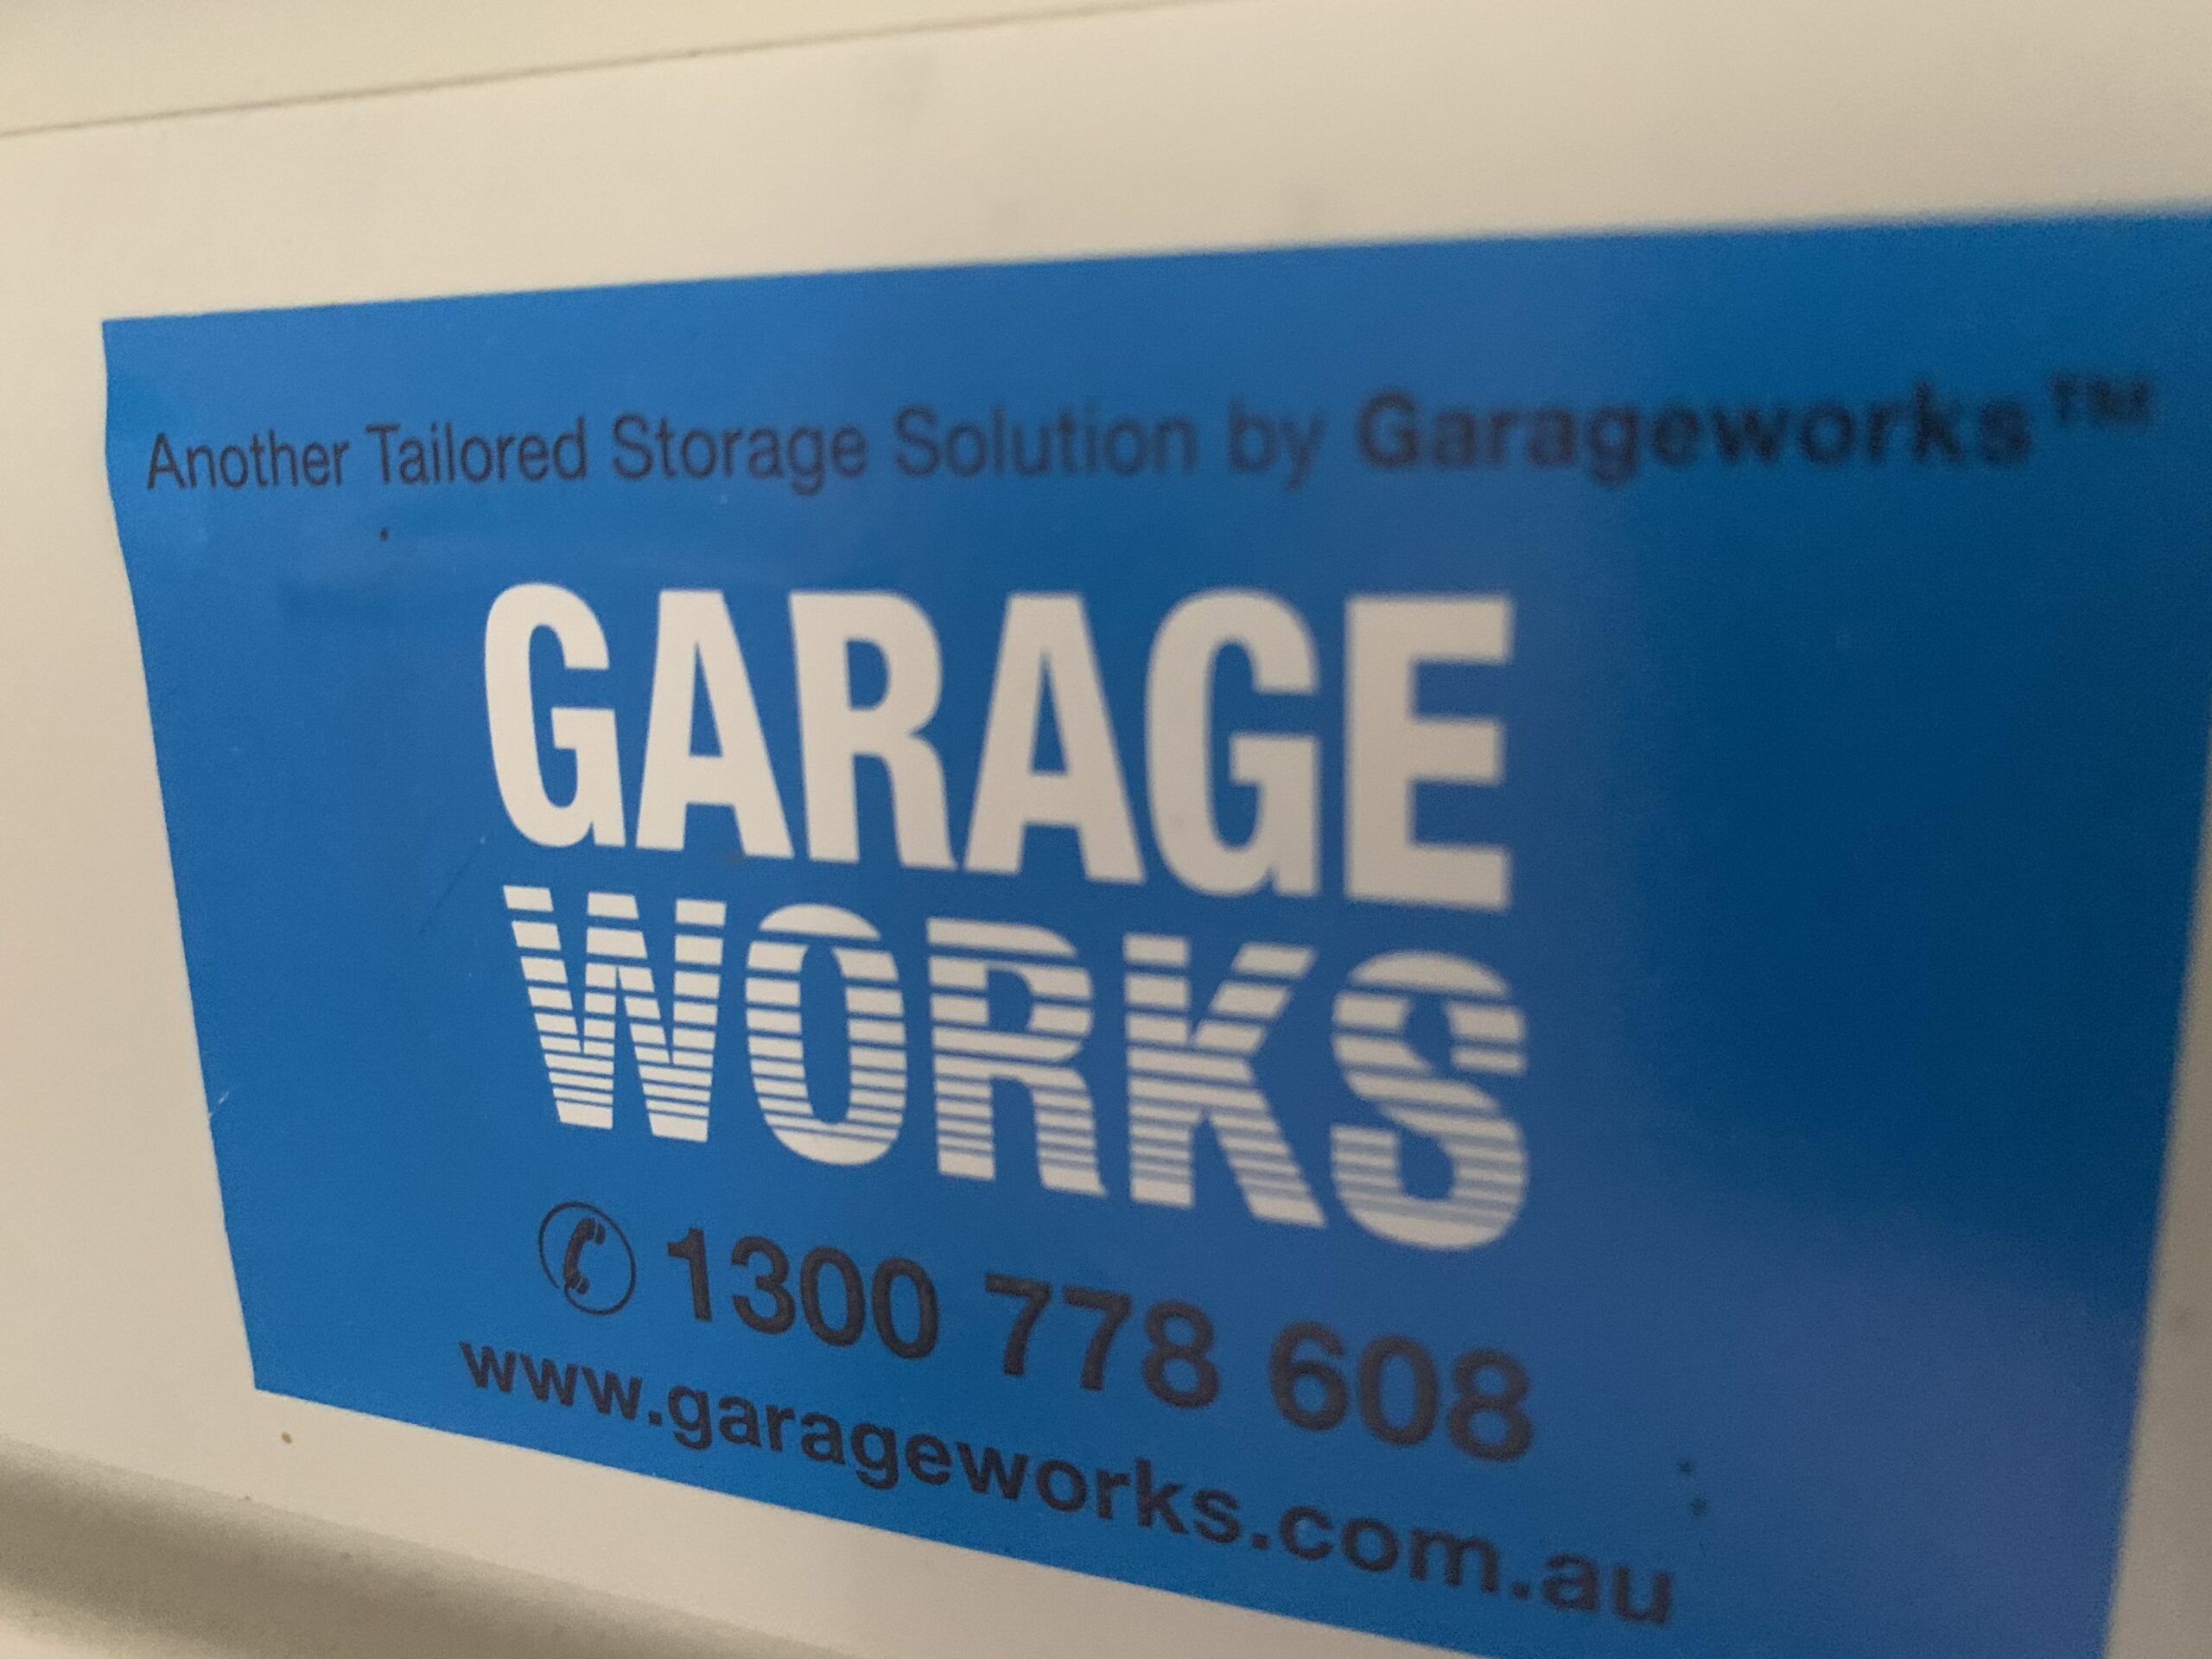
Garage Works was a Melbourne based business which used to sell the StoreWALL Garage Wall Panels System. This week, I received a call from a client needing hooks and shelves for a new home he had just moved into. Unknown to him, the garage walls of his home were fitted with StoreWALL.
The client visited his local Bunnings and purchased a range of accessories thinking they could be fitted to the wall. Unfortunately this was not the case.
Garage Works
The business operated out of the Northern suburbs of Melbourne (80 Enterprise Way, Sunshine VIC 3020). Unfortunately (from what I understand) this business ceased trading several years ago.
StoreWALL garage storage solutions is now exclusively distributed in Australia by StoreWALL Australia. We are an Australian business.
Over the past 3 years I have met many customers serviced by this business. Many are now either looking for additional garage wall panels or additional garage wall storage accessories.
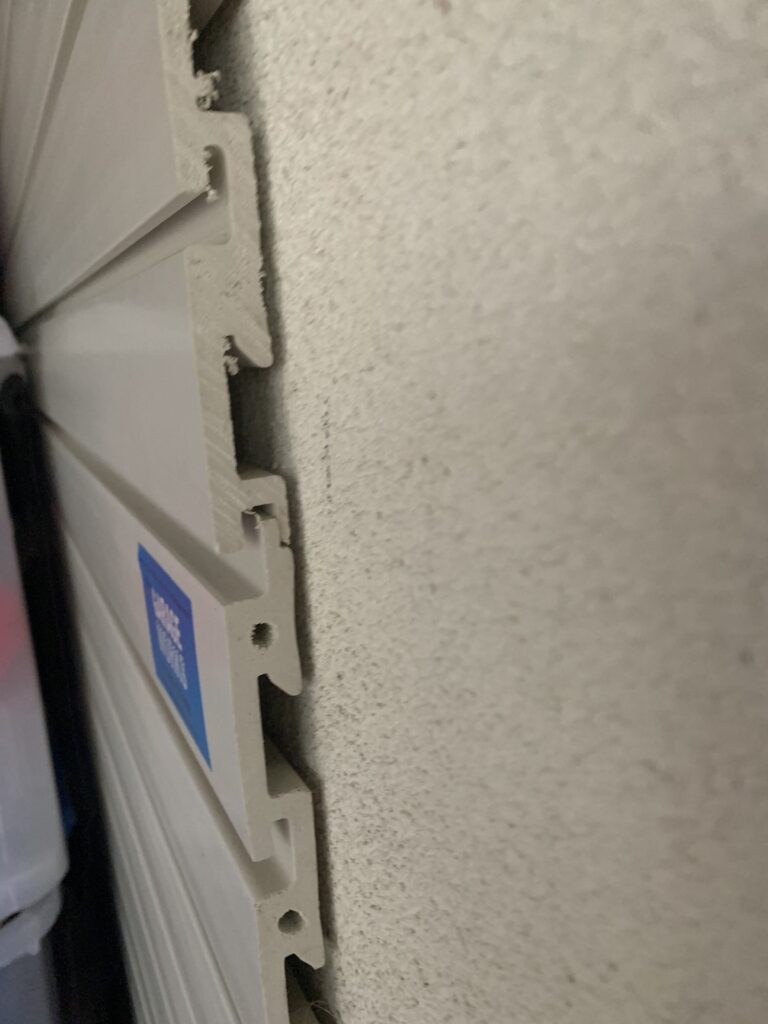
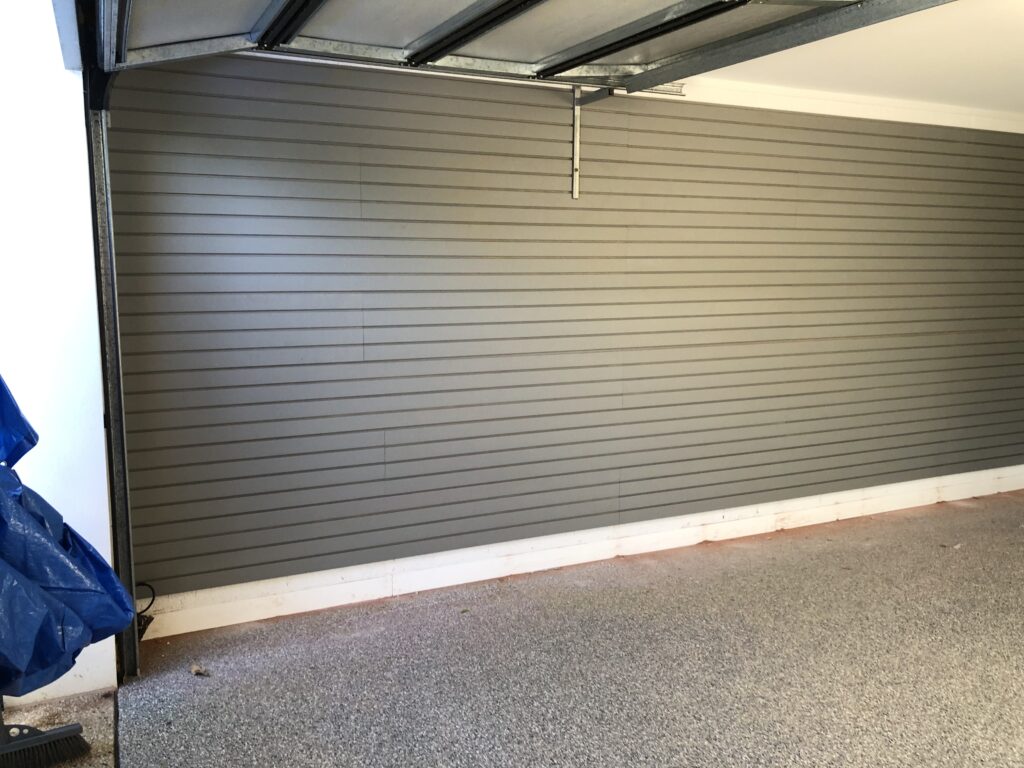
Wall Panels
If you are one of these customers and want to know if we can help you, all you need to do is send us a photo of your garage wall panels (like the photo I have below) and we can confirm this for you.
Garage Works installation
Whilst much of what this business sold was the StoreWALL Heavy Duty Wall Panel range, StoreWALL Australia actually stocks the full StoreWALL Wall Panel range. This includes Basic, Standard and Heavy Duty Garage Wall Panels.
All StoreWALL Accessories will work across the the full StoreWALL panel range.
To be clear, StoreWALL Australia did not purchase this business nor are we affiliated with it in any way. If you need assistance with your existing StoreWALL solution give us a call (0411280646) or email us.
Consider the improvement to your home’s value if your garage was more functional offering easy to use storage options from the first day the new buyer moves in. Investing in your garage is like investing in your garden, it is something you can enjoy whilst living at the home but can make a huge impression on any new prospective buyer.
The garage is usually the last room you turn your attention to when you are building a new home or renovating an existing home to live in or even flip. Even so, investing in your garage may be that point of difference you are looking for that could deliver a higher final sale price.
Consider that a higher proportion of customers who call StoreWALL looking for ideas and pricing to improve their garage are women. A tidy and organised garage doesn’t just appeal to the male buyer. It can motivate both parties to see your home as a worthwhile purchase.
New Home Design
Home design in Australia has moved the garage from the back of the property to the front. For many, it is also their main point of entry into the main living quarters of the home. However walk past most new homes and you will notice that their double garage usually only fits one vehicle, with the remaining free space taken up by stuff usually parked on the ground or on shelves against the wall.
Unfortunately it does not make for the prettiest site and confirms that garages still don’t get enough attention and that garage sizing by many home builders is not meeting people’s needs.
If you are prepared to invest in your garden so that it improves the overall look and value of your home, why wouldn’t you also invest in the garage? Consider how you will feel each time you enter and can easily find that tool or that beach chair or piece of sporting equipment. Whilst we don’t build our homes for our neighbours, they too will compliment you on the complete package you now have.
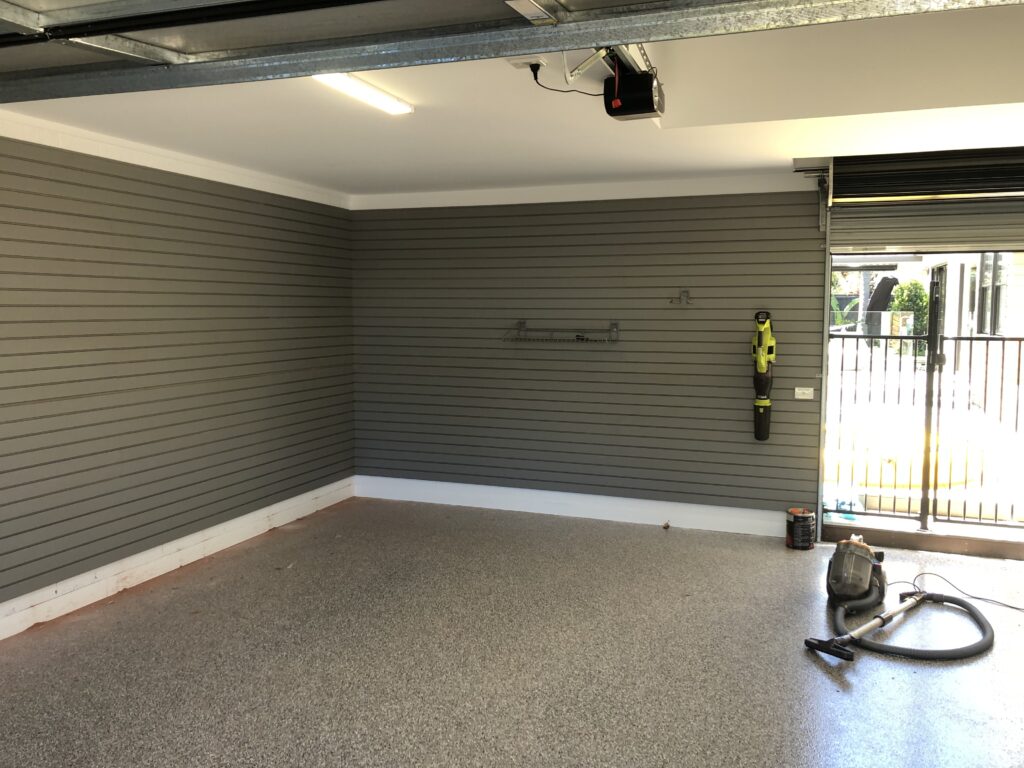
We recently completed some work on a lovely new home (about 18mths old) in a Melbourne beach side suburb which had a combination of brick and plastered garage walls that were not really helping this owner.
Following their investment in StoreWALL, the owners now had a lot more options on how to tidy up their garage (they also did some work on the covering the concrete floor). The owner started hanging items on the wall before we could collect our tools to leave.
Home Renovator’s Missing Piece
If you are in the game of renovating old homes to rent or sell, I doubt the garage would receive any attention outside of a quick sweep prior to inspections or auction day.
If prospective buyers see value in a well designed garden that is easy to maintain, what would they think of a kitted up garage with an easy to use storage solution that is ready and waiting for them?
Investing in Your garage
If you are looking to landscape part of your home including new lawn and plants, a budget of $2000 would be the minimum (that is probably just for the lawn) you would need to start with.
A garage wall area of about 5-6m in width and 2m in height with wall panels and a bunch of accessories like looks and baskets would require an investment of about $2500. With this investment, the garage and storage options offered would be complete and ready to use. To a prospective buyer, your $2500 may be worth a lot more.
A Garage for Life
You might not be planning on staying in the same home for the rest of your life but a garage kitted up with StoreWALL is an investment for the life of the home. It will outlast many generations of owners and they will all be thanking you for it.
We receive this question regularly. Can you purchase StoreWALL from your local Bunnings, Mitre 10, Home Hardware, or any other hardware store?
StoreWALL Bunnings?
StoreWALL Australia is a local Melbourne business. We are the exclusive distributor of the StoreWALL range of garage storage solutions which has been sold in the US for over 10 years. Our Garage Storage Solutions are sold online only at the moment via our website. You can also find some of the garage wall panels and accessories on eBay.
Free Delivery
We offer a combination of discounted and even free delivery based on your purchase value, what you purchase, and where you live. We ship Australia-wide.
Free Returns
We also offer free returns, should you order an item and then find it not as useful as you thought. You will need to pay to ship the product back to us.
Bunnings StorEase
Bunnings sell its own garage wall storage system called StorEase. We have reviewed it several times on this website comparing the StorEase panel and rail to StoreWALL.
There are several fundamental differences between what StoreWALL offers and that of StorEase. Firstly, we don’t sell a rail, we sell panels that are 304mm in height and either 1219mm or 2438mm in length. Our panels are made from a hardened thermoplastic which is water and mould-resistant. StorEase slat panels are only 150mm in height, 1200mm in length and made from aluminium. These panels are not designed to cover your wall, rather they are placed along your wall at a certain required height.
The second key difference is that our range of accessories is made from steel and then powder coated. They are heavier and more durable than those from StorEase.
StoreWALL CamLok
The locking mechanism used by our accessories is also quite different. StoreWALL uses a unique CamLok system to secure the accessory to the panel. We do not use claws or teeth. This makes StoreWALL significantly more secure when attached to the wall panel. It also makes it easier to remove and then move around. This ensures that your panels are not marked or scratched in the process.
If you like our accessories but already have StorEase rails, then you can actually use our accessories with StorEase. The CamLok system will also secure our accessory to your StorEase rail. THIS DOES NOT APPLY TO THE WALL TRACK SLIMLINE (BLACK RAIL).
StoreWALL Showroom
StoreWALL does not offer a showroom in Melbourne. However, if you are happy to visit our home office we are happy to show you what we offer and how StoreWALL will transform your garage. Call (0411280646) or email us ([email protected]) to organise a visit.
We can also help you with quotes on how many panels you may need as well as installation.
2020 is a year many of us will never forget. COVID-19 has locked a lot of us in our homes with plenty of time on our hands to look around and want to mend. The organised garage is something that has been talked about in many households when I consider the amount of enquiries we have received since the lockdown began.
We have covered how to organise your garage in several previous articles on our website, but I thought a top 10 (or 11) list of how to start and what to do would be useful.
The Organised Garage
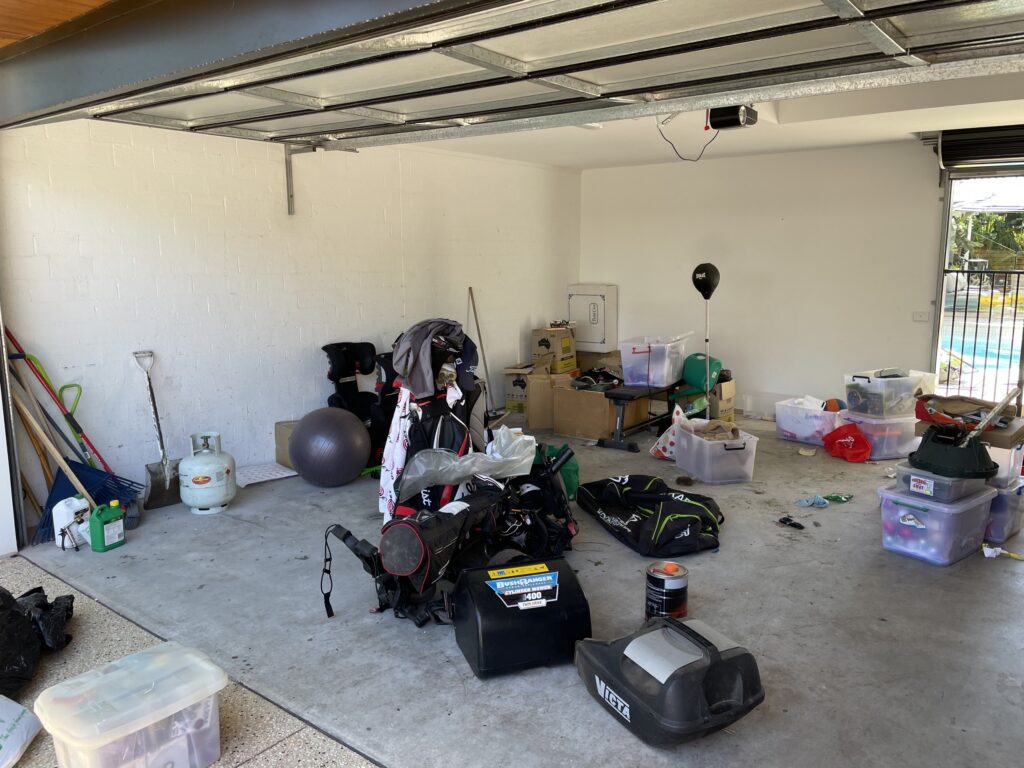
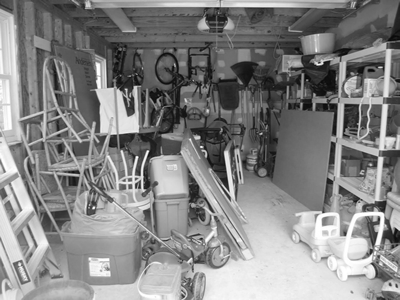
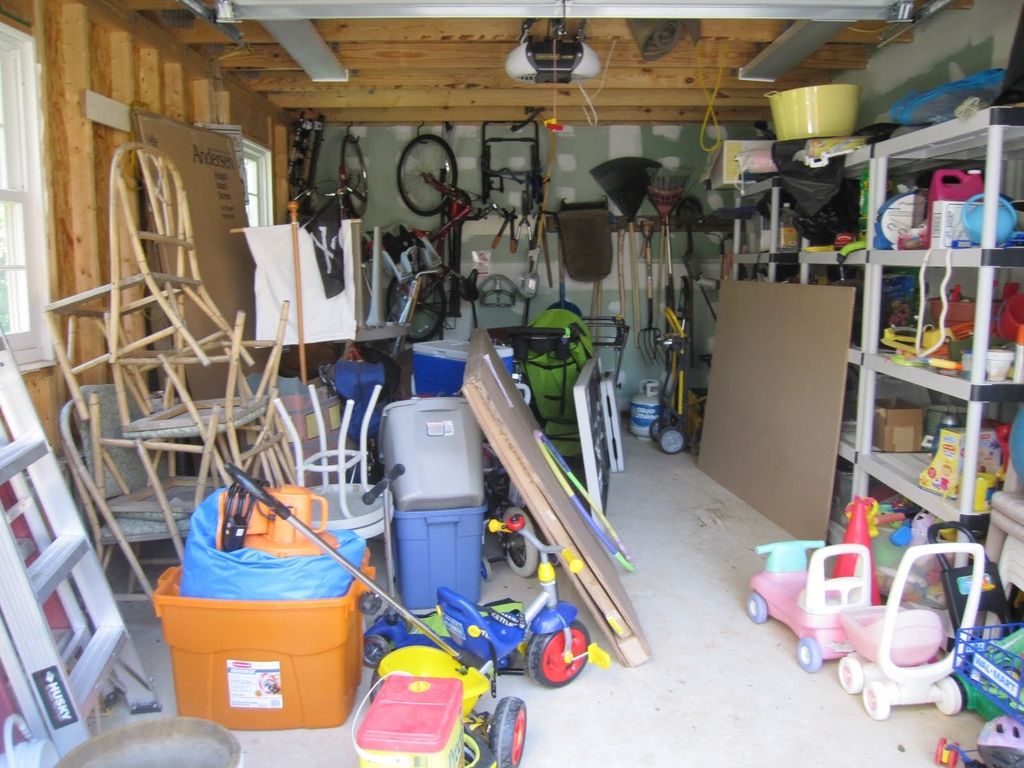
Whilst there are plenty of extreme garage photos out there, your typical garage will have some order about it. However, what then tends to happen is larger items start to take up space, the shelves you purchased fill up or don’t fit larger items (anymore) and things start to accumulate on the floor. Before you know it, you start to use the floor more and more until it’s impossible to move around and find anything quickly or safely.
Step 1 – Empty it out
The best way to start re-organising your garage is to clean it all out. Everything off the walls, the floor and the ceiling needs to come out. Start in the morning so you have the day ahead of you and begin the clean-out.
Step 2 – Group it
When its all out on the garden lawn or driveway, start to group it. One of the keys to attaining the organised garage is the organising bit.
When I look at what is inside my garage I have the following categories:
Tools
Sports Gear
Bikes
Food (cans/packets and excess food I store)
Xmas tree and decorations
Beach gear (boogie boards)
Party gear (decorations, plastic cups and plates)
Old kids furniture
Bins of books
Old clothes
Keep sake items
Step 3 – Sweep it out
Give your garage a good clean out. This includes sweeping and even hosing it down. Get all of the dust and dirt that has accumulated in the corners out. You will need to remove all the furniture to do this.
You should also look at the walls and ceiling and wipe it all down. Either by hand or with a broom. Get all of the cob webs down.
Step 4 – Keep, Dump, Not Sure
Once your sorting is done, you need to go through everything and decide to either keep it because you will use it or it has some sentimental value. Dump it because you will never use it and you know someone else will get better value from it. Or, put it into the “Not sure” list to be decided upon over the coming days.
What you decide to get rid of could go to a Salvation Army store for them to sell (and make a few dollars from). It could also be sold on Ebay or Gumtree if you have the patience. Alternatively, you could give it away to a friend/family. Finally, when hard rubbish comes around you could throw it out then.
The items that you are not sure about, should be put to the side to be looked at over the coming weeks and decided upon. Don’t add them to the Keep list unless you are certain that is where they belong.
Step 5 – Floor Plan
The floor plan is really important because it offers a way to design your layout and use of the space you have. Consider the furniture you have, its size and potential use.
Think about how you use your garage. Is it just for storage or do you do work in there. As an example, I exercise in my garage, so a certain area needs to be dedicated to my training equipment.
What about your car? Do you need to park your car in the garage? If you have bikes, think about where they can be parked or hung.
If you use the space as a workshop, consider what you will use as your bench or table.
You don’t need special software for this, a few pieces of paper will do it. However spend time thinking about the space, the objects and how you want to use it all. Think about your doorways and how you access the garage (main garage door, side door, back door).
Consider the location of the items you will keep but only use a year and those that you want to access regularly. If you have little ones accessing bikes or sporting gear, think about how they can safely move in and out of the garage.
Step 5 – Group it (part 2)
The second part of grouping relates to organising your items in tune with the garage floor plan you have designed. If you read through the many blogs on organising and watch the videos, there are tons of tips on the best approach.
With any space you are working on within your home you need to prioritise based on what you want to use the space for. If part of the space is for working, then making enough room to work is key, so is using the right furniture like a desk or bench.
Bikes, if you are regularly in and out of the garage to get a bike(s), then having these placed in an easy access area even when the car is in the garage is important. You don’t want to have to move the car to get the bikes each time.
Tools, if you are using tools or a regular basis then having your tools visible and accessible is key. This can include your smaller hand tools and all types of power tools.
Items which are regularly used should be easy to access. For you and the rest of your family members. Items which are used once a year (xmas tree) should be out of the way. These items can be stored high and in a harder place to access.
Remember that this step is not a once-off. Organising and re-organising happens all of the time within the house. It should be the same in the garage. The organised garage is not born overnight.
Step 6 – Using Walls
Whether your garage space is small or large using your wall space is important. Most people confuse shelving with maximising use of walls space. Sticking a few shelves on the wall is a start, it’s not the end.
Having open spare wall space in a garage is wasted space. Solutions like StoreWALL give you the ability to use your wall and change its use as needs change. Unlike a shelf which is large and can’t be easily moved around, Garage Wall Storage can change a wall from shelving to holding power tools in a matter of minutes. Accessories are unlocked and moved around as needed.
Use wall storage around shelving, cupboards and other furniture.
Step 7 – Use the height of your room
Use the height of your space to store larger items that you seldom use. It gets them out of the way and the lower easy to access areas are used for more frequent use items. Wall storage allows you to create shelving across the top of your wall.
However there are other garage storage options which create shelving across the ceiling of your garage.
Step 8 – Re-use old furniture
If you have furniture that can be re-used for storage, it makes sense to give it a second life. Why buy another piece of furniture if you can change its look with some paint and move it into the garage. This isn’t always practical but it can work. An old desk in the study can become a useful workbench in the garage.
Step 9 – Labelled Bins & Tubs
We all have them, coloured or clear plastic tubs with lots of stuff in them. They should be organised and clearly labelled. Some clear information on the outside of the tub will save a lot of time sifting through them all looking for that old book.
Ensure your tubs have lids and they are shut tight so that contents don’t collect dust.
Step 10 – By the Door
Keep your frequently used items by the garage door. This is the main garage door you use.
In my garage, the frequently used items are my tools, food and my gym equipment. They are all by the back door to the garage.
Step 11 – It’s not a once off
Just like any other room in your garage, it may take you a few goes to get it right. Over this time you will likely throw more stuff out and learn more about how you want to use the space you have.
Your version of “the organised garage” doesn’t need to look like what is in some of pretty staged pictures of garages. It needs to work for you, your stuff and the room you have.
If in 6 mths your needs or items may change, so should your garage.
To help our customers access the StoreWALL garage storage solution we have launched a new payment option through Afterpay.
Afterpay offers a very flexible payment plan service over 4 equal payments. Best of all, once you have ordered your StoreWALL equipment, it is sent to you straight away, unlike your traditional layby service.
Afterpay Payment Option
StoreWALL offers a great range of payment options, from your traditional credit card, to direct bank payment (attracts a 1% discount) and even Paypal. There is no additional cost for using any of these services and as noted above, we offer a small discount if you pay via a direct bank deposit.
Afterpay is no different. There is no additional cost in choosing to pay via this new payment option as long as you complete your payments as per your agreement.
How to Buy
The purchase process is very simple. Once you have filled your online shopping trolley with everything you need, Afterpay will appear as one of your payment options. It will also show you what the 4 equal payments will be. The 4 equal payments add up to the same value as your shopping trolley. There are no additional charges included.
Should you choose to use Afterpay, you will be directed to the their payment portal. This portal is hosted and managed by Afterpay. It will ask you to complete a short form requesting details from you. Once this is completed, our online store will be notified that the transaction has been finalised and we will process your order.
Afterpay actually pay us straight away (as quickly as a credit card payment). Therefore there will not be any delay in having your order packed and ready to be couriered to you. All discounts regarding shipping will still apply.
Notes on Afterpay
The key thing to remember however, is that you need to complete your payments as per the agreement. This will ensure you are not charged any penalties.
Note that StoreWALL does not receive any commission or incentive should you choose to use the service. It is not compulsory in any way. It is just another payment option in addition to the others we already offer making it easier for you to access our equipment when you need it.
Also note that any personal details you share with Afterpay are not shared with StoreWALL in any way.
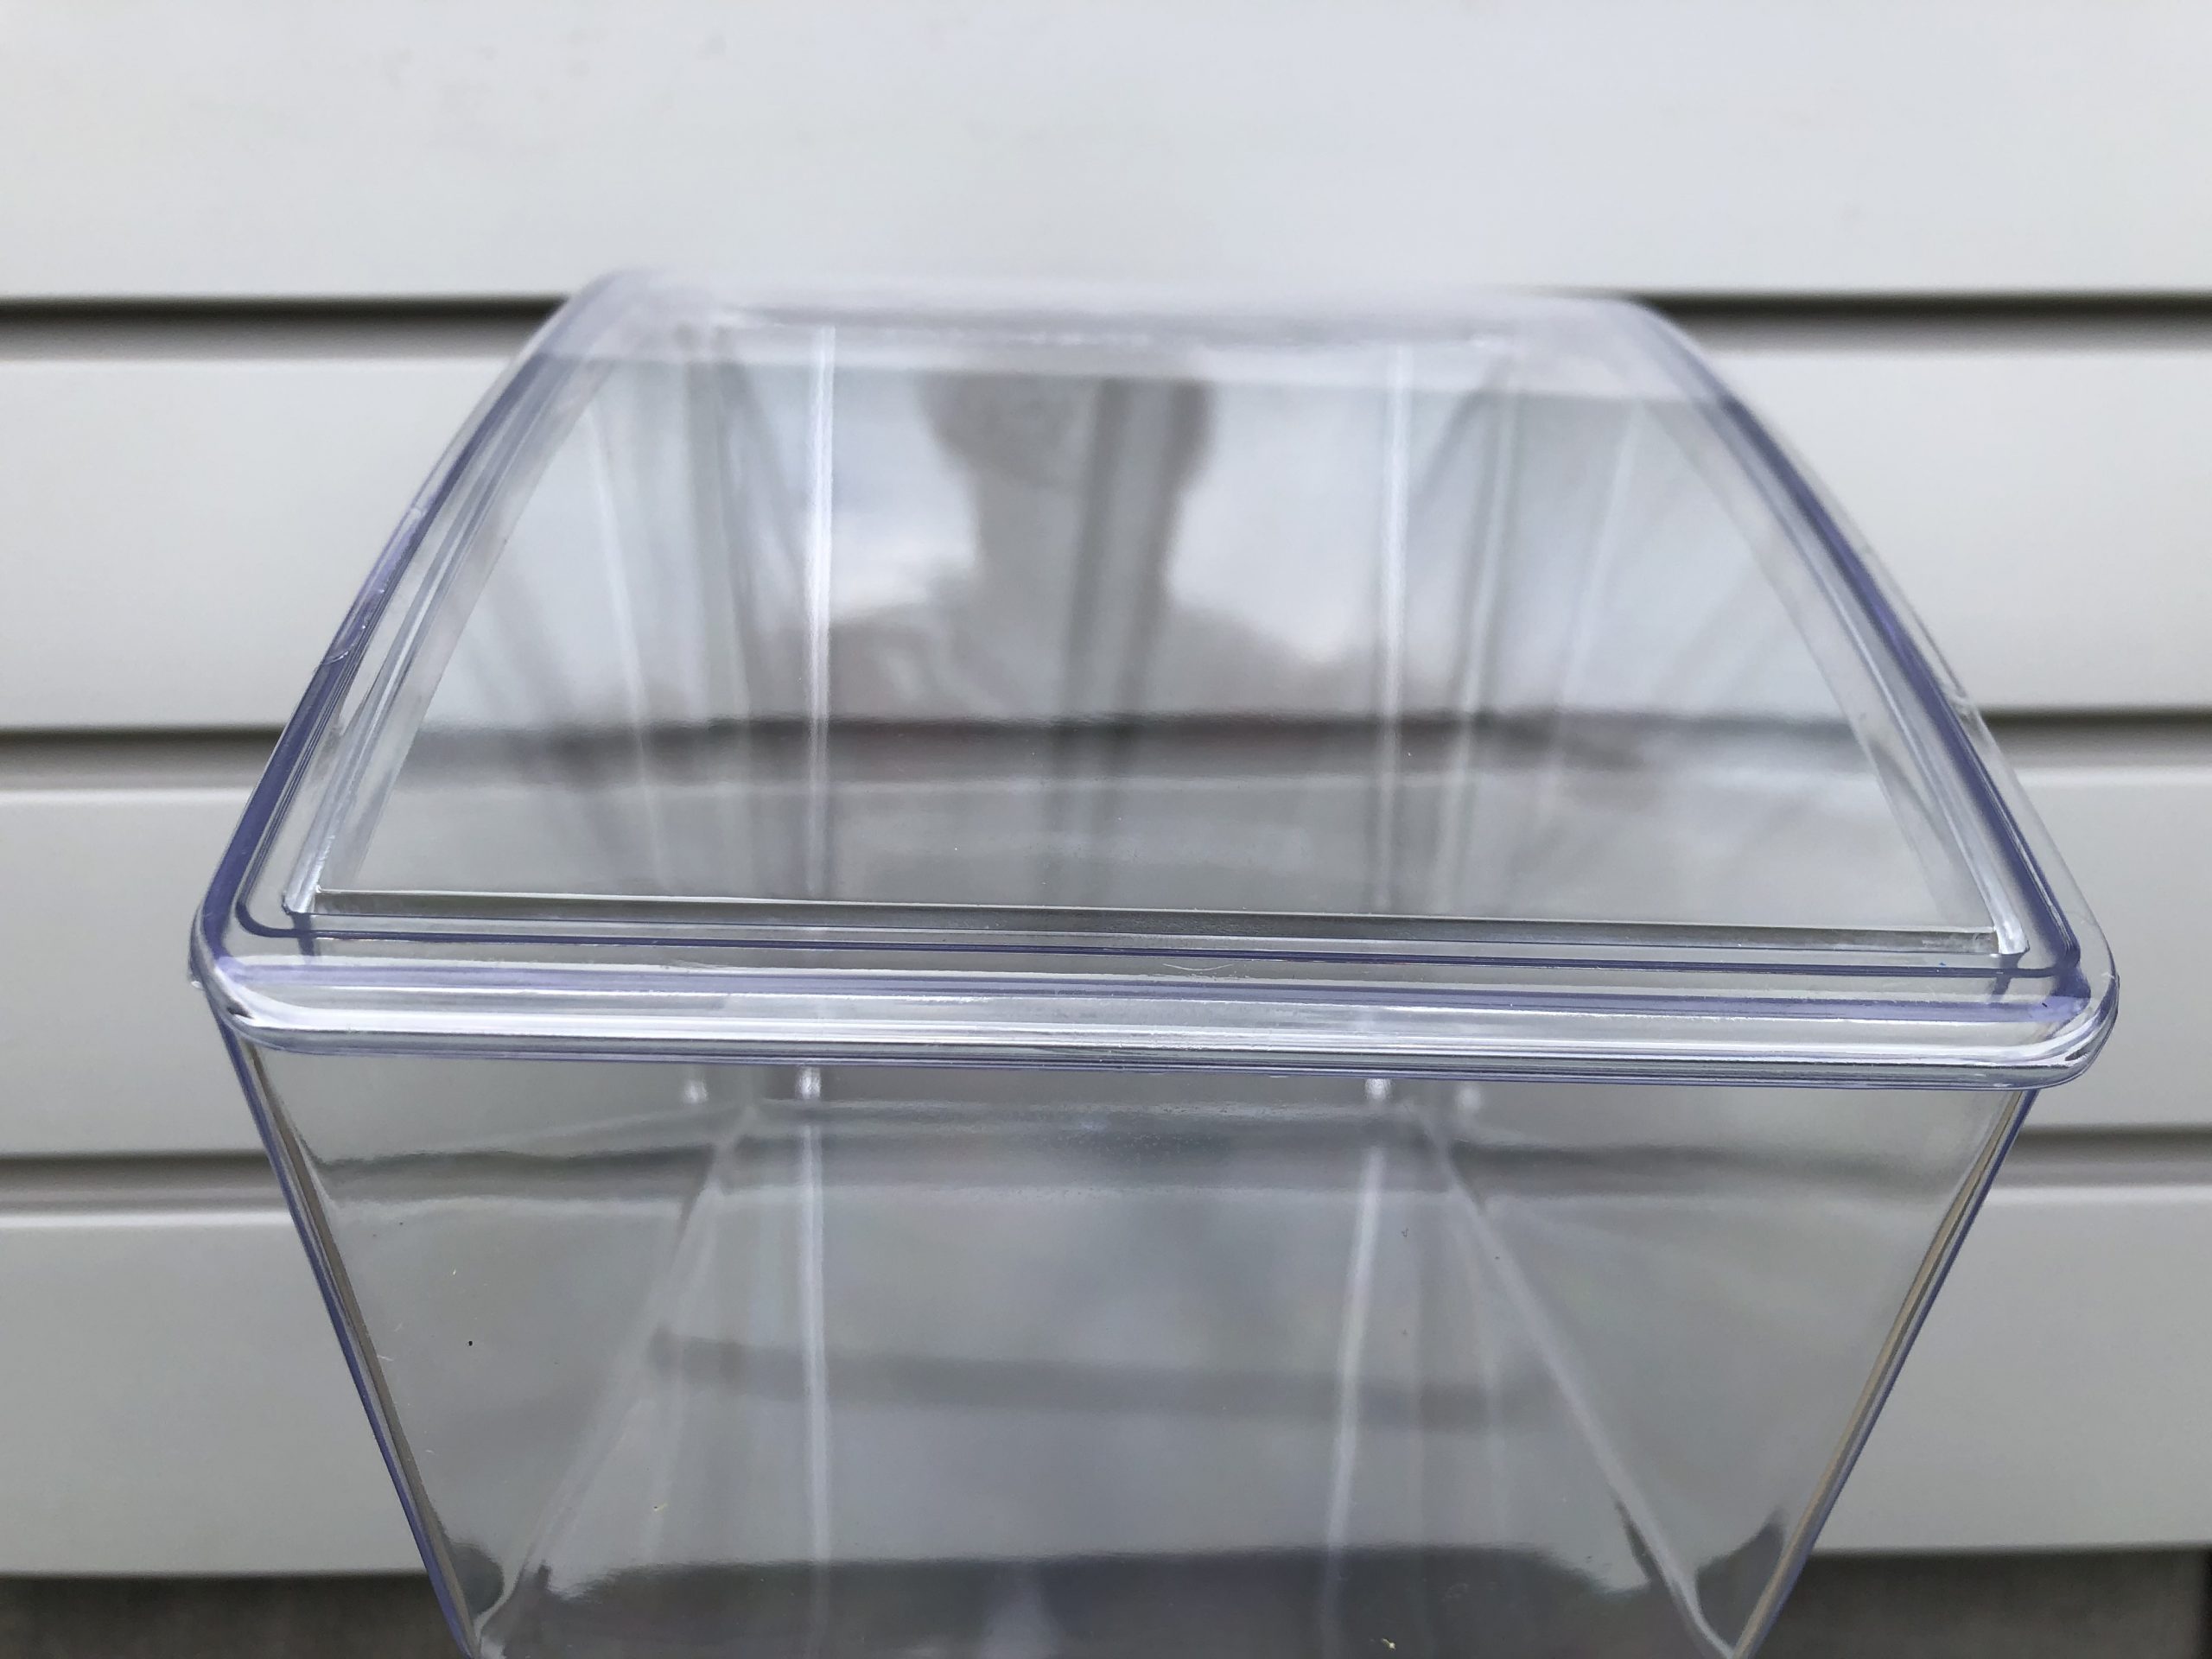
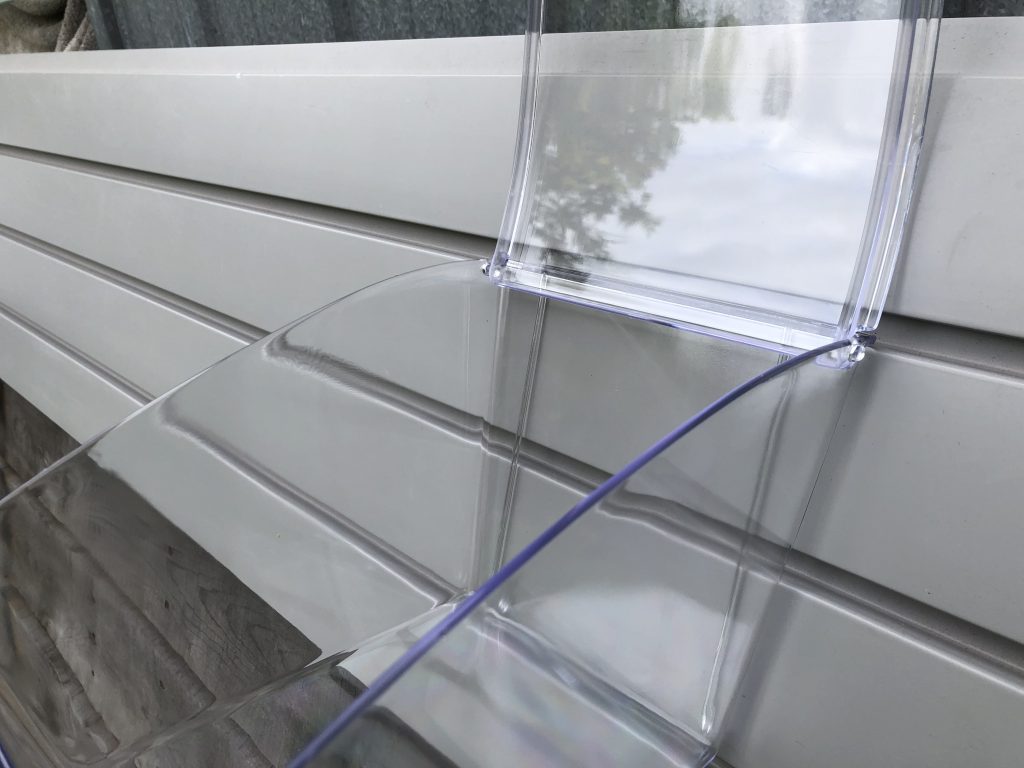
Bins are a very popular accessory at StoreWALL. To give our customers even greater choice , this week we introduced a new Clear Storage Box with Lid. This is our first bin which comes with its own lid. The StoreWALL Clear Storage Box with Lid is a unique bin which is only available in Chrystal Clear and is shaped like the Cube Bin but comes with a very useful lid.
The Clear Box was designed for retail stores but it is also very useful at home particularly if you are using your StoreWALL as a work area for storing craft or even sewing materials.
Clear Storage Box with Lid
The dimensions of the new Clear Box are: 230mm (L) x 150mm (W) x 150mm (H). The bin is made from a toughened polycarbonate finish, is very durable and can hold between 10 – 15 KG in weight.
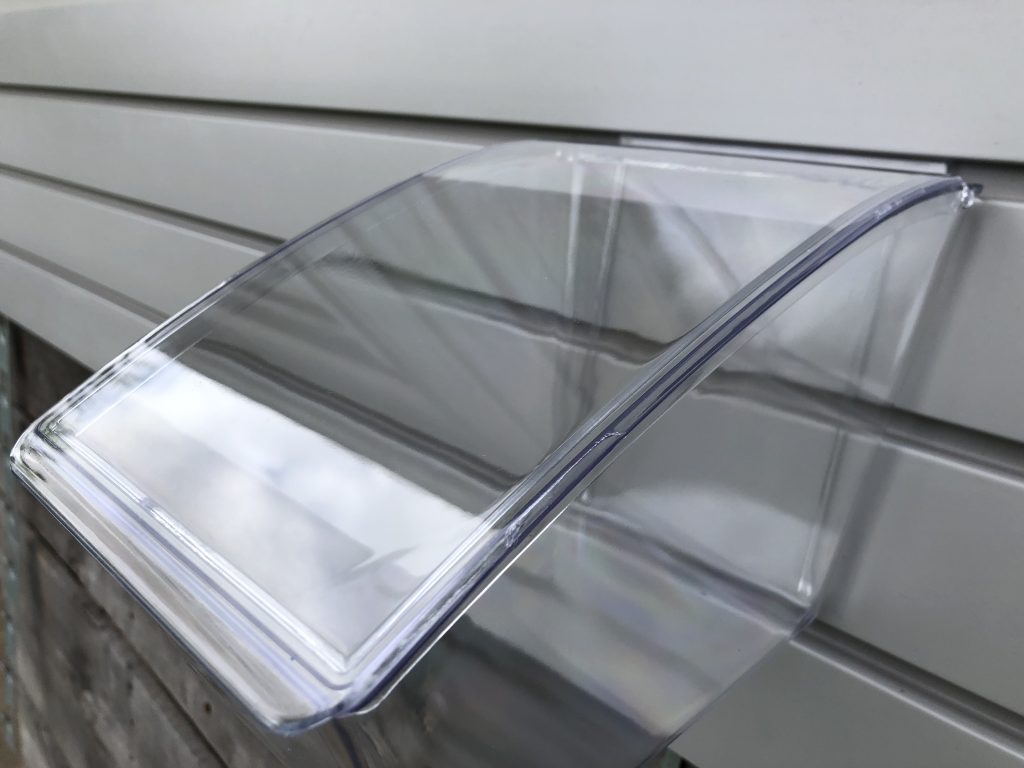
The edges are rounded making it rather elegant in terms of appearance. This is why it is particularly suited for retail stores.
Chrystal Clear Bin for Retail
We originally came across this bin when a client who was opening a retail store in Alice Springs contacted us about bin options. Initially he had ordered 2 types of open bins, but following some additional enquiries we were able to access the Clear Box with Lid for him which was ideal for his retail store. He ordered 40 of these bins so they could hold party accessories and balloons.
The Chrystal Clear Bin comes with a lid so it securely holds all types of merchandise. From lollies to craft items to haberdashery. The Clear Box with Lid is the ideal accessory to your slatwall.
Slatwall Bins
The Bin has been designed for all types of slatwall not specifically for StoreWALL. Therefore, if you already have your wall covered at home or in a store, the Clear Bin can still work perfectly for you.
Whilst our latest order was specifically for this client, we are keen on your feedback and will stock the Bin as a regular item if we find customers need and want it.
StoreWALL offers a diverse range of bins for your slatwall panels. They come in various sizes and colours. In terms of price, our smallest and most popular bin is around $3. StoreWALL Bins are super easy to install and can be moved around as required.
Heavy Duty Storage Recycle Totes
This last month we also introduced a new range of Storage Totes. These are Heavy Duty Storage Recycle Totes and are great for storing large items in the garage. This item is perfect for recycling uses and can be hung with StoreWALL Heavy Duty 380mm Brackets (sold separately) or rested on any shelf.
The Heavy Duty Storage and Recycle Tote comes with a ventilated base is ideal for storing files and any valuables including food items.
Comes
with an internal hanging rail designed for storage of hanging files
Ventilated
base protects contents against sweating
Large 68
Litre Storage Capacity Security Crate
Weight
capacity 70KG
Food
Grade PP (Polypropylene) that has a very high melting point of approx 160
degrees which is very high compared to many other plastics,
Hot water
used when washing will not cause container to warp
Strong
and Durable Metal Rods hold hinging lids
Lid
Lockable with Large Padlock or Security / Cable Ties Etc.
Also
comes in a smaller 34L model.
We are experimenting with these new Storage Bins to see demand from customers. The wait on them is about 10 days but this is reduce as we get more orders and store a greater local quantity.
At StoreWALL this week we received a call from a client who lives in the outer suburbs of Melbourne. Most of the homes in his neighbourhood were built 40+ years ago and have a standalone garage. The garage that this gentleman has is basically a metal shed with a brick facade (my garage is very similar). In terms of size if fitted at least 2 cars and so offered plenty of room. Being a metal shed however, he was limited in how he could use his walls for better garage wall storage. He was wondering if we had any ideas for installing Metal Shed Wall Panels.
The construction of the shed was a metal frame and metal sheeting covering the outer layer. This structure had stood the test of time. It was strong and sturdy and hadn’t rusted. However, due to the external body being metal, he had been very restricted in adding any hanging storage using any form of metal shed wall panel.
Metal Shed Wall Panels
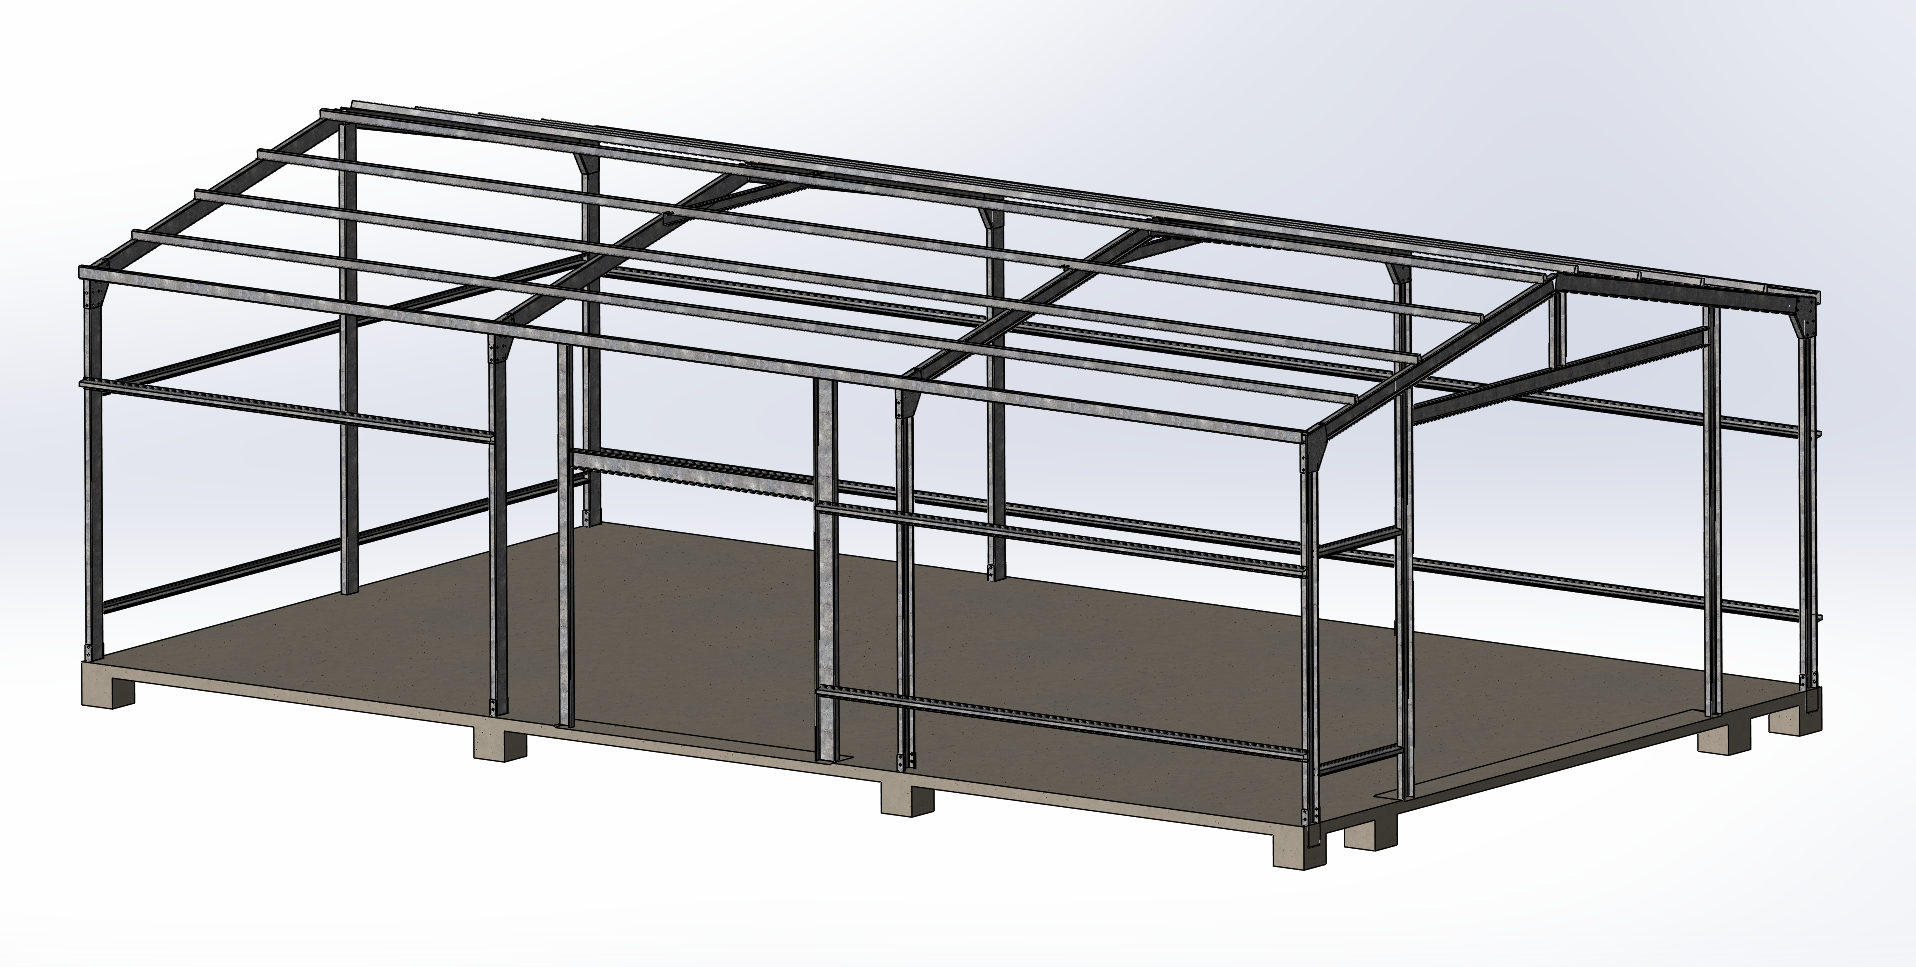
The gentlemen was kind enough to send through an image of the garage shed or at least how the frame had been constructed. You can see that whilst there is plenty of frame supporting the garage, the vertical and horizontal posts were quite far apart. This made it rather hard to install any type of Metal Shed Wall Panel.
This scenario is not ideal for garage wall panels of any nature but it is not an impossible task for a solution like StoreWALL.
Take the picture of this shed below. I found this picture on the internet at (theshedcompany). You can see the frame in this image and you can also see the large gaps between the vertical posts. The gaps are well over 1 metre apart. There is nothing wrong with the frame in terms of supporting the shed. It however doesn’t assist our objective of adding wall panels to your metal shed.
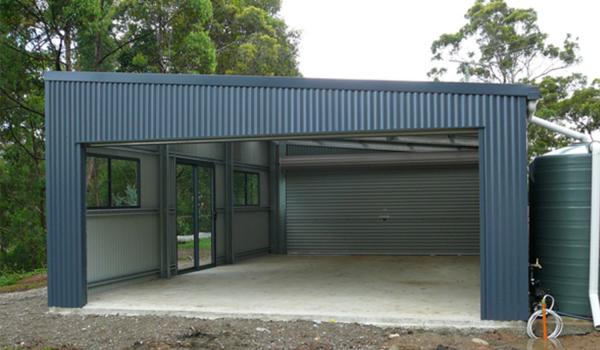
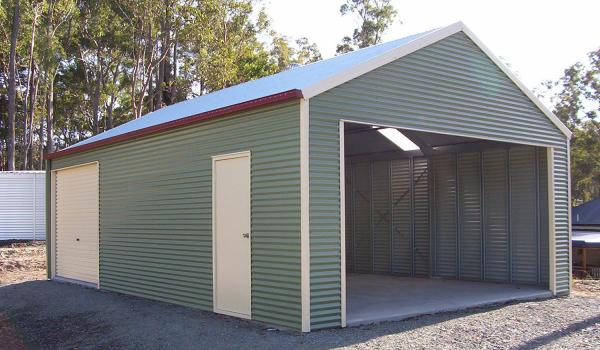
This second image (below) is from the same shed supplier (theshedcompany). Notice that the frame used in this case has many vertical studs that are narrowly spaced. This is a much better setup for supporting metal shed wall panels. Note that these are both great sheds just making the point about how they can support internal wall panels.
Shed B Narrowly spaced studs
If you took your typical garage hanging storage solution like StorEase from Bunnings and tried to install it on Shed A it would not work. Not if you were just wanting to install it directly onto the frame. The StorEase panel is only 1.2m in length and these studs are too wide apart. One option would be to install some plywood panels onto the frame and then screw your garage wall panels onto this. You would in this case still be required to support the plywood via the metal frame.
Installing on Shed B would be a lot easier with the additional studs supporting the panel. You may still want to install the plywood first.
Extending Your Shed Frame
I have a similar shed at home to that of the customer. It also doubles as my garage. It has a similar frame except that mine is metal but also supported by hardwood rails running horizontally along the length of the wall. There are 3 of these. One at the top, middle, and the bottom. With my setup, I could overcome the problem by adding additional studs between the horizontal rails. As I have a partly wooden frame, these vertical studs would be screwed onto the wooden rails. Once these rails are installed, then I have much more frame to work with. I could then use these studs to support my StoreWALL installstrips.
If your frame was only metal you would need to do something similar. You could either use more metal to build vertical studs or add wooden studs to your frame. It really depends on the composition of your frame and how sturdy you think it is to support some vertical studs.
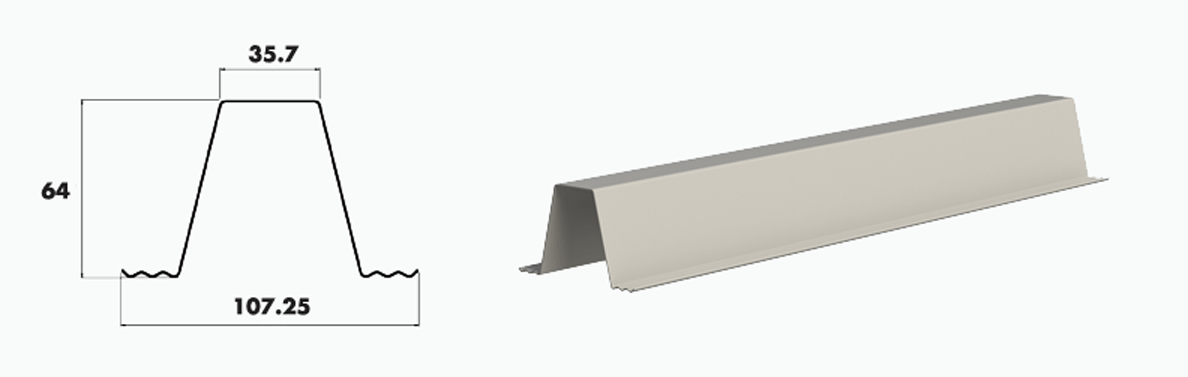
If your shed is new enough, you could look at whether the manufacturer sells additional frame parts that you can add. Alternatively, you might also want to consider TopHat battens such as the one pictured below. These TopHat Battens can be used to add additional vertical frame elements to your shed wall so that the Installstrips can be attached. TopHats are available from all major hardware stores.
https://www.metroll.com.au
Adding Plywood across your frame is also an option worth considering. If it is thick enough it could act as a suitable frame for the installation of the Installstrips.
StoreWALL InstallStrips
How much more frame do you need? For Metal Shed Wall Panels we would recommend a vertical stud every 400-500mm. This allows you to install your InstallStrip and provide 3 points of support to every 1.2m StoreWALL panel. Better still if the StoreWALL panels are 2.4m in length you would have 6 points of connection for each panel.
Your StoreWALL InstallStrip can be screwed or bolted onto your additional vertical frame. Once this step is complete it’s as easy as hanging the garage wall panels and attaching your new StoreWALL accessories to hang your storage items.
Metal Shed Installation
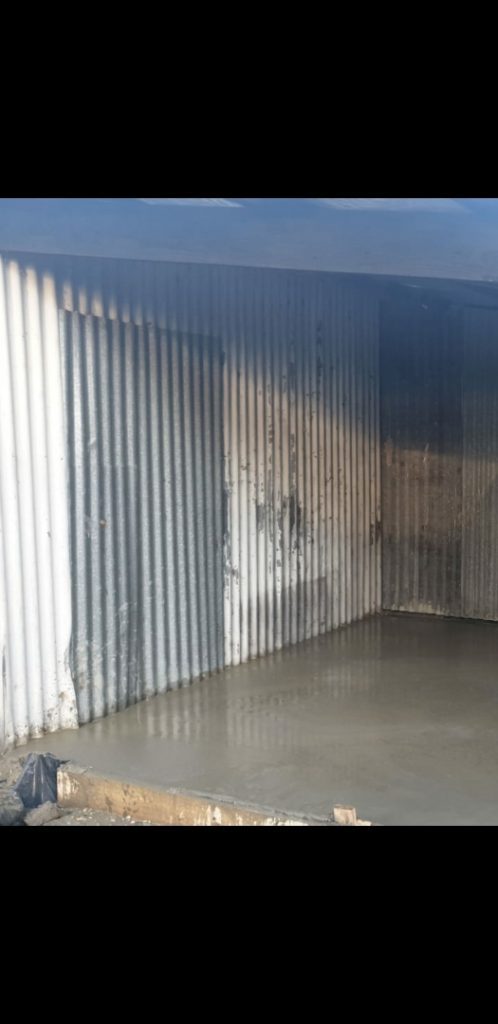
In early July a lady from Ghin Ghin in regional Victoria called me and wanted to see our panels. During her visit, she explained that she had a metal shed filled with gardening tools stored on the floor. Her goal was to have them all hanging on the wall using a garage wall storage system like StoreWALL.
The below picture is of the wall inside the shed. This will be covered with garage wall panels.
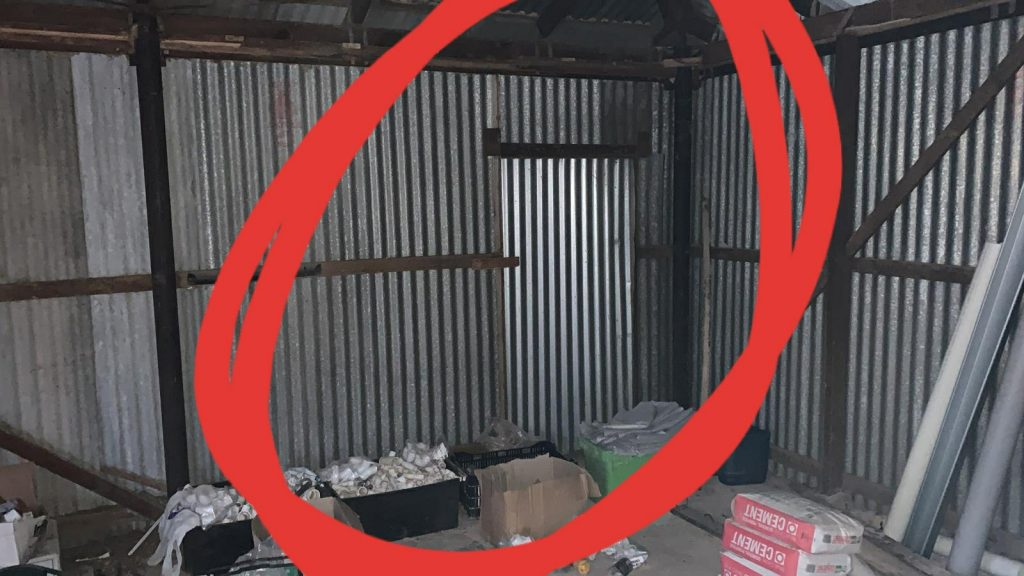
This is a picture of the other side of the same wall. You can see the limited studs. The client added additional studs and plywood sheets across the entire wall so that it could support the installation of the StoreWALL panels. Studs were added every 400mm.
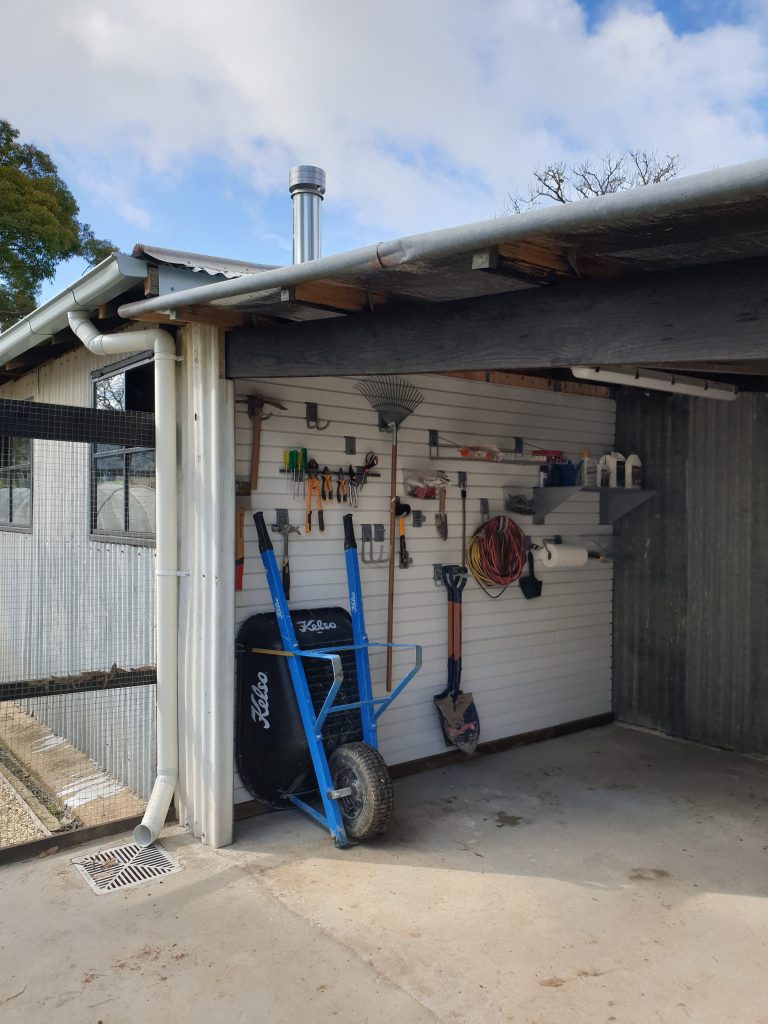
The result is fantastic and a great addition to this home. Now all of the gardening tools have been hung on the wall including the wheelbarrow.
StoreWALL provides the most extensive range of garage wall panels in Australia. All StoreWALL garage wall panels are made from a hardened thermoplastic and come in a range of sizes, grades and colours. We compare garage wall panels to help you pick the right wall panel for your garage.
Compare Garage Wall Panels
Below is a simple comparison table providing a detailed overview of each of the garage wall panel grades offered through StoreWALL. Each core features is listed down the far left column with details for each grade on the right.
Most measures in the table are in US Imperial (ie inches and feet). To help you convert this to Metric (what we use in Australia), I have the following tips.
A 12” panel height is 300mm. A 15″ panel height is 380mm.
The equivalent of 8 square feet is .74 square meters. Similarly 10 square feet is .92 square meters.
StoreWALL Australia gives you access to everything from StoreWALL in the US. To help you better understand what is on offer in Australia, and compare garage wall panels I have provided a more in-depth review of each grade of wall panel. StoreWALL offers three grades: Heavy Duty, Standard Duty and Basic Duty.
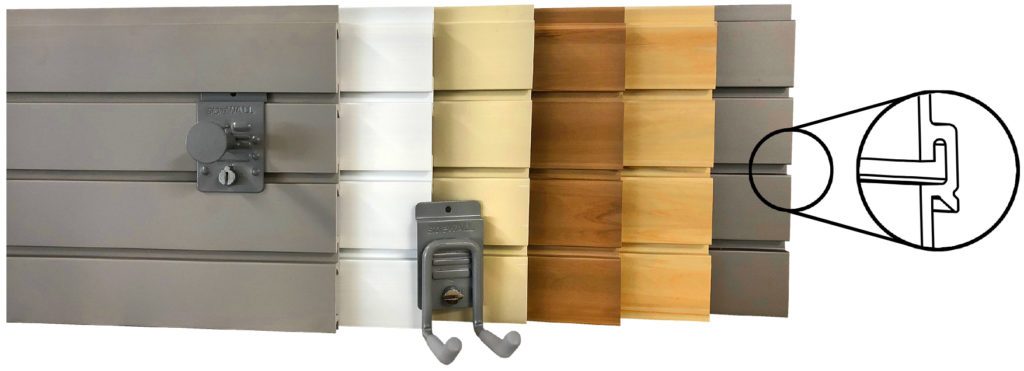
Standard Duty Wall Panels
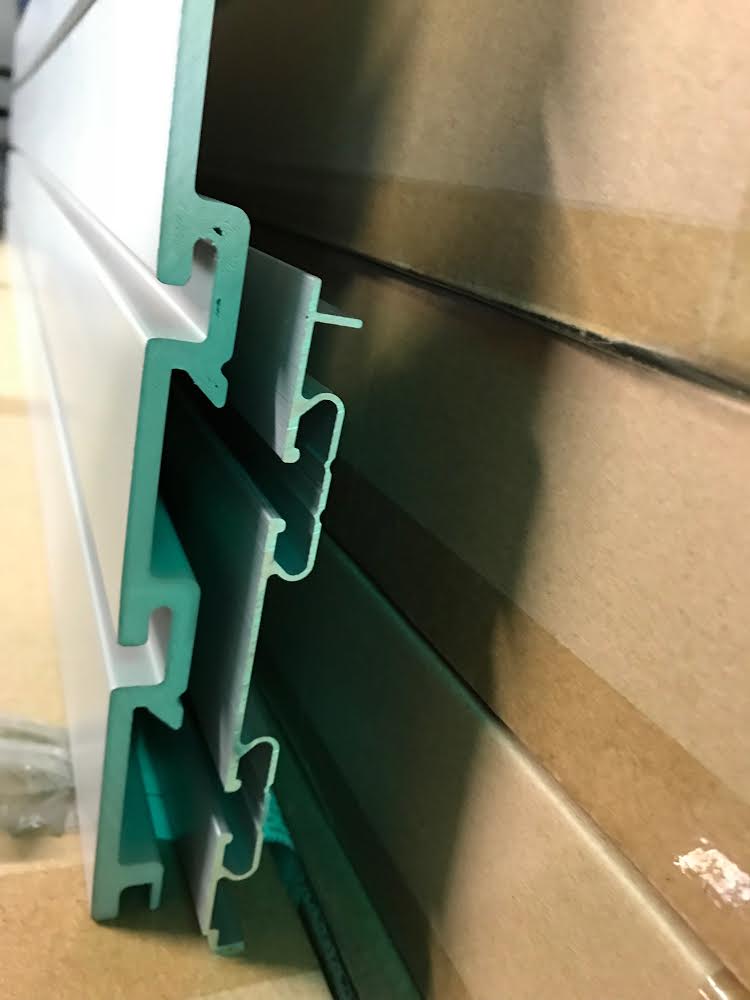
StoreWALL’s Standard Duty is the leading product in Australia and the ideal product for your home. The Standard Duty Wall Panels are designed for your home, retail store or workshop. They are designed with a patented profile to accept the exclusive InstallStrip (sold separately) for easy installation and a beautiful fastener free appearance. Standard Duty panels are moulded, solid core, so the colour and finish goes throughout the panel.
The Standard Duty profile shown above is used to lock in the panel to the InstallStrip. This ensures a secure panel as well as the strength to store and hang heavy items to your garage wall.
StoreWALL Standard Duty Panels are sold in 1.2m lengths as separate panels or in a carton of 6. In Australia we currently stock the Weathered Grey colour in the 1.2m range. However if you are interested in other colours, these can be custom ordered for you.
The more popular panel in the Standard Duty range is the 2.4m length. These are sold in cartons of 4 panels. Panels are available in your choice of 3 designer colours (Weathered Grey, Brite White and Dover White). Additional colours are available as a custom order.
Each panel is 300mm in height and 16mm in thickness. These dimensions apply to both the 1.2m and the 2.4m option.
Installation is via the StoreWALL InstallStrip (fastener free look) or using screws directly to the panel.
Basic Duty Panels
Launched in early 2019, this is the most recent addition to the range. The Basic Duty Panels are designed primarily for home and come in a narrower range of colours.
Basic Duty panels are only available in 1.2m lengths as single panels or in a carton of 4. The other key dimensions are a thickness of 16mm and a height of 300mm.
The Basic Duty colour range includes White and Grey. Both of these colours are stocked and available for order.
Installation of the Basic Duty Panel is via direct screws to the panel using the grooved section. We recommend approx 20 screws per panel. Screws can be colour matched to disguise them.
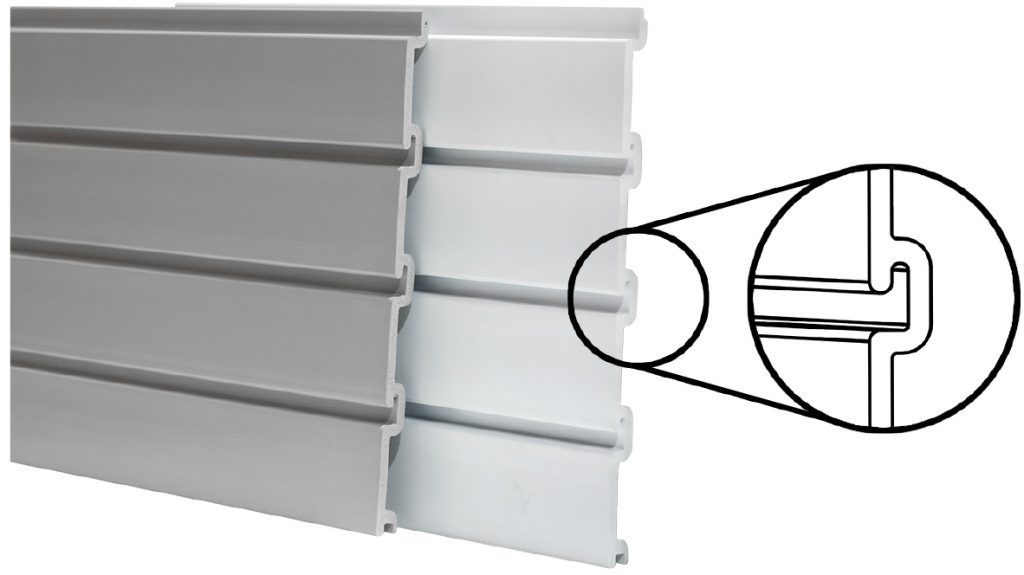
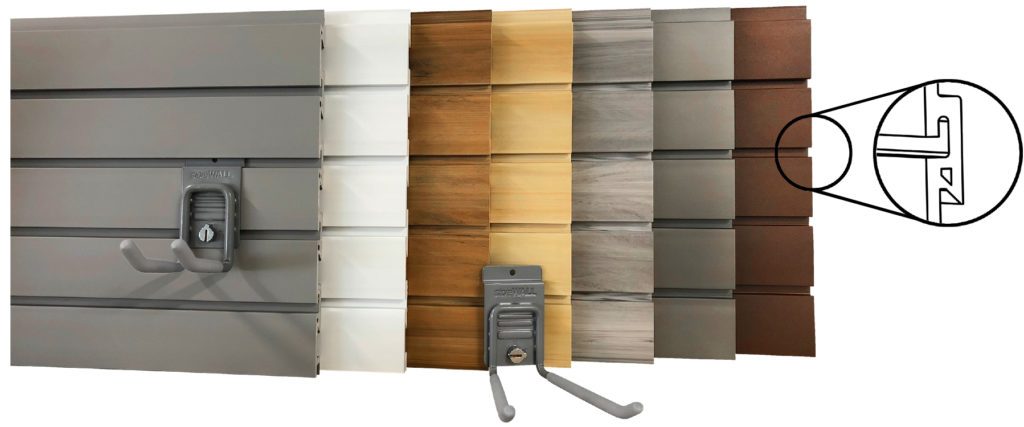
Heavy Duty Wall Panels
The Heavy Duty Wall Panel range is the original StoreWALL panel designed for your home, retail store or workshop. They are also designed with a patented profile to accept the exclusive InstallStrip (sold separately) for easy installation and a beautiful fastener free appearance. Note that the Heavy Duty InstallStrip is not interchangeable with the Standard Duty InstallStrip (profiles are not the same). HeavyDuty panels are also moulded, solid core, so the colour and finish goes throughout the panel.
StoreWALL HeavyDuty Panels are sold in both 1.2m and 2.4m lengths in cartons of 6 and 4 panels respectively. Panels are available in your choice of 7 designer colours and wood grains. Each panel is 380mm in height and 16mm in thickness.
Heavy Duty Wall Panels are currently only available as a custom order in Australia. Please give us a call if you are interested in this panel range.
StoreWALL Australia can help you decide which panel grade is best for your storage project. We can help you add to your existing StoreWALL installation and start a new one. Give us a call if you have any questions.
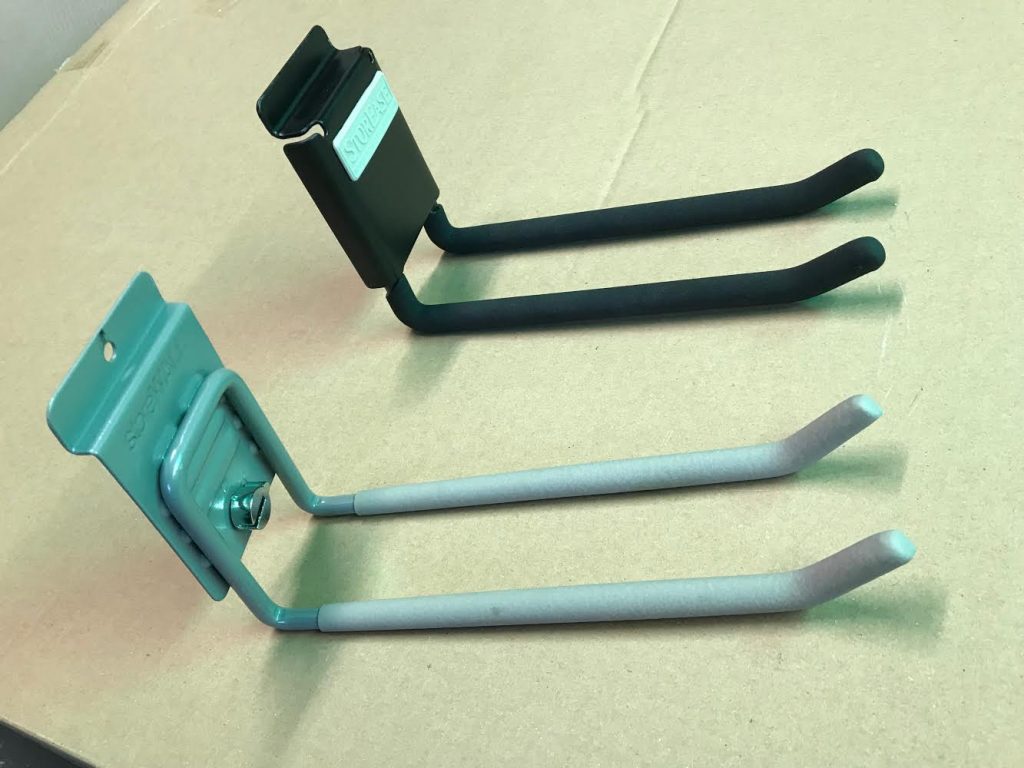
Over the past fortnight, I have been receiving calls from customers looking for accessories for their StorEase Slimline Smart Rail. The StorEase Slimline Smart Rail Wall Bracket is sold by Bunnings and allows you to clip on a broad range of accessories for your garage, sporting gear or workshop.
StoreWALL is not StorEase
StoreWALL is not StorEase. Whilst most of our accessories might work on the StorEase range of Wall Brackets, it is not the same product nor quality. I’d like to think StoreWALL is a much better solution, but I will let you be the judge of that.
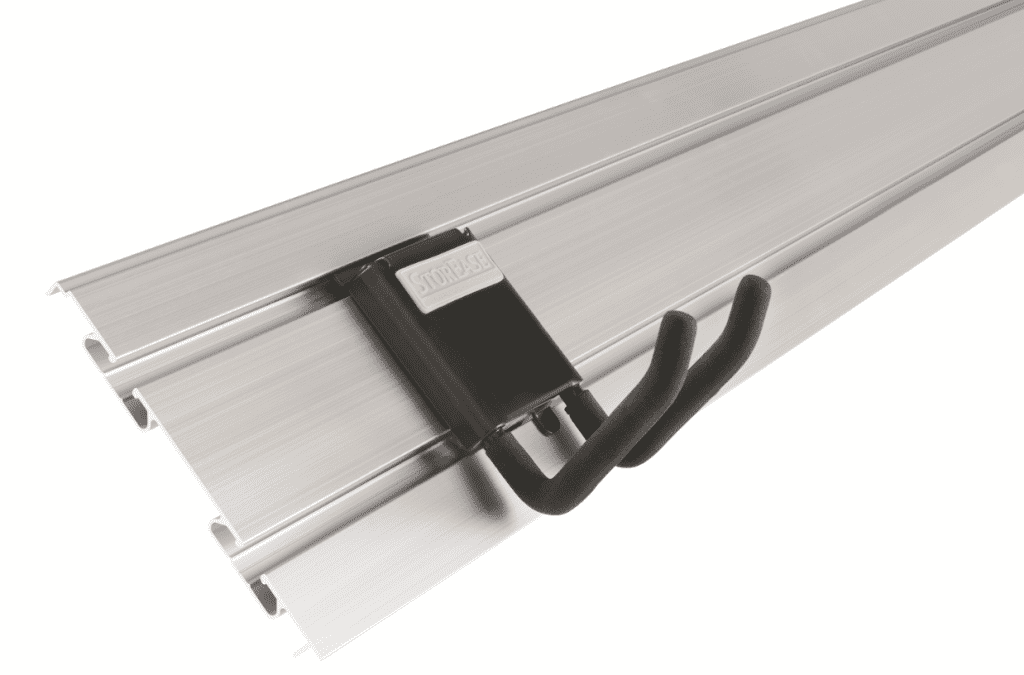
About a year ago, I did an in-depth review of the StoreEase Aluminium Smart Wall Panel and one of its more popular accessories. The review includes several videos and has proven to be rather popular. The Smart Wall Panel is very similar to the StorEase Slimline Smart Rail but it is a slightly wider wall panel and raw aluminium in colour. The StorEase Slimline Smart Rail is painted Black.
StorEase Smart Wall Panel
Source: Bunnings
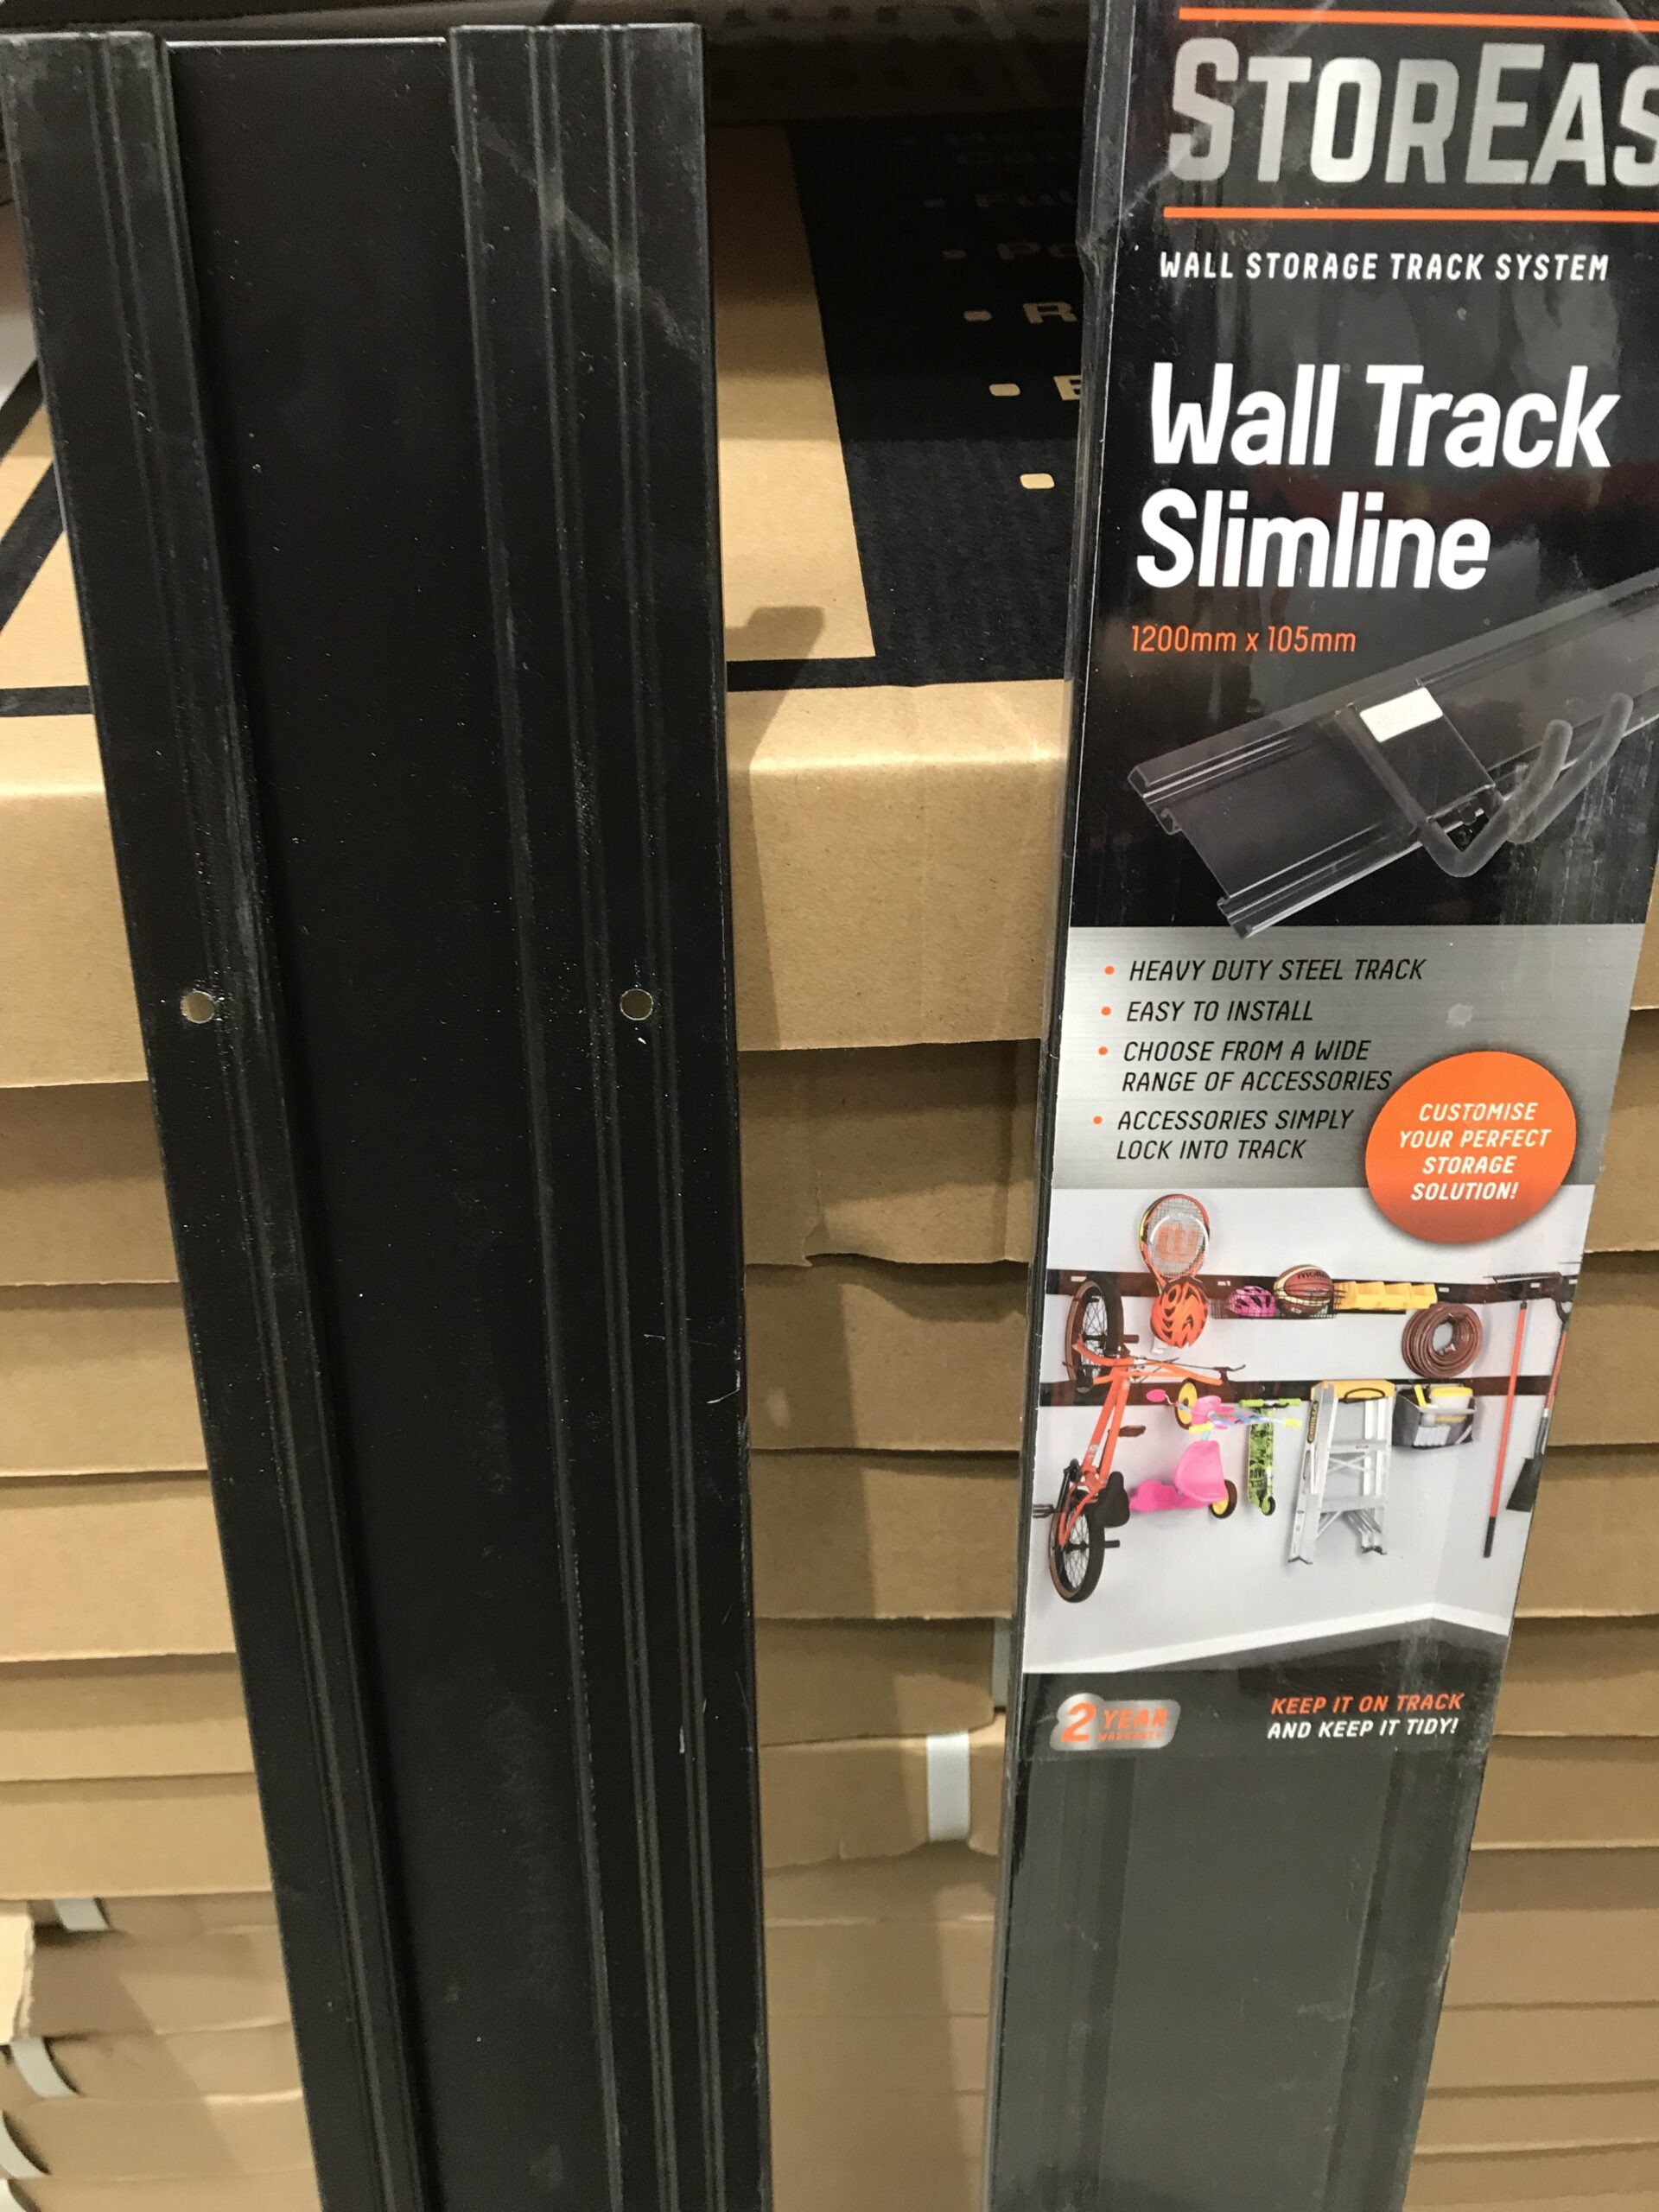
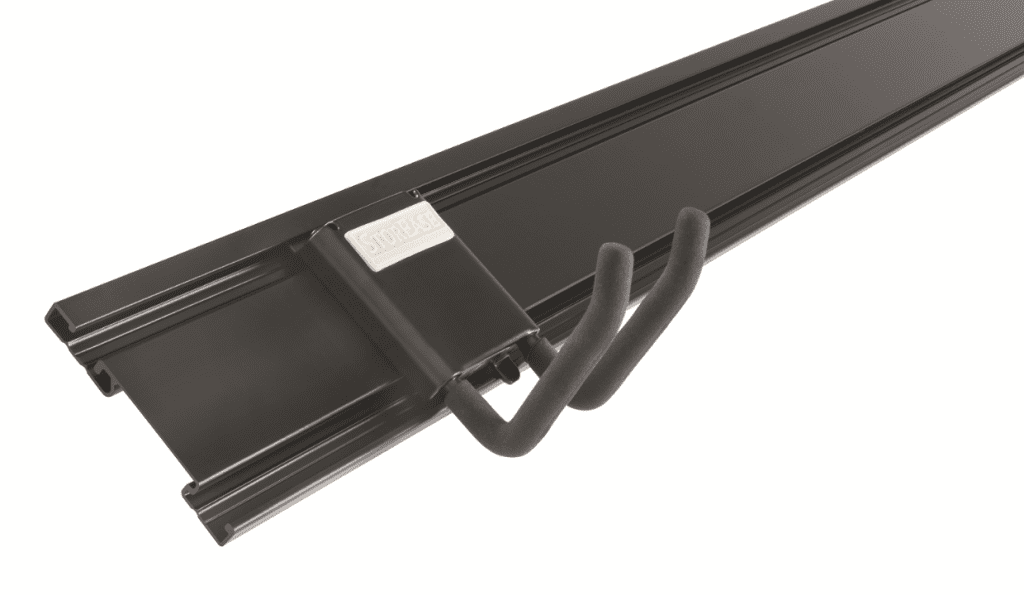
StorEase Slimline Smart Rail
Source: Bunnings
StorEase Slimline Smart Rail Compared
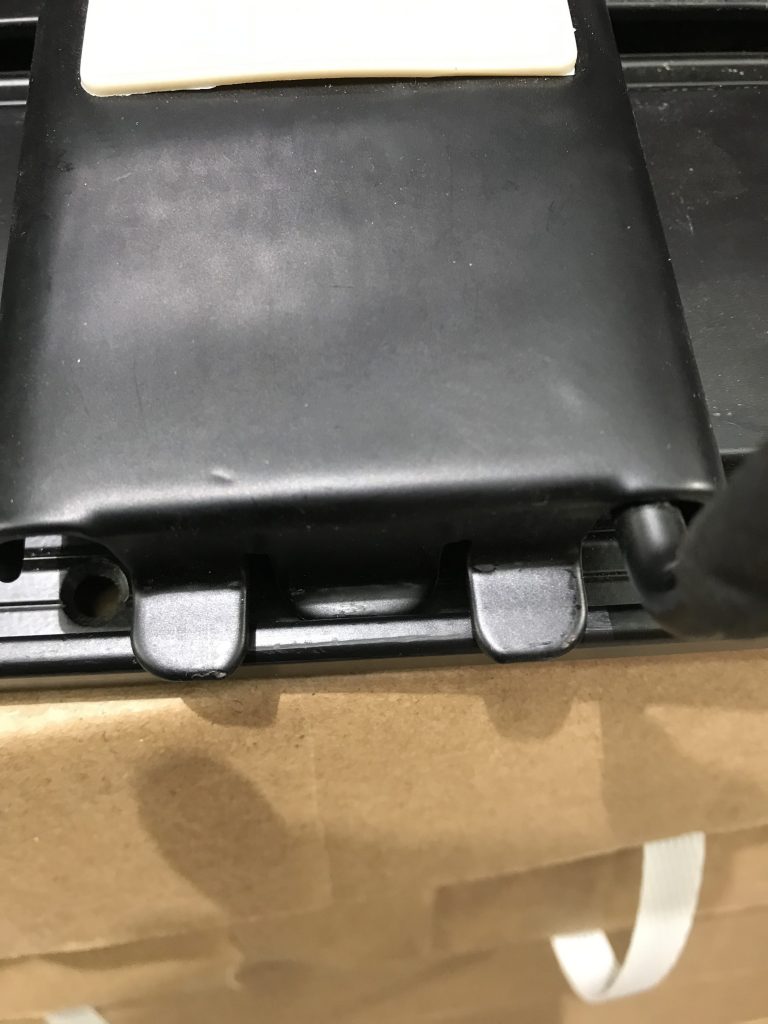
Some of the key difference between the two StorEase panels is that the Wall Track Slimline is a different Colour, a different Width and has a different groove for locking the accessory. In fact, several of the calls I have received have actually been specifically about the StorEase Slimline Smart Rail locking mechanism.
The price of the StorEase Slimline Smart Rail is about $30.82 and its dimensions are: W:105 H:10 L:1200. The Smart Wall panel is priced similarly but its dimensions are: W:158 H:5 L:1200. About 50mm wider. In fact, it now seems (2023) that the Wall Panel can only be purchased directly from StorEase as it is no longer featured on the Bunnings website.
StorEase Slimline Smart Rail Review
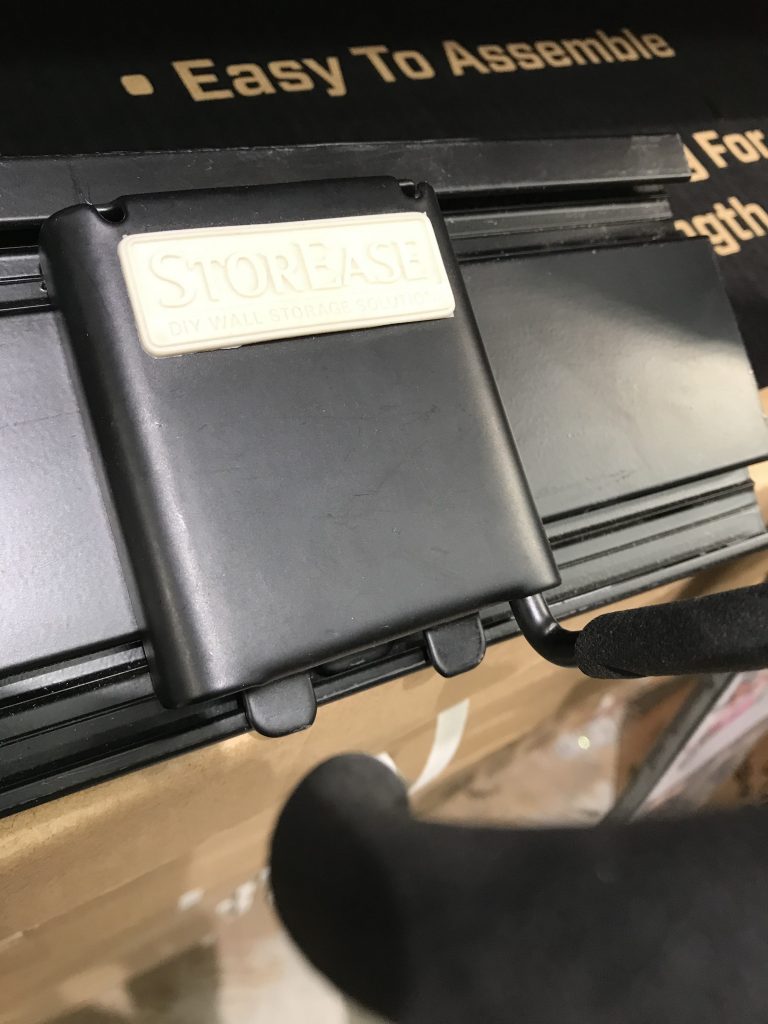
So I ventured down to my local Bunnings Store to see for myself what the StorEase Slimline Smart Rail looked like and how it worked. I had the opportunity to test it with one of the StorEase hooks and I have included some photos and video below.
StorEase Smart Rail
It didn’t take long to work out where the confusion and calls were coming from. I honestly didn’t find the StorEase Slimline Smart Rail very intuitive. As you can see from the video, trying to secure the hook to the rail was not easy and I wouldn’t be confident hanging heavy items from it.
This is in contrast to what I found with the Smart Wall Panel in my review. It secured the hook a lot better (probably a little too well). The StorEase Slimline Smart Rail looks nicer with its powder-coated black colour. It is also slimmer which makes it less visible on the wall. It just didn’t quite do the job when it comes to holding the accessories. This is supported by some of the reviews on the Bunnings website.
Comparing StoreWALL
StoreWALL’s wall panel system is in many ways similar to what is offered by StorEase but also quite different. For one, StoreWALL is not a rail, it is a wall panel, designed to cover your wall area. You can cover as much as you need to. Also, each wall panel is double the width of the StorEase product. The width of the panel is about 300mm (30cm) as opposed to the StorEase panel being 150mm (15cm). Being wider it has room for two rows of grooves and can therefore fit more accessories. You would need to join two StorEase panels together to get the same result.
Price wise the 1.2m StoreWALL panel is $69.99 sold separately and slightly cheaper purchased in a carton of 4. The cost of two StorEase Slimline Smart Rails is about $61.64.
Another key difference is the accessory range. StoreWALL’s accessories are designed to be attached to the panel and then locked in. There is no threat of the accessory falling off the panel. The CamLok locking mechanism eliminates this. See the below video on how it works.
CamLok Locking System
StoreWALL Accessories
StoreWALL’s accessories are priced a little higher than the equivalent from StorEase but as noted the quality and locking mechanism are different. The panels are also not aluminium but hardened thermoplastic which will not change shape, or attract rust or mold. They also come in several colours so you can match them to your wall colour or other cabinetry in the garage.
Having tested the StorEase Smart Wall Panel (wider panel), I can confirm that you can use the StoreWALL accessories on your StorEase Smart Wall Panel.
THIS HOWEVER DOES NOT APPLY TO THE STOREASE SLIMLINE SMART RAIL. OUR ACCESSORIES WILL FIT BUT THE GROOVE IS NOT DEEP ENOUGH TO SECURE THE CAMLOK.
Below is an example of what one client did in Melbourne. They had a StorEase rail in the garage and added 2 StoreWALL U Hooks to hang this dart board.
Give us a call should you want to know more about the differences.


