
How to Store Multiple Bikes in a Garage (Without Losing Your Floor Space)
One bike in a garage is manageable. Two is where it starts to get complicated. Three or more, and suddenly the bikes are stacked against the wall, leaning on each other, getting scratched, blocking the car, and falling over at inopportune moments.
The good news is that a well-planned wall storage system can comfortably hold four or more bikes in the same footprint that two bikes take up on the floor — and make every single one easier to get in and out. Here’s how to plan it.
Looking for our full bike storage range? See our Garage Bike Storage page
Step 1 — Know Your Bikes
Before you think about hooks or panels, take stock of what you’re actually storing. The answers shape every decision that follows.
- How many bikes? Count them all — include the ones currently in the backyard or laneway.
- What type? Road bikes, mountain bikes, kids bikes, and e-bikes all have different weights, tyre widths, and handling requirements.
- Who’s accessing them? Adults can manage a lift to shoulder height. Kids generally can’t — which affects hook height and the type of hook you choose.
- Are they ridden regularly? Daily-use bikes need quick on-and-off access. Weekend bikes can be stored with slightly more effort involved.
- Do you have accessories to store too? Helmets, pumps, shoes, lights, and bags all need homes on the wall alongside the bikes.
Step 2 — Understand the Space Each Method Takes
This is where most people get stuck — they don’t realise that different storage methods use wall space and floor depth very differently. Here are the four main options and their real-world space requirements:
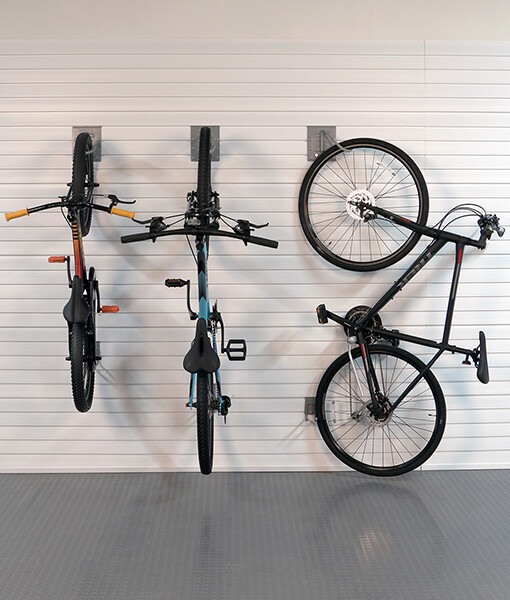
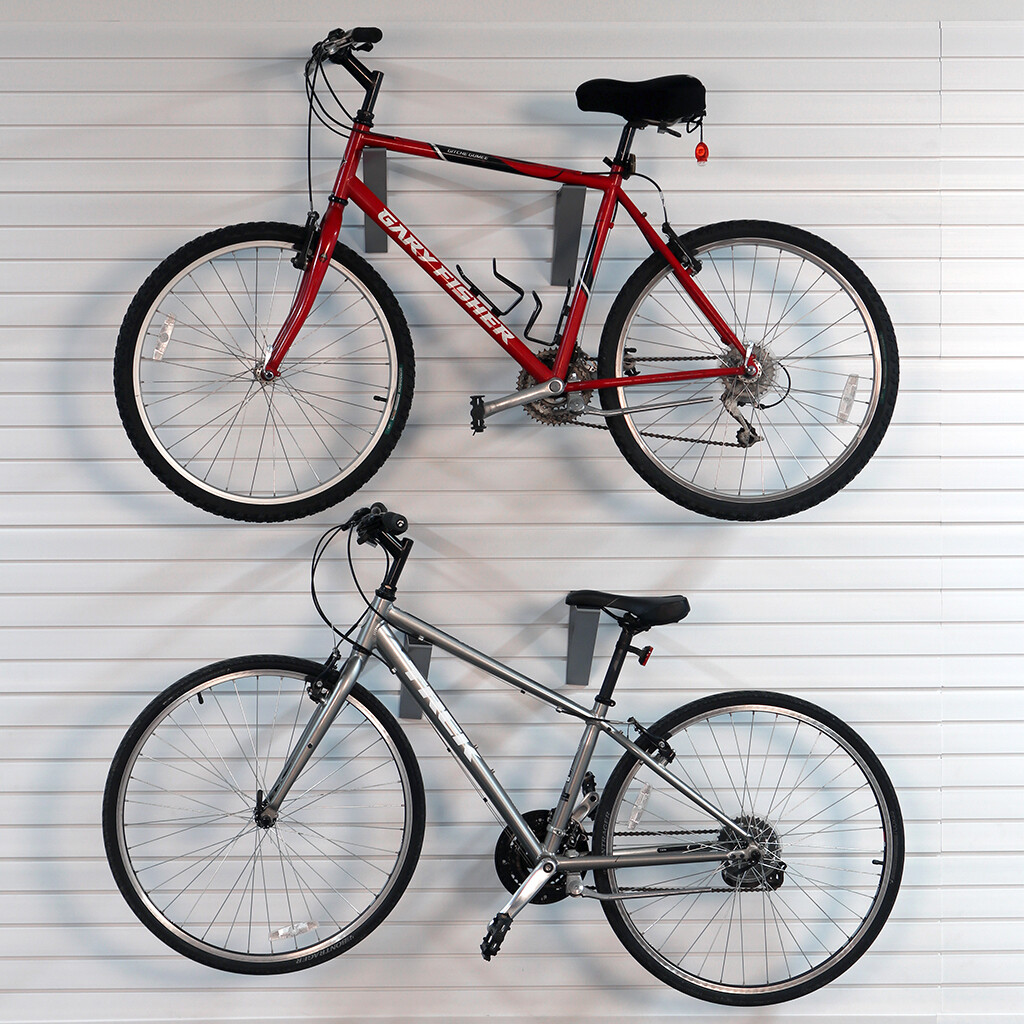
Perpendicular (J Hook) — most popular for 1–2 bikes
 The bike hangs front wheel on the hook, rear wheel on or near the floor, bike pointing out from the wall. Requires approximately 1m of floor depth in front of the wall and about up to 2m of wall height per bike (accounting for the length of the bike when standing upright). Easy on-and-off for adults.
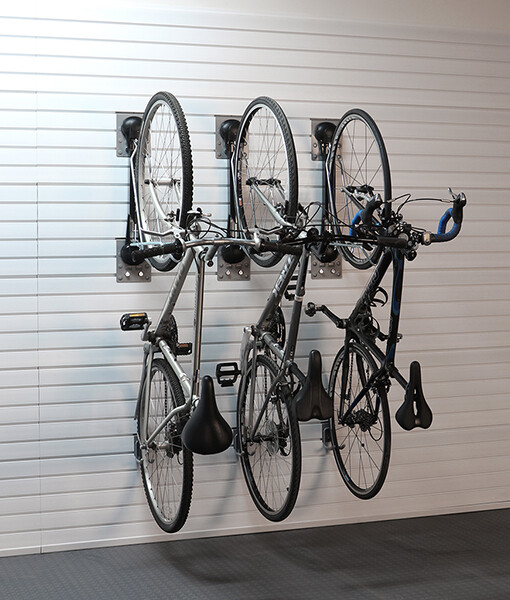
Rotating Hook — best for 3+ bikes
 Works like the J Hook (bikes standing upright) but the bike can swing flat against the wall once hung, so it runs parallel to the panel rather than pointing out. In the flat position the floor space is minimal and usuallly determined by the outer width of your bike (ie pedal to pedal which is about 60-80cm max). This is the single most space-efficient method for multiple bikes and why it’s our best-selling bike hook. The trade-off is that you need to swing each bike out before you can easily access the ones behind it. Bikes can be staggered at different heights to pack them tighter together.
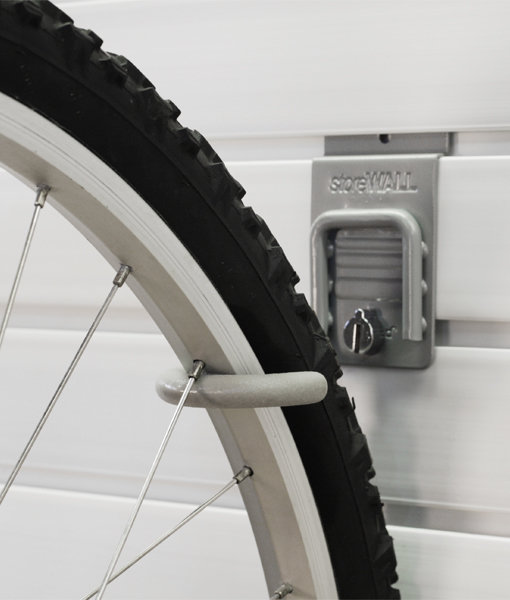
SteadyRack Brackets — best for kids or no-lift households
 The SteadyRack rolls in rather than lifts — you roll the front wheel onto the bracket and it pivots up at an angle. SteadyRack brackets will also rotate left of right and allow you to have the upright bike stand flat against the wall. The amount of floor space used is the same at above (Rotating Bike Hook), ie about 60-80cm. No lifting required, which makes it the most accessible option for children and older riders. Can be staggered at different heights to pack bikes tighter together.
Horizontal brackets — best for aesthetics or tight depth
 The bike lies flat on the wall, hung by both wheels on 381mm brackets. Uses about 170cm of wall width per bike but only about 40cm of depth (pedal to pedal). The cleanest-looking option, it however takes up the most about of space. Works well where the garage depth is limited but the wall is wide.
A similar solution but with the bike being hung from the front tyre flat on the wall uses our Heavy Duty Universal Hook. Ideal if you only have 1 or 2 bikes and plenty of wall space to use.
Step 3 — Plan the Wall Layout
Now that you know your bikes and your preferred method, it’s time to map out the actual wall. Here’s a practical process:
- Measure the usable wall width — subtract any door frames, windows, shelving units, or electrical panels from the total width.
- Decide on hook type — for most families with 3+ bikes, the Rotating Hook will give you the most bikes in the least space. It is also the most cost effective solution we offer.
- Sketch the bike positions — mark each bike’s width on the wall with tape. Stand back and check the spacing feels workable.
- Add the accessories — allow space for a few baskets to hold your helmets and bike pumps. These are small but they matter for day-to-day usability.
- Work out panel coverage — your bikes and accessories determine how many panels you need. A rough guide: one 2.4m Standard Duty panel can support three hanging bikes using the Rotating Bike Hook. However if you want to also include baskets for accessories, more of the wall will need to be covered.
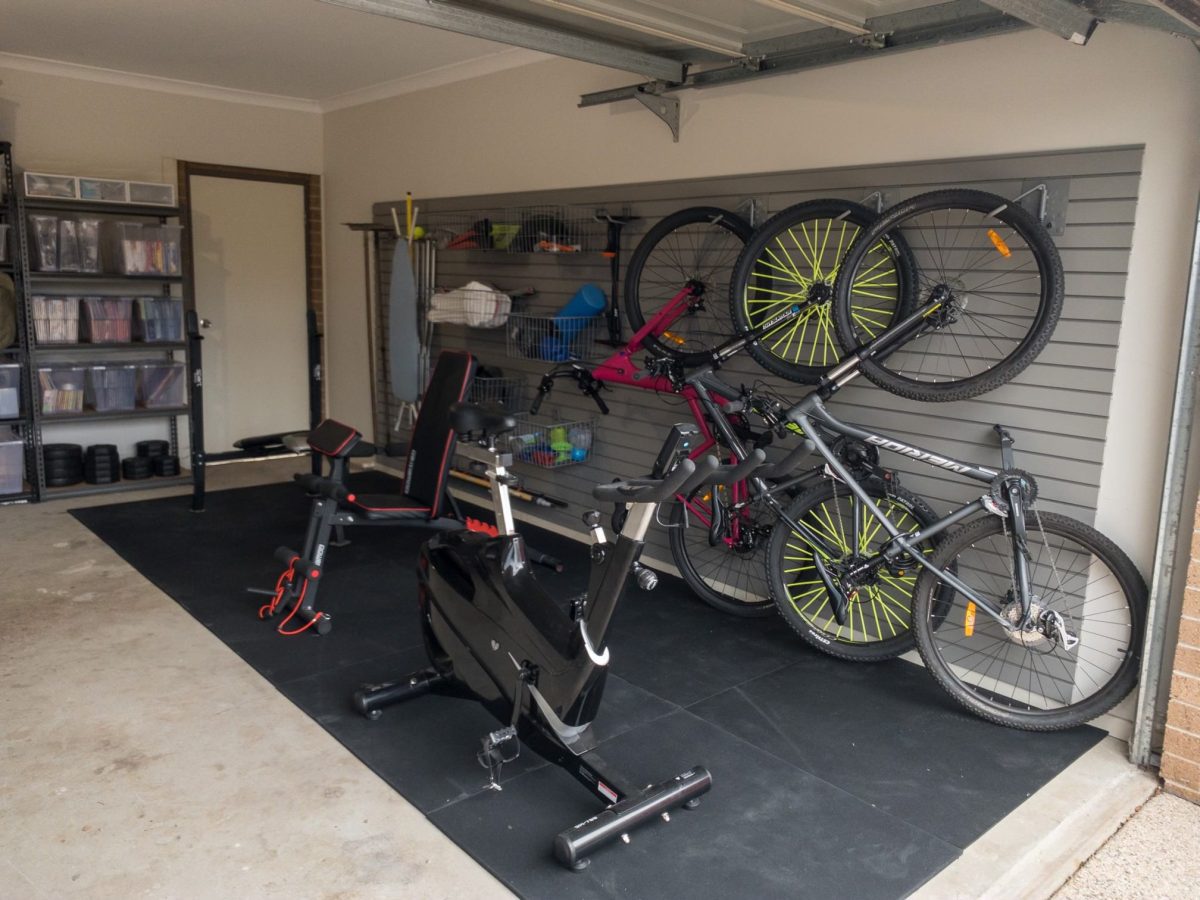
Step 4 — Real Example: A Family of Four with 5 Bikes
Here’s a real-world example based on a customer in Melbourne — a family of four with two adult road bikes, two kids mountain bikes, and an e-bike that didn’t have a permanent home.
Their garage wall measured 6m wide with a height of 2.4m. They chose Rotating Bike Hooks for the adult bikes and the e-bike (so they could swing flat and keep access clear) and two SteadyRack Classic brackets for the kids bikes (easier for the kids to use independently).
This client chose to panel 6m x 2.1m of the wall surface area. They could however have limited the wall paneling to only the top half of the wall, say 1.2m of height.
In addition to the bike hooks, they also inlcuded 2 Heavy Duty Deep Baskets for the helmets and bike pumps, and some smaller bins for the gloves and lights. All five bikes off the floor, all accessories in one place.
Before the install, the bikes took up the equivalent of about 6 square metres of floor space. After, they used very limited floor space and the family could fit both cars in the garage again.
Step 5 — Heights and Clearances
A few practical numbers that save a lot of frustration:
- Adult bike hook height: the hook centre should be at approximately shoulder height (140–160cm from the floor) for easiest on-and-off access
- Kids bike hook height: 80–100cm from the floor — kids can manage a small lift but shouldn’t have to reach above their head
- SteadyRack height: follow the manufacturer’s guide which is based on your specific bike’s wheel size
- Rotating Bike Hook: because the bike swings flat, adjacent hooks need at least 10cm clearance between bikes in the flat position. You can also stagger the heights slightly allowing you to squeeze them in.
- Helmet hook: 10–20cm above the bike hook so helmet is easy to grab as you take the bike off the wall
Panel Quantity Guide
Use our Panel Calculator on the website to enter your exact wall dimensions and get a precise recommendation.
Frequently Asked Questions
Can I mix different bike hook types on the same wall?
Absolutely. It’s actually common to mix Rotating Hooks for adult bikes and SteadyRack brackets for kids bikes on the same panel — the panel accepts any accessory regardless of what else is on it. The most important thing is leaving enough space between each bike so they don’t clash when being loaded or removed.
What if my garage wall isn’t wide enough?
If wall width is the limiting factor, the Rotating Bike Hook will be your best option with bikes rotating left or right and possibly staggered in height to fit them into the wall space you have.
Can I store an e-bike on a standard bike hook?
Yes, but e-bikes are heavier — typically 20–30kg — so the hook and panel setup needs to match the weight. The Rotating Bike Hook and the SteadyRack Brackets are supported by 2 x CamLoks giving your bike more support. I would also recommend have the lower tyre rest on the ground rather than floating. Contact us if you’re unsure — we’re happy to recommend the right setup for your specific bike.
My garage wall is brick. Does that affect installation?
Not significantly. StoreWALL panels can be installed on brick walls using InstallStrips with masonry anchors. The InstallStrips distribute the load across multiple anchor points, which is actually more secure on brick than a single screwed-through approach. We have an installation guide specifically for brick walls on the website.
Need more information? Read our latest post comparing rotating vs vertical options.