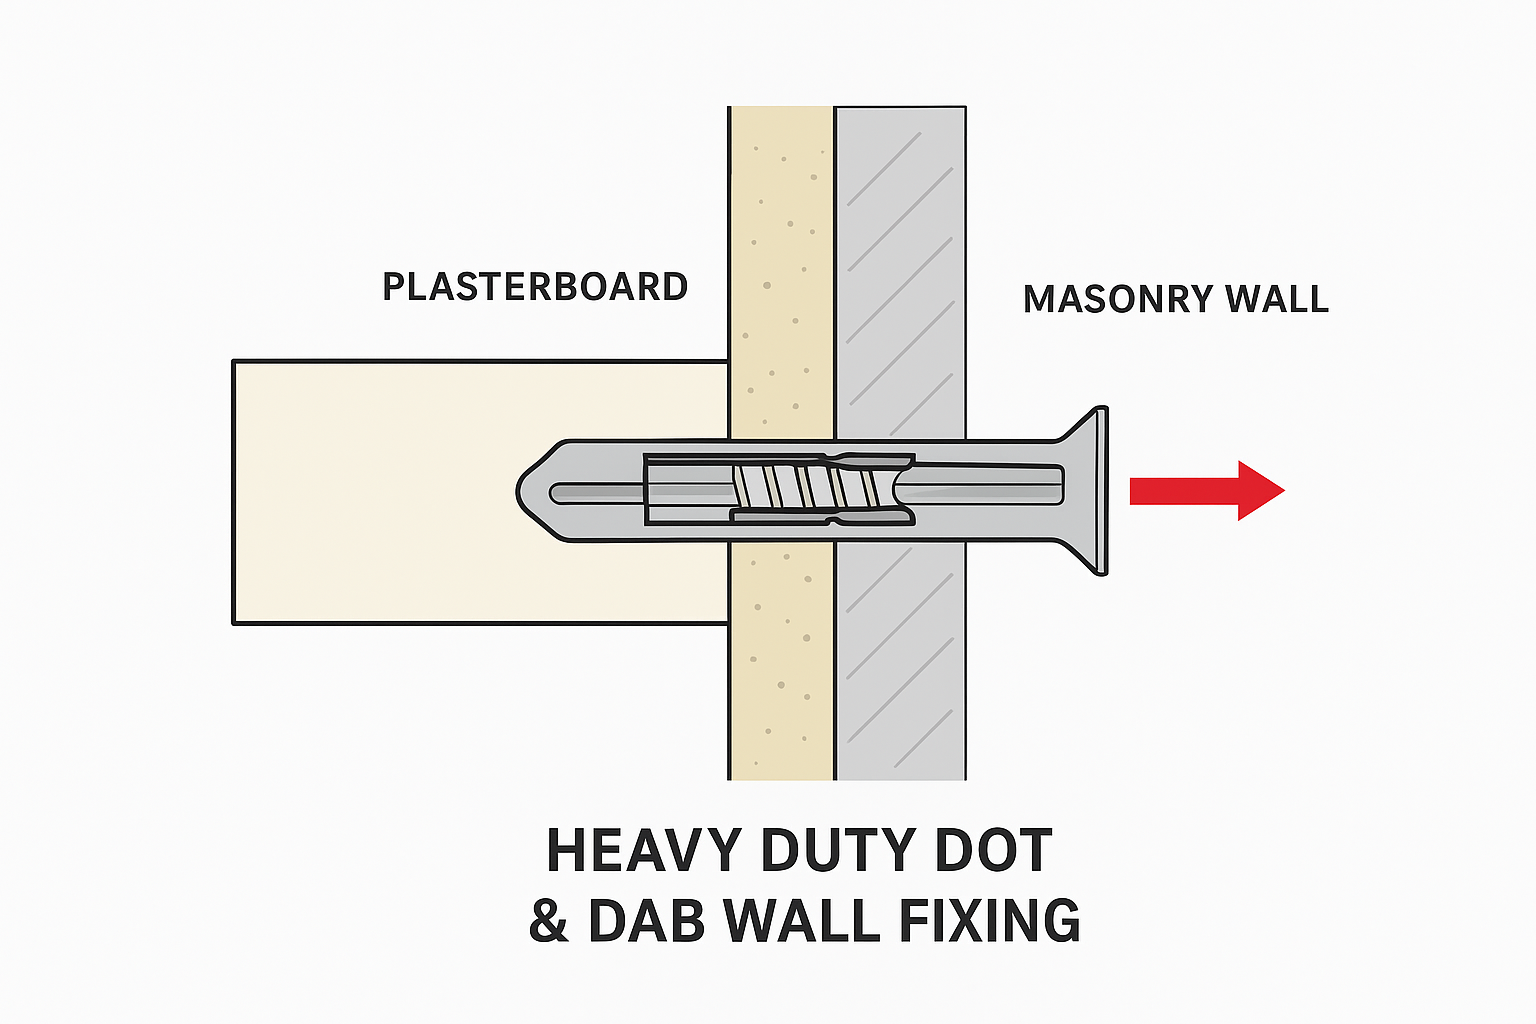
When working with dot and dab walls — also known as drylined or plasterboard walls fixed to masonry with adhesive — finding the right method to securely mount heavy items can be tricky. Standard wall plugs or plasterboard fixings often aren’t enough to hold significant weight, which is where Heavy Duty Dot & Dab Wall Fixings come in.
These specialised fixings are designed to bridge the gap between the plasterboard and the solid wall behind it, ensuring your shelves, cabinets, slatwall panels, or other heavy items are securely anchored.

Understanding Dot & Dab Walls
A dot and dab wall is constructed by applying adhesive “dots” or “dabs” to a solid wall, then pressing plasterboard sheets onto it. This leaves small cavities between the plasterboard and the masonry surface.
While this method is quick and efficient for building, it presents challenges for securing heavy loads because:
- The plasterboard alone cannot hold significant weight.
- Standard wall plugs may spin or loosen due to the gap behind the plasterboard.
Why Use Heavy Duty Dot & Dab Wall Fixings?
Heavy Duty Dot & Dab Wall Fixings are specifically engineered to overcome these issues. They:
- Span the gap between the plasterboard and masonry.
- Expand or grip firmly in the solid wall behind.
- Support much heavier loads than regular plasterboard fixings.
- Provide a flush, neat finish once installed.
Typical uses include:
- Kitchen wall cabinets
- Slatwall or garage wall panels
- Heavy shelving
- Large mirrors or TVs
- Tool racks and garage storage systems
Tools and Materials You’ll Need
Before you start, gather:
- Heavy Duty Dot & Dab Wall Fixings (with the correct length to bridge your gap)
- Masonry drill bits
- Hammer drill
- Screwdriver or impact driver
- Measuring tape
- Pencil for marking
- Spirit level
Step-by-Step Guide to Using Heavy Duty Dot & Dab Wall Fixings
Measure the Gap
Use a thin probe or measure the plasterboard thickness plus the adhesive gap to the solid wall. This ensures you select fixings of the right length.
Mark Your Fixing Points
Use a pencil and spirit level to mark exactly where each fixing will go. For heavy loads, use multiple fixings spaced evenly.
Drill Through the Plasterboard
Using the correct-sized drill bit (as per the fixing instructions), drill through the plasterboard until you reach the solid wall behind.
Drill Into the Masonry
Switch to a masonry drill bit and continue drilling into the solid wall to the depth recommended for your fixing type.
Insert the Fixing
Push or tap the Heavy Duty Dot & Dab Wall Fixing through the plasterboard until it reaches the solid wall. Some designs use a sleeve or spacer to bridge the gap.
Secure the Screw
Drive the screw into the fixing. The fixing will expand or grip into the solid wall behind, locking everything tightly in place.
Mount Your Item
Once all fixings are secure, you can mount your shelf, panel, or other item with confidence.
Safety and Weight Limits
- Always check the manufacturer’s maximum load ratings for your specific fixings.
- Distribute weight evenly across multiple fixings where possible.
- For very heavy installations (like garage slatwall systems), ensure fixings are into masonry at multiple points.
Final Thoughts
Installing on a dot and dab wall doesn’t have to be a headache. Heavy Duty Dot & Dab Wall Fixings give you the strength and reliability needed for secure, long-lasting installations. Whether you’re hanging garage storage panels, shelving, or other heavy equipment, the right fixing will make all the difference in safety and durability.