
Embark on the journey of installing StoreWALL with our comprehensive step-by-step guide. Understanding the intricacies of StoreWALL and its seamless integration into your home or business has never been easier.
Step 1 – Your Room
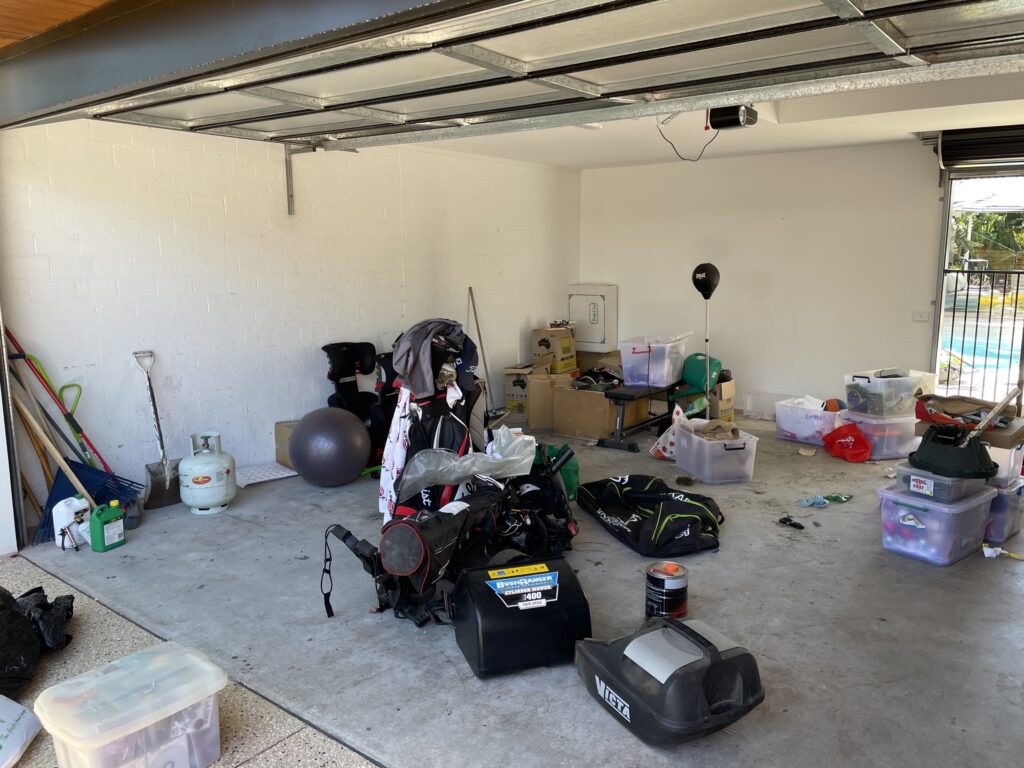
Begin by assessing the room and decluttering. Take stock of the available space, group items, and decide on the optimal wall for StoreWALL installation. The cleanup might create additional wall space for essential items.
Step 2 – Wall Size
Once you have decided which wall you will install the StoreWALL slatwall system on, you will need to measure it up. You will need to calculate the total area covered in square meters. Using a measuring tape, measure the length and height of the wall you want to be covered.
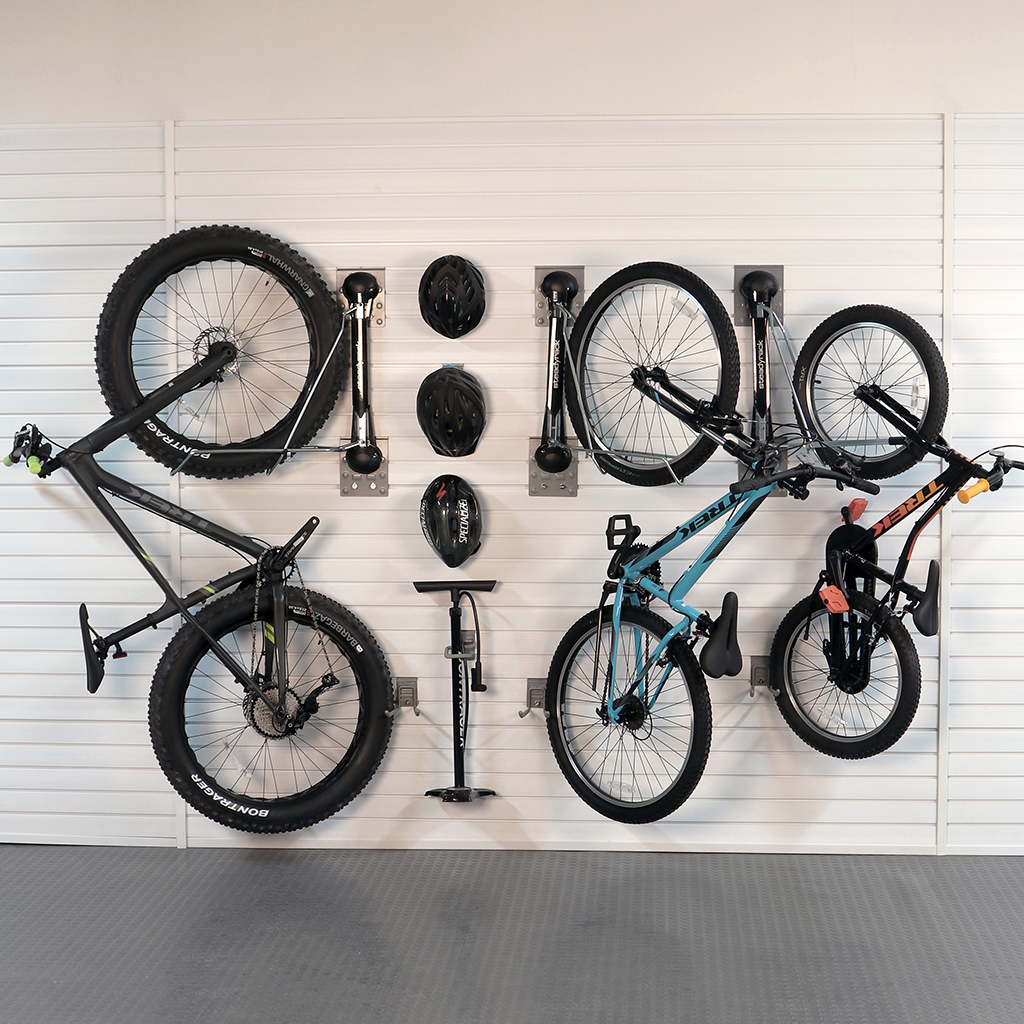
It is important to consider the type of items you want to be stored on your wall and where is the best place for them. ie Bikes are a popular item to be stored on your wall. Bikes are typically stored upright (perpendicular to the wall). Consider the height of your bike when stored upright and where the hook will likely be on your wall. This will give you an idea of the height that your garage wall panels will need to reach.
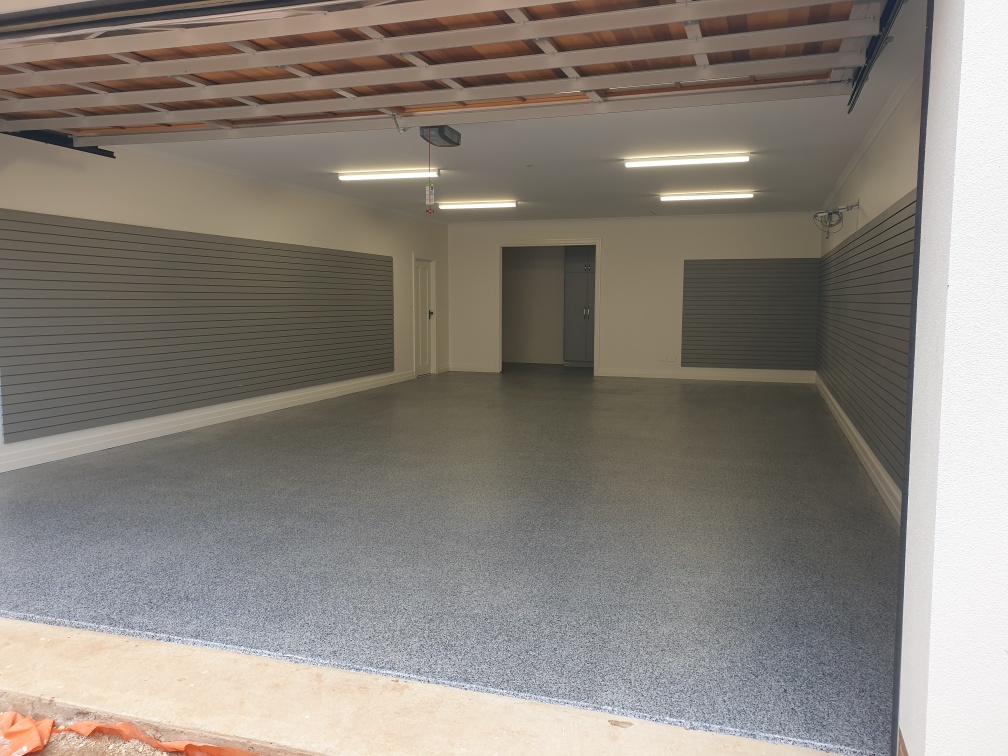
Some customers prefer to panel the entire wall. This will obviously give you a lot more options. Others panel the top half or three-quarters of the wall. Below are some examples of how it looks if you panel all or part of your wall.
If you are thinking about how you can use the bottom half of your wall, consider using it for baskets, shelving, tote bags, or bins.
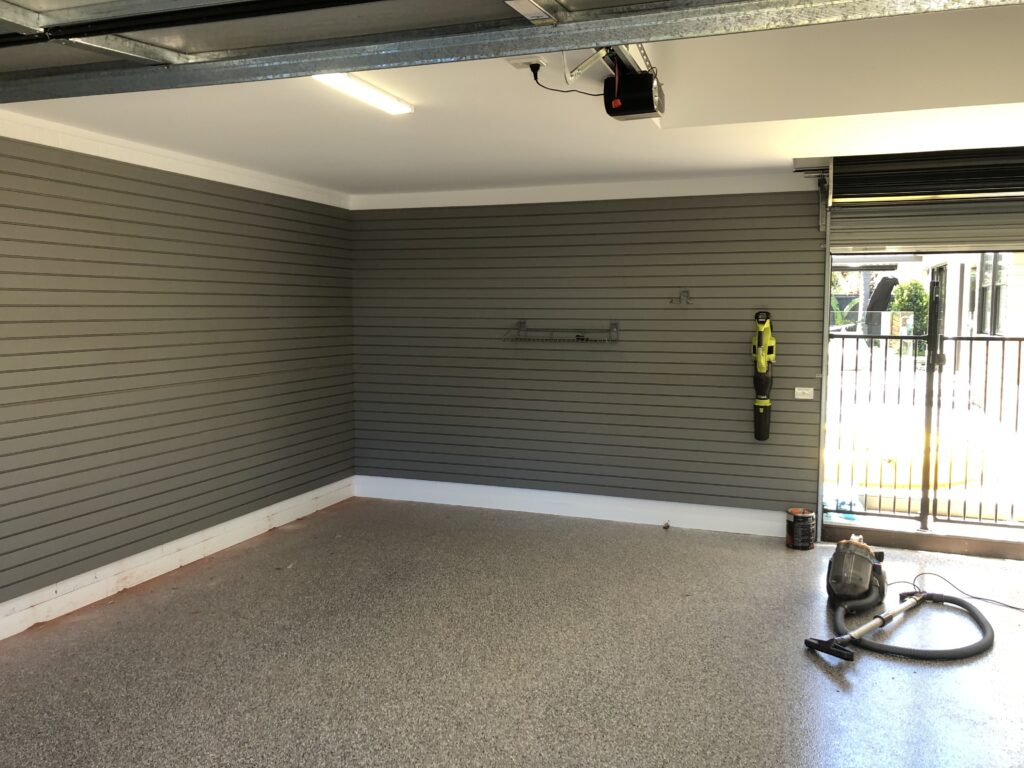
Floor-to-ceiling installation
Step 3 – StoreWALL Panels
Determine the number of StoreWALL slatwall panels needed based on your wall dimensions. Choose between 1.2m and 2.4m panels, calculating coverage in square meters for accurate requirements.
- 2.4m – 2438.4mm (length) x 304.8mm (height) x 16.7mm (thickness). The total coverage for each panel is .74m squared
- 1.2m – 1219mm (length) x 304.8mm (height) x 16.7mm (thickness). The total coverage for each panel is .37m squared
Let’s say your wall space is 4m in length and 2.4m in height. Total Square Metres is 9.6m (4 x 2.4). With 9.6m squared of space to cover, the number of wall panels you will require is:
- 9.6/0.74 = 13 or 14 (2.4m) panels. StoreWALL 2.4m panels come in packets of 4. In this case, you would require 4 cartons (total of 16 panels). If the cost of the 4 boxes is too much, you might decide to only panel the top half of the wall (ie not all of it). The process of determining how many panels you will need is the same. Note that depending on your order size and your location, we can split cartons in order to save you from over-ordering.
Wall Panel Estimator
Step 4 – Installation Extras
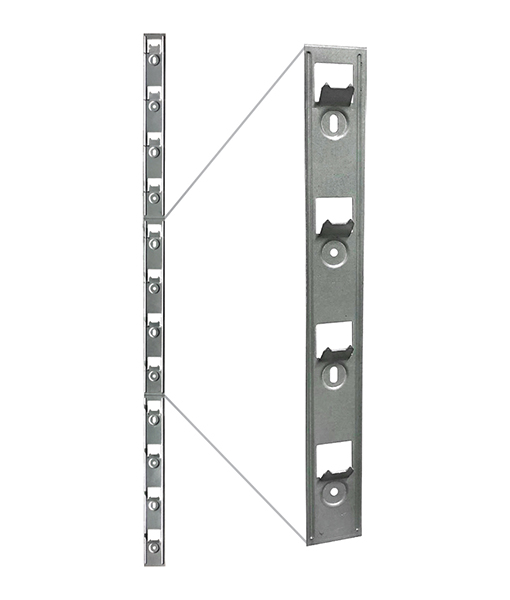
The most effective and reliable way to install StoreWALL slatwall panels is by using our InstallStrips. InstallStrips deliver unmatched strength because, in addition to the screws securing your panels to the wall, each panel is supported by a solid metal bracket. This creates a far stronger and more stable installation, allowing your StoreWALL system to safely carry more weight.
InstallStrips also make installation quicker, cleaner, and easier. Unlike other methods that require drilling directly through the panels, InstallStrips eliminate the need for visible screw holes—resulting in a cleaner, more professional finish. And because your panels remain intact, you can remove them and take them with you if you move house, without any damage.
For the strongest, cleanest, and most future-proof installation, StoreWALL InstallStrips are the best choice.
Whilst we recommend that you install using our InstallStrips, you can screw the slatwall panels directly with coloured screws (or any screws of your choice).
Clean Finish
If you are keen to keep your StoreWALL panels clean from screws and holes, you will need to use the following number of InstallStrips:
- One InstallStrip-SD for EACH 1.2m panel. Each InstallStrip-SD is 914mm in length but can be split into 3 parts.
- Two InstallStrip-SD for EACH 2.4m panel. Each InstallStrip-SD is 914mm in length but can be split into 3 parts.
In the above example, if we are using StoreWALL panels for the entire 9.6m area, the total number of StoreWALL 2.4m panels is 13. The required number of InstallStrips is 2 x 13 = 26 x InstallStrip-SD
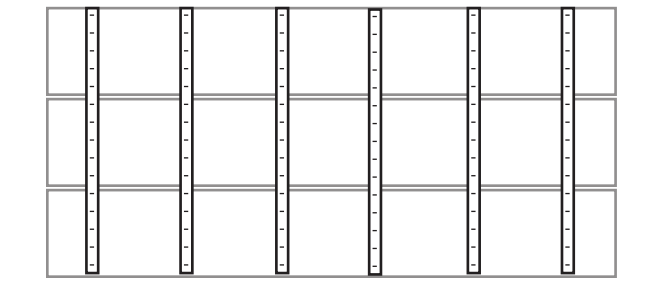
Most Australian homes will have studs spaced at approx 450mm - 600mm apart. Working with this spacing, you will need to install your InstallStrips at 450mm distances (on the studs). As an example, start as close to the edge of your wall as you can, basically the first stud (or part of your internal door frame). Once your first InstallStrip is installed, it is every 450mm or every stud thereafter until you reach the end of the wall or the size of the wall you want to install.
In total, you will have between 5 and 6 supporting contact points per 2.4m panel or 3 supporting contact points per 1.2m panel. You can apply similar spacing even for a brick wall.
If you need help with this step, please email us as we can create a custom design for you for the dimensions of your wall. There is no cost for this service. We will also estimate the total cost of materials for you.
Step 5 (a) – Leveling, Leveling, Leveling
Achieving precision in your StoreWALL installation hinges on effective leveling. Whether you're a DIY enthusiast or hiring professional assistance, here's why leveling is paramount:
- 1. Choose the Right Tools: Invest in accurate leveling tools such as a Laser Level or a traditional spirit level.
- 2. Locate Wall Studs: Efficiently locate the studs on your wall using a reliable stud finder. Drill small holes to confirm stud positions, allowing for precise placement of InstallStrips.
- 3. Mark Vertical Lines: Once studs are identified, mark vertical lines on the wall, extending as high as your installation requires. These lines serve as essential guides for strategically placing InstallStrips.
- 4. Verify Levels: Drill into your wall as needed to verify stud positions accurately. Stud finders, while helpful, may not be flawless. A few drill holes guarantee precise stud location and edge identification.
- 5. Check Adjacent Surfaces: Never assume that your floor, adjacent pier, or neighboring walls are perfectly level. Always perform thorough checks and double-checks to ensure accurate leveling.
- 6. Check Horizontal and Vertical Levels: Prioritize the correct leveling of InstallStrips, both horizontally and vertically, to guarantee a stable foundation for your StoreWALL installation. This meticulous approach ensures the success of your project, whether you're tackling it on your own or relying on professional assistance.
Here's a step-by-step guide for placing InstallStrips to ensure a seamless process and optimal results:
- Commence Installation Outward: Initiate the installation process by starting with the outermost InstallStrip and progressively working your way inward. This methodical approach ensures a structured and secure foundation.
- Maintain Leveling Precision: Throughout the installation, meticulously check the vertical and horizontal levels of each InstallStrip. Consistent leveling is crucial for a cohesive and aesthetically pleasing outcome.
- Verify Grip with Panels: Regularly assess the interaction between InstallStrips and panels. Confirm that the InstallStrips securely grip the panels while maintaining the desired level. A firm grip is essential for the stability of your StoreWALL system.
- Prioritize Grip Quality: Emphasize the importance of grip quality during the installation process. A secure and dependable grip ensures the longevity and effectiveness of your StoreWALL system.
Consistent monitoring of leveling and grip quality guarantees a reliable and visually appealing outcome.
Pre-drilled holes
When installing StoreWALL with InstallStrips, you will notice that the Installstrips come pre-drilled. You will notice that several of the holes are longer allowing you to adjust the installstrip up/down. These holes should be used first when adding your installstrip because they help you adjust to get your levels.
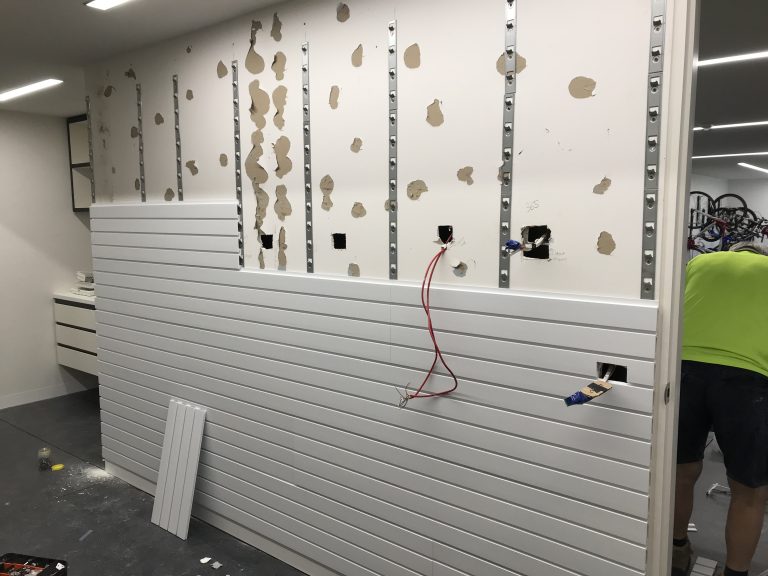
You can continue this process along the wall, adding the outer InstallStrips first, checking levels, and then the inner ones. Keep checking with a panel so that the grip and levels are correct. As the panels are placed side by side on your wall they need to butt up nicely against each other. This is where the leveling is key.
If you need to join two pieces of the cut panel, I suggest you keep the factory-cut edges for this and use the cut you make for the outer edges. When joining two pieces, it works best to have them both share half an Installstrip. This will give both edges added support and look nicer on the wall.
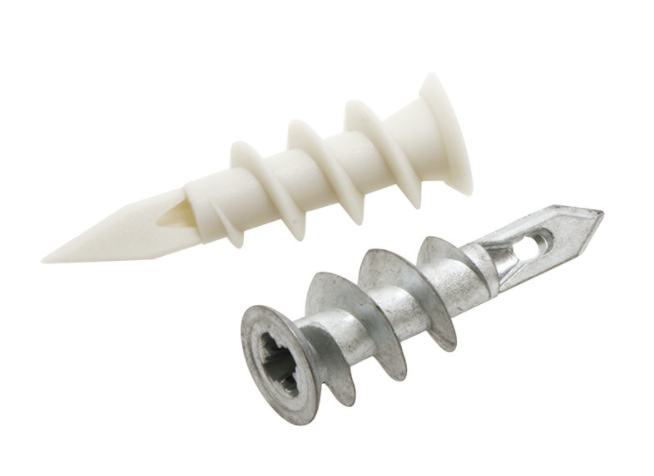
To add another installstrip on a plastered wall where no stud exists, you can use a metal or nylon screw in "Plaster Wall Anchor".
What you will find from time to time is that whilst the level has been done, the walls aren’t straight and you have some InstallStrips that don’t grip the panel that well. What you can do is adjust the specific claws that are not gripping by lightly tapping them upwards with a hammer so they grip the panel tighter.
Note, once you add your items to the wall panels, their weight will push the panels down into the claws of the installstrip. They will feel firm and tight.
Step 5 (b) – Formation
Once your first row is complete, you might be required to cut your final panel to fit it to your wall. The remainder of that panel will be used to begin the next row. This should give your wall that brickwork formation.
You don't necessarily need to follow a brick formation, you can also stack your panels.
Step 5 (c) – Second Row of InstallStrips
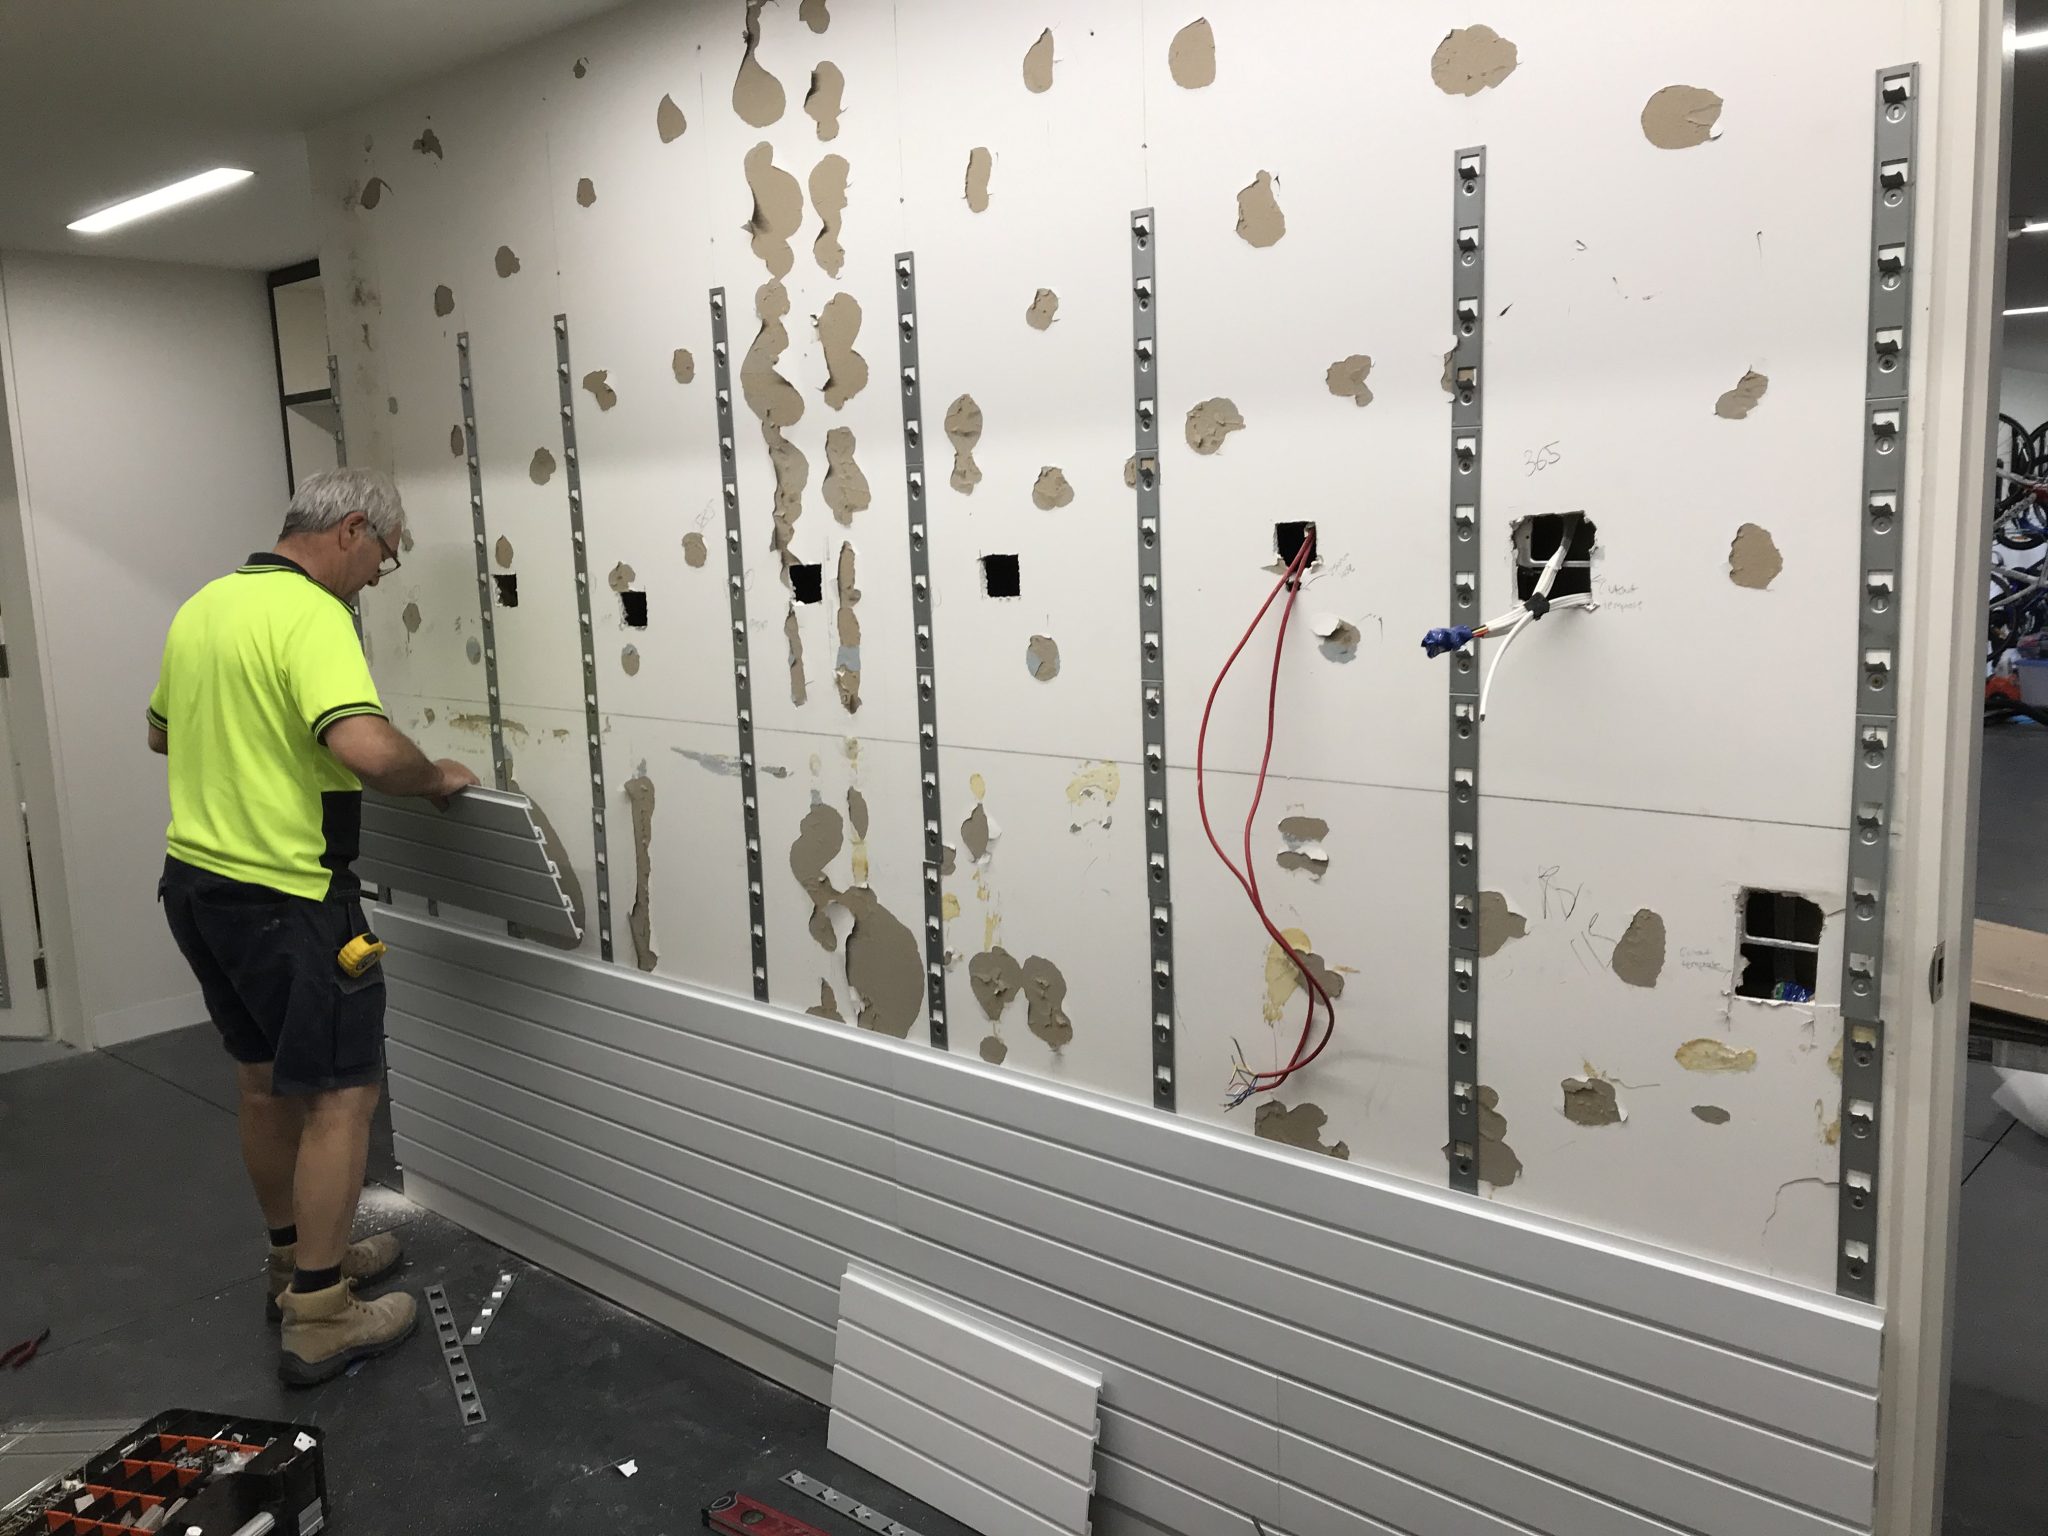
When installing the second tier of InstallStrips, follow the same steps. The bottom of the second row of InstallStrips should line up with the top ends of the row below.
Hold your first outer InstallStrip against the wall to position it. The new row of panels will sit on top of the row below, using the tongue-and-groove edges to lock into place. The easiest way to keep everything level is to place your InstallStrip directly above the lower one, then slide your fourth panel into position.
Adjust the InstallStrip so it grips the panel properly, then mark your first fixing hole. Add your first screw or nail and check your levels again, as well as the grip on the panel. If everything looks right, add the second screw or nail to lock the InstallStrip in place. Repeat this same process for the next InstallStrip.
Step 6 – Trims
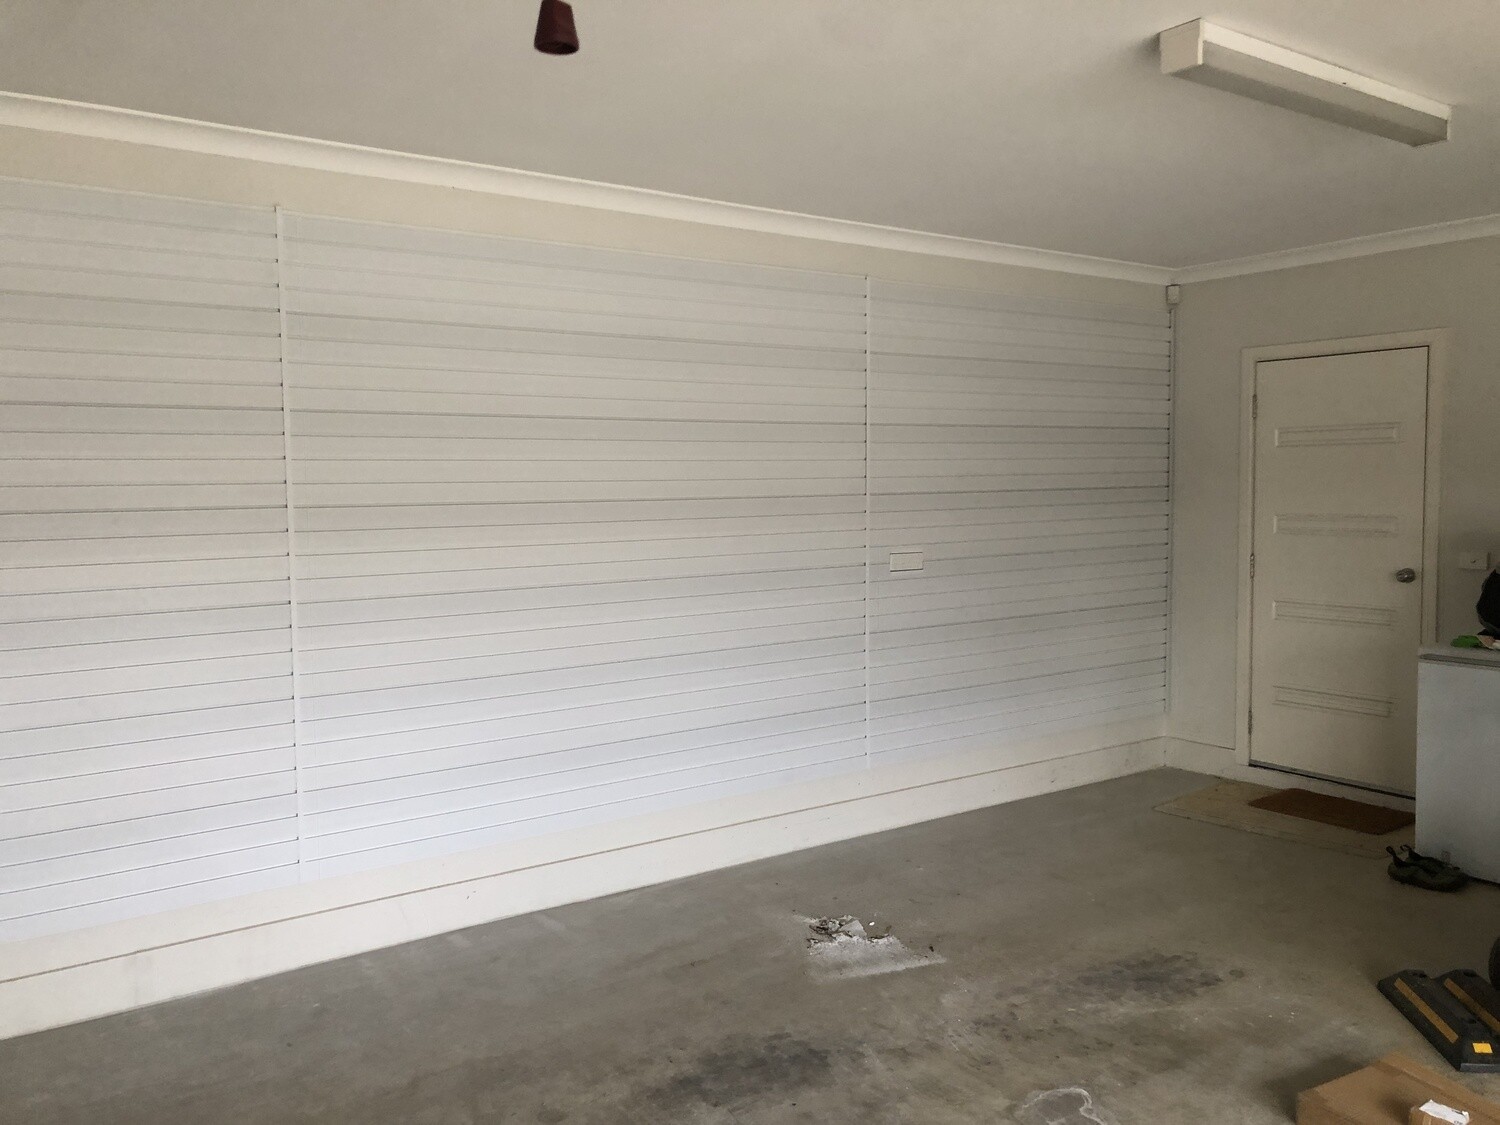
StoreWALL offers a great way to finish off your StoreWALL installation by using Trims. Our L-shaped Wide trim can be used on the outer (left and right) exposed edges to clean them up. These edges are not suitable for the top or bottom.
We also have a joining trim which can be used to separate your panels when your formation has them stacked one on the other in straight lines.
Step 7 – Accessories
Once you've calculated the required quantity of StoreWALL slatwall panels, it's time to consider accessories to optimize your storage space. StoreWALL presents an extensive collection featuring over 50 accessory types, including brackets, shelves, bins, hooks, bags, and baskets. Each category offers diverse sizing options to cater to your specific needs.
Accessorize with StoreWALL: Explore our online store to discover the wide array of accessories designed to enhance your wall organization. From versatile brackets to functional shelves and stylish baskets, our collection ensures you find the perfect fit for your space.
Unmatched Flexibility: One of the key benefits of StoreWALL is its unparalleled flexibility. All accessories are designed for easy movement, allowing you to reconfigure your storage setup effortlessly. Adapt your space to changing needs with StoreWALL's dynamic and customizable accessory options
Flexibility and scalability are the keys to your StoreWALL system. If your needs change in a year or so, you can easily add and remove accessories to ensure your StoreWALL system continues to meet your needs.
Installing StoreWALL - Handy Tips
Before placing your order for StoreWALL, explore our installation resources to decide whether to tackle the installation yourself or seek assistance. Watch our instructional videos and guides, providing valuable insights into the process.
- Installation Resources: Visit our Youtube Channel, housing a diverse range of videos covering installation procedures, product explanations, and more. Gain a comprehensive understanding of StoreWALL's features and installation techniques.
- Guidance for Installers: For those preferring professional assistance, we offer guidance for installers across most states in Australia. Connect with reliable experts to ensure a smooth and efficient installation process.
- Melbourne Installation Services: If you're located in Melbourne, take advantage of our installation services. Let us handle the installation, providing you with a hassle-free experience and ensuring StoreWALL is seamlessly integrated into your space.
- Installation Timeframe: As a reference, a 3m x 2.4m wall on plasterboard takes approximately 4-5 hours for a solo installation. For brick walls, allocate a couple of extra hours. The hourly cost for carpenters or handymen varies by city, with a minimum expectation of $80/hr.
- Can StoreWALL Panels Be Cut? Yes, StoreWALL panels are designed for customization. Whether cutting vertically or horizontally, the panels can be tailored to fit around obstacles like light switches. Utilize a Multi Tool or Circular Saw with a finishing blade featuring a high tooth count for precision. Should you need your panels cut to specific lengths prior to being shipped to you, we are happy to help out. There is no charge for this service just let us know your lengths at the time you order.
Empower yourself with the knowledge and resources needed to make informed decisions about your StoreWALL installation. Whether a DIY enthusiast or seeking professional support, we've got you covered.

Installing StoreWALL on a brick wall
Step 8 — Order and Delivery
Once you know your wall dimensions, panel quantity, and accessory list, you're ready to order. Everything ships Australia-wide directly from us. Use the Wall Panel Estimator to confirm your panel count before ordering — or call us on 0411 280 646 with your wall measurements and we'll calculate it for you at no charge.
Delivery times from payment clearance:
- Melbourne — 2–3 business days
- Sydney, Canberra, Adelaide — 3 business days
- Brisbane — 4–5 business days
- Perth — 7 business days
Installation and Product Guides
Access a wealth of installation guides, product specifications, and videos to facilitate the installation of StoreWALL’s slatwall panels and accessories.
Installers & Garage Organisers
Explore our StoreWALL Installers page to find professionals who can assist with your installation needs.
Embark on the journey of organizing your space with StoreWALL – where flexibility, strength, and style converge to meet your storage requirements.